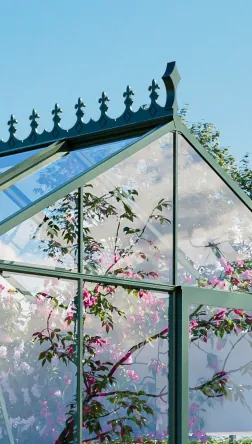


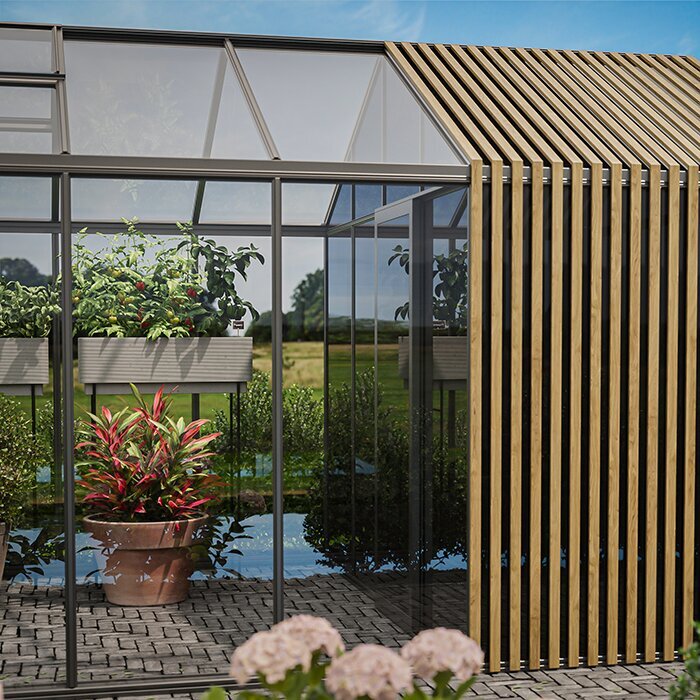



Classic Greenhouse with Storage and Accoya Wood Fusion
An Aluminium Greenhouse and Garden Store with Natural Accoya Detailing
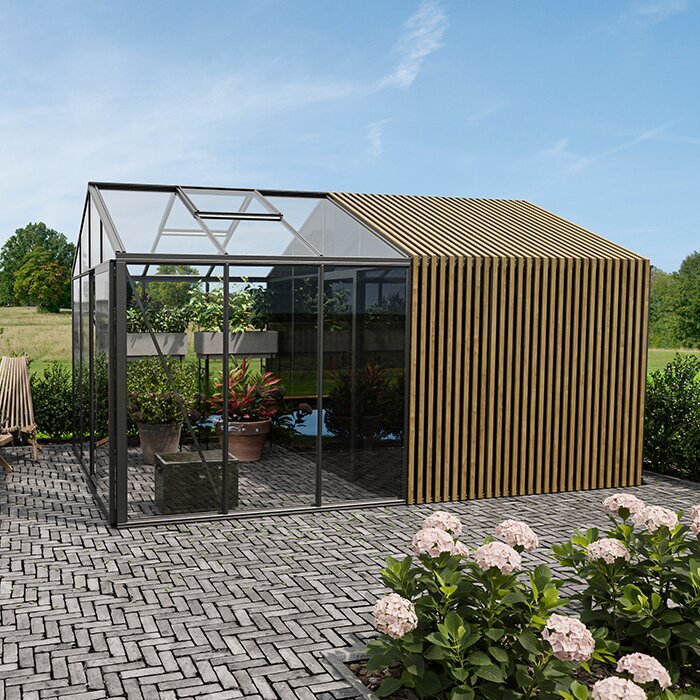
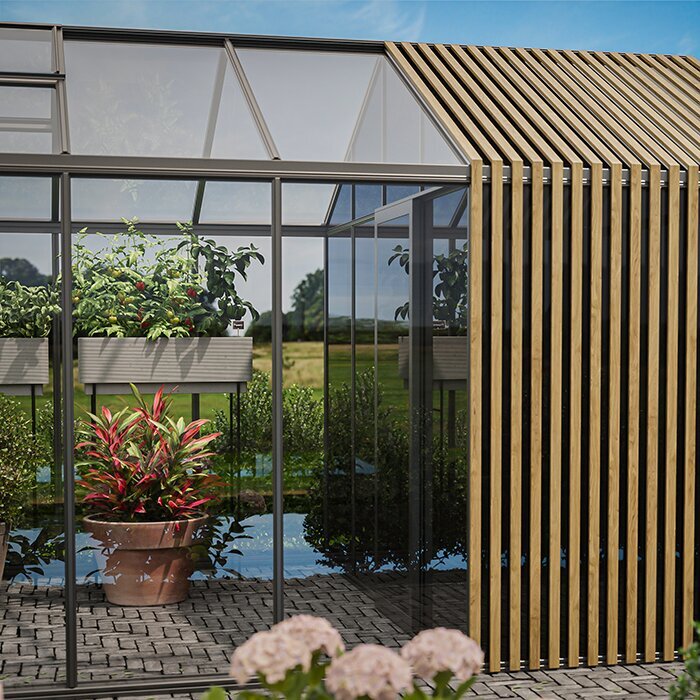
Our greenhouse with built-in storage combines a bright growing area, a separate storage room and the warmth of natural Accoya® wood in one garden building. It is designed for gardens where a stand-alone greenhouse and separate shed would occupy too much space or look disconnected. The divided interior gives each area a clear purpose: daylight for cultivation and an enclosed room for gardening equipment and supplies.
We offer this Accoya Wood Fusion version in a broad choice of sizes, allowing you to compare the proportion and position of each zone against your site. Begin with the jobs the building needs to support, then check whether the proposed paths, benches and shelving will leave both areas comfortable to use. If enclosed capacity is your main priority, explore our wider greenhouses with storage range as well.
Everyday convenience
Grow in one zone. Store in the other.
A separate storage room makes everyday greenhouse jobs easier. Tools, compost, pots and watering equipment can stay beside the growing area instead of being carried between the house, shed and greenhouse. This saves time when sowing, potting on, feeding and clearing up, and keeps wet or soil-covered equipment out of the home. Place the items you use every week where they are easiest to reach.
Keeping spare pots, compost and seasonal accessories out of the glazed area leaves more room for plants and unobstructed paths. Benches are easier to clean, crops are easier to inspect and watering equipment can be moved without navigating around stored items.
The storage room is built into the greenhouse from the outset. For more about the frame and construction, see our aluminium greenhouse information.
Why this model is different
Growing space, storage and natural timber in one structure
This is more than a Classic greenhouse with decorative timber added. The enclosed room provides practical garden storage, while the Accoya elements give that part of the building a warmer appearance than a fully glazed wall. This can be especially important when the greenhouse is visible from the house, terrace or main garden path. When choosing a configuration, consider how the building will look and work as well as the amount of growing space it provides.
Integrated storage
The enclosed room forms part of the original design, allowing storage access to be considered alongside growing-area benches and paths rather than added later.
Configuration choice
Choose from compact and larger configurations according to your available garden space and the room you need for plants, storage and clear paths.
Accoya Wood Fusion
Natural wood grain brings warmth to the aluminium and glazing, giving the enclosed section its own character while keeping the whole structure visually consistent.
One coordinated footprint
The shared structure keeps the roofline and materials consistent, avoiding the need to find a separate position for a shed elsewhere in the garden.
Accoya Wood Fusion
What is Accoya wood, and why do we use it?
Accoya is real wood made from radiata pine and modified through a process called acetylation. The modification extends through to the core and substantially reduces moisture uptake compared with ordinary untreated timber. This limits the swelling and shrinkage that can affect the appearance and fit of exterior joinery and cladding while retaining the wood’s genuine grain and texture.
Because it takes up less moisture, Accoya has high dimensional stability and strong resistance to rot; it is classified as Durability Class 1. These qualities make it a recognised choice for exterior cladding, windows, doors and façades. On this greenhouse, the timber contrasts naturally with the aluminium profiles and transparent glazing. Keep nearby drainage clear, remove surface dirt gently and inspect joints during routine greenhouse maintenance.
Accoya gives the greenhouse a warmer, more natural appearance while remaining suitable for long-term outdoor use. Weather exposure will gradually shift its colour towards silver-grey. Sheltered and exposed elevations may change at different rates, creating tonal variation across the building. Choose this version if you want genuine timber and are comfortable with its appearance developing naturally over time.
For more background on how we use this material, see our Accoya greenhouse design article and aluminium greenhouse FAQ.
Interior layout
Plan the layout around what you want to grow and store
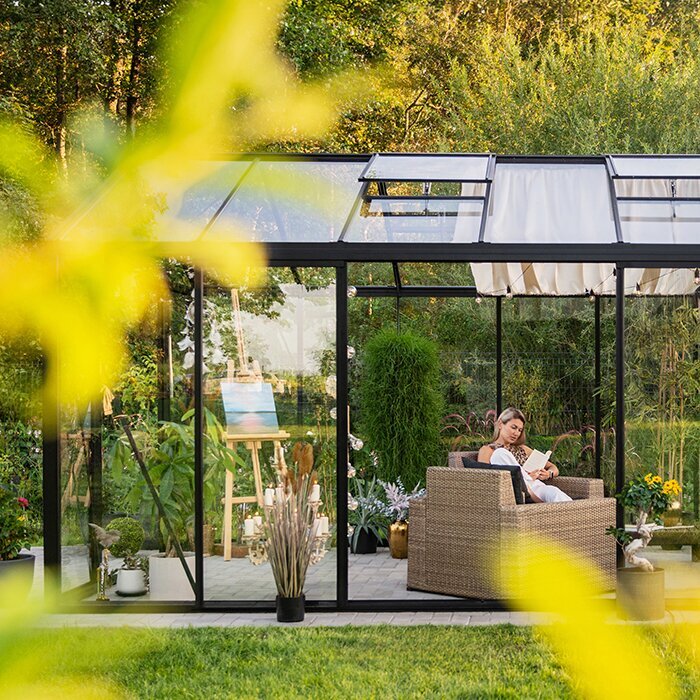
Treat the greenhouse and storage room as connected work areas rather than one room with a cupboard attached. Plan the route between stored equipment, benches and containers so routine jobs can be completed without crossing cluttered paths. Keep door movement and access to the roof vents unobstructed, and reserve enough room to carry compost, trays or large pots comfortably between the two zones.
Glazed growing area
Use the glazed section for plants and jobs that benefit from daylight. Arrange benches and containers so you can water, tie in, inspect and harvest crops without stepping over equipment. Keep ventilation routes open and avoid using paths as temporary storage.
✓ Vegetable beds and containers
✓ Seedling and propagation benches
✓ Tomatoes, cucumbers and climbing crops
✓ Potting bench and watering points
Enclosed storage area
Reserve the enclosed section for items that do not require the daylight available in the growing area. Keep stored equipment within planned shelf, rack and floor positions so the doorway and access between the two zones remain usable.
✓ Hand tools and long-handled tools
✓ Pots, trays and labels
✓ Compost, feeds and gardening supplies
✓ Cushions, seasonal accessories and small equipment
Product specifications
Classic greenhouse dimensions and construction
The model retains the established Classic greenhouse shape while adding a separate storage section and Accoya detailing. It is rated for wind speeds up to 30 m/s and a snow load of 210 kg/m². The aluminium structure is covered by a comprehensive 12-year warranty, subject to the applicable warranty terms. A correctly prepared foundation, secure installation and routine maintenance remain essential, so review those terms and the instructions for your chosen configuration before work begins.
01. Sizes
20 different size configurations.
02. Widths
Available widths: 235 cm and 310 cm.
03. 235 cm models
Ridge height: 232 cm. Door height: 165 cm.
04. 310 cm models
Ridge height: 267 cm. Door height: 185 cm.
05. Glazing
Choose polycarbonate or 4 mm toughened safety glass.
06. Construction
Aluminium profiles, roof vents, integrated gutters, a built-in aluminium base and single or double sliding-door options. Door availability depends on the width of the relevant wall, so check the selected configuration rather than assuming that both arrangements are available in every size.
Run-off and routine cleaning
Using the greenhouse through wet and changeable weather
Wet tools, muddy pots and open bags of growing media can quickly make a greenhouse untidy. The separate storage section keeps them close without taking up valuable growing space. Allow wet equipment to drain or dry before placing it on shelves, and do not pack damp textiles tightly together. Sweep away soil and leaves regularly so they do not hold moisture or interfere with the sliding-door track.
Integrated gutters collect roof run-off and help manage water around the structure. Inspect the channels and outlets regularly, removing leaves and debris before they restrict the flow. Check where the discharged water goes as well: it should not pool beside the foundation or run across the approach path. Keeping the surrounding ground clear also makes developing drainage problems easier to spot.
For general care advice, use our greenhouse FAQ. You can also browse the BloomCabin UK blog for planning and growing ideas.
Shelves, racks and floor space
Plan the storage layout around what you actually need to store
The best arrangement depends on how you garden. Before fitting shelves or racks, measure the longest tools, largest trays and bulkiest bags you intend to store. This helps prevent shelves being placed at awkward heights or too close together. Reserve floor-level space for stable, heavy items and use the walls for lighter equipment that can be secured properly.
Tool wall
Use hooks or racks to organise hand tools, secateurs, watering equipment and long-handled tools. Protect sharp edges and place frequently used items within comfortable reach rather than high overhead.
Potting supplies
Keep pots, seed trays, labels, twine, compost and feeds together. Closed or clearly labelled containers make smaller items easier to find and help prevent opened materials from spilling across shelves.
Seasonal storage
Set aside shelving for cushions, small accessories and items used only at certain times of year. Clean and dry suitable items before storing them for longer periods, and make sure they do not block the entrance or everyday gardening supplies.
Cleaning kit
Keep a hand brush, dustpan and cleaning cloths in an accessible place so loose compost, soil and leaves can be dealt with before they spread through the growing area or collect around the door track.
From potting to clean-up
Arrange storage around the gardening jobs you do most
Think through a typical session: collect tools, prepare pots, transplant seedlings, water, clean up and put everything away. Arrange the storage room to follow this order. Pots and labels can sit with other propagation supplies, while cleaning equipment can be kept near the exit. A clear sequence is more useful than filling every wall because it allows each task to be completed without repeatedly moving stored objects.
Use the first few gardening sessions to test where each category belongs before treating any storage position as permanent. If an item is repeatedly left in the growing area, move its designated place closer to where it is used. Remove empty packaging and return surplus seasonal items to their allotted shelf so the room continues to support the way you work.
Give fertilisers, treatments and sharp tools their own stable storage positions. Retain original labels and follow each product’s instructions, including any requirement to separate particular materials or restrict access. The built-in room keeps these items conveniently close, but they still need to be stored and handled as their manufacturers direct.
Measure before you choose
Choose the right balance of growing and storage space
A gardener with a large tool collection may value the enclosed room most, while someone growing tomatoes, cucumbers or seedlings may prioritise the glazed area. Consider both needs before choosing a configuration. Mark out the proposed footprint, then sketch the benches, shelving and paths inside it. Include the room required by large containers and mature plants, not just their size at planting time. This gives a more realistic comparison than looking only at the building’s external area.
The narrower model family is better suited to tighter sites, while the wider family offers greater flexibility for central paths, side benches and larger containers. The wider models can also accommodate double sliding doors where the relevant wall is sufficiently wide. Compare the selected configuration with your proposed interior layout and check that its listed door height suits any tall tools or bulky supplies you need to move.
Check shelving depth as carefully as its length, because deep fittings can reduce usable floor space quickly. Draw each unit at its intended depth on your layout rather than representing it as a line against the wall. In the growing area, account for the space plants will occupy at maturity so they do not press against vents or take over the path.
Before ordering, review our purchase and delivery information.
Foundation and installation
Prepare one accurate foundation for the whole structure
The greenhouse and storage room share one structure, so the base must be level and accurate across the entire footprint. Confirm the external measurements of the exact size ordered before preparing the site. A level support helps the doors run correctly, keeps the frame aligned and provides a sound base for the glazing. Leave enough access around the outside for cleaning and maintenance rather than placing fixed obstacles against every side.
Check the route from kerbside delivery to the installation site, particularly for long aluminium profiles and glazing. Measure gates, narrow side passages, corners, steps and overhead obstructions before delivery. Identify a level temporary area where components can be sorted without being laid in mud or blocking household access. Protect the glazing and profiles from damage while they await assembly. Careful route planning is especially important for a greenhouse behind a terraced property or in a garden accessible only through the house.
Use the installation information for the exact configuration throughout site preparation and assembly, as dimensions from another model may not apply. Check drainage around the footprint before assembly and make sure water will not collect beneath the entrances or beside the base. Set aside sufficient working room and arrange suitable help to handle the frame and glazing safely during installation.
The ordering process is explained in How to Order.
Compare the alternatives
Why choose this model rather than a standard Classic greenhouse or a separate shed?
A standard Classic greenhouse uses its entire footprint for cultivation. Choose that format when almost all the available space should be devoted to plants and your tools already have a convenient home elsewhere. It may be the better choice when growing capacity matters more than enclosed storage.
A separate shed provides independent storage and may suit a garden where equipment needs to be kept away from the greenhouse. However, it requires another footprint and supporting surface, as well as a separate decision about its position and appearance. Moving between the two buildings also becomes part of each gardening session.
The Accoya Storage Greenhouse brings the two uses together in one coordinated building. Choose it when you want supplies immediately beside the growing area, equipment kept apart from crops and a consistent overall appearance. It will not suit every gardener, but it offers a practical alternative when the relationship between growing and storage should be planned from the start.
Questions about the storage greenhouse
Classic Greenhouse with Storage and Accoya Wood Fusion: FAQs
Should I fix shelves before checking the working space?
No. Mark out their proposed depth first, then check door movement, the route between the two zones and the room needed to carry pots or compost. Install suitable shelving only after confirming that it will not narrow the main passage or interfere with everyday access.
How should storage be organised if two people use the greenhouse?
Give shared equipment a fixed, clearly identified position and agree that each item will be returned after use. Keep everyday tools near the access between the two zones, with less frequently used seasonal supplies farther into the storage room.
Is the Accoya supplied with a surface coating?
No. The Accoya is left without a surface coating, allowing its colour and tone to develop naturally outdoors. Choose this version only if you are comfortable with visible weathering as part of the timber’s appearance.
Does silver-grey weathering mean the Accoya is deteriorating?
No. A gradual silver-grey colour is expected as the uncoated timber weathers; the colour change is not in itself evidence that the wood needs replacing. Different levels of exposure can also produce tonal variation between panels.
Which glazing should I choose if I want a clear view?
Choose toughened safety glass if a clear view into and through the greenhouse matters to you. Polycarbonate has a more diffused appearance, so select the option that best suits the view and overall look you prefer.
Should I leave the roof vents in the same position?
No. Adjust the roof vents in response to the temperature and humidity inside the growing area. Sunshine, plant growth and watering all affect ventilation needs, so keep the space around the vents clear and check conditions throughout the season.
Does the built-in aluminium base mean I can skip preparing a foundation?
No. The built-in base connects the structure to the prepared foundation, but it does not replace that supporting surface. Confirm the exact footprint, prepare a level and dimensionally accurate foundation, and plan suitable drainage before assembly.
Where can I find delivery and ordering guidance?
For planning, purchase and delivery guidance, see our Useful Information section, then use the How to Order guide for the ordering steps. Have your preferred size and glazing choice ready while reviewing the information.
BloomCabin
Keep growing space and practical garden storage together
Use the configurator to compare the available size, glazing and colour options for your site. Have the proposed footprint and an outline of your likely shelving and growing layout to hand so you can judge how each configuration will work from day to day.
For details of delivery, site preparation and ordering, review our Useful Information before you configure the greenhouse.
Details to have ready
✓ Available garden width and length
✓ Preferred balance of growing and storage space
✓ Preferred glazing option
✓ Intended door position and access route
✓ Preferred RAL colour
✓ Delivery route and prepared foundation details
Configure your storage greenhouse