
Garden Shed Assembly Tools: A Practical Checklist
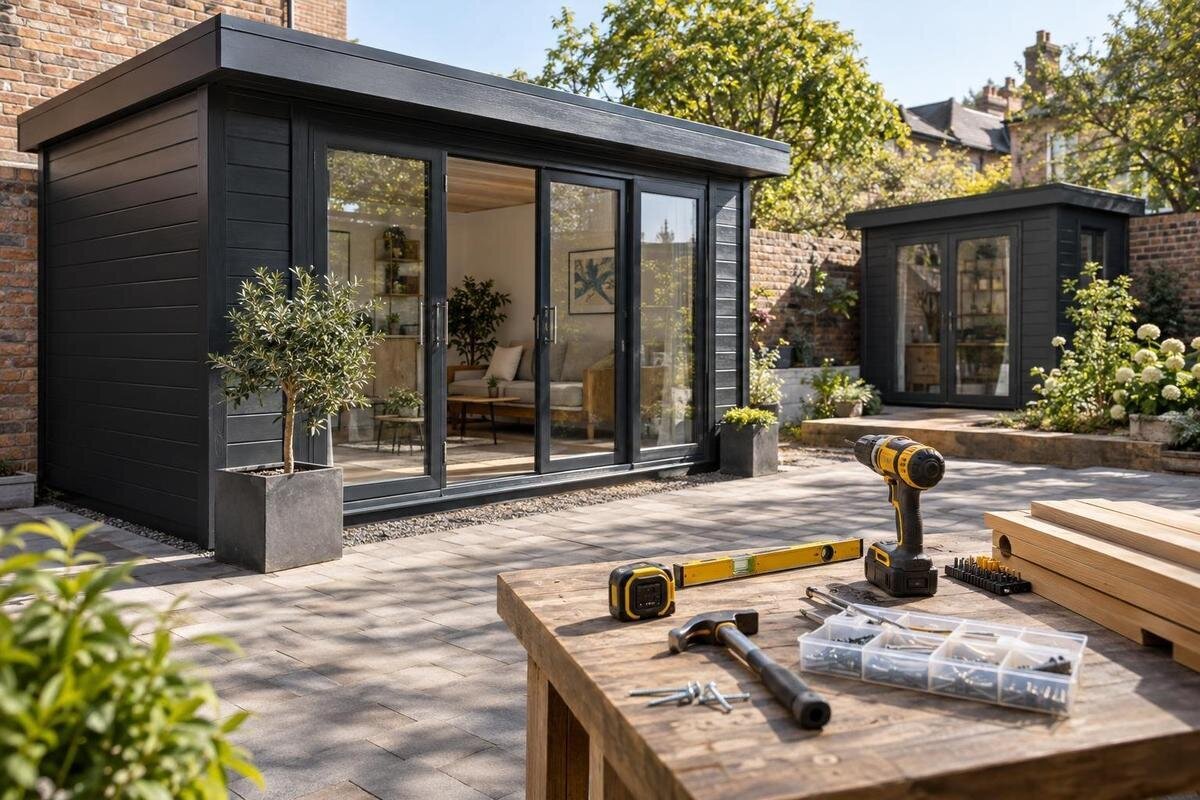
Garden shed assembly
An organised build starts with the instructions for the exact garden shed, not a large collection of tools bought in advance. A tape measure, suitable screwdriver, marking tools and a way to keep fixings sorted are useful planning candidates, but the kit decides what is actually required. Use this checklist to separate routine assembly tools from base-preparation equipment, power tools and optional items; then check what you own, what is supplied and what needs to be sourced before you begin.

Before you order 1
Read the instructions before choosing tools
Begin with the assembly instructions for the exact kit, rather than a generic garden shed tool checklist. Read the order of work and scan the parts list before opening boxes or buying tools. Note each tool named at a step, the type of bit or fastener, and whether it is marked as required or recommended. Check whether the same document separates assembly from base preparation or later care, since those are different jobs and can call for different equipment. If the instructions are not available before purchase, ask for the current version instead of guessing from a photograph or a similar model.
If you are considering the Verdana 1 garden shed, ask whether its current assembly instructions can be reviewed before ordering if they are not already available. Create a short register with three columns: the tool or item named, whether you own it, and whether it is included or needs to be obtained. Add a note for any unclear instruction instead of substituting a tool from another kit. Writing the page or step number beside each item makes it easier to find later. This gives you a realistic shopping list and helps settle questions before assembly day.
Prepare the assembly area and check the base requirements
Measure the chosen assembly area and compare it with verified information for the kit and its base. Leave room to set components down and reach the sides needed at each stage; the space occupied during assembly may be greater than the finished shed footprint. Keep the area lit, reasonably even underfoot and clear of garden furniture, hoses and loose items that could catch a foot or hide a small fixing. If a fence, wall or other feature limits access, check whether the assembly sequence needs room on both sides before settling on the position. These checks help create a workable space; they are not a way to design a foundation.
For a Verdana 2 garden shed, confirm base dimensions and preparation from that kit’s information; measurements from another model or a general tool checklist are not a foundation specification. A tape measure and pencil help mark a confirmed position, while a broom or hand brush clears small debris. A straightedge or spirit level can help check the prepared surface against the instructions, but neither tells you how to construct a suitable base. If the requirements are unclear, seek advice from a suitably qualified local professional before assembly. Keep site-preparation tools separate from kit fasteners.
Before you order 2
Select hand tools that fit the fixings
For fastening, the correct fit matters more than having a large toolbox. Use the manual to identify the screwdriver head that matches the supplied screws and any separate driver bits. Fastener heads may be cross-head, slotted, hex or another type; note what is actually shown rather than choosing by screw length or appearance alone. A hand screwdriver can offer more control for small fittings or final tightening. Keep any listed spanner or socket nearby, but do not buy a full set until you know the required type and size. Use a hammer or mallet only for a step that specifies it, not to force a joint together.
Before sourcing tools for the Durano garden shed, check the kit-specific fastener list; the product name alone does not reveal whether it needs a screwdriver, spanner or another hand tool. Lay out small fasteners in labelled trays or shallow containers, keeping different lengths and types apart. A parts diagram can help you match each group to its step, but leave the original labels available until you have checked the contents. A screwdriver tip that fits the screw head properly is less likely to slip than an approximate substitute. Avoid using pliers or an adjustable spanner to turn a fitting unless the instructions call for that tool.
Use power tools only when the kit allows them
An electric drill or driver is not automatically required just because a shed is being assembled. Check the exact guide for whether one is needed or permitted, and note any specified bit. If you use a powered driver, follow its manufacturer’s instructions, hold the bit square to the fastener and apply controlled pressure. A fastener driven too hard can be stripped or damage a part. Do not substitute an unlisted drill bit or setting for the specified fitting, and do not press on when a hole or joint does not line up. Pause to check the orientation and sequence instead; the illustrated step may clarify whether drilling is actually required.
If you are comparing the Veltor 1 garden shed, check whether its own instructions call for a powered driver before buying or borrowing one; do not infer tool requirements from a photograph. Match the bit to the fastener listed, and keep a hand screwdriver available where careful adjustment is needed. If your tool is battery-powered, charge it ahead of time and check that the selected bit is in good condition. A spare compatible battery is useful only if you already have one or expect a long work period. Avoid buying a large drill set for a single assembly until the guide identifies what is needed.

Before you order 3
Measure and mark from the correct reference points
Keep measuring and marking items together: a tape measure, pencil and carpenter’s square, plus a spirit level or straightedge if the instructions need one. These tools help identify reference edges, check a right angle or mark a position specified in the manual; they do not replace its measurements. Use labels or removable tape to identify parts, and choose a marking method that will not leave a blemish on a visible surface. Write down confirmed dimensions or orientation notes instead of relying on memory, particularly if the build may pause. Do not transfer measurements from a different shed model.
For the Orello 1 garden shed, use its own diagrams and reference points; do not copy measurements from another garden shed or assume a similar-looking part has the same orientation. At each stage, compare the position and alignment described in the instructions before adding more fixings. A level or square can reveal that something is out of line, but it cannot identify the cause on its own. If a frame or panel does not sit as shown, check the order of parts, their orientation, the fasteners and the prepared base rather than pulling it into place with extra force. Repeat any alignment checks requested in the manual.
Use clamps and supports only when appropriate
Clamps can hold a small part temporarily, but they are optional unless the instructions call for them or the task clearly needs them. Check that a clamp fits the component and can be positioned without covering a fixing point or pressing on a delicate edge. Padded contact surfaces may reduce marking, but do not assume that padding makes an unsuitable clamp safe for every part. Choose a stable work surface appropriate to the component rather than improvising with loose boxes or stacked objects. Follow the clamp maker’s instructions, and do not treat temporary support as a permanent fixing.
Before choosing clamps for the Modano 1 garden shed, see whether its assembly sequence actually calls for temporary holding; if this is not clear, ask rather than guessing. A clamp is not a substitute for a specified fixing, nor should it be used to pull misaligned pieces into position. Keep fingers clear of pinch points, and remove temporary supports only when the instructions say the joint is secure. If a component shifts unexpectedly, stop and reset it safely before continuing. The purpose is to keep a part steady during the stated operation, not to change its shape or the way the kit fits together.
Before you order 4
Treat cutting and finishing tools as conditional
Keep saws, files, sandpaper and other cutting or adjustment tools off the default checklist unless a step in the kit instructions calls for them. Do not cut a panel, trim a framing part or enlarge an opening simply because the pieces appear not to fit at first. Check the part label, orientation, assembly order and prepared base. If the instructions do not clearly allow an adjustment, pause and ask the supplier or a competent installer before altering a component; a change can affect how later parts fit. Keep the relevant page open so any advice can be compared with the actual step.
With the wooden garden shed M, use the product-specific assembly information to establish whether any trimming or finishing operation is required; do not infer any required step from the product name. A utility knife or scissors may be useful for packaging only, on a stable surface and away from the parts. If sanding, filing or a brush-on treatment is specified, gather the tools and protective items named in the instructions and follow the product maker’s guidance. Do not buy finishing materials or apply a coating on the assumption that every kit needs one; requirements can differ between products.
Include protective equipment and clear the work area
Include protective equipment in the tool plan, matching it to the work described. Use eye protection where the tool maker’s instructions or the kit guidance identifies a risk from drilling, cutting or loose particles. Wear sturdy closed footwear and clothing that will not catch on tools or components. Gloves may suit handling some parts, but follow the power-tool manufacturer’s advice and do not wear them where they could become caught in moving equipment. If a step creates dust or noise, use the protection recommended for that task rather than assuming ordinary gloves are enough.
When comparing the wooden garden storage shed S, ask for the kit-specific assembly notes and any stated precautions alongside the tool list; a broad checklist cannot establish the hazards of a particular step. Before starting, clear packaging, cords and garden items from underfoot, arrange good lighting and keep children and pets away from the work area. Put sharp tools down safely when not in use, and keep fasteners where they cannot be scattered. If a task or powered tool is outside your experience, stop and consult the tool instructions or a competent person instead of improvising.

Before you order 5
Lay out and inspect tools before starting
Stage equipment in the order it appears in the assembly sequence. Put measuring and marking items together, fastening tools and matching bits in another group, and protective equipment where it is easy to reach. A small tray or divided container keeps fixings from rolling away, while the original part labels help you identify them. Mark the checklist as each item is laid out; this catches a missing screwdriver bit or spanner before work begins. Keep tools used for clearing or measuring the base apart from kit fasteners, and return each item to the same place after a stage. This routine also helps if assembly is paused.
Give each tool a quick condition check. Look for worn screwdriver tips, damaged bits, loose handles and a tape measure or square that is hard to read; do not rely on a tool that slips or gives an uncertain reading. Check that batteries are charged, the selected bits fit the fasteners and any clamps operate as intended. Replace a missing or damaged item with a suitable one rather than forcing an approximate substitute. Compare the kit components with the parts list at the same time, so a missing component is not mistaken for a tool problem halfway through a step.
What to confirm before ordering the shed or tools
Before ordering tools, divide the list into three groups: items you own and can use, items you can borrow or rent, and items still to source. Include expendable items only when the instructions name them. Do not buy duplicates of tools or fixings that may already be supplied without checking the kit contents. For a specialised bit or spanner used briefly, borrowing or renting may be more practical than buying a full set. Keep any unclear entry marked as unconfirmed and ask for the exact tool name or compatible size rather than shopping from an assumption.
Make the garden shed purchase decision with its assembly information in view. Before placing an order, check whether you can consult the current manual, which tools or fixings are included, and whether a step calls for equipment you do not own. If the answer affects your planned assembly date, resolve it with the seller or arrange to borrow the item. A model’s title, appearance or broad category cannot tell you how it is assembled. Choose the kit for the use and site you have in mind, and plan around its confirmed requirements rather than paying for tools you may not need.
Frequently asked questions
What tools should I put on a garden shed assembly checklist?
There is no universal list for every kit. Start with its assembly instructions, then note the measuring, fastening, holding and protective items specified. A tape measure, pencil and suitable screwdriver may be useful, but confirm the exact requirements and what is included before buying anything.
Can I use a cordless drill to assemble a garden shed?
Only if the instructions allow or call for a powered driver. Match the bit to the fastener, follow the tool maker’s guidance and use controlled pressure. Keep a suitable hand screwdriver available for careful adjustments, and do not force a joint that does not line up.
Should I buy the tools before ordering the shed?
It is usually more practical to check the kit’s tool list first. Ask whether you can consult the current assembly instructions, compare the requirements with tools you already own, then decide what to borrow, rent or buy.
Do I need a spirit level?
It can be useful if the instructions call for checking a prepared surface or alignment. It does not determine how to construct a suitable base. Follow the kit’s requirements and seek professional advice if the base preparation is unclear.
Can I cut a part that does not seem to fit?
Do not cut or alter a component just to make it fit. Check the part label, orientation, assembly order and base first. If the instructions do not clearly authorise an adjustment, ask the supplier or a competent installer before making changes.
A practical garden shed assembly tool checklist is specific to the kit, not a one-size-fits-all shopping list. Use the current instructions to identify the tools and protective equipment each stage calls for, confirm the base requirements separately, and sort out any gaps before starting. That preparation keeps the work focused and helps avoid buying equipment that the assembly does not need.
