
Garden Shed Floor Insulation: What to Plan Before Assembly
Garden shed planning
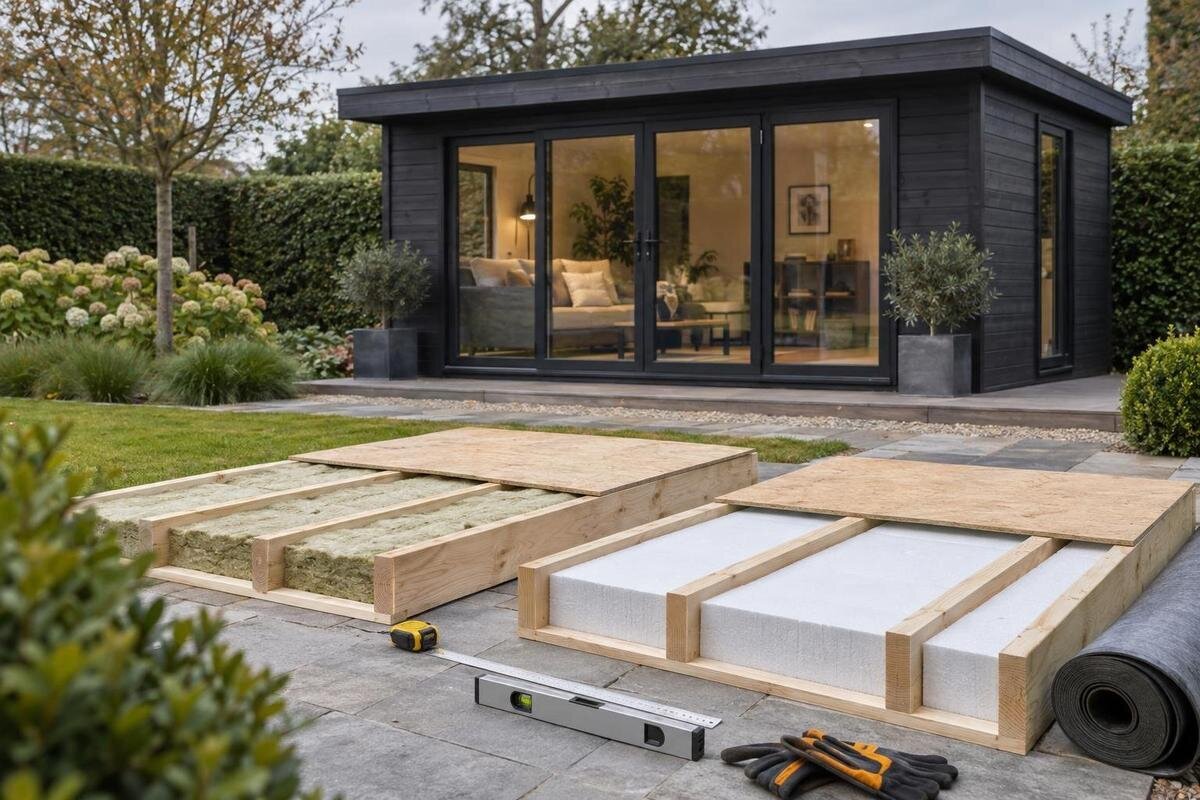
Garden shed floor insulation is easiest to plan while you are choosing the shed and preparing its base, rather than after the floor is closed. An added layer can affect finished floor height, doorway clearance and what must be ordered, so it belongs in the assembly plan. This guide covers the decisions to settle before purchase and assembly: intended use, the supplied floor, the site, moisture, material compatibility and work sequence. The right arrangement depends on the exact shed and its instructions; a product name or picture does not establish that an extra layer will fit.

Before you buy 1
Why floor insulation should be planned before assembly
Floor insulation is a design choice that can affect the shed you buy and the way it is assembled. Once the floor is closed, there may be less access to add a layer neatly; adding one later can also change finished height or doorway clearance. Before ordering, treat the floor as a complete arrangement: the support below, any insulation and moisture-control layers, the floor surface, and the edges where it meets the walls and entrance. Details depend on the shed’s supplied construction, so do not assume a generic floor package accepts every extra layer. Settle the question while comparing sheds, rather than choosing insulation first and trying to fit it afterwards.
Start by identifying what you want the extra layer to achieve. It may be relevant where you spend time standing or working inside, or where a colder floor affects how you use the space, but it will not by itself make a shed reliably warm, dry or temperature-controlled. The roof, walls, openings, air movement, moisture and the way you use the building also matter. For straightforward storage, the added cost and lost height may not be worthwhile; for frequent use, assess the whole shed rather than treating the floor in isolation. If the planned use goes beyond ordinary storage, ask a building professional to review the overall arrangement. A warmer-feeling surface is not the same as a temperature-controlled room.
Match the floor plan to the shed’s intended use
Write down how the shed will be used through the year rather than treating insulation as a goal on its own. Occasional storage, frequent hobby use and a workspace occupied for longer periods place different demands on a floor. Think about whether you will stand at a bench, move equipment, clean the surface regularly or store items that need protection; note whether floor comfort, reduced heat loss or managing moisture is the actual concern. These are separate aims, and insulation is not a substitute for ventilation, a sound base or suitable storage containers. Record your main priority so you can judge whether added height and cost are worthwhile.
Also be clear about what the shed will not be expected to do. If you need stable conditions for sensitive goods or plan to use the building as a regular occupied room, floor insulation alone will not establish them. The roof, walls, door, windows, junctions and ventilation need to be considered together; a qualified professional can assess a more demanding use. For a practical comparison, list real activities and the constraints they create, such as rolling stored items over a threshold, keeping a level work surface or moving shelves after assembly. That list makes supplier questions more precise and stops an insulation label being mistaken for a complete performance guarantee.
Before you buy 2
Confirm what comes with the shed’s floor
Read the exact product description and assembly information for the shed you intend to order. A listing may distinguish between a base or support structure and a finished floor; those terms do not necessarily mean the same thing. Confirm whether floorboards, bearers, fixings or other parts are included, whether a pictured floor belongs to the chosen package, and whether insulation is a separate purchase. A name, photograph or product category cannot answer these questions; look for a written list of included items and any optional extras. When reviewing the Verdana 1 garden shed, use the stated package contents and assembly information to establish what arrives and what remains to be planned. If the floor arrangement is unclear, ask before placing the order.
Ask for enough detail to compare the proposed floor with the insulation you have in mind: the specified support arrangement, included floor components, permitted additions and any restrictions on changes. If a floor kit is optional, confirm that it is intended for that exact model and ask whether adding insulation changes the fitting order or required fixings. Do not treat another model’s kit as interchangeable just because it looks similar. Keep the answer with the assembly guide and record which model it applies to. If no finished floor is supplied, the plan must cover both the supporting base and floor surface, not simply a layer between them. For structural questions the supplier cannot answer, consult a suitably qualified installer.
Prepare the base for the complete floor arrangement
The support below the shed has to be planned together with all floor layers. Find out what prepared surface the selected model calls for and whether the site can accommodate it; insulation will not correct a soft, uneven or poorly drained base. Follow the manufacturer’s site and assembly guidance, and assess local ground conditions before work begins. Confirm the intended footprint and entrance position before base work starts, then consider how water will move around the footprint rather than letting it collect against or beneath the floor. This is planning, not a foundation design: if slope, drainage, ground movement or bearing capacity is uncertain, have a qualified professional assess the site instead of guessing at a solution.
Include the proposed finished floor height when you discuss site levels with the person preparing the base. An added layer can change the relationship between the floor, doorway and surrounding ground, so base and floor should not be decided independently. For a particular purchase such as the Verdana 2 garden shed, establish the specified base and floor arrangement before setting site levels; do not transfer details from another model. Include any step or ramp you expect to need, because access has to suit the final height. Give the person preparing the base the model-specific requirements and floor proposal, not a generic shed size. Keep both plans together and revisit them if either changes before assembly.

Before you buy 3
Check finished floor height and doorway clearance
Plan the full finished height before selecting an insulation product. Record the dimensions stated for the base, insulation, floor components and any top finish, then ask whether the combined arrangement is permitted and how it relates to the shed’s stated interior and doorway. An additional layer can take away usable clearance or affect the fit of adjoining parts. Use actual dimensions from current product documents, not estimates from pictures or category labels. For any candidate, including the Durano spacious garden shed, look for model-specific information about the floor and doorway arrangement; overall shed dimensions are not the same as finished floor height. Do not cut or alter shed components to make an unapproved build-up fit.
Think about everyday movement across the threshold, not only the figures on a plan. A raised surface may leave a lip at the entrance or make it harder to roll a trolley, bring equipment inside or clean along the doorway. Check that the door still opens and closes as intended, and consider where shelves and work surfaces will sit once the floor is complete. In a compact shed, preserving clear space can matter as much as adding a thermal layer. Ask for confirmation of the finished internal height and doorway clearance for the proposed arrangement. If no one can confirm compatibility from the documents, get professional advice rather than assuming a standard board or insulation product will fit.
Plan moisture control with the floor layers
Insulation does not solve moisture problems on its own. Water may be associated with site conditions, rain reaching an exposed edge, or moisture in the air; an uncoordinated floor arrangement can leave dampness hidden between layers. Decide how the base, insulation, floor surface and any moisture-control layer are intended to work together, using the instructions for the shed and insulation. Do not add a membrane, seal every gap or close an edge by default: the correct detail depends on the complete arrangement. Products sold for moisture control are not automatically interchangeable. If instructions are silent or conflict, ask the supplier or a qualified building professional for a recommendation before covering the floor.
Include delivery and storage in the moisture plan. Keep floor parts and insulation dry and protected while they wait to be fitted, and set the work sequence so vulnerable materials are not left exposed on site. If components arrive wet, ask how to proceed rather than covering them. Leave accessible edges available for any inspection or maintenance required by the instructions; do not close off an area simply to hide a gap. If you are comparing the Veltor 1, ask what floor construction is specified and whether any moisture-control requirements apply rather than assuming its name tells you. Persistent standing water, dampness or recurring ingress should be addressed before the floor is enclosed; if the source is unclear, get a professional to assess it.
Before you buy 4
Check insulation compatibility before buying
Compare insulation products by whether their documented use fits the proposed floor arrangement, not by thickness or a broad thermal claim alone. Read the product data for its intended application, dimensions, installation conditions and any layers or protection it requires. Then compare those details with the shed manufacturer’s instructions and the floor components you will actually use. A product described for a different part of a building is not automatically suitable for a shed floor. Performance figures for one product do not describe a complete floor with its joints, edges and gaps. The listing for Orello 1 identifies a particular shed; it does not establish what insulation will fit. Use its model-specific assembly information alongside the insulation manufacturer’s documentation, and get confirmation before making an alteration.
Check how the insulation will meet the floor finish and edges, and whether its maker permits the planned surface and method of support. The floor needs to remain appropriate for the shed’s intended use; a loose or poorly fitting layer can affect the finish and access, while an incompatible arrangement can create problems that are hard to correct once covered. Avoid buying on the strength of a phrase such as ‘suitable for sheds’ without checking that it applies to floor use and to the proposed construction. Keep the product documents together. Think about maintenance, too: if the design makes the layer inaccessible, plan how the finished floor can be cleaned and repaired in line with the instructions. If two sets of instructions do not agree, get clarification rather than improvising.
Agree the installation sequence and responsibility
Set the installation sequence before assembly begins. Insulation may need to be fitted while parts of the floor remain accessible, but the exact stage depends on the shed’s construction and should come from its assembly information. Ask whether the floor is assembled in place or handled as a unit, whether a new layer changes access to fixings, and whether any components must remain exposed. A late addition can restrict access to edges or leave unplanned cutting, so settle the order in advance rather than creating a new assembly method. When considering the Modano 1, make the order of work a model-specific question; do not leave an added layer or adjustment to assembly day.
Agree who is responsible for the extra work. A shed assembly service, if one is arranged, may have a defined scope; do not assume it includes installing insulation or adapting the supplied floor. Give the installer the product documents and proposed floor arrangement in advance, and ask whether the work is within their remit. If it is not, arrange suitable help rather than asking an assembly team to make unplanned cuts or changes. Check the required tools and working space with the person doing the job. Plan a dry, protected place for components until they are needed, and keep the shed guide, insulation data and written decisions together so everyone works from the same information.

Before you buy 5
Compare the full cost and scope
Compare the cost and work for the complete floor arrangement, not just the insulation product. Your budget may need to account for preparing the base, a supplied or separate floor, insulation, any specified moisture-control materials, the finish and fitting. These items may appear in separate quotations, so check that each quote covers the same scope. Avoid paying twice for a component already included, but do not assume that a base, flooring or fixings are part of a package without confirmation. For a listing such as the Wooden garden shed M, use the exact package details when comparing the floor allowance with another shortlisted model; the label alone does not say what is included.
Ask whether proposed changes affect package contents, assembly sequence or any product support offered, and request a written answer where compatibility is important. Clarify what you must buy separately and who will fit it. If insulation comes from another supplier, compare its delivery with the assembly plan and check how it should be stored instead of ordering far ahead without a suitable place for it. Consider finishing needs and any material waste, but do not order extra until dimensions and compatibility are confirmed. Comparing quotations on the same scope makes gaps easier to spot before you commit.
Record the floor plan before ordering
Before placing the order, put the decisions in one short plan: selected shed model, included floor parts, proposed insulation product, finished floor height, base arrangement, moisture approach, fitting stage and person responsible. Record unanswered questions about fit or permitted changes. The page for the Wooden garden storage shed S can identify the candidate you are considering, but verify floor and insulation assumptions against the actual package details and assembly information. Keep supplier responses with the version of the guide you will use, and note which model and question each response concerns. If support, clearance or moisture management remains uncertain, resolve it with the supplier or a qualified professional before work begins.
Check delivered components against the order and your plan before assembly. If the package or selected insulation differs from what was discussed, pause and confirm whether the revised combination is compatible; do not substitute a similar-looking item or rely on a measurement guessed from its packaging. Update the plan if the final materials, floor finish or installer changes. Review any proposed change before it is covered, while there is still an opportunity to confirm the arrangement. A successful choice is not the thickest layer available; it is a floor arrangement that matches the shed’s instructions, intended use and site, with its components and fitting sequence understood in advance.
Frequently asked questions
Does every garden shed need floor insulation?
No. It depends on how you use the shed, what floor the manufacturer supplies and whether an added layer fits the approved assembly without affecting clearance. For occasional storage, the extra cost and lost height may not be worthwhile. Decide according to your actual needs, and consider the whole shed if you require stable indoor conditions.
Why plan floor insulation before assembly?
Floor layers can change access to components, the finished height, doorway clearance and the fitting sequence. Once parts are closed in, adding a layer may be awkward or incompatible. Planning early gives you time to confirm what is supplied, what the manufacturer permits and who will fit it before ordering materials.
Can floor insulation alone keep a shed warm and dry?
No. Insulation is only part of the floor arrangement; conditions also depend on the walls, roof, openings, ventilation, moisture sources and intended use. It will not repair leaks or correct a poorly prepared base. If you need reliably controlled conditions or have persistent damp, ask a professional to assess the shed and site.
Should insulation sit under or over the shed floor?
There is no universal position. It must suit the model’s floor construction, the insulation product’s instructions and any specified moisture-control details. Follow the instructions for the exact products and get confirmation if they do not cover an added layer. Do not choose a position only because it is convenient or used in a different shed.
What should I confirm before ordering?
Ask which floor parts are included, what base is specified, whether insulation is permitted, and how the proposed layers affect finished height and doorway clearance. Clarify any moisture-related details, when the insulation should be fitted and whether installation is included in the work you have arranged. Keep answers tied to the exact model and product documents.
Planning floor insulation before assembly is mainly an exercise in compatibility: the layer must suit the intended use, supplied floor, base, finished level and moisture approach. Confirming those points against the chosen shed’s instructions helps prevent a rushed change after the floor is closed and avoids buying material that cannot be used as planned. If the documents leave a critical fit or site question unanswered, resolve that specific issue before assembly begins. A useful plan sets out what is included, what will be added and how the finished floor will remain usable.
