
How to Ventilate a Garden Shed While Keeping Insects Out
Garden shed buying guide
Keeping a garden shed aired without inviting insects is both a ventilation question and a buying decision. Vents can provide an air route while the door is closed, but only if the opening is suitably screened, kept clear and backed by a suitable route through the shed. Door edges, windows, panel joints and later-added openings need separate attention. This guide explains what to check in a product description, how to plan insect screens and when to ask the maker or installer before making changes.

Plan ventilation and insect protection together
Air needs a route into and out of a closed shed; a hole in one wall does not guarantee that air will pass through the whole space. Natural ventilation varies with wind, temperature, the size and position of openings, and obstacles inside or outside. Separated inlet and outlet points may create a clearer route, but their effect still depends on the site. Plan for ordinary use with the doors shut, not only for the moment when a wide entrance is open. Think about where air can travel after entering: tightly packed boxes, full-height shelving and stored covers can interrupt a route even when the vents themselves are clear. Ventilation also cannot correct rain getting in or replace storage instructions for particular items.
Insects can enter through intended vents as well as through gaps around doors, windows, joints and later-added openings. A screen needs to cover the opening and meet its frame all the way around; a loose edge can leave a way in. Mesh can also restrict some airflow, especially if it is fine, dirty or blocked. Before comparing sheds, decide whether you need a protected vent while the door is closed, a screened entrance during longer use, or both. The answer depends on how you use the space and which openings it has.
Map the air route before choosing a shed
Sketch the shed’s intended position and mark any vents, entrance and windows shown in the plan. Note where a wall, fence or dense planting may sit outside, and where shelves or a workbench may go inside. The aim is not to point every opening in one fixed direction, since outdoor airflow changes. Instead, check that intended openings can remain accessible on both sides and that air has a route through the part of the shed you use. Leave room to reach exterior screens for inspection. For a candidate such as the Verdana 1 garden shed listing, use the available plan to check whether documented opening positions fit your layout.
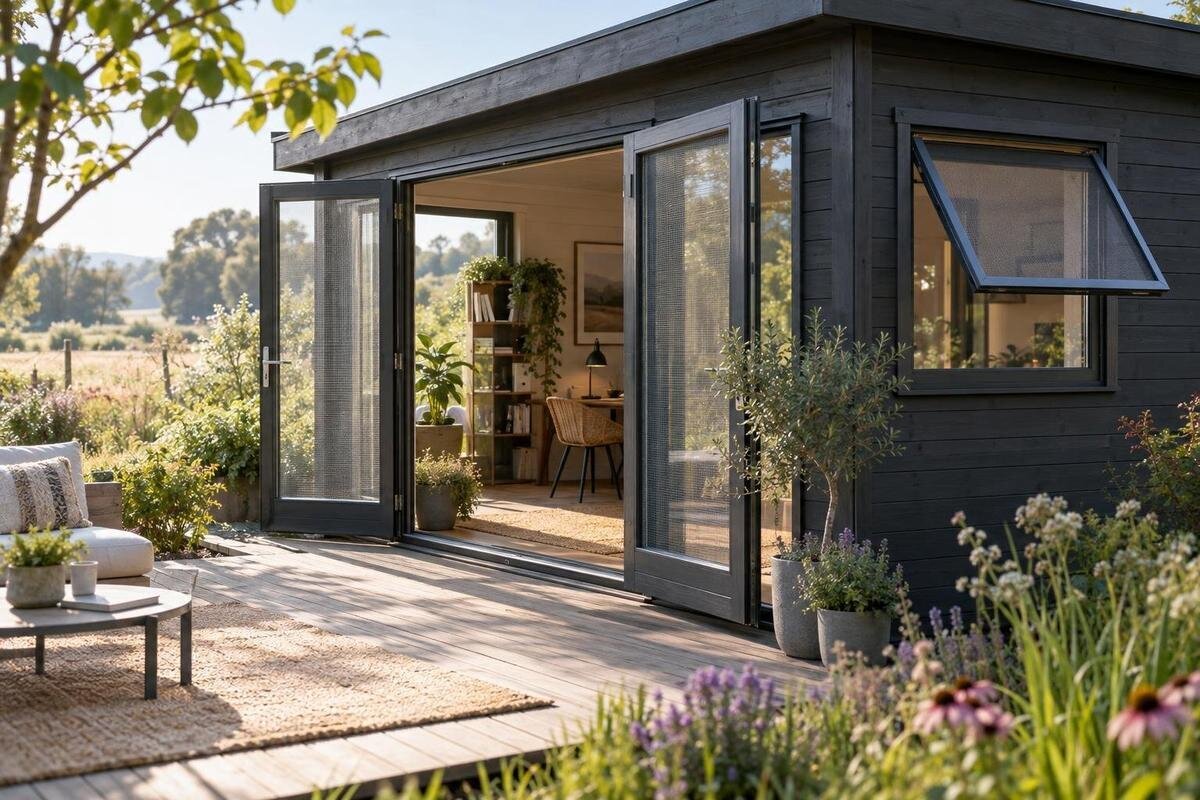
An attractive product image is not enough to establish where vents are, whether they open, or whether they are screened. Look for a plan or written description, and ask about missing details before ordering. Consider the position of the shed as well as its internal layout: a vent that ends up pressed close to a fence or hidden behind storage may be difficult to access and less useful. Include routine cleaning in your plan. A screen that cannot be reached without moving heavy items or dismantling a fitting is less convenient to maintain. Also consider whether a future boundary fence, planting or rainwater item could limit access after the shed is in use, rather than assessing the empty site alone.
Check what the product details say about vents
If ventilation is important, look for specific written information rather than relying on a general description or a picture of a grille. Check the number and position of fixed or opening vents, their dimensions if provided, and whether insect mesh is included. Find out whether a screen covers the full opening or is a separate option. A visible detail is not necessarily a usable vent, and a vent does not automatically come with a screen. Confirm which components are supplied with the exact variant you are considering, rather than assuming that all versions are the same. Keep a note of the version, options and any clarification received, so the details can be checked again before the order is finalised.
Apply the same checks to the Verdana 2 garden shed listing: use its current product information to confirm what is documented, and ask the seller or maker about anything unclear. If no suitable vent is listed, ask whether a compatible option is available and where it can be fitted. Do not assume you can cut an opening into a panel or roof after assembly. Before planning such a change, get guidance from the manufacturer; if installation involves modifying the structure or weather protection, consult a competent installer.
Choose mesh that fits the vent
Choose insect mesh for the insects you want to keep out, while considering how much open area the vent provides. A finer weave may exclude smaller insects but can also restrict more air; the effect depends on the mesh and the vent. There is no single mesh choice that suits every opening and every pest concern. Ask the supplier which screen is designed for the vent and the insects you need to exclude. Avoid treating a grille or louvre as an insect screen unless the product information confirms that mesh is fitted behind it. A screen should also be positioned so that it protects the intended air path without becoming an easily damaged loose layer on the outside of the shed.
Fit matters as much as the mesh itself. The screen should cover the whole opening and be secured around its perimeter, including corners; check for gaps, loose edges and damage. Ask how it attaches and whether it can be removed for cleaning or replacement without damaging the vent. If you are considering the Durano garden shed listing, check the documented vent details and confirm which screen, if any, is compatible. Do not assume that a screen shown separately will fit a particular opening or is included with the shed.

Account for doors and other openings
A door often creates a much larger route into the shed than a vent, especially when it is left open during use. Decide whether you need a separate screen door or another barrier across the entrance. Check that the shed’s documented design can accept it and that it will not stop the main door from opening, closing or latching properly. Consider how the screen will be held open while you carry items in and out, and whether it creates a trip hazard at the threshold. If the product has an opening window, treat it as a separate point to screen; mesh fitted to a vent will not protect an uncovered window.
Think about how the entrance works in daily use. A screen should not make it awkward to carry stored items through the doorway or interfere with the normal door. If you expect to leave the entrance open for longer periods, an entrance screen may be more relevant than relying only on vent screens. For the Veltor 1 listing, check the actual drawings and product details for door and other opening arrangements before considering an accessory. Confirm dimensions and compatibility rather than assuming that a standard screen will fit.
Find unwanted gaps without blocking designed openings
Inspect the shed with its doors shut and work methodically around the entrance: check the top, sides and threshold, not just the area near the latch. Look for uneven contact, damaged seals or a gap that changes when the door moves. If the shed has windows, check their frames too. Examine panel joints and any opening made later for a pipe or cable, where applicable. Separate these unintended gaps from designed vents and drainage openings; the latter may need to remain clear. A visual check is a useful first step, but it will not identify every possible route.
Small gaps around a moving door may call for a suitable brush strip or weather seal, while an uneven or persistent gap may need a different remedy. Choose materials and fittings intended for the shed’s construction and make sure the door still moves and closes freely. Check any proposed seal against the door’s full travel, including at the corners and threshold, before fixing it permanently. Do not fill every seam indiscriminately: doing so could obstruct a designed vent or drainage route. When comparing the Orello 1 listing, use the documented construction and fitting information to understand what can be adjusted. Ask the maker or a competent installer about larger gaps or uncertain repairs.
Allow for the site and the storage layout
Check the planned position before ordering, not only after the shed is assembled. Consider whether nearby walls, fences or planting will make the outside of an intended vent hard to reach or leave it obstructed. Follow the product’s installation guidance for placement, and allow practical access for inspecting screens. No single orientation guarantees good airflow: conditions vary from site to site. The useful question is whether the planned openings will be accessible and whether the chosen position leaves a clear route for air to enter and move through the shed. Revisit this assessment if you plan to add tall planting, storage or a privacy screen nearby, since a clear space at installation may not remain clear.
Plan shelves, boxes and work surfaces so they do not cover vents or block the route you have identified. A low opening, if the plan includes one, should not end up buried behind stored items; the same applies to outlets that are meant to stay clear. When considering the Modano 1 listing, use the supplied drawings and dimensions to plan the interior rather than assuming the layout will leave openings unobstructed. If the shed stores items with specific handling or ventilation instructions, follow those instructions as well; general shed ventilation is not a substitute for them.
Confirm screens and options before ordering
Before placing an order, make a short list of what must be included: which vents are documented, whether they are screened, whether the screen covers the full opening, and whether any opening window or entrance needs a separate barrier. Ask whether screens are supplied as standard or offered as an option, and record the answer against the exact version you are considering. For example, with the wooden garden shed M listing, rely on its written product details or a direct clarification, not the model name, to establish which ventilation or screening components are included.
If you expect to add mesh after purchase, confirm the opening dimensions, attachment method and availability of a compatible frame before ordering. Ask how the screen can be removed for cleaning or replacement, and whether the proposed addition is suitable for the shed’s construction. Establish who is responsible for supplying and fitting each part, particularly where a vent and screen are obtained separately. If the product information does not show a suitable vent, ask the maker whether one can be added. Any plan to cut into a wall, panel or roof should be discussed with the manufacturer and, where the work affects the structure or weather protection, a competent installer.
Keep screens and air paths clear
Include vents and screens in routine shed checks. Dust, leaves, webs or other debris can cover mesh and reduce the open area, making an otherwise suitable vent less effective. Remove build-up using a method recommended for the screen; forceful brushing or unsuitable cleaning products may damage some mesh or its frame. While cleaning, inspect the whole perimeter for loose fasteners, lifted edges, tears and gaps between the screen and the opening. Check that doors still close properly and that stored items have not been moved against a vent. Look from both sides where access permits, because debris on the exterior and a stack of stored items indoors can each restrict the same intended air route.
Inspect again after garden work, repairs or cleaning that could snag the mesh, and whenever you notice damaged screening, insects inside or reduced airflow. A fixed inspection calendar is not necessary for every shed: how often to look depends on the surroundings and how often the space is used. If a screen needs replacement, note its opening and attachment details so the replacement can be matched correctly. Keep intended vents clear when reorganising storage, and avoid sealing a screened opening simply because it admits air; that is its purpose.
Compare the complete ventilation arrangement
When comparing options, record what is confirmed and what remains unknown: the documented air route, vent positions, screen inclusion, door and window openings, and access for cleaning. Treat each product as a candidate to assess, not as proof of a particular feature. For instance, when reviewing the wooden garden storage shed S listing, use the available product information to fill in your checklist and leave unanswered points as questions. This makes it easier to compare sheds on the details that matter for insect protection and avoids relying on a model name or photograph to establish specifications.
Give priority to a plan that keeps a useful air route available with the door closed, screens the openings you intend to use, and leaves unintended gaps that can be addressed without blocking vents. Include any separate screen or fitting work in your purchasing decision, and confirm compatibility before committing to it. Compare the ongoing tasks as well as the initial arrangement: a solution that can be inspected and cleaned easily is more likely to remain useful. If a candidate has no documented ventilation arrangement and no confirmed way to add one, do not assume that an easy retrofit will be possible. A clear answer from the maker or a competent installer is more useful than trying to solve structural questions after assembly.
Frequently asked questions
Will insect mesh on a vent keep every insect out?
A correctly fitted screen can limit entry through that vent, but it cannot seal other routes or guarantee that no insects enter. Check the full edge of the screen, then inspect the door, any windows, panel joints and later-added openings. Keep the mesh intact and attached; if a door is left open, a screened vent does not protect the doorway.
Does an insect screen reduce airflow?
It can. Mesh takes up part of the opening, and finer or dirty mesh may restrict airflow more than a clean, more open weave. The effect depends on the mesh, frame and vent, so there is no single answer for every shed. Compare the screen and vent as one assembly, and clean the mesh according to its care instructions.
Is leaving the shed door open enough for ventilation?
An open door may let air through temporarily, but it is also an unprotected entrance for insects and is not a consistent route when the shed is closed. A screened vent can provide an intended air path between visits. If you need to leave the entrance open while using the shed, plan a compatible screen for that opening too.
Can I add a vent after the shed has been assembled?
Possibly, but it depends on the shed’s construction and the manufacturer’s guidance. Do not cut a wall, panel or roof based only on general DIY advice; an alteration may affect the structure or weather protection. Ask the maker or a competent installer about a suitable location and installation before making changes.
How often should I inspect the insect screens?
Check screens and their edges regularly, and whenever you notice reduced airflow, damage or insects inside. Look more closely after cleaning, nearby garden work or a repair that might snag or loosen the mesh. The right interval depends on use and exposure, so a quick visual check as part of routine shed care is more useful than assuming one fixed schedule suits every site.
The reliable arrangement is not simply the largest vent or the finest mesh. It is a documented air path that remains unobstructed, a screen suited to the insects you want to exclude, and closed edges around openings that are not meant to provide ventilation. Check those details before ordering, then inspect screens and seals as part of routine shed care. This keeps airflow useful without relying on an open door or sealing every gap indiscriminately.
