
Growing Cauliflower in a Greenhouse
The Blanching Atelier · T17
Growing Cauliflower in a Greenhouse
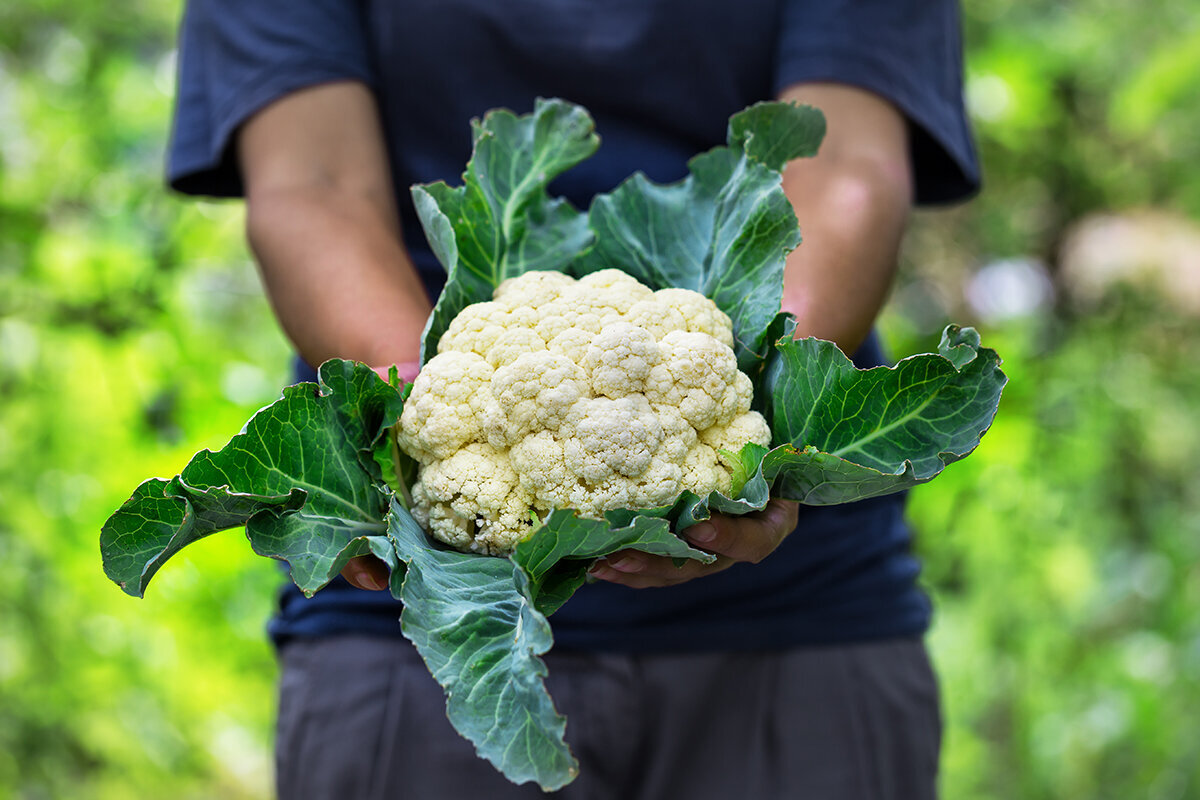
A flawless cauliflower head is neither chance nor the result of excessive warmth. It reflects cool air, even soil moisture, vigorous leaves, active roots and uninterrupted growth.
A greenhouse can deliver this quality reliably when managed as a cool, controlled shelter rather than a heat trap. Use it for an earlier start, a longer autumn harvest, protection from unsettled weather and precise watering. Malta’s summer heat cannot be turned into ideal cauliflower conditions.
Crop-planning noteBest window: after late-summer heat eases and through spring, depending on the site and variety. Allow for broad mature leaves, cool ventilation and a single, timely harvest.
For leafy brassicas grown with adequate spacing, clear airflow and a dry working path, discover the Classic Aluminium Greenhouse.
01 / The desired finish
“The pale, closed head records consistency throughout the crop: strong leaves first, then cool development, followed by timely protection until the precise harvest cut.”
Cauliflower needs greater precision than many greenhouse crops because its quality window is narrow. A tomato may recover after brief drought and simply produce a smaller fruit. Disturbance during leaf growth or head formation often gives cauliflower a tiny head, grainy texture, internal leaves or a prematurely loose curd.
That is exactly why a greenhouse is useful. Watering remains controllable, young plants are sheltered from wind and heavy rain, and airflow can be managed deliberately. The principle is simple: first grow a strong, broad-leaved plant. Then keep water, nutrition and climate even so it can form a firm, clean head.
02 / Variety, maturity and season
Schedule the crop for the coolest part of the gardening year.
In Malta, unheated greenhouse cauliflower is best scheduled from autumn into spring, away from peak summer heat. For a spring harvest, ventilate early on sunny days. An autumn crop is safest when sowing and planting wait until sustained heat has eased and the variety suits the site. The structure can buffer wind, heavy rain and cool spells, but monitor internal heat. Use suitable protection if unusual cold or frost is forecast.
Choose varieties for planting date, maturity period, local suitability, heat tolerance and leaf-covering habit—not simply from a photograph or the promise of an exceptionally large head. For spring, select an early, quick-maturing variety. Autumn types may grow more slowly if they form heads reliably in cooler weather. Self-covering white varieties naturally arch their inner leaves over the curd, reducing manual work.
Early variety / spring crop
Fast, compact, heat-aware
Suitable when harvest must finish before warm weather arrives. Start only where both cold stress in young plants and later heat build-up can be avoided reliably.
Main variety / autumn crop
Steady growth, cool finish
Often the more reliable option: sow or raise plants as sustained summer heat eases, transplant in milder conditions and use greenhouse shelter through autumn and into the cooler season.
Self-covering / white head
Naturally closing leaves
Useful where daily checks are impossible. Inspect heads regularly nonetheless: covering leaves reduce light but cannot compensate for heat, drought or nutrient shortage.
03 / Raising plants
Young plants should stay compact, well rooted and free from interruption.
01 / Seed
02 / Cell tray
03 / Young plant
04 / Planting out
Start cleanly and in control
Sow one seed per cell in fresh, clean seed compost. Keep the medium evenly moist, never sodden, and label the variety and intended planting date immediately.
Build roots, not height
Give seedlings bright light straight after emergence and gentle air movement. Aim for a compact, sturdy root ball—not a soft, drawn-out indoor plant.
Keep the juvenile stage stable
Do not leave plants crowded, hungry or root-bound while they wait for the bed. Overgrown cauliflower plants are especially sensitive to this early growth interruption.
Plant out with a strong root ball
Plant when several true leaves and a stable root ball are present. Set at the same depth as in the cell tray, firm gently and water thoroughly.
Treat young-plant raising as the first quality check. For a late-spring crop, sowing may begin in February where the site and variety suit that timing. The Bavarian State Institute for Viticulture and Horticulture gives 16 to 18 °C for early cauliflower germination, followed by 14 to 16 °C for raising plants. Cold, overheld or otherwise stressed plants can form tiny heads prematurely. If the bed is not ready, a fresh small sowing is often better than holding overgrown plants.
Before planting out, acclimatise young plants over several days to cooler moving air and stronger light. Do not let the root ball dry out; cold nights are not suitable hardening-off training. Plant in late afternoon or under cloud where possible. The change should be almost invisible: no severe wilting, damaged roots or growth pause that the later head will reveal.
04 / Mature plant dimensions
Plan for the leaves that will grow, not the small plug.
50–60 cm plant spacingClear working pathSpace from glazingOpen ventilation route
Plant spacing
Depending on variety, 50 to 60 cm between plants and rows is a practical guide. Give vigorous autumn varieties the wider spacing so their leaves can dry quickly.
Working path
Keep a path that is easy to walk. You must inspect leaf undersides, soil moisture and head formation without treading on soil or continually brushing plants.
Glazing edge
Outer leaves should touch neither glazing nor the greenhouse wall. A clear margin improves airflow and reduces condensation problems and sharp temperature changes beside the cover.
Ventilation corridor
Dense foliage must not block doors, roof vents or other openings. Cauliflower needs gentle, regular air movement rather than a still, damp canopy.
A newly planted row can initially look almost too empty. Keep that space. The later broad leaves fuel a strong head, while compressed foliage creates damp zones that dry very slowly under cover. Two rows make sense only when both sides remain accessible and neither bed nor roots need to be trodden on during care and harvest.
Where space is limited, a few excellently managed plants are more valuable than a supposedly productive but crowded row. Consider the Classic Aluminium Greenhouse as a growing space for large-leaved brassicas, organised propagation and a genuinely usable central path—not merely weather cover for individual pots.
05 / Temperature, ventilation and light
Manage the greenhouse as a bright, cool growing room.
Cauliflower gains nothing from a sun-baked greenhouse. Open doors and roof vents as the structure warms in the morning, not once the air already feels hot and heavy. Shade can help during exceptional warmth, but replaces neither suitable timing nor effective ventilation. A minimum-maximum thermometer at leaf height is more dependable than a brief subjective impression on entering.
A mostly cool, even growing period is crucial. In Malta, strong sun and closed vents can create heat build-up very quickly, even outside summer. Warm nights and high daytime temperatures disrupt head formation and encourage loose curds. During an unusual cold spell, fleece can protect plants if night frost is forecast; remove it in the morning so leaves and soil can dry.
Ventilation is also preventative plant protection. Water directly into the root zone in the morning where possible, then open the greenhouse sufficiently. Heads and leaves should not remain wet into the night. If using a fan, let it move air gently through the foliage without drying one side of the bed. Find more options for a controllable growing space among Bloomcabin aluminium greenhouses.
06 / The space for consistency
Every interruption shows in the head later.
Cauliflower must not alternate between lush growth in wet soil and a dry pause. Nor can a stalled crop reliably be “made up” with a late, heavy nitrogen feed. Irregular root conditions produce irregular leaf growth, and that instability continues into the curd.
01 / Root zone→
02 / Foliage→
03 / Head formation→
04 / Finish
Keep soil evenly fresh through the active rooting depth. Check below the drier-looking surface with a finger, dibber or small trowel before watering again.
Steady moisture and balanced nutrition create broad, healthy leaves. This foliage provides energy needed before the head is visibly forming.
Cool conditions and an undisturbed plant allow a sensibly sized head to form. After early stress, a premature, very small “button” head may appear instead.
Even growth supports a firm, fine-grained head. Heat, drought or rushed fertiliser applications can loosen or coarsen its surface, or produce small leaves within it.
Water with a steady hand
Water an in-ground bed deeply enough to reach the active root zone. Check again before watering next. A greenhouse receives no natural rainfall, while soil type, sunshine and plant size continually change demand. Drip irrigation or slow, soil-level watering is therefore better than frequent surface sprinkling. Clean, loosely spread mulch can smooth evaporation, but must not keep the stem permanently damp.
Base feeding on the soil
Cauliflower has high nutrient needs, but “more” is not a fertilising strategy. Work mature compost into the bed before planting and provide an appropriate organic base feed. With weak or unusual growth, a soil test is more informative than blind additional feeding. A modest supplement during leaf growth can help; high doses of readily available nitrogen do not automatically produce large heads or reliable quality.
For a stable growing space with considered ventilation, robust construction and accessible beds, the Classic Aluminium Greenhouse provides a carefully planned foundation.
07 / Start of head formation
Observe closely as soon as the first pale dome appears.
When a small pale point appears between the younger inner leaves, inspect every plant every two to three days. This is not the time for radical corrections. Keep soil moisture and ventilation stable, remove weeds, and cut only diseased or damaged leaves lying on the ground. Healthy leaves stay: they feed the head and later become its natural protection.
White cauliflower heads remain especially attractive when protected from direct, intense sun. The leaf canopy works both as shade and as a quality indicator: a strong plant with abundant healthy leaf area had good conditions for a firm head. Do not remove large leaves for supposed ventilation. Air comes from spacing, clear paths and open vents—not stripping the plant.
08 / Blanching and leaf protection
Close leaves like shutters—never like tight wrapping.
Blanching shades the white cauliflower head with its own outer leaves, keeping the pale ivory surface out of intense sun. Begin only once a small, firm head is clearly visible. There is no fixed timetable: weather, variety and growth speed determine how soon harvest is needed. Regular checks matter once the curd sits beneath the leaf canopy.
Self-covering varieties do some of this work themselves. Do not assume every plant will envelop its head completely. A quick look reveals whether one side lies open to sun. Bring leaves together especially loosely in warm or humid weather. Wet foliage against the head raises rot risk; the aim is shade with airflow, not a damp seal.
01 / Open
02 / Shade
03 / Secure
04 / Check
Open growth
Wait until a small, firm head is visible. Before then, open inner leaves need light and unobstructed air exchange.
First shade
Bring two or three dry, healthy outer leaves loosely together over the head without sharply creasing or breaking leaf ribs.
Secure loosely
If needed, use a soft clip or loosely tied string well above the curd. Always retain an airy gap.
Check regularly
Briefly open the cover after dew, high humidity and before harvest. Check dryness, firmness, discolouration and hidden pests.
09 / Checking the finish
Read the surface before blaming the variety.
Not every deviation makes a head inedible, but it indicates how the crop has developed. Use the visible result to improve the next planting rather than trying to repair a formed head with frantic interventions.
Compact
Buttoning
Graininess
Bracting
Soft rot
Firm and pale
This is the desired finish: dense, even grain, a firm dome, pale colour and no protruding individual florets. Cut while this structure remains closed.
Buttoning
A very small, premature head usually follows early stress: overgrown young plants, cold, heat, drought, root damage, nutrient deficiency or pest pressure.
Graininess
When individual florets stretch and separate, the curd loses its fine closed texture. Heat or marked growth fluctuations often came first. If usable, harvest promptly.
Bracting
Small green leaves between florets can be varietal, but are also encouraged by heat, drought and other disturbance during early head formation.
Discolouration or rot
Yellow or brown patches call for a review of sun exposure and frost protection. With dark, wet or soft tissue, also check condensation, damage, hygiene and air movement.
Change the next planting
First check propagation temperature, planting date, root condition, ventilation and watering. A finished head cannot be rebuilt, but the next crop can be timed more suitably.
Buttoning is a classic warning sign: the plant begins forming a head before it has built enough leaf area. The cause often lies weeks earlier—in excessively cold propagation, prolonged pot holding, damaged roots or drought soon after planting. Extra fertiliser will not enlarge the head afterwards. Harvest it small while firm, then improve conditions for the next planting.
Grainy heads and internal leaves above all require a climate review. High temperatures, drought and uneven growth encourage a loose or leafy surface. Schedule the next head-forming phase for cooler weather, ventilate earlier on sunny days and keep the root zone predictably moist. Flooding a bed after it has dried out does not restore lost consistency.
10 / Pests, diseases and hygiene
Keep the growing space clean and every plant visible.
Protected growing does not exclude brassica pests. At least twice weekly, inspect leaf undersides and heart leaves for eggs, aphids, caterpillars, feeding damage, webbing and droppings. With a few plants, caterpillars can be picked off early. A close-fitting crop-protection net at open sides can reduce incoming cabbage white butterflies, but must not obstruct essential ventilation. If further action is needed, identify the pest first, then check Malta’s current register and the product label for the crop, use and user category before applying it.
Clubroot deserves special attention. Wilted plants despite moist soil and swollen, knobbly roots should be taken seriously. Do not compost affected plants; remove cruciferous weeds too, and avoid all brassicas on the affected area for years. A soil test helps where clubroot is suspected. Crop rotation includes broccoli, kohlrabi, radish, mustard, rocket and many cruciferous green manures as well as cauliflower. Water at soil level, remove diseased debris promptly and ensure foliage dries quickly.
After harvest, remove roots, leaves and spilled soil completely. Clean knives, seed trays, work surfaces and paths, especially after unusual plants. Hygiene is not decorative extra work: it breaks the link between a finished crop and the next carefully planned one.
11 / Harvest and storage
Cut at peak firmness and cool the harvest promptly.
Signs of maturity
Harvest when the head is firm, dense, pale and evenly closed, before individual florets separate. Do not wait for maximum catalogue size if warm weather is coming or the surface is becoming grainier. A slightly smaller head at its best is more valuable in the kitchen than an oversized head cut a day too late.
Use a clean, sharp knife and cut the stem beneath the head. Leave several wrapper leaves as a protective collar; they reduce bruising and drying on the way to the kitchen.
Cool
Take harvested cauliflower out of the greenhouse immediately. Store it unwashed in the vegetable drawer, loosely protected by its leaves. Wash only shortly before preparation. As refrigerator air can be drying, the natural leaf collar is useful protection.
Store and preserve
Freshly harvested cauliflower tastes best and should be used within a few days. Check stored heads regularly and remove any with soft or dark patches. For longer storage, divide the head into florets, blanch briefly in boiling water, cool quickly and freeze. This avoids delaying harvest unnecessarily at the expense of head quality.
12 / Questions from the greenhouse bench
Greenhouse cauliflower FAQ
Can cauliflower grow in a greenhouse all year?
Only where and when genuinely cool, even conditions can be maintained. In Malta, cauliflower under glass is mainly suited to the cooler months from autumn into spring. Summer heat is usually the main obstacle; shorter winter days can slow growth, while unusual cold spells may still require protection. An unheated greenhouse extends the window but does not remove seasonal limits completely.
Does self-covering cauliflower need extra blanching?
Usually not, because inner leaves of these varieties naturally arch over the head. Inspect every plant nonetheless. Where strong sun reaches an open patch, lay a few dry outer leaves loosely over it. Never tie wet leaves tightly or permanently around the curd.
Why does my cauliflower have only a tiny head?
This is often buttoning: the head formed before the plant built enough leaf area. Possible triggers include overgrown or root-bound young plants, cold stress, heat, drought, damaged roots, nutrient problems or pest pressure. Late feeding will not make the small head large. Harvest it while firm and plan the next planting date more carefully.
How many plants fit into a small greenhouse?
Calculate for mature leaf width, not only bed length. With 50 to 60 cm spacing, a clear path and sufficient distance from walls, a small greenhouse often holds fewer plants than expected. Doors and vents must remain operable, and every plant must be checked, watered and harvested without constantly brushing foliage.
Can cauliflower be grown in containers under glass?
Yes, although a deep greenhouse bed is usually more reliable. A container must be large, stable and well drained. Its root zone warms and dries faster, making the necessary consistency harder to achieve. Do not place containers at the hottest glazed edge, and check moisture daily.
13 / Sources and further reading
Technical foundations for a better finish
The following specialist sources support guidance on raising young plants, crop climate, plant health, head quality and preventative plant protection.
More from Bloomcabin: “Setting Up a Greenhouse: Layout, Plants & Care” · on protection from weather and pests in an aluminium greenhouse · “Grow Fresh Food All Year Round”
- LWG Bavaria: Raise young plants yourself or buy them
- LWG Bavaria: Small greenhouses and early crops
- Saxony Garden Academy: Cauliflower in home gardens
- German Environment Agency: Plant protection in vegetable gardens
- North Rhine-Westphalia Chamber of Agriculture: Recognise and prevent clubroot
- Royal Horticultural Society: Cauliflower – Grow Your Own
- LWG Bavaria: Cauliflower propagation guidance and temperatures
The final fitting
Give cauliflower a greenhouse that breathes in time.
- Timing: Place head formation in the coolest dependable part of the autumn-to-spring growing season.
- Leaf room: Give every plant 50 to 60 cm, an accessible path and space from the glazing.
- Ventilation: Open early, water the root zone evenly and keep protective leaves dry and airy.
Classic Aluminium GreenhouseBloomcabin aluminium greenhouses
