
Growing Microgreens in a Greenhouse
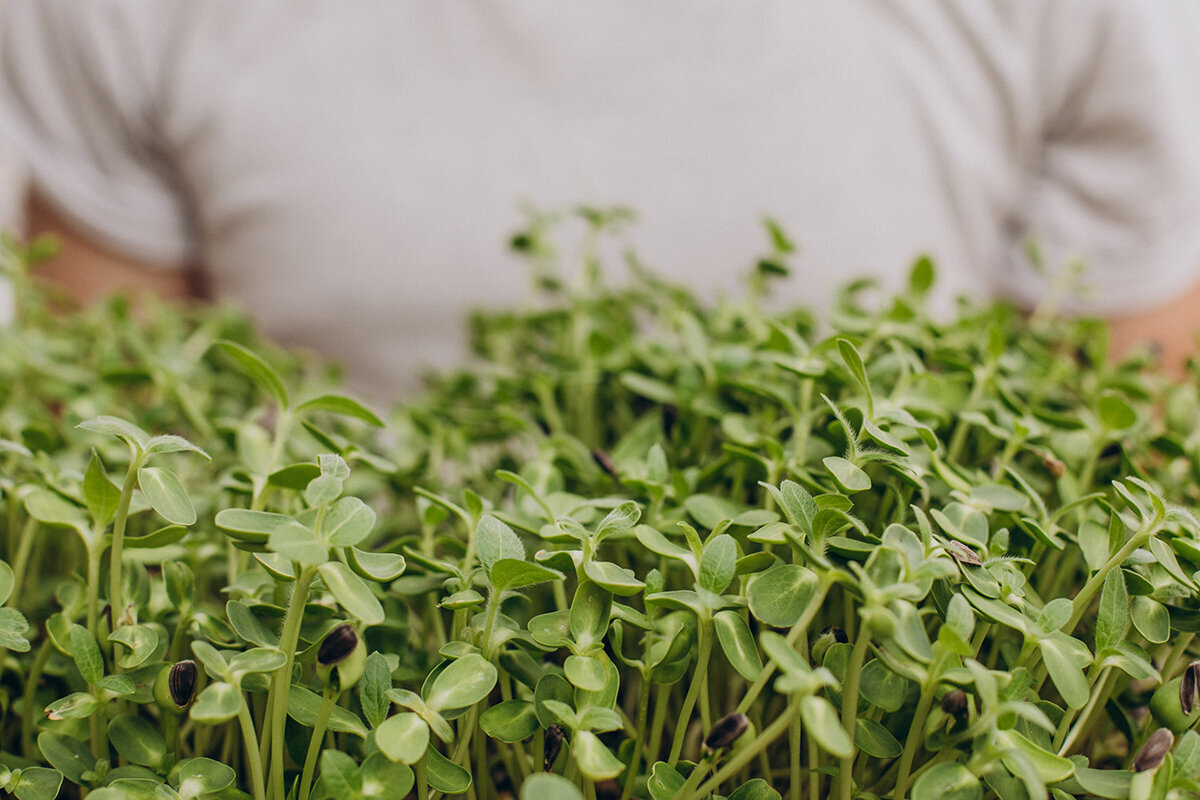
Greenhouse growing notes / 27
Growing Microgreens in a Greenhouse
The quickest greenhouse crop needs a precise routine: suitable seed, even density, a controlled dark phase, tempered light and prompt chilling.
Classic aluminium greenhouse7–21 days Typical crop-dependent harvest window
1 tray per crop Keep germination behaviour comparable and traceable
Clean → chilled Protect quality after cutting
The growing principle
Not miniature vegetables, but short, disciplined growing cycles.
Microgreens are edible young plants harvested after germination, once their cotyledons have opened—depending on the crop and preferred cut, shortly before or as the first true leaves emerge. Unlike sprouts, they usually grow on shallow growing medium or a suitable propagation mat. Cut just above the surface; seed husks, roots and growing medium remain in the tray.
That distinction determines how the greenhouse should be used. A tomato bench benefits from space, warmth and a long season. A microgreen bench benefits above all from repeatability. The cycle from dry seed to harvest is so short that small mistakes show quickly: an over-sown tray stays wet, a pleasant greenhouse in the morning can become very hot by afternoon, and dirty scissors can compromise an otherwise carefully managed batch.
For keen home growers, this precision is useful rather than discouraging. You need neither a large setup nor a complicated feeding programme to begin. What matters is a dependable tray format, a few straightforward crops, drinking water, an easy-clean work surface and a daily check at roughly the same time. Treat the first month as calibration. Record crop, seed batch, sowing weight, any soaking time, covering time, start of the light phase and condition at harvest. These notes are more valuable than an apparently universal harvest day.
Microgreen quality is set before sowing—and protected until chilling.
01 / Seed behaviour
Choose by rhythm, not colour alone.
Start with a crop whose seed size and germination behaviour can be judged clearly in one tray. Fine brassica seed soon forms a shallow, compact leaf canopy. Larger peas and sunflowers make sturdier shoots, but need more space, closer water management and consistent cleaning. Avoid mixtures at first. Only when you know how quickly each crop germinates, how much water it takes up and when it becomes too tall or firm for your taste can harvests be combined sensibly.
Buy clearly labelled, untreated seed expressly intended for eating as sprouts or microgreens. Keep details of the supplier, germination rate and batch, and label every tray with crop and sowing date. This makes it easier to isolate a weak run, repeat a successful process and see whether a batch grows more slowly than usual during a cool or cloudy greenhouse week.
Fine seed / quick
Broccoli
- Soaking: Usually not needed.
- Dark phase: Brief and controlled.
- Character: Mild, fresh and delicately spicy.
- First tray: Ideal for practising even sowing.
Fine seed / colourful
Radish
- Soaking: Usually not needed.
- Dark phase: Brief; uncover once seedlings stand upright.
- Character: Peppery, crisp and colourful.
- First tray: Beginner-friendly; still monitor density.
Large seed / vigorous
Pea shoots
- Soaking: Often useful; drain thoroughly afterwards.
- Dark phase: A light cover can support rooting.
- Character: Sweet, juicy and substantial.
- First tray: Easy to assess, but needs airflow.
Large seed / robust
Sunflower
- Soaking: Commonly used, with clean drinking water only.
- Dark phase: Remove the cover promptly as growth increases.
- Character: Nutty, crisp and full-flavoured.
- First tray: Best once your hygiene routine is secure.
Use untreated seed only, intended for growing as microgreens or sprouts and for eating. Treated, coated or ornamental-plant seed does not belong on a microgreen bench. Start with one crop per tray and mix different crops only after harvest, once their growth and cutting times are known.
02 / Density as a variable
Dense enough for a leaf canopy. Open enough to breathe.
Too sparse
Productive density
Overcrowded
Seed should form a roughly even surface, not mounds beside bare patches. In a productive tray, cotyledons close into a harvestable canopy while individual stems can still dry after watering. Where seeds lie in thick lines or clumps, moisture stays trapped at the surface. Weak, elongated stems and uneven growth then become more likely.
Tray, medium and calculation
Measure once. Record the result consistently.
A shallow tray of around 30 × 50 cm is practical for greenhouse growing at home: differences in density and germination are easy to see while the tray remains manageable. A sealed lower tray beneath a perforated growing insert makes bottom watering simple. The lower tray is a temporary reservoir, not a permanently filled water basin.
Starting seed quantity = tray area × proven crop rate.
There is no universal number of grams per tray. Seed size, variety, germination rate, medium, light level and desired harvest stage all affect the suitable amount. Begin with your seed supplier’s microgreen guidance, weigh every sowing with kitchen scales and adjust only after comparing canopy closure, surface dryness and harvest quality. Test new seed batches in their own tray first.
Suitable media include fresh, light, structurally stable propagation compost without raw animal manures, coconut-fibre products from a reliable source, or mats expressly made for this crop. Moisten the medium evenly before sowing without saturating it. Dense garden soil is unsuitable for this shallow, short crop. Avoid immature compost and materials of unknown origin, as microgreens are often eaten raw.
03 / Tray setup
Keep roots, water and the edible leaf canopy functionally separate.
Keep the system simple enough to clean completely after every batch. Moisture reaches the roots from below; between watering, the edible leaf canopy stays as dry and well ventilated as possible.
Air at leaf level
Even sowing zone
Root mat and medium
Perforated insert
Lower water reservoir
Place a perforated growing insert inside a sealed lower tray. The medium can take up water from below, while excess water is poured away afterwards. Keep the substrate layer shallow, level and evenly moist. Spread seed in a calm, even layer rather than in mounds. Roots anchor in the medium; enough open space must remain around the leaves for the crop to dry between waterings.
Food-safe contact surfaces Use intact, washable trays and reserve them for edible crops. Cracked containers can hold residues and cannot be cleaned reliably.
Medium depth A thin, level layer is enough for many fast-growing microgreens. Peas and sunflowers usually need more support than finely sown brassicas.
Water path Add water to the lower tray, allow it to rise into the root zone, then remove any excess. Inserts should not sit with submerged roots in water for extended periods.
Air path Leave visible space around every tray. Air must circulate over and between trays, not merely move somewhere in the greenhouse.
04 / From dark to light
The dark phase is a germination tool, not a fixed ritual.
Some crops benefit during early germination from a second tray as a cover, a dome or a light weight. The aim is even moisture and good contact with the medium—not a standard number of dark days. Crop, temperature and seed vigour determine when the cover comes off.
Phase 01
Sow and settle
Even sowingPhase 02
Rooting
Check dailyPhase 03
Move into light
Filtered daylightPhase 04
Finish with airflow
Dry and uprightLevel the moist medium, spread seeds evenly and press them only enough to ensure contact. Mist only if it settles the seed; avoid puddles.
Check the tray daily. If roots lift the insert or seedlings press hard against the cover, reduce pressure or uncover it. Warm, stagnant air and unusual smells are warning signs.
Move trays into bright but tempered greenhouse light as soon as cotyledons want to open. Avoid an abrupt move into hot, direct midday sun behind glazing.
Water from below as needed, ventilate the greenhouse and harvest when the crop is crisp, proportionately grown and at its intended stage.
Watch for warning signs: A tray with a musty or sour smell, fuzzy coating, a persistently wet surface, slime or patchily collapsing plants should not be grown on or harvested. Separate and discard a suspect batch, clean the surrounding area, and check seed density, water quantity, temperature and airflow before the next sowing. Washing cannot make a questionable crop safe afterwards.
05 / Greenhouse management
Give the fastest crop the calmest place in the greenhouse.
Greenhouse growing is efficient because daylight, water, tools and the harvest route can be close together. It also creates the central risk for microgreens: temperature and humidity rise quickly in an enclosed glazed structure. The goal is not maximum warmth, but an even, moderate environment where the leaf canopy dries promptly without suffering heat build-up or direct sun.
For many common crops, a moderately warm range of around 18 to 24 °C is a useful starting point. A thermometer at tray height is more helpful than an impression at the door. Check conditions at the brightest time of day as well as on cool mornings. When sunshine follows a cool night, open roof vents and the door early. In Malta, even mild sunny winter days can heat shallow trays strongly. In summer, a shaded bench or light shade cloth is often more effective than extra water, because watering does not solve heat stress.
During Malta’s cooler, brighter months, natural light can be enough for robust, quick-growing crops if the site is open and glazing is clean. In the hotter season, control direct sun and heat carefully; more warmth never replaces inadequate light. A small circulation fan should move air gently around trays without constantly drying one edge. Avoid condensation drips, harsh draughts at the door and stagnant corners behind stored pots.
Classic aluminium greenhouseStore
seed
seed
Prepare
sowing
sowing
Manage
crop
crop
Cut +
chill
chill
Organise the greenhouse bench as a small food station.
Leave at least a hand’s width of clear space beside trays, keep hose ends and watering nozzles off the ground, and reserve a clean place for scissors, labels and empty harvest containers. The flexible interior of a Classic aluminium greenhouse can become a compact, orderly growing studio. Use that flexibility for washable surfaces, airflow, seasonal shading and short working routes rather than squeezing another tray into a crowded corner. A bench is productive when every insert can be checked, watered and cut without moving unrelated garden equipment, and the entire area can then be thoroughly cleaned.
06 / Food safety
Work consistently forward: dirty steps never return to harvest.
Microgreens are often eaten raw. Cleanliness is therefore part of crop management, not an optional final step. Buy untreated seed expressly suitable for eating as sprouts or microgreens, and use drinking water for soaking, watering and, if needed, washing. Wash your hands before handling seed or cut produce. Animals, dirty garden tools, raw animal manures and immature compost do not belong in the growing and harvest area.
Cleaning and disinfecting are separate steps. First remove soil, roots and visible residues with water and a suitable cleaner. Only on a clean surface can a food-contact-safe disinfection step work effectively when used according to its instructions. Set a simple routine for each cycle: empty the tray, remove the root mat, clean trays and tools, rinse as directed, disinfect if needed, air-dry, and store separately from substrate, hoses and garden shoes.
Stop: Used trays, hose ends, substrate residues and garden shoes must not enter the cutting, packing and chilling area.
01Receive
02Clean
03Sow
04Grow
05Cut and chill
Store seed dry, labelled and separately from plant-protection products or other chemicals. Clean trays, tools and bench surfaces before food contact. Handle substrate and seed in a designated sowing zone. During growing, water carefully from below and remove waste promptly. At harvest, use clean, sharp cutting tools and suitable containers; then refrigerate microgreens without unnecessary delay. The direction remains clear: substrate work and used trays never cross back into the clean cutting and packing area.
07 / Harvest window
Harvest by condition, not a calendar promise.
Figures such as seven, ten or fourteen days are only guidelines. Light, temperature, variety, seed batch and preferred stem length shift the actual harvest time. Look for an upright, evenly coloured canopy, fully opened cotyledons, clean dry surfaces and a fresh crop-typical flavour. Cut during the cooler part of the day where possible, before major heat builds up under glass.
Use clean, sharp scissors or a knife and cut just above the medium. A clear gap from the surface reduces substrate residues and prevents the harvest being dragged through soil or fibres. Clean, dry harvested microgreens do not automatically need washing; extra moisture can shorten their keeping quality. If washing is needed in the kitchen, use drinking water and dry leaves very thoroughly before chilling.
Harvest only what can be eaten, shared or packed in excellent condition. Small staggered sowings—such as one or two trays a few days apart—usually supply a household with fresh produce more reliably than one large sowing where every tray reaches cutting stage at once.
Radish
Crisp cotyledons
Broccoli
Even leaf canopy
Pea
Tender shoots
Sunflower
Strong leaf pair
Radish tastes best with open, crisp cotyledons and its characteristic peppery note. Cut broccoli when the leaf canopy is tender and evenly green. For pea shoots, choose your preferred stem length before plants become firmer. Harvest sunflowers at the strong leaf-pair stage, before elongated growth, clinging husks or damaged leaves detract from their clean, nutty character.
Chilling belongs to the growing cycle.
Move harvested microgreens out of greenhouse warmth as soon as practical. Pack them loosely in clean, food-safe containers and refrigerate promptly. Do not store cut produce beside raw meat or unwashed vegetables. Microgreens are at their best when the route from clean cutting to the kitchen is short.
08 / Diagnosis
Read a failed tray as a clue—not a cue to water more.
Negative image
Long, pale stems
Long, pale stems
Elongated and leaning
Even light is probably lacking, often together with an overly long covering phase or excessive sowing density. Uncover the crop at the right time and move it into bright, filtered light. Also check whether plants lean towards one side of the glazing. Extra warmth will not correct a weak, pale canopy and can make heat build-up worse.
Positive image
Dry and upright
Dry and upright
Surface stays wet
Reduce the water quantity, water carefully through the lower tray and improve gentle airflow. Check the sowing pattern too: fine seeds placed too closely form a damp, felted surface even if the greenhouse is generally ventilated.
Negative image
Patchy emergence
Patchy emergence
Uneven germination
First check medium moisture and seed distribution. Dry edges, a waterlogged centre or seed clumps cannot produce an even stand. Moisten and level the medium beforehand. Also record whether the particular crop benefited from soaking, light pressing or a short controlled covering period.
Positive image
Cleanly cut, quickly chilled
Cleanly cut, quickly chilled
Short keeping quality
Harvest only dry, sound leaves with cleaned tools. Limit time in greenhouse warmth, do not pack wet cut produce and chill promptly. If keeping quality remains short, review both the hygiene route and handling, pack moisture and temperature after cutting.
Questions from the workbench
Microgreen FAQ
Do microgreens need direct sun in the greenhouse?
No. Bright daylight is valuable, but intense direct sun behind glazing can quickly overheat shallow trays and stress tender leaves. Choose a bright but controllable position with good ventilation and seasonal shading. Supplemental grow lighting is most useful when natural light is short or persistently unreliable, rather than as a substitute for managing Malta’s strong sun.
Must all microgreens be soaked and weighted?
No. Large seeds such as peas and sunflowers are often soaked, while fine brassica and radish seed usually do not need it. Covers and light weight also depend on the crop, temperature and seed batch. Follow supplier guidance, inspect daily and respond to visible emergence instead of following a fixed blackout timetable.
Can I grow several species in one tray?
It is possible, but single-variety trays are much more dependable at the start. Crops differ in seed size, water uptake, germination speed and ideal cutting time. Keep records for each crop first. Mixtures are easier and more precise to create after harvest, without cutting one crop too early or too late.
Do microgreens need fertiliser?
Many microgreens complete their short cycle using seed reserves and an appropriate growing medium. Additional nutrients should not therefore be applied automatically. First establish even germination, sufficient light, careful bottom watering and a clean routine. Then follow crop-specific advice from your seed or system supplier if the chosen growing method requires supplementary nutrition.
Is a greenhouse suitable for young plants eaten raw?
Yes, provided growing is consistently treated as food production. This means drinking water, suitable seed, fresh medium, clean trays and tools, excluding animals, hygienic hands, drying airflow and rapid chilling. Do not use rainwater for this ready-to-eat crop unless its quality has been reliably verified. A greenhouse alone does not make a batch safe; daily practice is decisive.
Sources and further reading
Develop your own growing notes on a sound basis.
These German and international specialist sources support the guidance on seed, hygiene, crop management and the distinction between sprouts and microgreens. They help assess risks, refine tray routines and document decisions on water, medium, climate and harvest clearly.
More from Bloomcabin: Setting up a greenhouse: layout, plants & care · Summer greenhouse care · More Bloomcabin garden ideas
- BfR: Recognising and preventing STEC/EHEC risks from food— German Federal Institute for Risk Assessment guidance on food-borne STEC/EHEC risks and prevention.
- LAVES: Sprouts and seedlings— Lower Saxony State Office for Consumer Protection and Food Safety information on sprouts, seedlings and hygienic handling.
- EFSA: Risk assessment of seed and sprouts— European Food Safety Authority scientific risk assessment of seed and sprout production.
- Virginia Cooperative Extension: Greenhouse microgreen production— Technical guide to microgreen production in greenhouses and controlled indoor systems, including crop and system basics.
- Penn State Extension: Growing microgreens— Practical information on sowing, growing medium, light, watering, harvest and common microgreen decisions.
Start with a clean, shadeable tray—and make the process repeatable.Classic aluminium greenhouse
