
How Long Does an Aluminium Greenhouse Last? Care & Spares
Long-term ownership
The life of an aluminium greenhouse starts with the right choice before purchase.
How long an aluminium greenhouse lasts cannot be answered from its frame material alone. Proper installation, a sound site, regular checks and replaceable wear parts all matter.
The short answer: what really determines service life
A well-planned, well-maintained aluminium greenhouse can remain useful for many years. A fixed lifespan would be misleading, since site, foundation, installation quality, weather exposure and care of moving or flexible parts vary greatly between gardens.
Aluminium profiles are only one part of the system. Dry, stress-free connections, intact glazing, working drainage and access to matching spares all support long-term use. Small routine checks are usually more effective than major repairs after damage.
01
Construction
A level foundation and correctly fastened profiles prevent stress, distortion and permanently strained connections.
02
Care
Cleaning, visual checks and timely adjustment of moving parts protect details before minor issues grow.
03
Spare parts
Model details, purchase documents and component photos help identify matching seals, rollers, panes or fixings.
Construction, siting, care and suitable spares shape use across many gardening seasons.
For many gardeners, an aluminium greenhouse is a long-term purchase. Aluminium is corrosion-resistant and easy to maintain, but real service life depends on glazing, seals, doors, windows, fixings and the foundation as much as on the frame.
For lasting use, look beyond appearance and current equipment. Check whether the construction is understandable, components can be reached for inspection, and the manufacturer provides spares for typical wear points. This makes repairs much easier.
This guide explains the main influences and shows how to care for an existing greenhouse systematically. It does not replace assembly instructions or professional assessment, but helps you spot concerns early and choose for many useful years.
Inspection 01 · Checkpoint 01
Why aluminium alone does not define lifespan
Aluminium suits greenhouse frames because it needs little everyday garden maintenance and, unlike untreated steel, does not rust. Durability still depends on more than profiles. Connections between materials, screw joints and areas of standing moisture need attention. Installation determines whether water drains away and parts work together without stress.
Use also affects condition. Frequent opening of doors and windows, leaning heavy items against the frame or adding accessories can place more load on particular points. Inspect fittings, screws and glazing position, not only visible frame faces. A cared-for greenhouse is not maintenance-free; it is a system with manageable details.
Pay particular attention to ground-level connections and corners. Fine soil or plant debris often gathers there and can retain moisture. Remove deposits carefully, then check that screw connections appear secure and profiles remain aligned without unusual tension. Repeating the same inspection route makes changes easier to spot.
Also check whether added accessories obstruct frame profiles or operating routes. Fit accessories only at intended points, so they do not create new stresses or inaccessible dirt traps.
- Keep bearing surfaces level; permanently stressed profiles can unnecessarily load doors, windows and glass panes.
- Keep contact areas clean so soil, leaves and moisture do not remain in joints for long periods.
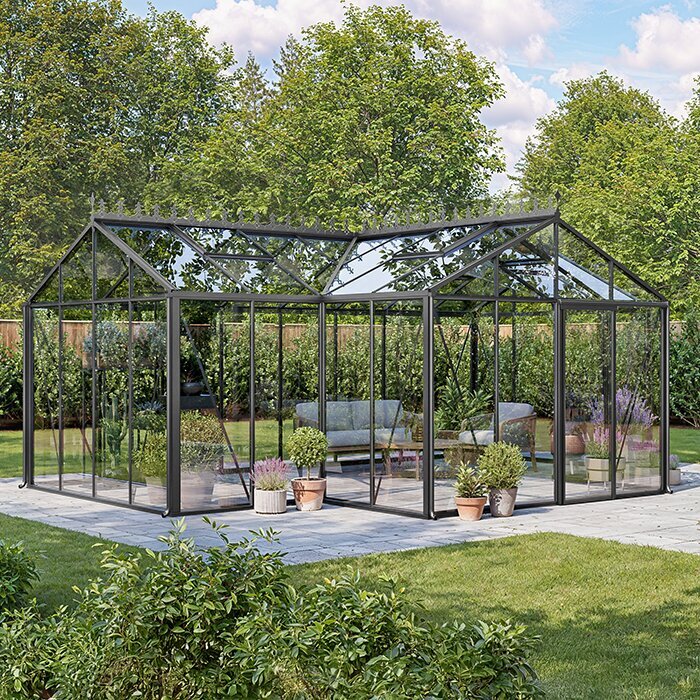
For a straightforward starting point, a standard Classic greenhouse offers clearly accessible frame and connection areas.
Inspection 02 · Checkpoint 02
Foundation and site as the supporting base
A solid foundation distributes loads and keeps the greenhouse in its intended geometry. Even slight unevenness can make doors run poorly, place panes under stress or require screw joints to be readjusted. Treat the base as part of the construction, not an afterthought. The model’s assembly instructions are decisive.
The site also needs a realistic assessment. Exposed windy positions, overhanging branches, splash zones and ground with recurring waterlogging pose different demands from a sheltered garden. Observe sun, drainage and access for care. If local requirements or planning questions are unclear, ask a perit to confirm the Planning Authority classification or consult another suitable professional. Consider later use of the surroundings: new beds, trellises, water butts or furniture can narrow maintenance routes and restrict side-wall access. Keeping space permanently clear simplifies cleaning and later checks of foundation connections, glazing and drainage.
Consider future use around the site as well. New planting, climbing supports, water butts or garden furniture can reduce maintenance access and make side surfaces harder to reach. Keep a clear working strip for cleaning, checks and later maintenance, and plan how tools and spare parts can safely reach the greenhouse.
Include the area around the foundation in inspections. Roots, sinking edges or later-added paving can alter water routes and obstruct access to lower frame sections.
- Before assembly, check foundation diagonals, levels and fixing points with suitable measuring tools.
- Leave a maintenance path around the greenhouse so gutters, panes and lower profiles remain accessible.
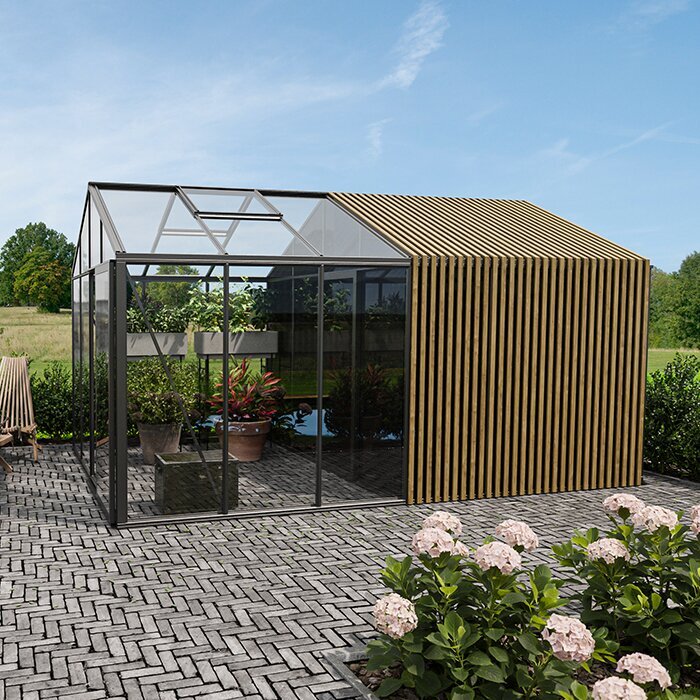
Against a house wall, a large regular lean-to greenhouse needs especially careful connections to the foundation and wall area.
Inspection 03 · Checkpoint 03
Check glazing, seals and joints regularly
Panes and seals are key protective layers of a greenhouse. After the season and notable weather, check that panes are secure, edges look undamaged and seal profiles sit continuously. Rattling elements, visible gaps or shifted clips should not be ignored. They may indicate loose fixings, frame movement or worn flexible parts.
Clean with restraint. Remove dirt using plenty of water and a mild material-compatible cleaner; abrasive or aggressive products can damage surfaces and seals. Do not use concentrated high pressure on joints and edges. Cleaning is also a good opportunity to remove deposits and assess glazing in clear light.
During visual inspections, look for changes as well as obvious damage. A seal no longer sitting evenly or a clip that has shifted can be an early sign. Record where the issue is and when you first noticed it. This documentation helps assess progress and request the right solution.
With doors and windows open, inspect adjoining seal areas too. You can more easily see whether a moving element closes evenly or whether particular points are under unusual load.
- Note damaged seal profiles early, before dirt or water can penetrate deeper into connection areas.
- Clean panes with soft tools and inspect clips, edges and profile grooves at the same time.
With a Classic greenhouse with standard frame these repeat visual checks fit easily into seasonal garden routines.
Inspection 04 · Checkpoint 04
Doors and windows as moving wear points
Moving parts often show first when the construction has changed. A scraping door, a window with a stiff opener or unusual noises are signals to inspect. Dirt in running tracks, loose fasteners, altered alignment or a worn component may be responsible. Do not force parts, as this can add stress to fittings and glazing.
Clean tracks and fittings in line with manufacturer guidance, keeping them clear of soil, plant remains and leaves. If adjustment is permitted, document the starting position and work gradually. For cracks, bent parts or unclear causes, request the correct spare or professional advice rather than continue with improvised fixes.
Do not keep ventilation elements open using improvised wedges, cords or permanently trapped objects. These methods can load tracks and connections unfavourably. Use the intended operating and retaining devices, and check that they work cleanly. If a window or door will not stay where wanted, investigate early before operation worsens.
A brief function check after cleaning is worthwhile because loosened dirt can move into tracks. Open and close elements gently afterwards and check that movement remains even.
- Test doors and windows at regular intervals; smooth running matters more than temporarily disguised play.
- Remove plant growth from moving zones so it cannot block fittings, seals or ventilation elements.
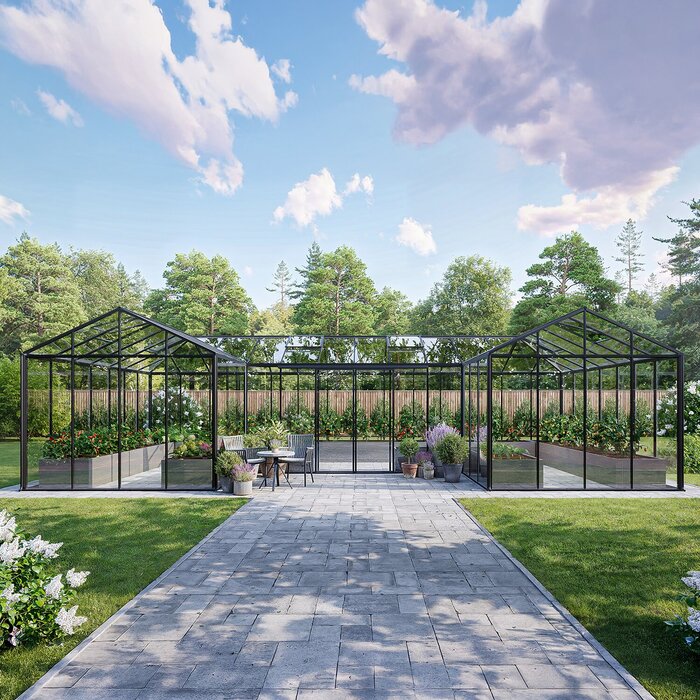
With a full-size regular lean-to greenhouse wall-side movement and cleaning areas should remain accessible from the outset.
Inspection 05 · Checkpoint 05
Drainage prevents avoidable stress
Rainwater, condensation and irrigation water belong in greenhouse use, but should not remain unnoticed in joints. Keep gutters, outlets and lower profile areas clear. After leaf fall, inspect gutters and transitions. If water overflows or repeatedly collects in one place, check the cause and drainage route before deposits become established.
Moisture matters indoors too. Good organisation makes watering, ventilation and cleaning easier, while pots close to frames or persistently damp soil can hide problem areas. Keep a practical route along walls. This lets you spot drip marks, algae or loosened seals without moving large furnishings. Check drainage in wet conditions as well as dry weather. After a shower, overflows, splash zones and standing water are especially visible. Ensure water is led away from the foundation and no deposits build up nearby.
Do not inspect water drainage only in dry weather. After rain, overflows, splash areas and standing water are easier to identify. Check that water moves away from the foundation and that deposits do not form nearby. Small changes to organisation, planting and cleaning frequency can keep critical areas easier to monitor.
- Clean gutters and drainage routes especially after leaf fall and before longer rainy periods.
- Plan watering so water does not repeatedly splash against doors, profiles or sensitive connection joints.
A standard Classic greenhouse provides a clear basis for considering water routes and maintenance access from the beginning.
Inspection 06 · Checkpoint 06
Act correctly after weather and winter
After storms, heavy snowfall or falling branches, carry out a visual inspection. Walk around inside and out: are panes seated, profiles straight, doors and windows closing normally, and gutters clear? Photograph anything unusual before changing it. This helps identify parts and answer questions from professionals or the manufacturer.
In winter, the right approach depends on the site, construction and operating instructions. Remove loads or deposits only without putting panes, roof or your own safety at risk. Do not stand on components not designed for it. With recurring high loads at the site, individual local assessment is better than generic advice.
Do not wait to inspect until the garden is fully in use again. Soon after an event, loose plant debris, displaced clips or blocked outlets are often easier to find. Work in good visibility from a safe position. If damage cannot be assessed clearly, avoid additional loads and obtain qualified advice.
After a weather event, also inspect the immediate surroundings. Broken branches, windblown objects or shifted furniture can cause later damage even when the greenhouse initially appears unaffected.
- After exceptional weather, first check for loose parts, broken glass and blocked drains before using the greenhouse.
- Keep photographs and notes about damage; they make a factual spare-parts enquiry much easier.
For wall-side garden plans, a full-size regular lean-to greenhouse makes a considered site assessment particularly important.
Inspection 07 · Checkpoint 07
Arrange spare parts early and accurately
Availability of matching spare parts is essential to long-term ownership. Not every profile, seal or fitting is interchangeable. Keep the order confirmation, model name, assembly documents and ideally photographs of the assembled greenhouse. When replacement is needed, close-up images, measurements and the exact fitting position reduce identification errors.
Typical enquiries concern seals, glazing clips, screws, door rollers, window fittings or individual panes. Do not order from a similar-looking image alone; compare every detail with the precise model. If a component repeatedly loosens or breaks, inspect its surroundings as well. Otherwise, you replace only the symptom, not the cause. A small inventory list is particularly useful for an accurate enquiry. Record the model name, approximate purchase period, affected assembly and available documents in one place. Add a photograph of the entire fitting situation to close-ups so orientation remains clear.
For an accurate spare-parts enquiry, keep a small inventory list. Note the model designation, purchase period, affected assembly and available documents together. Pair close-up images with one showing the whole installation. This makes it easier to tell whether only a wear part is needed or whether fixings and adjacent components also require inspection.
- Store documents and photos digitally so model information remains findable years after purchase.
- For enquiries, always give the fitting location, photo, approximate dimensions and visible component markings.
A standard-format Classic greenhouse is easier to care for over time when its documents stay with the garden records.
Inspection 08 · Checkpoint 08
Repair, adjust or seek professional assessment
Not every concern needs a major intervention immediately. Surface dirt, a blocked track or one aged seal can often be handled specifically. Broken glass, clearly distorted profiles, recurring leaks or a door that no longer fits despite permitted adjustment are different. In such cases, identify the cause methodically and do not introduce extra loads.
Set priorities: safety and preventing further damage come first, then function and appearance. Isolate an area with damaged glazing and work only with appropriate protective equipment. Questions about structural changes, local requirements or possible insurance issues depend on the individual case; clarify them with the relevant authority, insurer or professional.
Before repair, follow a clear order: secure the damage, observe the cause, compare documents, then choose a measure. This prevents a suitable part being stressed again by unsuitable installation. Keep removed parts and meaningful photographs until identification is resolved. They provide useful information about shape, fixing and installation position.
When investigating causes, distinguish an isolated defect from recurring stress. A replaced fitting or new seal will perform well long-term only if alignment, fixing and surroundings are also suitable.
- Replace damaged parts with model-compatible items rather than bridging seals or fixings with unsuitable makeshift solutions.
- Seek support if load-bearing areas, glazing or the safe alignment of the structure may be affected.
Systematic maintenance planning for a large regular lean-to greenhouse should include repair access and clear part identification.
Comparison
What supports long-term use
This overview separates maintenance actions you can influence from points decided before purchase or during installation. It helps assess greenhouse condition objectively and rank measures by urgency.
| Area | Favourable long-term condition | Warning sign during inspection |
|---|---|---|
| Foundation | Level, load-bearing and prepared according to the assembly instructions. | Scraping door or visibly uneven joints. |
| Frame | Clean profiles and checked connection points. | Distortion, loose screws or permanently wet connections. |
| Glazing | Secure seating, intact edges and close-fitting seals. | Rattling, cracks, gaps or displaced clips. |
| Moving parts | Clear tracks and regularly checked fittings. | Stiff running, play, scrape marks or blocked tracks. |
| Drainage | Clear gutters and reliable water run-off. | Overflow, deposits or recurring drip marks. |
Plan maintenance as a yearly routine
A short repeated walk-round reveals changes while they are still manageable. Match these steps to your model, site and the guidance in your documents.
01
Spring: deep clean
Clean panes, frames, gutters and access routes gently. Then inspect seals, clips and fittings in good light.
02
Early summer: test function
Open and close doors and windows several times. Remove plant debris from tracks and note unusual resistance.
03
Late summer: check water routes
Check outlets before leaf fall. Arrange pots and equipment so internal walls and lower profiles remain accessible.
04
Autumn: document condition
Photograph noticeable areas and retain measurements. This creates a good basis for later spare-parts enquiries.
05
Winter: inspect after events
After notable weather, check glazing, frame and drainage from a safe position. Follow the operating instructions.
Checklist before purchase and for existing greenhouses
Use these points as a discussion basis when choosing a greenhouse and as a compact check for an assembled one.
01. Is the ground permanently level, load-bearing and prepared to the chosen model’s instructions?
02. Is there enough space around every side for cleaning, inspection and replacing individual components?
03. Are the model name, assembly documents and spare-parts contact details safely stored?
04. Can doors, windows, gutters and frame areas be reached without plants or furniture in the way?
05. Do the site, drainage and protection from falling branches suit the intended use?
06. Are seals, clips and fixings visibly complete and undamaged during an inspection?
07. Is there a simple routine for cleaning, function checks and documentation after weather events?
08. Is damage secured first, then addressed with model-compatible parts or professional help?
Frequently asked questions about aluminium greenhouse lifespan
How long does an aluminium greenhouse last?
No universal duration can be stated responsibly. An aluminium frame is only one part of the overall system. Foundation, installation, site, maintenance, glazing, seals and access to matching spares together determine how long the greenhouse remains reliably usable.
Does an aluminium greenhouse need regular maintenance?
Yes. Maintenance is usually manageable but important. Clean frames, panes and drainage, inspect seals and fixings, and test doors and windows. Regular visual checks help identify small deviations early, before they become major repairs.
Which parts usually wear out first?
Pay close attention to seals, glazing clips, fittings, running parts and screw connections. These components face movement, moisture, dirt or repeated loading. Their actual condition still depends heavily on the model, installation, use and local weather.
Can I replace a single damaged pane?
That may be possible depending on the construction and available parts solution. First secure the area and identify the model, installation position and exact pane and clip specification. Photos and measurements support identification. Always handle damaged glazing with due attention to safety.
What should I do if the door suddenly scrapes?
First remove dirt and plant remains from the running area and inspect visibly loose parts. If the problem persists, check alignment and follow only permitted adjustment instructions. Force or unsuitable packing pieces can add stress to fittings, glass and frame.
Does spare-parts availability really matter when buying?
Yes. Long-term ownership also means being able to repair individual components properly. Keep model identification clear and retain your documents. You can then request seals, clips or fittings more precisely rather than improvising with similar but unsuitable parts.
Plan the right greenhouse
Thinking long-term means caring for details
The lifespan of an aluminium greenhouse is not a fixed figure on a data sheet. It results from a suitable site, correctly prepared foundation, careful installation and attention to small changes. Glazing, seals, water routes and moving parts deserve regular care.
Well-organised model information and maintenance steps provide a sound basis for long-term use. The Bloomcabin team can help you choose a greenhouse suited to your garden plan. Before deciding, check the available documents, maintenance access and options for model-compatible spare parts.
Explore greenhouse solutions and choose a construction whose care and use fit naturally into your everyday garden routine.
