
How to Measure a Site for a Garden Shed Accurately
Garden shed planning guide
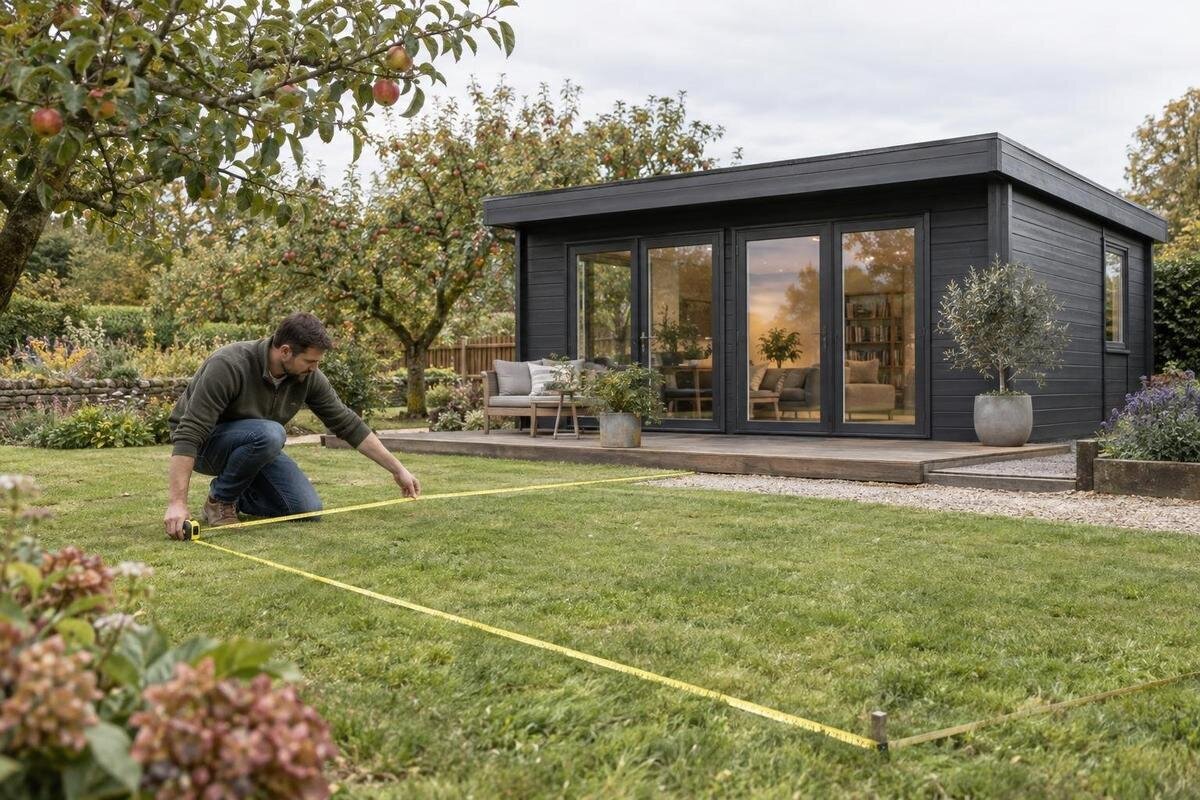
Accurate garden shed site measurements need to show more than the length and width of a patch of ground. You also need to know where the clear space narrows, whether the surface changes level, which fixed features interrupt the footprint, and whether there is a clear access route to the intended position. A labelled sketch turns those observations into useful figures for comparing a model's dimensions and considering an order.
Before you order 1
Choose the area you want the shed to occupy
First decide what you are measuring: the full outdoor area that might be available, or the precise patch you would like the shed to occupy. Those are not always the same. A fence, wall, planted bed or path may define a visible edge, while the usable rectangle starts further in. Choose the intended orientation on paper and identify the approximate corners of the footprint. If you are considering more than one position, sketch each separately rather than combining the widest point from one with the greatest depth from another. Keep the side limits tied to the same corner and location.
Record three different figures rather than combining them: the maximum clear area, the footprint you hope to fit, and any room you need around it for reaching or using the shed. A shed dimension is not the same as a space allowance. The gap depends on the layout and intended access, so write it as a separate requirement rather than quietly adding or subtracting it from the footprint. There is no universal clearance figure to assume for every model and use. Note whether each line runs to the inside face of a wall, the edge of a path or another fixed point; changing the reference changes the available space. Use metres or millimetres consistently, label every figure, and convert before comparing unlike units.
Measure width and depth from fixed points
Use a tape measure with clear endpoint marks and a notebook or phone for the sketch. Agree where the zero point sits before measuring, then use that same edge for repeat readings. Measure the width from one fixed reference to the opposite one, then the depth at right angles; a diagonal gives a longer distance than either side. Keep the tape straight and taut, and take plan dimensions horizontally rather than letting it follow uneven ground. For a long span, make sure both ends are set on the actual planned edges. If the measurement is awkward to hold accurately, ask another person to hold the far end or use suitable equipment for a second check.
Write down where each number begins and ends, not just a bare figure. Label the points A and B on the drawing, then enter the distance beside that line. Measure the opposite edge too: a site that is 3 metres wide at the front may be narrower at the back. Repeat a critical reading straight away, and investigate a mismatch instead of averaging two measurements taken from different points. If a wall or planting blocks the actual edge, note which substitute point you measured to and its offset. When considering the Verdana 1 garden shed, compare dimensions confirmed for the chosen model with these labelled site lines; do not guess a footprint from the model name or photograph. Mark any product measurement that remains unclear as unconfirmed.
Before you order 2
Allow for an irregular site
Gardens are rarely perfect rectangles. Where a boundary angles in, a wall steps out or a planting bed curves into the proposed position, measure the clear width at the near edge, middle and far edge, plus the available depth on both sides. Record how far each reading is from the same starting edge so the narrowing can be located on your sketch. At each point, measure across the intended footprint rather than at an angle through the widest empty part. An average may describe the general area but cannot show whether a rectangular shed will fit through its tightest part.
Draw a simple outline of any notch or angled corner and write down its distance from a fixed corner, rather than forcing the site into a rectangle on paper. Identify the largest uninterrupted rectangle that is genuinely available; treat extra space in a recess as separate unless the chosen building's shape can use it. For a candidate such as the Verdana 2 garden shed, compare its confirmed footprint with that clear rectangle, not with the garden's total area. Keep each width reading on the sketch so the position of a restriction stays clear. If an edge curves or is difficult to define, note the limiting points and keep the usable measurement conservative until you can check it again before ordering.
Use diagonals to check the outline
Side lengths alone can conceal a skewed outline. If the intended site is rectangular, measure both diagonals between opposite corners and write them down separately. Mark the corners A, B, C and D on the sketch so the readings are unambiguous: measure A to C and B to D, not from whichever points are easiest to reach. A noticeable difference is a reason to revisit the corner positions, side measurements or assumption that the area is square; it does not tell you which reading is wrong. If the actual space is angled, keep that shape on the plan instead of adjusting a dimension until it looks regular. For a curved or irregular outline, diagonals describe only the chosen corner points, not the whole shape.
Treat diagonal measurements as a cross-check, not a substitute for measuring each side. Two equal diagonals do not by themselves prove that an irregular four-sided outline has right angles, so make sure the corner points match those used for the side measurements. Product photographs are not scale drawings and cannot confirm that a site shape matches a shed footprint. When comparing the Durano garden shed, rely on dimensions confirmed for the exact model and your measured outline; if a drawing leaves a corner or projection unclear, ask for clarification rather than estimating from the image.
Before you order 3
Record fixed obstacles and overhead limits
Survey the space for anything that reduces the clear footprint or affects how you approach the shed. Record posts, tree trunks, raised kerbs, steps, fixed planters, drain covers, outdoor taps, wall projections and any other feature that cannot simply be moved. Locate each one from a named corner, using two measurements where needed to show its position rather than giving a single distance. Add its width, depth or shape where they matter. For a rounded obstacle, note how far it projects into the available space. Also mark fittings or covers that need to remain reachable, even if a shed would not physically overlap them.
Look above the proposed position too: low branches or projecting structures may create a height restriction that a ground plan cannot show. Note any relevant height clearance, and separate fixed obstacles from items you could relocate. Treat an item as removable only if moving it is genuinely part of your plan. When checking a candidate such as the Veltor 1 garden shed, compare the dimensions confirmed for that exact version with the obstacles you have recorded; do not estimate eaves, roof projections or overall size from a product photo. This gives you a more complete picture of what can occupy the site.
Keep ground levels separate from footprint size
Measure the surface at the intended footprint as well as its outline. Note whether the ground appears broadly even or falls from one corner to another, and whether there are hollows, raised patches or abrupt changes at the edges. Record observations at the corners and centre, together with the direction of any obvious fall. A simple level check is separate from the plan dimensions; note where the highest and lowest points are rather than reducing the slope to a guessed average. If you cannot take a reliable level reading, a clear description of where the ground changes is better than assuming all corners are at the same height. A tape laid along a slope will not give the same horizontal plan distance, so keep levels separate from length and width.
These observations help distinguish a site that fits in plan from one whose surface needs further assessment; they are not a design for a base or foundation. If the level varies noticeably, or you are unsure what the chosen model requires beneath it, ask the seller or a qualified installer what to confirm before purchase. A short note that simply says "uneven" does not explain where the change occurs, so retain the corner or centre references. For the Orello garden shed or any other candidate, use dimensions and requirements confirmed for that exact model; ask if an important figure is missing rather than assuming.
Before you order 4
Measure the route to the site
A site may be large enough for the finished shed but difficult to access. Trace the likely route from the point where items could enter the property to the intended position. Measure the clear opening at the narrowest gate and passage, the space at turns, the width between fixed objects and any overhead restriction or step. Measure the opening itself rather than relying on a gate's stated width, and include posts, handles or thresholds if they reduce the passage. Open gates fully when measuring and note where the gate leaf sits, as it may take up turning space. Slopes or sharp turns matter too: a route can become difficult at a corner even when its straight sections are wide.
Ask what dimensions and access conditions apply to the chosen supply format, rather than assuming that a finished shed, its components or packaging will pass through the route. For a turn, record the approach and exit directions as well as the clear width; a long item may need room to manoeuvre, but the required space depends on what is supplied. Check the full route, not only the gate nearest the garden, since another doorway or passage may be narrower. This is separate from the footprint: site width and depth do not establish route width. Before choosing the Modano 1 garden shed, compare your access notes with the information for the exact item and ask about any gap. Keep the answer with your sketch for use when ordering.
Compare the site with the shed's stated dimensions
Compare the measured clear area with the product's complete external dimensions, using the drawing or written information for the exact model and configuration you plan to order. Check what each listed dimension describes: the outer walls, base, roof edge or widest projection may not share the same reference points. A dimension described as the base size may not match an exterior projection, so compare figures with matching definitions. Look for whether the figures include projecting parts; do not assume a headline measurement covers the full envelope. If the drawing does not identify its reference points, ask before treating the footprint as confirmed.
Keep external fit separate from internal usable space and from the clearance you need to reach the building; they answer different questions. Turn the plan to match the orientation you prefer, then compare like with like: width against width and depth against depth. If you might rotate the shed, check that access and fixed features still line up in that orientation; the same rectangular footprint can work differently in use. For the Wooden Garden Shed M, as for any candidate, use dimensions confirmed for the selected item and do not treat a model label as a measurement. If figures are close to the available limits, recheck them rather than relying on rounding. Identify the clearance your layout needs instead of adding an arbitrary margin.
Before you order 5
Record measurements clearly before ordering
Make a record that another person could understand without standing beside you. Draw the outline, label the corners, add widths, depths and diagonals, and show where fixed obstructions and level changes sit. Include a small legend to distinguish fixed features, movable items and points you still need to check. Write the units in the heading, include the date and mark the front or approach side. Add separate figures for the narrowest clear point and the access route, because neither is represented by the site's widest measurement. Keep the original readings as well as any calculated clear rectangle, so the result can be checked. Do not leave an unlabeled number on the page.
Take a clear photograph for context if useful, but keep it secondary to the measured sketch: perspective gives no reliable scale. Re-measure a critical span or ask another person to check the same endpoints. If readings differ, retain both and resolve the reference points before choosing a final figure instead of averaging them blindly. Before ordering the Wooden Garden Storage Shed S, confirm the exact item and any selected version against the dimensions and supply information used for your comparison. If a supplier clarifies a dimension, note which model and reference point the answer concerns. Keep these notes together so a change of model or orientation is visible before the order is confirmed.
Recheck the figures before choosing a size
Review the figures for common errors: metres mixed with centimetres, a diagonal entered as a side, a measurement taken to the wrong face of a wall, or an obstacle missing from the sketch. Check not just the numerals but what each one describes: clear width, side length or diagonal, and which edge is the front. For an irregular outline, make sure the rectangle you plan to use lies wholly within the clear area rather than crossing a notch. Revisit the physical reference points when a result looks unusually generous or conflicts with another reading. Do not round a tight fit upwards; keep the measured value and note any uncertainty, then check the relevant product dimensions again.
Separate dimensional fit from other questions about the location. A sketch can show the space available and where access may be awkward, but it does not establish every property or site constraint. If the measured edge is uncertain, the ground is unusually uneven, or a product drawing does not define its full dimensions, record that question rather than filling in a guess. When seeking advice, share the sketch and name the exact point or measurement that needs clarification. Obtain the missing information from an appropriate source before making the size comparison final. A concise, accurate record is more useful than a precise-looking number based on an assumption.
Frequently asked questions
What measurements should I write down?
Record the clear width and depth at several points, both diagonals for an intended rectangle, fixed obstructions, level changes and the access route. Label the endpoints and units on a sketch; one number without a reference point is difficult to compare with a product drawing.
Should I measure along the ground?
For footprint comparison, measure the horizontal span between the intended points, not the length of a tape laid over a slope. Note changes in level separately. If you cannot keep the measurements consistent, ask someone experienced to check the site rather than treating a ground-following reading as the plan width.
How do I measure an irregular site?
Draw the actual outline and record widths at the near edge, middle and far edge, or wherever the site changes. Show notches and angles from fixed corners, then identify the largest uninterrupted rectangle that fits. Do not average widths into a rectangle that the site does not contain.
Is the shed's internal measurement enough to check fit?
No. Internal dimensions help you understand the usable space inside, but they do not show the building's full outside footprint. Compare the chosen model's confirmed external dimensions with the measured clear area, and keep working clearance and the access route as separate checks.
What if the ground is uneven?
Record where the surface rises or falls, especially at the proposed corners, and keep that note separate from plan dimensions. Measurements do not determine the right base or foundation. If the variation is noticeable or model requirements are unclear, ask the supplier or a qualified installer before deciding the site fits.
Good garden shed site measurements describe one exact position, the clear space within it, its obstacles and levels, and the route in. Keep those details beside the confirmed outside dimensions of the model you are considering. When both records use the same reference points and units, you can compare sizes without relying on a guess or a photograph.
