
How to Prepare Garden Shed Timber Before Painting
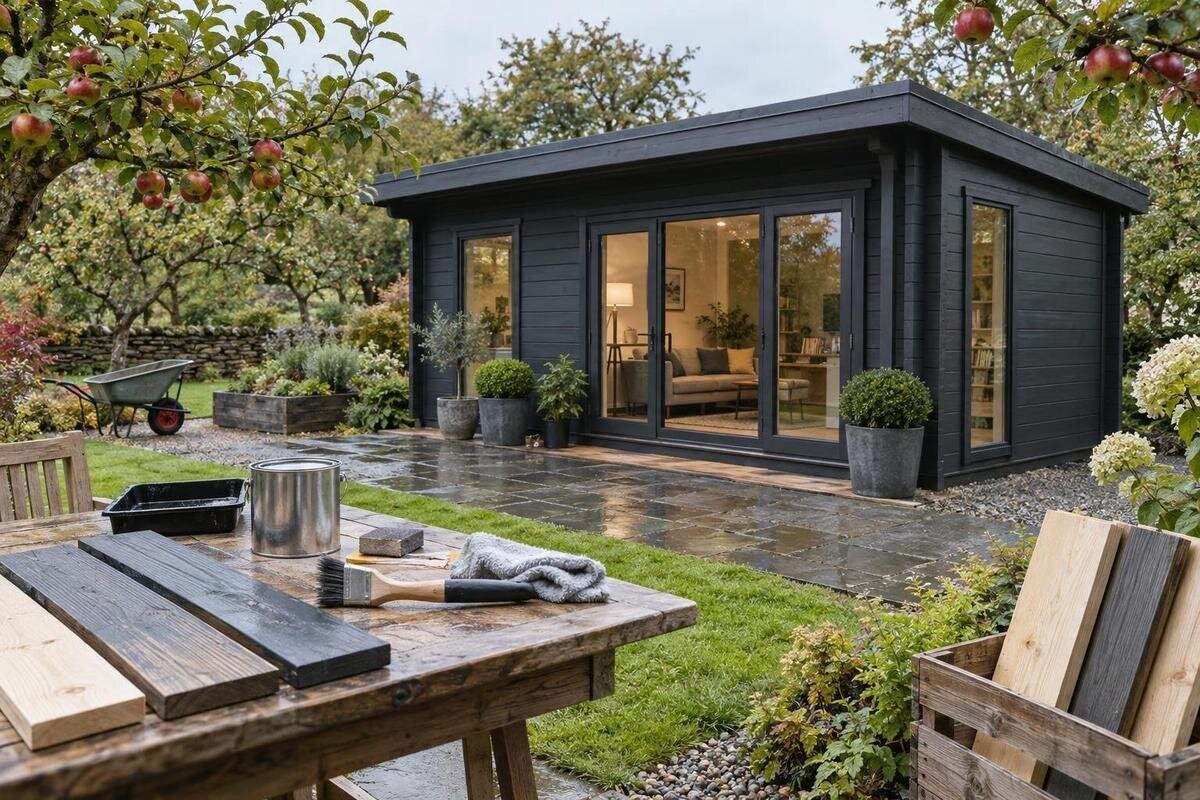
Garden shed preparation
Paint adheres and looks more even when the wood beneath it is sound, clean and properly dry. Before painting a garden shed, establish whether the timber is bare, treated or already coated; then address dirt and loose material, sand only where appropriate, remove dust and let the surface dry. This guide sets out a practical sequence and the checks that help prevent a rushed coat from hiding a problem.

Before you begin 1
Identify the existing finish before sanding
Before choosing abrasives, establish what the wood has already received. A shed that looks like bare timber may have been factory-treated, while previously painted, stained or sealed wood needs a different route from clean, unfinished timber. Look for sheen, uneven colour, peeling edges or old brush marks, but treat these as clues rather than proof: a transparent coating may be difficult to see. Check any care leaflet, product paperwork and the history of an existing shed. If different parts seem to have different finishes, note them separately instead of assuming one method fits all. The right preparation depends on the surface and paint system, so do not begin by sanding the whole building. Also check whether previously hidden areas, such as behind a downpipe or under a window ledge, differ from the main wall. Their condition may reveal a local repair or coating change. Record these differences before buying preparation materials, because a paint manufacturer may specify a separate primer or cleaning approach for one substrate or coating type.
Anyone ordering a shed specifically to paint should first confirm that the surfaces they plan to coat are timber and ask whether they arrive untreated, treated or already finished. Include the exact model in that enquiry, for example the Verdana 1 garden shed listing, rather than treating a name or photograph as a finish specification. Ask whether the supplier specifies a cleaning method, primer or waiting period after assembly. Confirm the answers before choosing paint; washing or sanding an unidentified coating can add work and may remove a layer intended to stay in place.
Inspect the timber and shed before cleaning
Walk around the shed in good daylight and inspect the areas you plan to paint before wet cleaning. Look for raised grain, splinters, loose paint, cracked edges, open joints, dents, dark marks and water staining. Colour alone does not tell you whether damage is present. Gently check suspicious areas without gouging the wood; timber that feels soft, remains damp or moves at a joint needs attention beyond ordinary preparation. Where safely accessible, check exposed edges as well as the broad faces. Mark separate spots with removable tape or a simple note so you can find them after cleaning, and distinguish superficial roughness from a fault that needs repair.
Pay particular attention to lower edges, panel joins, corners and areas around openings, which are easy to miss when viewed from the front. On a new shed, follow its assembly instructions before coating; some preparation may need to happen in a specified order. If damage is visible on delivery, photograph it and contact the supplier before filling or sanding it. Keep the exact product record, such as the Verdana 2 product page, to identify the model when asking about assembly or care. Do not alter a part before the supplier has had a chance to respond.
Before you begin 2
Clean the surface without soaking the timber
Remove loose grit, cobwebs and dry surface dirt with a soft brush first; this helps prevent particles being rubbed into the grain during washing. If grime remains, use only a cleaning solution suitable for the timber and planned coating. A mild detergent diluted as its label directs may suit ordinary dirt, but test a small, inconspicuous area and follow the shed and paint makers’ instructions. Apply the smallest amount needed with a cloth or sponge, and do not let a cleaner dry on the surface. If the product calls for rinsing, use controlled clean water and wipe away excess rather than leaving puddles. Work from higher boards towards the lower parts so dirty liquid does not run over an area already cleaned. Change the water, cloth or sponge when it becomes visibly dirty; otherwise, cleaning can simply spread residue across the timber.
More water does not mean a better result. Avoid soaking boards, forcing water into joints or directing a pressure washer at the timber; trapped moisture can delay painting and make later checks harder. Do not use oily furniture polish, wax or an unapproved solvent, since residue can interfere with adhesion. Bare, clean timber may not need a wet wash at all. Before washing a newly purchased shed, ask about its supplied surface; the Durano garden shed listing is an example of a model name to include when requesting product-specific care instructions.
Separate surface flaws from deeper problems
Once clean, decide whether you are dealing with a small surface flaw or a broader problem. A loose splinter or slight raised fibre may need gentle hand preparation, while a shallow defect may call for a filler specifically suitable for exterior timber and the coating system. Follow the filler’s label and allow it to dry as directed. Do not fill normal panel gaps, joints, drainage paths or spaces that need to accommodate movement simply to make the surface look seamless. Avoid smearing filler across sound grain, and do not use a repair product until you know it is compatible with the paint you intend to apply.
Soft wood, persistent damp patches, mould growth, swelling, recurring stains or joints that shift are reasons to pause rather than paint over them. Find and address the moisture source first; if the extent is uncertain, ask a shed supplier or qualified timber professional to assess the repair. For a recently delivered item, quote its exact identity, such as the Veltor 1 listing, when contacting the seller and keep photographs of the affected area. Painting over a fault can hide it temporarily without making the surface suitable for a lasting finish.

Before you begin 3
Sand only where the surface needs it
Sanding can smooth rough fibres and prepare a sound coating when the paint system calls for it; it is not a compulsory step on every square centimetre. Follow the coating and shed makers’ instructions, then test a small, inconspicuous patch with a suitable abrasive. Work with the grain using light, even pressure. On an old coating, feather sound edges only if that is safe and compatible with the paint system; on bare timber, stop once raised fibres are smooth. Excessive abrasion can leave scratches that show through paint or remove a useful treatment. Choose the abrasive for the actual surface rather than using the same approach everywhere. Check the test patch from more than one angle before continuing, as scratches and uneven dullness can be easier to see in raking light. Stop if sanding exposes an unexpected layer or makes the timber fuzzy rather than smooth.
Use a hand sanding block on broad, flat areas and gentler hand work at corners, mouldings and edges; avoid rounding profiles or thinning exposed board edges. Keep abrasive away from glass, seals, hardware and gaps, and do not sand wet or dirty timber. Replace clogged paper rather than pressing harder. If the shed is still on your purchase list, ask whether its delivered surface needs sanding and identify the item, for example the Orello 1 product page. A model title or image cannot tell you how its actual surface was prepared.
Treat old or unknown coatings differently
A previously painted shed needs a different decision from bare timber. If the existing coating is sound and firmly attached, clean it and check the new paint maker’s directions to see whether it can be overcoated and whether light abrasion or a primer is required. Try the proposed preparation on an inconspicuous area and assess it as directed before proceeding. Where paint is cracked or peeling, remove loose material using a method suitable for that coating, then smooth the edge only as the instructions allow. A new coat should not be used to hold loose flakes in place.
If you do not know what an old coating is or how it was applied, do not aggressively dry-sand it. Disturbing an unknown coating can create dust that should not be handled casually; stop and seek advice from a qualified paint professional about safe removal and compatibility. For a shed you already own, a purchase record may help identify the exact item: include the Modano 1 listing in a question to the supplier. The record can help identify the model, but the surface you can see—not an assumption about its current condition—determines the preparation needed.
Before you begin 4
Remove sanding dust from every surface
After sanding, remove dust from the highest surfaces downwards so it does not settle on areas already cleaned. Use a vacuum with a soft brush attachment or a clean, soft hand brush, paying attention to board edges, ledges, corners, grooves and joints. Collect the dust rather than sweeping it into the air or pushing it into gaps. Clean or change the brush when it becomes dusty. Then inspect the timber in good light; fine pale dust can be hard to see on a light surface, and darker residue may show differently on another colour of wood. Open and close accessible doors or windows carefully before the final dust check, as movement can dislodge debris from ledges and hardware. Remove that dust before painting rather than expecting the first coat to bind it.
Finish with a clean, lint-free cloth if the paint instructions recommend wiping. A slightly damp cloth is not suitable for every timber surface, and a tack cloth can leave residue, so use either only when the paint maker permits it. Allow any re-wetted area to dry again and repeat the dust check before coating. When asking about a new model, identify it—for example, the garden shed M listing—and ask what cleaning method is compatible with its supplied surface. Avoid using compressed air to scatter dust around the garden or back into joints.
Let the timber dry and check the conditions
Cleaning or rinsing is not finished when the surface merely looks dry. Water can remain in joints, end grain, shaded corners and sheltered areas after the face of a board feels dry to the touch. Let the shed dry where air can circulate; do not wrap damp timber in a close-fitting cover or apply direct heat to hurry it. If a moisture meter is appropriate, use it according to its instructions and compare readings with the paint maker’s stated limit. Check more than one area, since exposed faces and sheltered joints may differ. There is no single moisture reading or waiting period that suits every coating and piece of timber.
Before painting, check the paint label for its limits on timber moisture, air and surface conditions, and observe its required dry-weather window. The surface should be free of rain, condensation and dew, and within the coating maker’s temperature guidance. If a shed has recently been delivered or assembled, follow its storage and preparation directions instead of guessing how long it should stand. When asking about a product such as the garden storage shed S listing, include the model name and confirm any storage or pre-paint waiting instructions that apply. Recheck joints and shaded spots on the day you plan to paint.

Before you begin 5
Protect fittings and keep the work area clean
Clear a workable route around the shed before starting, so you can reach the areas you plan to prepare without brushing against wet or freshly cleaned timber. Protect nearby paving, plants and other surfaces with suitable covers, and mask glass or hardware where present. Keep preparation products off hinges, handles, seals and moving parts. Do not cover vents, drainage gaps or joints that need to remain open. Remove obstacles before sanding or washing; otherwise, moving them later can drag grit back over the surface you have just prepared.
Keep clean cloths, sanding materials and used dusting tools separate. Work in manageable areas, completing inspection, preparation and final dust removal in one area before moving on. If the work is interrupted, protect nearby surfaces without trapping moisture against the wood, then check for settled dust or condensation before continuing. Keep the working area clear of debris that could stick to the timber. Do not begin painting until cleaning residue is gone and the surface has passed the dry check; if it has not, repeat the relevant preparation rather than trying to work around it.
Make a final check before opening the paint
Use a final touch-and-light check, not a quick glance from the doorway. The surface should feel clean and stable, with no loose flakes, visible dust, greasy film, wet patches or rough splinters left behind. Inspect along the grain and around edges, joints and the bottoms of boards; revisit any mark you taped earlier. A smooth surface need not be polished flat: the important point is that the coating will meet a sound, compatible substrate. If a small test area still sheds dust or feels tacky, stop and find out why before continuing. Check the planned painting tools as well: a dirty brush, contaminated roller or dusty paint tray can undo careful preparation. Keep them clean and ready, but do not open or mix the paint until the surface check is complete.
Then follow the chosen paint system’s instructions for any specified primer, additional preparation and application conditions. The label may call for a different sequence on bare wood, treated wood or an existing finish, so use the directions that match the surface you actually have. Keep a short note of what you found, what you cleaned or sanded and any repair made; it can help explain future maintenance without relying on memory. If a check fails, correct the cause and repeat only the necessary preparation instead of hiding the problem under paint.
Frequently asked questions
Should I sand every part of a new garden shed?
No. First check whether the timber is bare, treated or coated, then follow the shed and paint manufacturers’ instructions. Sand only where the surface needs it and where the specified coating system calls for it.
How can I tell whether the timber is dry enough?
A dry feel is useful but does not confirm that joints or end grain are dry too. Follow the paint maker’s moisture guidance and, if using a meter, its instructions. Do not rely on a universal waiting time or reading.
Can I paint the shed straight after washing it?
Wait until the timber is dry in the areas you plan to coat, including shaded joints and edges. Follow the paint manufacturer’s conditions for moisture and weather rather than choosing a fixed number of hours.
Do I need to remove all the old paint?
Not necessarily. Sound paint may be suitable for recoating if the new paint system allows it. Loose or peeling paint needs attention, while an unknown or old coating should not be aggressively sanded until you have advice on safe removal.
What is the best way to remove sanding dust?
Use a clean, soft brush or a vacuum with a soft brush attachment, working from the top down. Wipe with a cloth only if the paint maker permits it, since damp cloths or tack cloths are not suitable for every surface.
Good preparation does not mean sanding every board until it looks identical. It means understanding the surface, removing dirt and loose material, dealing with defects properly and leaving the timber clean and dry. Follow the instructions for the actual shed and paint system, and pause if the wood is damp, damaged or covered by an unknown coating. A careful final check gives the paint a sound surface to meet and helps avoid repeating work later.
