
Plan realistic greenhouse yields per square metre
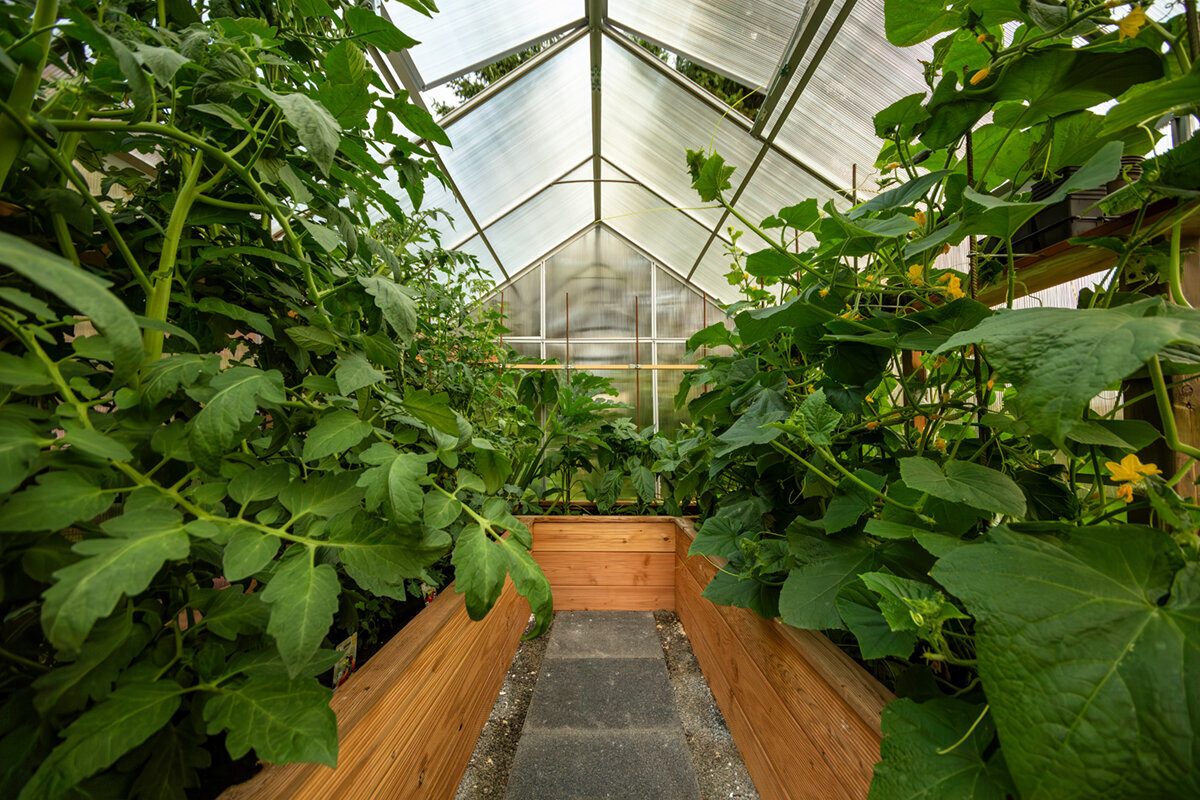
A greenhouse extends the gardening season and provides a sheltered setting for warmth-loving crops. Yet floor area alone does not measure eventual yield. A densely planted bed may initially look productive, but poor air movement, shade and difficult care can have the opposite effect. Realistic planning therefore starts with conditions on site.
Space is especially valuable when it is used over many months. Early salads may be harvested before tomatoes need their place; later in the year, follow-on sowings or robust cool-season crops can follow. This time-based approach turns a greenhouse from a summer tomato plot into a versatile growing space with clear transitions.
Plan more than beds: include access, water points and working routines. Plants that are easy to reach are checked more regularly and harvested on time. Greenhouse yield per square metre becomes a practical planning question: which crops suit your routine, your cooking and the available light?
Stage 1: Starting point
Assess usable, not total, area
For robust planning, separate external dimensions, circulation space and actual growing area. Doors need room to open, a path prevents damage from treading, and plants at the sides should remain easy to reach. These areas are not wasted: they make care, watering and harvesting reliably possible. Draw beds and paths to the same scale before choosing seed or young plants.
Height also affects how productively a site can be used. Tall crops need supports and must not permanently shade smaller plants. Use vertical levels deliberately, for example for climbing vegetables, while low crops should stand only where they receive sufficient light. Clear zoning keeps the space calm and functional. Check the sketch from the viewpoint of daily work: where will you place a watering can, secateurs or harvest basket without blocking the path? A clear routine prevents beds being maintained from only one side for convenience. With tall crops, consider tying, side-shoot removal and harvesting while drawing the layout.
Measure reachable bed space inside and allow for door openings, water containers and room for harvest baskets.
Use edge areas for low crops that are quick to harvest, rather than filling them with plants that are difficult to reach.
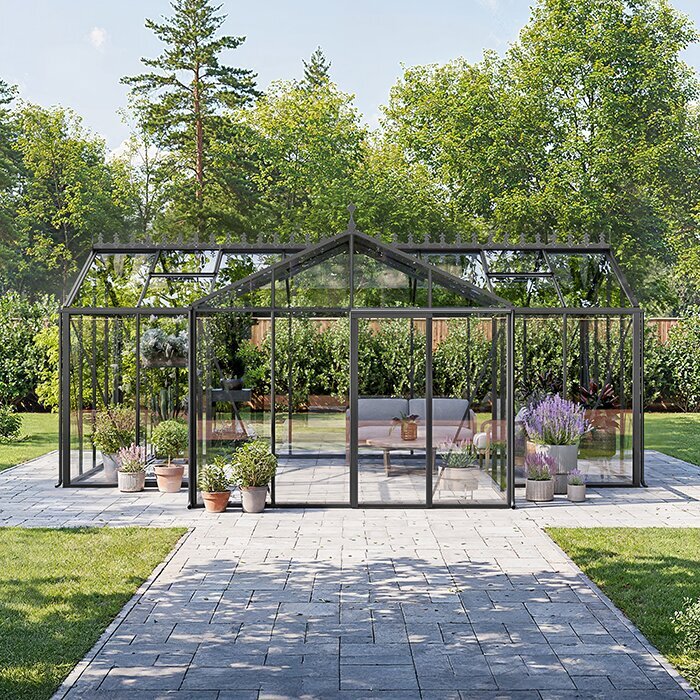
For a self-contained growing area, a standard Classic greenhouse provides a clear basis for beds, paths and seasonal crop changes.
Stage 2: Read the light
Understand the site as a yield factor
Light helps determine which crops are worthwhile in a greenhouse. Over several days, observe when neighbouring buildings, trees or fences cast shade. In Malta, light shade can be welcome during hot periods, while it may noticeably slow growth at lower-light times. Note the direction of strongest sun so tall plants do not dominate smaller crops.
Orientation alone cannot replace observing the site. Reflections, seasonal foliage and distance from walls all change the microclimate. A place beside a house wall may behave differently from a freestanding area, for example through stored warmth or less air movement. Base crop choice and planting dates on these observable conditions, not an idealised scheme. Watch not only direct sun but also the duration and position of shaded areas. A section may be bright in the morning yet substantially cooler in the afternoon because of a building. Such differences are useful when matched with suitable crops. Keep notes through the season, as light changes with the sun’s position and surrounding foliage.
Before the first season, keep a simple light record for morning, midday and afternoon at several points.
Reserve the brightest areas for crops with high light needs and use calmer zones flexibly.
Where an existing wall suits the layout, a large regular Lean-To greenhouse can incorporate building-side light conditions into your space plan.
Stage 3: Crop choice
Choose plants by use and season
A high practical yield is not necessarily the greatest quantity harvested, but the vegetables you genuinely use. Tomatoes, cucumbers, peppers, aubergines, salads, herbs and seedlings have different requirements for warmth, space and care. Begin with a few crops that feature regularly in your kitchen. This lets you learn how your greenhouse behaves without overloading the area.
Mixtures work especially well when growth rate and final size fit together. Fast-growing leafy crops can use gaps early in the season before larger plants need room. Avoid combinations that later compete for light and air. Write down a finishing date or possible follow-on date for every crop; this makes free space visible through the year. Also consider the rhythm of your kitchen. Anyone harvesting small amounts often benefits from accessible herbs and leafy vegetables. Crops for preserving or larger harvests can also be useful, but often require more uninterrupted space. A clear focus simplifies care and prevents conflicting needs from colliding in a tight area.
Prioritise crops you eat often instead of filling every free corner with varieties used only rarely.
Combine short early crops with later main crops, but clear transition areas promptly and consistently.
For a flexible mix of main and secondary crops, a Classic greenhouse for a standard garden can be planned with clear bed areas and a manageable number of plants.
Stage 4: Keep your distance
Plant spacing protects productivity
Planting too closely is one of the most frequent reasons for disappointing results. Leaves dry more slowly after watering, checking for disease becomes harder and fruit is less accessible. Follow the spacing advice for each variety and consider its mature width. A bed that looks empty at first is often exactly the space plants will need later.
Not every crop uses ground space in the same way. Climbing plants need height and stable support, while bushy types need more side clearance. Low salads or herbs can temporarily stand between young main crops, but should be removed before competition develops. Plan this interplanting from the outset as temporary use, not permanent crowding. During the season, check whether the planned spacing still works. Some plants grow more strongly than expected or lean towards the light. Remove ageing leaves only when needed and tie climbing shoots early, keeping paths and neighbouring plants clear. This preserves the planned structure even when the greenhouse fills quickly in summer.
Mark planting positions with canes or string before planting, so spacing remains visible even when the planter is full.
Consider future leaf growth and harvesting reach, not only the size of young plants.
Anyone working beside the house with clear rows and supports will find a full-size regular Lean-To greenhouse a suitable setting for airy plant spacing.
Stage 5: Manage the climate
Balance water, air and warmth
Productivity also relies on daily routines. Water according to need at the root area and avoid keeping leaves continually wet. Check soil moisture before watering again, since the surface and root zone can feel different. Mulch, suitable containers or a thoughtful bed layout can help maintain moisture more evenly without replacing checks.
Ventilation is not a minor detail but part of crop management. On warm days, air can heat up quickly; at night and in changeable weather, openings need attention again. Watch condensation, leaf condition and the temperature inside. Good air movement supports a more balanced environment, but cannot replace suitable spacing or regular checks. When watering, aim for consistency rather than the greatest possible volume. Different containers, soil areas and crop stages dry at different rates. A quick look at the root zone and plant condition provides better guidance than a fixed routine. Spotting changes early lets you adjust care before stress builds over time.
Link daily watering with a brief inspection for wilted leaves, pests, ripe fruit and ventilation needs.
Adjust water volume to weather, growth stage and growing medium rather than following a rigid calendar.
For gardeners who want compact, efficiently organised care routes, a standard Classic greenhouse creates a clearly organised environment for beds and crop checks.
Stage 6: Use time well
Keep space active with succession crops
The most productive area is not necessarily filled all year, but sensibly timed. Start robust early crops when conditions suit them, and keep a defined handover date free for warmth-loving main crops. After the main harvest, leafy vegetables, herbs or green manure can use the space. Which sequence works depends on your site and available care time.
A growing calendar prevents conflicts before they arise. Record sowing, planting, expected clearing and possible follow-on crops in a table or annual plan. Leave buffers for delayed development, holidays or weather phases. The plan is not a rigid programme, but a tool for noticing free areas and bottlenecks early. For every follow-on crop, consider bed preparation too. Plant remains, roots and, where necessary, supports must be removed so the new crop starts with enough room. A short note of the actual clearing date shows after the season which sequences worked well. You can then create follow-on plans that suit your own time budget.
Set a desired clearing date for every crop so following plants are not suddenly left without space.
Keep compost, containers and seed ready during crop changes, so free beds can be put to good use promptly.
For staggered early and follow-on crops alongside a building, a full-size regular Lean-To greenhouse can offer accessible space for clear seasonal sequences.
Stage 7: Guide the harvest
Harvest regularly and use observations
Harvesting is an active part of space planning. With many fruiting vegetables, regular picking encourages continued fruit production, while overlooked fruits can burden the plant. Harvest at the appropriate stage of ripeness and schedule regular inspection days. This keeps you in control and helps you notice early if a crop needs more space, water or support.
Keep a simple garden diary. Record not only quantity, but also planting date, variety, difficulties and your satisfaction with the result. After one season, you will know much more clearly which crops make sense in your space. These personal observations are more valuable for future planning than general record figures from entirely different conditions. Keep notes close to the greenhouse or in an accessible digital list. Add observations promptly, as small details are quickly forgotten after a few weeks. Photos of beds can also help comparisons: they show when plants became crowded, which areas stayed empty and how the arrangement changed over the season.
Check plants several times a week during the main season so ripe fruit and emerging issues do not go unnoticed.
Assess each crop by taste, harvest timing and care effort, not solely by weight or number of items.
Anyone wanting crops within easy reach for daily checks and harvesting can plan a Classic greenhouse standard model as a clear focal point for the gardening season.
Stage 8: Take stock
Improve your own benchmark each year
At the end of the season, an honest review is worthwhile. Which areas stayed empty too long, which plants stood too close, and which harvests were enjoyed most? Separate the causes: an unsuitable site, a late planting date or an inappropriate variety each call for different adjustments. Change only a few things in the following year, so it remains clear what genuinely worked better.
Equipment and design should also suit your routine. Check whether you have enough working room, reachable growing areas and sensible proximity to water or the kitchen. If a greenhouse is planned beside a building, construction requirements, drainage and boundaries must be clarified individually. In Malta, ask the Planning Authority and consult a perit about the proposal, including footprint, height, enclosure, land designation and existing permit conditions. Do not judge the season by a total quantity alone. A crop can be especially valuable despite a modest harvest because it was uncomplicated and often on the table. Conversely, a very space-hungry plant can demand considerable attention. This review aligns future space planning more closely with usefulness, care effort and your actual habits.
Compare your notes at the end of the season and choose no more than two specific improvements for the next growing cycle.
Clarify local requirements early for a building project and do not rely on broad statements from online forums.
If your garden routine suggests a building-side solution, consider a full-size regular Lean-To greenhouse and the local conditions that apply to it.
Comparison
Which space strategy suits your growing?
The right strategy depends less on an abstract yield figure than on your priorities. This overview helps you align crop mix, care effort and use of space deliberately.
| Strategy | Suitable for | Space allocation and note |
|---|---|---|
| A few main crops | Tomatoes, cucumbers or peppers | Allow generous spacing, clear climbing zones and comfortable harvesting paths. |
| Staggered mixed growing | Salads, herbs and fruiting vegetables | Use temporary gaps; write down handover dates for main crops. |
| Sowing and propagation | Young plants and early batches | Provide tables or work surfaces and consider where later plants will move. |
| Season extension | Early and late leafy crops | Watch the weather, choose robust varieties and reserve beds for follow-on crops. |
| Everyday harvesting | Vegetables used regularly | Limit crop numbers, keep inspection routes short and record ripening times clearly. |
Your growing plan in five steps
A simple plan before the season prevents many space problems. Work from the available area through crop choice to review, rather than placing plants wherever room happens to remain.
01
Sketch the interior
Draw beds, paths, the door area and water access. Mark especially bright, shadier or difficult-to-reach zones too.
02
Prioritise crops
Choose vegetables you genuinely use first. Only then add herbs, salads or experimental varieties for free spaces.
03
Add mature sizes
Place plants according to their space needs when mature. Include supports and access for care and harvesting from the start.
04
Schedule succession
Arrange early, main and follow-on crops over time. Note possible clearing dates and deliberately keep buffers for changes.
05
Document results
After each season, record what worked. This leads to realistic decisions on varieties, spacing and the next layout.
Checklist for realistic yield expectations
Go through these points before planting and during the season. They help you plan usable space clearly and base decisions on your actual conditions.
01. I have recorded plantable bed area separately from necessary paths.
02. I know the light conditions at the site across different times of day.
03. I choose crops by what I use, not only visual variety.
04. I consider each plant’s mature size when planting it.
05. I have arranged tall, low and climbing crops sensibly.
06. I allow clear transitions between early, summer and later crops.
07. I check water needs, humidity, plant condition and ripe harvests regularly.
08. I record successes and difficulties for next season’s planning.
Frequently asked questions about greenhouse yields
How do I calculate greenhouse yield per square metre?
First record only the area that can actually be planted, then document each crop’s harvest through the season. A useful review also considers whether you used the vegetables and how much care they required. Compare your own results across several seasons instead of treating a general figure as a target.
Does denser planting automatically increase yield?
No. Plants set too close compete for light, water and nutrients; leaves also dry less well and care becomes harder. Follow the information for the variety and its mature size. Free space improves air movement, inspection and harvesting, often making use of the area more effective.
Which crops make especially good use of a greenhouse?
That depends on the site and your kitchen. Warmth-loving fruiting vegetables, early salads, herbs and young plants can use different time windows. The most worthwhile crops are those you harvest regularly and can care for well. Decide by taste, effort and conditions in your greenhouse, not supposed record yields.
Should I keep all areas permanently planted?
Not necessarily. Clear transitions make crop changes easier, prevent crowding and give you flexibility when growth is delayed. Plan early and follow-on crops consciously instead of permanently overfilling beds. An area left free for a time can be more important for soil care, fresh sowing or clearing old plants than one extra plant.
How does a growing calendar help space planning?
A calendar shows when crops need space and when they release it again. Enter sowing, planting, expected harvest and clearing dates. This prevents main crops from competing with late starters. After the season, compare the calendar with your notes and improve the sequence for the coming year.
Do I need to consider planning rules for a greenhouse?
Requirements vary by site, size, design and location. In Malta, ask a perit to confirm the Planning Authority classification before committing, especially beside a building. Permission under the Development Notification Order is conditional and does not replace other approvals or third-party consent. Check boundaries, drainage, land designation, heritage protections, ODZ status and environmental-assessment requirements for the specific site.
Plan your greenhouse to suit you
Productivity starts with the right plan
Greenhouse yield per square metre is not a promise, but the result of many manageable decisions. By considering light, paths, plant spacing and seasonal sequences from the outset, you create an area that is pleasant to tend and suits your everyday garden routine.
Start with a manageable crop mix, document the first season and develop your plan step by step. Each observation then becomes a practical improvement, turning the available area into a well-used space for vegetables, herbs and your own experience.
Discover greenhouse solutions that suit your layout, crops and everyday garden routine.
