
Setting Up an Art Studio in a Garden Shed: Light, Surfaces and Ventilation
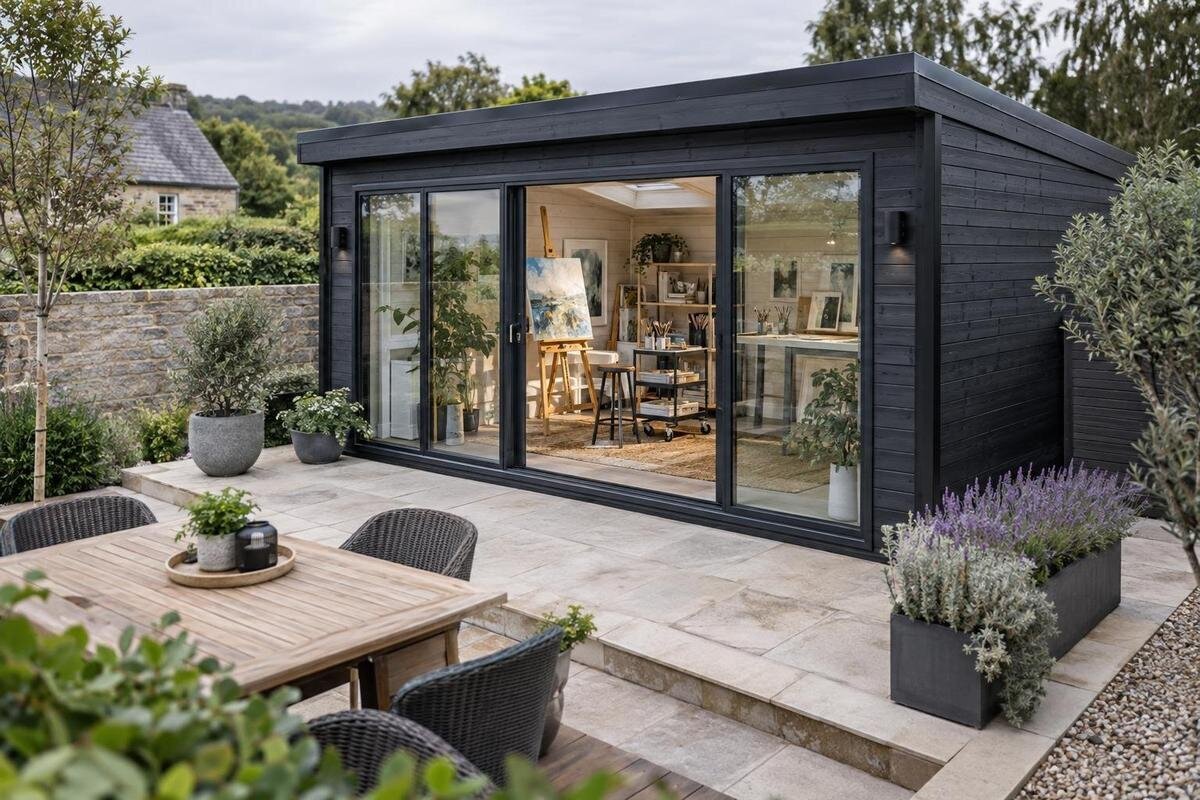
Garden shed art studio
An art studio in a garden shed has to support the way you make art, not simply fit a table inside. Natural light shifts; surfaces need to suit your medium and be manageable to clean; ventilation depends on both the building and the materials you use. Before buying, map your regular tasks, equipment and preferred work positions, then compare that plan with the garden-house details and conditions on site. The decisions are linked: a window can improve daylight but affect glare, while materials that call for more air movement may shape the building choice.
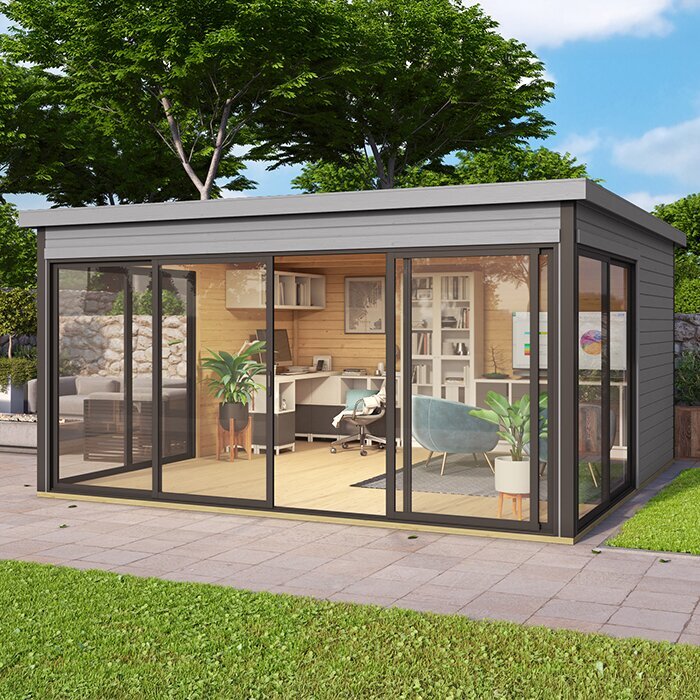
Before you buy 1
Choose the building around your art practice
Begin with the art you expect to make most often: drawing at a desk, painting at an easel, printmaking or small three-dimensional work all create different routines. Note the usual size and orientation of each piece, whether you sit or stand, and where unfinished work can rest while drying. Include the chair, easel, bench, paper, trolley and equipment that must stay clear of the floor. A shed may look large enough for a table yet leave too little room to step back, turn while carrying a canvas or reach tools without crossing the working area. Distinguish frequent activities from occasional ones, so a rare project does not dictate the everyday layout.
Turn that list into building requirements: usable internal floor area, headroom, door position, uninterrupted wall space, window openings and the floor provision. Read product information rather than relying on a model name or an exterior photograph; the position of an opening can matter as much as whether one is present. The Verdana 1 garden shed is one listing to assess against these questions, not evidence of any particular studio feature. If regular materials need particular airflow or storage conditions, establish whether the building can accommodate them before ordering furniture or committing to a fit-out. Also decide whether wet and dry work need to remain set up at the same time.
Measure the layout before ordering
Draw a simple plan from confirmed internal measurements. Mark the easel or workbench first, followed by a chair, drying area, paper and tools, then show the route from the entrance to each station. Leave room to carry a completed piece without brushing against another project. An open door, pull-out drawer or folding table also occupies space when in use, so mark its position rather than planning around the closed version. If you alternate between seated drawing and standing painting, sketch both arrangements. A temporary outline on the ground can reveal awkward distances before you order the shed or buy furniture. Note which tasks can share a surface and which need separate clean-up.
Compare the sketch with the dimensions and drawing available for the Verdana 2 listing. Ask whether measurements are internal or external and confirm the positions of doors and windows; these details affect how much uninterrupted wall remains for a table or shelves. Check that a canvas, board or other large item can pass through the entrance, including any turn between the garden access and the shed. Where no dimensioned plan is available, request the missing measurements from the seller before settling the layout. Avoid treating the visible width of a product photograph as a reliable guide to the space inside.
Before you buy 2
Plan for natural light at the actual site
Natural light is useful, but it changes through the day and across the seasons. Observe the proposed site at more than one time, and, if practical, in different weather. Note shadows cast by a house, boundary wall, tree or neighbouring structure. Check where daylight will fall on the work itself, not only whether the outside of the shed looks bright. If you paint, draw or compare colours, a beam that moves across the table may make the same surface look different from one session to another. Record the brighter and more shaded periods before deciding where your main work station belongs.
Use documented window positions on a candidate building to test the layout, then consider the garden’s orientation and surrounding obstructions. For example, use the product details for the Durano garden-house listing to check whatever information about openings is provided; the name or photograph cannot tell you how the building will face on your plot. Consider whether a second work position could use softer light, and whether a window can be shaded without losing all useful daylight. Treat natural light as one part of the lighting plan, not as a constant you can rely on in every session.
Control glare and reflections
Direct sun can cause glare on white paper, a glossy canvas or a protective table cover. A bright window behind the subject can also create strong contrast when you are working on details. Test a chair and easel position at the times you expect to use the studio. Look for reflected brightness from pale paving or nearby walls as well as light entering through a window. If your hand casts a distracting shadow, try the opposite side or change the angle; the better arrangement depends on the task and whether you work left- or right-handed.
Adjustable blinds, a curtain or another suitable shade can soften bright light while allowing you to adapt the room, but keep any opening needed for ventilation usable. A muted or neutral wall finish is less likely to affect the colours you see in the work than a strongly saturated one. If prolonged direct sun is a concern for finished work or materials, plan a shaded place for them. Before settling on a worktable or shade, check the stated opening arrangement for the Veltor 1 garden shed. Its listing alone cannot establish the light conditions at your site.
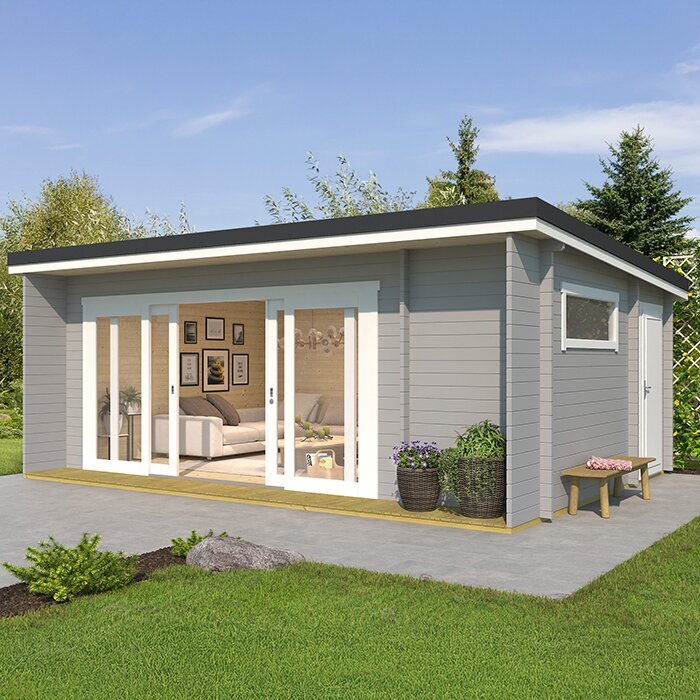
Before you buy 3
Add task lighting for detailed work
Plan artificial light for cloudy periods and evening sessions, even if the shed receives generous daylight. General room lighting helps you move around, while an adjustable task light can bring detail into a sketch, close-up brushwork or a cutting area. Position it so your hand, easel or equipment does not cast a hard shadow across the work, and avoid aiming a bright source into your eyes or at a reflective surface. If you make colour-sensitive decisions, consider how the lamp’s colour rendering compares with daylight. A consistent setup can make it easier to judge a piece from one session to the next.
Mark possible light positions and the intended worktable on your plan before finishing the interior. Compare them with the building’s confirmed dimensions and the locations of walls and windows; do not assume a product includes lights, sockets or a ready-made studio fit-out. The Orello garden-house page is a listing to check for its own stated layout, not a specification for lighting provision. Ask a qualified electrician to assess any new electrical work and the suitability of the proposed arrangement. Leave enough flexibility for a lamp to move if you change the easel position or take on a different task.
Match work surfaces to your medium
Choose a worktop for the processes you use most. Drawing and paper work call for a smooth, steady area with enough room to arrange sheets and tools; painting benefits from a surface that is easy to protect and clean. Wet or dusty processes may need a separate, removable covering. If you switch between detail work and larger pieces, think about whether a change of angle or height would help, rather than choosing a fixed table that suits only one posture. A portable board can protect a worktop and give you flexibility without permanently assigning the room to one medium.
Decide what can remain freestanding and what, if anything, needs to be attached to a wall. A fixed shelf, rail or easel requires a suitable wall and fixings, so ask a competent installer to assess alterations rather than assuming a particular surface can support them. Check how the finish responds to the paints, adhesives or cleaning products you actually use, following their labels and testing a small sample where appropriate. Before planning a built-in worktop around the Modano 1 listing, confirm its stated internal measurements and opening positions instead of inferring usable wall length from an exterior image.
Before you buy 4
Choose easy-to-maintain floor finishes
Flooring has to cope with the ordinary mess of making art. Drips, graphite, dry pigment and small offcuts are easier to deal with on a surface that can be cleaned using methods compatible with its finish. Put a washable protective mat under a painting area or use a removable drop cloth for messy sessions, and keep a separate clean place for paper and finished work. Consider comfort when standing for a long session, too. A mat should sit flat rather than curl into the route between work stations, and the floor should be practical for the tasks you plan to do, not chosen on appearance alone.
Before ordering extra floor covering or a coating, establish what floor, if any, is included and what preparation it needs. Check the documentation for the chosen building, such as the wooden garden shed M listing, and confirm that a proposed finish is compatible with the stated base and the materials you use. If the information is unclear, ask the supplier or a flooring professional rather than covering a damp or unsuitable surface. Follow the finish manufacturer’s instructions, including any guidance on curing, and consider fumes as part of the ventilation plan before using the studio.
Plan ventilation around art materials
Ventilation belongs in the room plan because it affects comfort and how moisture from wet work is managed. Identify which openings you can use during a session, whether air can pass through the room rather than stagnate around the worktable, and whether you can open them without exposing artwork to outdoor dust or weather. Do not place a tall cupboard, drying rack or large canvas across an opening. If the shed will remain closed between sessions, think about how wet work and damp materials will be managed before closing it up. Keep the route to any opening clear enough for it to be used as intended.
Materials need different precautions. Water-based paints are not a reason to assume no ventilation is needed; solvents, sprays, varnishes, adhesives, fixatives and some powders can require particular handling. Read the product label and safety information, and do not treat an open door or small window as a substitute for ventilation specified there. If your process calls for mechanical extraction or a dedicated air-movement arrangement, ask a qualified ventilation professional to assess the building and equipment together. Avoid planning a studio around a material whose stated conditions cannot be met in that space.
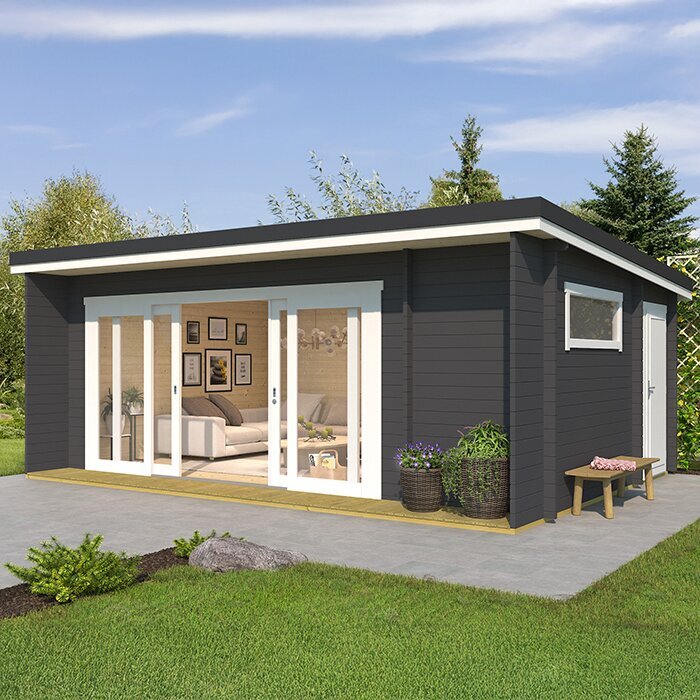
Before you buy 5
Check moisture protection and interior conditions
Regular art sessions can be uncomfortable if the interior is damp, draughty or difficult to keep at a workable temperature. Before buying, check the documentation for the roof, walls, doors, glazing, floor and any insulation or surface treatment actually supplied. Ask how the building is intended to be maintained, whether additional weather protection is needed and what ventilation openings are provided. This matters if paper, canvases or art materials will stay in the studio between sessions. The label garden shed alone does not tell you how a particular building manages moisture or heat, so use the stated details rather than general assumptions.
Read the precise product details for the wooden garden storage shed S listing in the same way: confirm the construction and included components that are stated, and ask about anything not described. Do not assume that a floor, insulation, sealed windows or a particular ventilation system is included unless the specification says so. If you plan a finish or alteration, check its compatibility with the building and your intended materials before purchase. Where the documents do not address your intended use, ask the seller or a qualified building professional what further information is needed. That helps keep the fit-out based on confirmed details rather than guesses.
Confirm site and product details before ordering
Check the garden location as well as the building. Measure the available footprint, note ground levels, trees and nearby structures, and consider the route from the access point to the final position. A shaded corner may reduce direct sun but fail to meet your daylight needs; a brighter spot may call for more effective shading. Do not assume one type of base suits every site. Ask the retailer or installer what site preparation the chosen product requires, and use a qualified professional for site-specific structural or ground questions. Leave access to the openings you intend to use for light and ventilation.
Before placing an order, compare the final product specification with your room plan: internal dimensions, door and window locations, floor details, ventilation openings, stated weather protection, any insulation and what is included. Clarify assembly, maintenance and any electrical or ventilation alterations separately; do not assume they form part of the building purchase. It can help to keep the confirmed details with your plan for the bench, easel and lighting. Once you have assessed the building and fit-out separately, you can arrange the studio around the materials and processes you actually use rather than a product photograph.
Frequently asked questions
Can any garden shed be used as an art studio?
Possibly, if its confirmed dimensions, floor and openings suit your work, and you can provide the lighting and ventilation your materials require. Check what is included and what changes may be needed; the term garden shed alone does not establish whether a particular building suits regular studio use.
Where should I put an easel for natural light?
Observe how daylight reaches the proposed site at the times you expect to work. Try positions that avoid direct glare and distracting shadows, and check the result at the easel rather than judging only by how bright the room looks. Adjustable shade can help as the light changes.
Will an open window provide enough ventilation for painting?
Not necessarily. Ventilation needs depend on the materials and processes involved, so read their labels and safety information rather than assuming a window or open door is sufficient. If a process requires mechanical extraction, ask a qualified professional to assess the building and the proposed equipment.
What should an art-studio work surface be like?
Choose a stable, practical surface that suits your medium and can be cleaned using products compatible with its finish. Drawing, painting and wet or dusty processes may call for different protections. A removable cover can also let one table serve more than one task.
Should I fit out the shed before ordering it?
Plan the fit-out first, but confirm the building details before buying furniture or materials. Check its internal dimensions, openings, floor provision and stated construction. If you need electrical, structural or extraction work, have a qualified professional assess the changes before you proceed.
An art studio in a garden shed works best when the building and fit-out are planned as one room: daylight falls where you make art, task lighting fills the gaps, work surfaces suit your medium, and ventilation fits the materials. Base purchase decisions on confirmed dimensions, openings, floor details and intended use, not a model name or product image. With those points resolved before fitting out, you can arrange the studio around the work you actually make and the way you prefer to make it.
