
Window installation joints: sealing tapes, weatherproofing and insulation explained
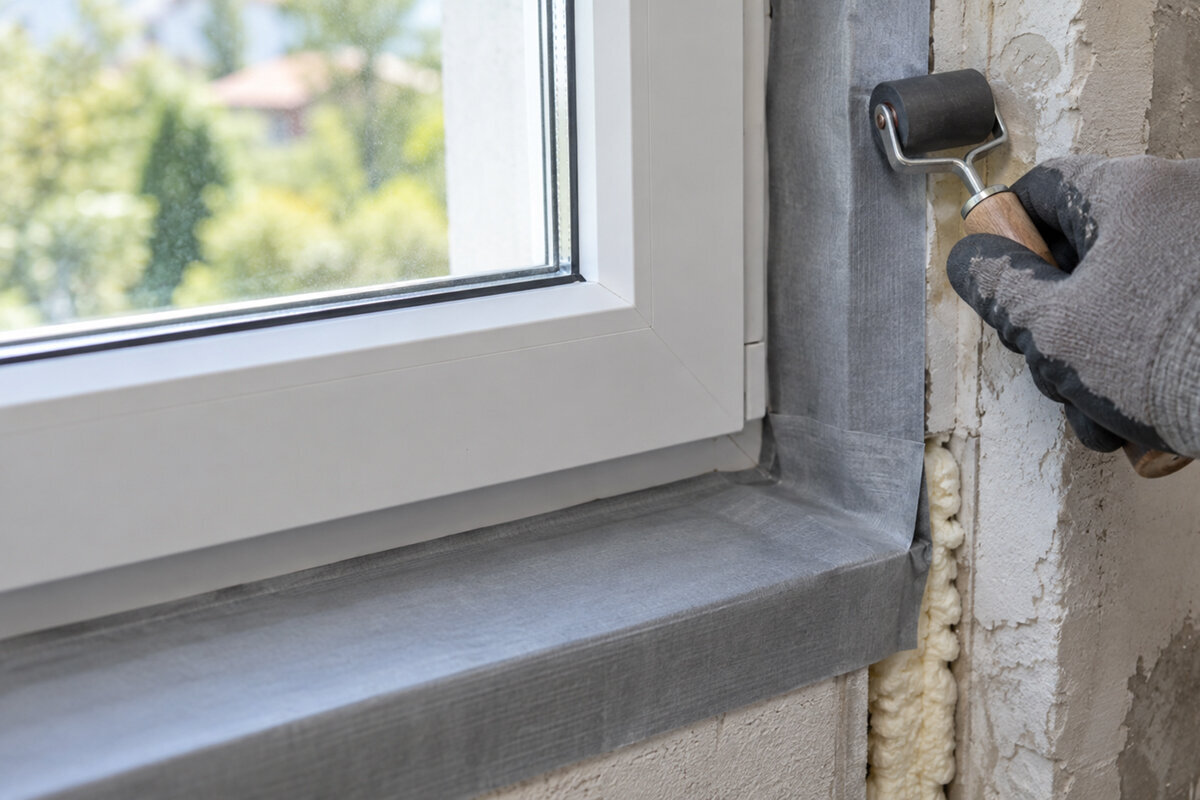
Planning a window installation joint
When replacing windows, the first discussion is often about frames, glazing and sash configuration. Yet the installation joint also determines whether the new element works as part of the wall: it runs around the frame between the window and structure, and must accommodate movement, unevenness, moisture and temperature differences. A good window cannot deliver its full performance with a poorly planned connection. The joint should therefore not be decided on site with an arbitrary foam and sealant. Instead, compare the window position, wall build-up, fixings, internal sealing, insulation material and external weather protection as a coordinated system. This guide explains the role of each layer and the questions to resolve before ordering, measuring and installation.
Understanding the installation joint as an interface
The installation joint is neither a simple border around the window nor merely a visible finishing line. It connects two components that may behave differently: the window frame and the reveal in masonry, concrete, timber or a multi-layer wall. The clearance is needed for tolerances, fixings and functional layers. Its width and geometry therefore belong in the survey and installation plan. Ordering only to the clear masonry opening, without considering plaster, insulation, existing stops, shutter guides or the window sill, shifts important decisions to installation day. Particularly in refurbishment work, old seals, uneven reveals and hidden damage can alter the planned solution.
Treat the window and its connection as one system. With a single-leaf inward-opening window the opening direction, fittings, internal sill and eventual internal connection detail must all work together. In refurbishment, first establish whether the new element remains in the existing plane or moves to a different position within the wall. This determines the length and accessibility of connection surfaces, the location of fixing points and the transition to plaster or façade insulation. A section through the head, side reveal and sill usually says more than the phrase “installation included”. Ask for these three detail areas to be considered separately, as they do not perform identical functions.
Putting the three-level principle in context
As a planning model, division into three functional levels has proved useful. The room-side layer should limit uncontrolled movement of warm, humid indoor air into the joint. The middle layer fills the gap and primarily contributes thermal and sound insulation. The outer layer protects the connection from weather, especially wind-driven rain, while allowing drying towards the outside. What matters is not seeing the same material everywhere, but ensuring each role is fulfilled continuously around the complete window perimeter. Corners, fixings and transitions to the sill or lintel often determine practical quality.
This model describes functions, not a shopping list. For example, a pre-compressed tape can seal externally and, depending on the selected system, perform further tasks; membranes or liquid-applied seals may be alternatives for complex connections. Installation foam can provide insulation, but does not automatically replace internal airtightness and external weather protection. Conversely, a carefully applied visible sealant bead is not automatically the complete connection. For each side, ask specifically: which product performs which function, what substrate does it adhere to, how are joints and corners formed, and who checks the work before it is covered? This turns “tighter inside than outside” from a slogan into a verifiable detail.
Consider the complete window connection
Inside: create an airtight connection, not simply cover gaps
The internal connection line affects whether room air can flow into the joint. If humid indoor air reaches cooler areas of the connection, condensation may form there; draughts and heat loss may also result. The internal layer must therefore connect permanently to both frame and building structure. Depending on the substrate and detail, connection membranes, suitable sealants, pre-compressed systems or liquid-applied systems may be appropriate. A sound, clean bonding surface and enough room for movement between frame and wall are essential. A rigid, thin bead on a dusty or cracked substrate does not solve the planning task, even if it initially looks closed.
Transitions deserve particular attention. An airtight surface at the reveal provides little benefit if it ends beneath the internal sill or does not connect to the existing airtight layer at the head. For plastered internal surfaces, clarify whether plaster is brought to a specified plaster connection profile, whether a membrane may be plastered over and how later repairs remain possible. With a double-leaf inward-opening window the internal detail also needs coordinating with use: sill depth, reveal linings and handles must not obstruct the sash. Ask the installer not only to name the tape, but to describe the uninterrupted route of the internal seal around the entire frame.
Middle: insulation needs suitable geometry and protection
The middle joint layer should fill the space between frame and building structure without voids. Its purpose is not to fix the window or compensate for major irregularities in the opening. Joint width, permitted deformation, substrate, application method and later connection layers all affect the choice of insulating material. Mineral insulation, foam or system-bound insulating tapes may suit different details. The fill should be even and not excessively compressed. Large open cavities or overfilled joints make it harder to connect the internal and external layers and can impair insulation performance.
Installation fixings must be planned independently of the joint fill. Support blocks, fasteners and load transfer keep the element in position; insulation does not replace this function. This is especially clear with wide or heavy elements. A Patio Life lift-and-slide door for example, requires a well-designed threshold and load-bearing zone before side sealing is considered. Ask where the element is supported, how the frame remains aligned and how insulation can be brought up to these areas. If individual areas need a different construction for structural reasons, it should be clear how airtightness, insulation and weather protection continue there. A sound middle layer comes from the correct sequence, not from using as much material as possible.
Outside: repel rain while allowing drying
Outside, the installation joint faces weather, UV exposure, splash water and façade details. The external layer should keep moisture out and direct water away in a controlled manner. At the same time, moisture that has entered the connection must not be trapped by an unsuitable layer. The effective solution depends on exposure, façade surface, existing stops, window position and adjacent components. A protected joint deep within a reveal has different requirements from one close to the façade plane. General statements such as “just use silicone outside” overlook the connection between the joint, plaster, flashings and sill. Record which sides are directly exposed to weather, where façade projections offer protection and where water runs off in concentrated paths. Adjacent cracks, open plaster edges or inadequate bonding surfaces must also be considered before selecting materials. Agree who prepares the substrate and how long the finished seal may remain unprotected. Processing requirements for the chosen system should already be available when scheduling the work.
The lower connection zone merits a drawing of its own. Side connections, falls, end caps, the sill, wall waterproofing layer and possibly a door threshold meet there. Water getting behind an external cover needs a planned route to the outside; a visibly closed surface alone is not proof of this. With a single-leaf outward-opening patio door the transition from the internal floor to the external finish must also be set early. Otherwise, later build-up heights may conceal the connections, disrupt drainage or restrict door movement. For low-level areas, request a section showing every layer, not merely a view of the finished façade.
Comparing sealing tapes, membranes and sealants
Sealing tapes are often quick to install and can compensate for unevenness when the joint width is selected correctly. However, they need suitable dimensions, a prepared joint and sufficient time or space to expand. Connection membranes are flexible for complicated geometries and can link to the building’s airtight layer. Their performance depends greatly on adhesive, substrate preparation and neatly bonded overlaps. Liquid-applied waterproofing can help at difficult-to-access or irregular connections, but requires controlled layer formation and suitable substrates. Sealants suit defined joints and connections, but must be matched for adhesion, movement capacity and compatibility. For comparison, make a small connection matrix: straight sides, corners, head, sill and known problem areas. Note which material will be used in each location, how it joins the next component and what preparation is required. This reveals whether a solution works only on a straight sample run or can also be installed at interruptions. Check product data and application instructions for the actual offered system, not merely a similar product category.
Do not compare only the roll of tape or membrane. Check whether the frame surface and wall substrate need preparation, whether a primer is specified, whether the product may be plastered, painted or covered, and when the next stage may begin. Also ask how a joint at the frame and a corner are formed without folds or open paths. With a fixed-glazed window the connection is unaffected by a moving sash, but the frame-to-wall transition still requires the same care. The best choice is the system whose application remains clear under the real conditions on site. A material list without a detail drawing, substrate specification and allocation of responsibility is not a reliable installation plan.
Consider the complete window connection
Window shape and opening method change the detail
Rectangular standard windows often allow repeatable connections, but glazing bars, fixed lights, sash layouts or an unusual opening method can alter the survey and workflow. Glazing bars sit within the window construction; for the installation joint, the external frame perimeter matters, not the visible division of the glass. A window without glazing bars has an installation line just as extensive as a visually divided window. The key point remains how frame, reveal and seal meet. In historic elevations, the external appearance can matter without automatically making the joint solution simpler or more complex.
Curves, slopes and other special shapes increase the number of cuts, corners and transitions. A triangular or sloping fixed-glazed window therefore needs a detail review at every inclined edge, especially at the top junction. This is precisely where fixings, insulation and external water management should not be improvised one after another. Roof windows add the connection to the roof build-up and covering; they need a separate concept suited to the roof system. For special shapes, give designers and installers a scaled elevation and section. Ask where the selected tape is cut or joined and how continuity is retained afterwards.
Prepare new builds and refurbishment differently
In a new build, window position, wall build-up and connection materials can be coordinated early. This makes it easier to define clear interfaces between structural work, window installation, plaster, façade and internal finishing. Even so, responsibility for making, protecting and accepting connection surfaces must be assigned. A membrane left exposed after window installation can be damaged by following trades; completing the façade too early can hinder later fixings. Scheduling is therefore part of technical planning. Record when frames are installed, when the internal and external layers are closed, and how open connections are protected from weather and damage in the meantime. Where many openings are alike, an early reference window can help assess interfaces before series installation. Review not only visible surfaces, but also substrate preparation, corner formation, fixings and handover to following trades. Record any deviations directly in the approved detail. A verbal approval of a sample does not prevent later openings from being executed differently.
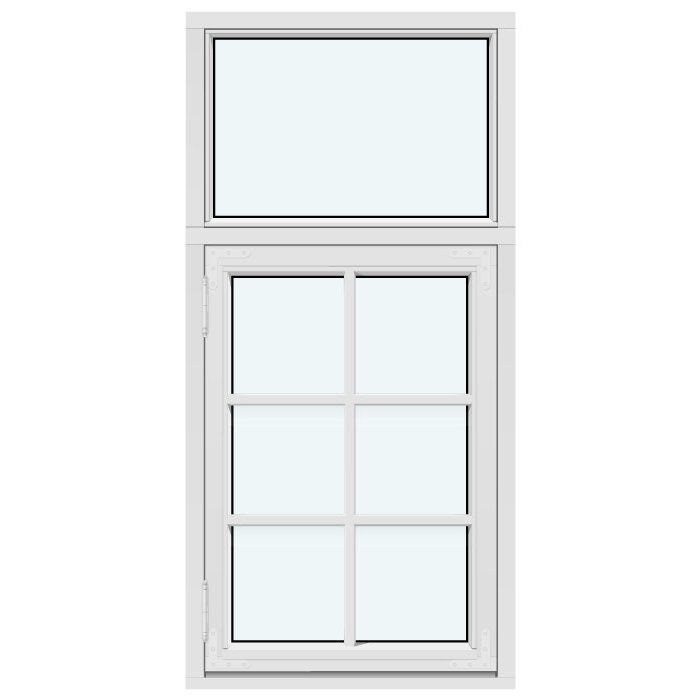
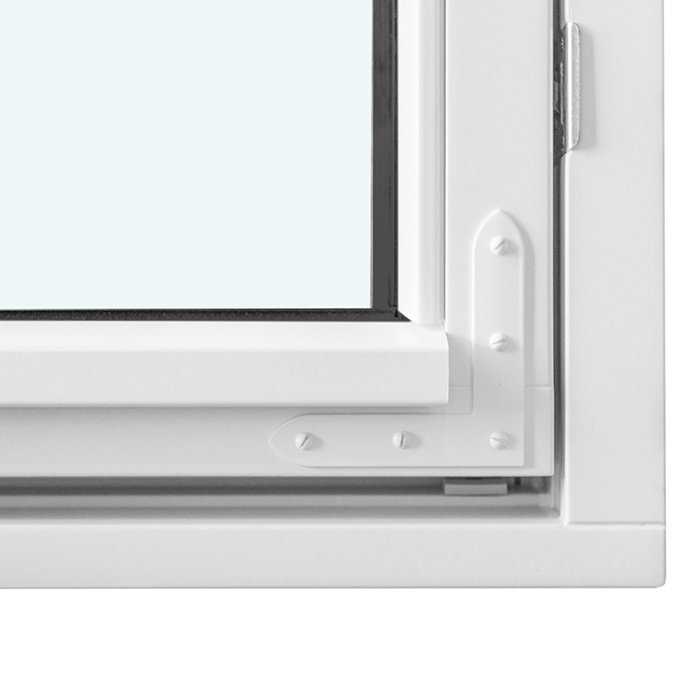
In existing buildings, work starts with a condition survey. Removed old windows can reveal crumbling reveals, damp areas, existing seals or unexpected layer thicknesses. Plan a response to such findings rather than relying solely on an ideal dimension. With a traditional-style outward-opening “Kombi” casement window existing elevations and connection widths may influence the design decision; nevertheless, the joint must fit the actual building structure. Before removal, document dimensions, the visible wall build-up, internal and external finishes, and sill positions. A joint site visit by the window supplier, installer and, where appropriate, façade or plaster contractor reduces conflicts between trades.
Coordinate fixings, movement and following trades
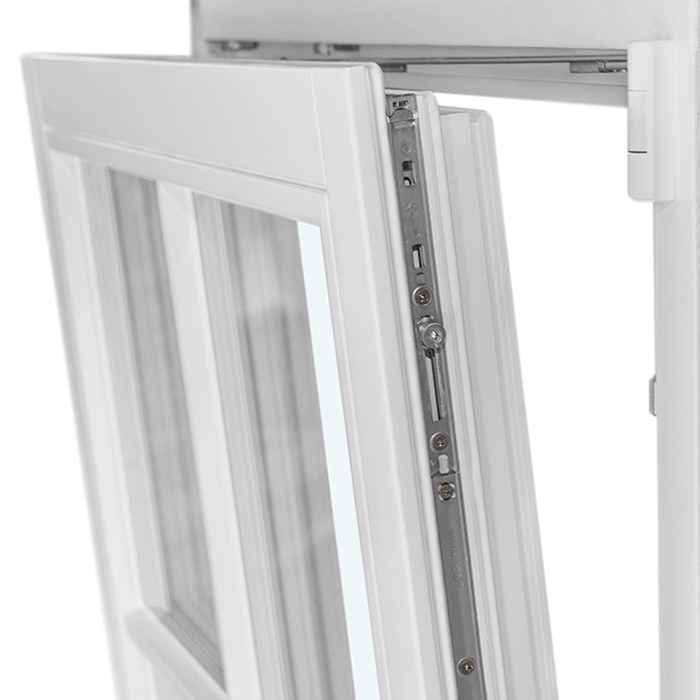
Window frames change with temperature and use, building structures can settle or move slightly, and seals must accommodate these movements over time. A connection solution must therefore neither rigidly trap the frame in an unsuitable location nor overload the fixings. The location and number of fixings, along with distances from frame corners, need planning for the individual project. Ask for the load transfer, alignment and purpose of support and spacing blocks to be explained. Only once the window is securely positioned can the functional layers be added properly. Foam or sealant should not take on an unintended structural role.
Following trades also affect the joint. Internal plaster, dry lining, sills, external plaster, thermal insulation, metal covers and solar shading can conceal connections or penetrate them with fixings. Before work begins, define who seals each penetration and which surfaces must remain visible until the installation is checked. With outward-opening folding doors the transitions at side frames and floor level become more important because several leaves and a large opening meet. This does not automatically dictate a particular sealing method, but it does require especially careful coordination of opening space, external finish, threshold and water management. A coordination meeting before ordering costs less than adapting completed surfaces afterwards.
Organising specification, inspection and handover
A useful specification says more than “install windows professionally”. It assigns the window to an installation position, describes prepared connection surfaces and identifies the functional tasks inside, in the middle and outside. It should also include details for the head, sides and sill, fixings, treatment of window sills or thresholds, and protection until the completion of finishing work. Where several window types are used, standard details and differing special details should be listed separately. Provide dimensions and drawings before ordering so that frame size, joint space and accessories can be checked together. The installer should be able to identify what is included in the quotation and where other trades connect. Compare quotations line by line: substrate preparation, removal and disposal of existing materials, fixings, every joint layer, sill connections, protective measures and documentation. Mark missing or lump-sum items before comparing prices. A lower total is of limited value if reveal repairs, connection profiles or sealing below the sill have not been assigned. Ensure alternative items are described clearly, so the actual ordered construction is not uncertain later.
Inspect connections while they are still accessible. Photograph the prepared substrate, fixings and individual layers before plaster, linings or the sill conceal them. Visually check for continuous connections, sufficient overlaps, carefully formed corners, correctly treated joints and undamaged materials. An unresolved question is not a quality defect if it is clarified before covering. Request documentation of the system components used, care instructions and responsibility for remaining connections. Bloomcabin states a five-year manufacturer guarantee for windows and doors; delivery is generally four to six weeks after order confirmation. These details do not replace project-specific checking of the installation and connection plan.
Frequently asked questions
Is installation foam sufficient as window sealing?
No. Installation foam mainly performs a role in the middle joint layer and is not automatically the complete internal airtight layer or external weather protection. The additional layers required depend on the connection detail, substrate and installation situation. Ask for the three functions to be identified and documented separately.
What does “tighter inside than outside” mean?
The phrase describes a functional principle: room air should not enter the joint uncontrollably, while moisture within the connection should be able to dry towards the outside. It does not replace a material decision. Whether tape, membrane, sealant or another solution is suitable must be planned for the frame, wall build-up, joint width and weather-exposed side.
Should the window installation joint be specified before installation?
Yes. At the latest before ordering and surveying, the installation position, wall build-up, frame dimensions, fixings and connections to the sill, façade and internal surface should be coordinated. Site findings may require adjustments. A prepared alternative for uneven or damaged reveals prevents uncoordinated decisions under time pressure.
Who is responsible for sealing between window and wall?
That depends on the contract, specification and division between trades. The key question is not only who applies a tape, but who creates the continuous connection to plaster, the façade layer, sill and other layers. Record responsibilities, the inspection point and protection of open connections in writing.
How do I recognise an installation plan that can be checked?
It includes at least elevations and sections for the head, sides and sill, identifies the functional layers and their connections, and shows fixings and load transfer. Separate details are useful for doors, special shapes and low-level areas. Before covering, inspect the work against these documents and record it with photographs.
Next step
A functional window installation joint does not result from one “sealant”, but from the interaction of internal sealing, an insulated middle layer, external weather protection, fixings and adjacent components. Start with the wall build-up and installation position, not with a material name. Have the details drawn for every side of the frame, assess special shapes and thresholds separately, and allocate interfaces between trades in writing. Planning the joint before ordering and removal makes quotations easier to compare and allows the work to be checked while the critical layers remain visible.
