
Pergola Planning for Accessible Outdoor Dining
Pergola planning
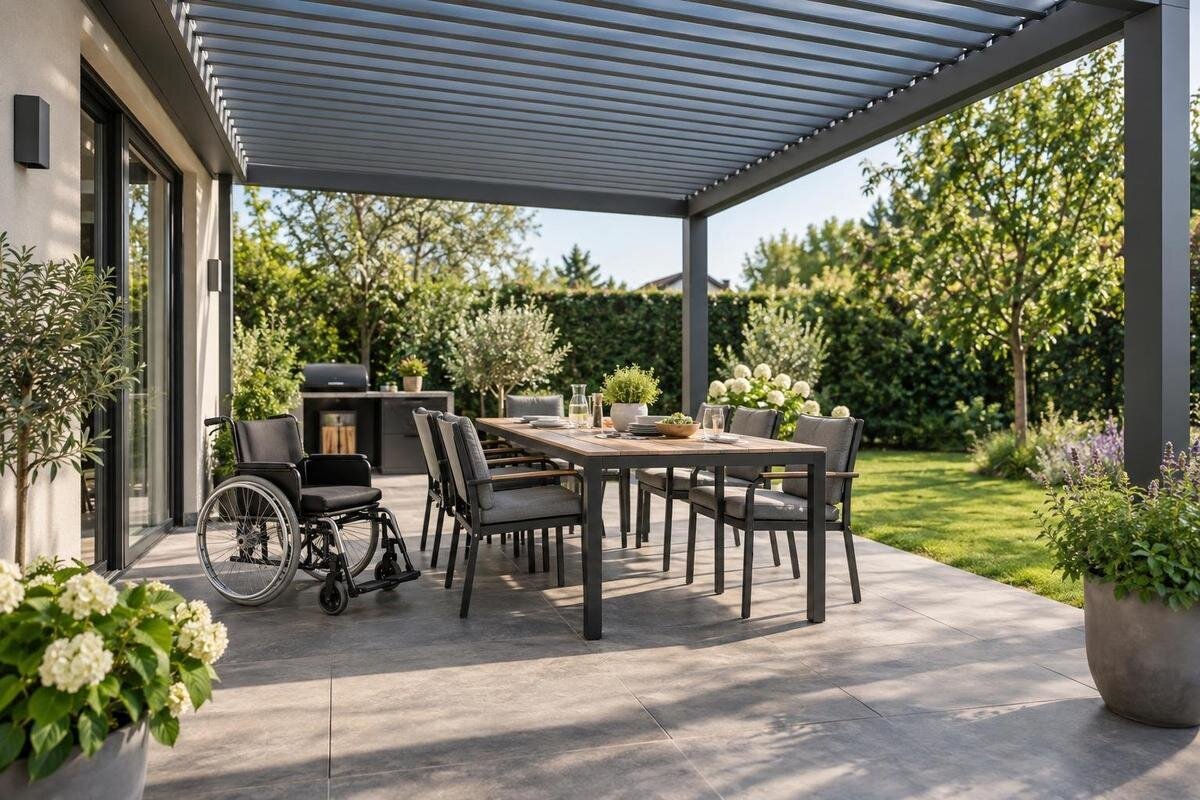
Accessible outdoor dining beneath a pergola begins with movement and use, not the overhead footprint alone. Map the route from the house or garden to the table, then allow for the people, mobility equipment and chairs that occupy it during a meal. A practical layout checks step-free access, a wheelchair’s approach, room to turn and circulation once chairs are pulled out. This guide covers comfort and planning; it does not give universal clearance dimensions or prove that a design meets any accessibility requirement.

Plan around the way people dine
Begin with ordinary meals, not a catalogue picture. List the people who will use the area most often, the mobility equipment they bring, and whether a companion or carer needs a nearby seat. Trace a normal visit: leave the house, reach the table, sit down, eat and return. Ask whether the person using a wheelchair prefers an end or side position, whether another approach is useful, and what tends to be carried in or out. Accessibility is personal; two diners using similar equipment may still prefer different arrangements. Confirm needs with the people who will use the space rather than designing from assumptions.
Measure the site and everyday furniture before settling on a pergola size. Sketch the doorway, garden entrance, fixed boundaries and existing obstacles, then add the table and chairs at their actual dimensions. Mark where dishes are carried, where spare chairs sit and whether a serving trolley or companion’s chair is part of a usual meal. Separate the items that must remain in place from those you are willing to move or replace. This helps you see whether a tight layout calls for different furniture or a different pergola footprint. Once that sketch is clear, compare Bloomcabin Pergola with the intended arrangement. Keep the furniture measurements on the sketch so you can assess each configuration against the same needs, rather than changing the dining plan to make a preferred model appear to fit.
Draw the route from the house or garden
Trace the route from the actual door or garden entry, rather than starting at the edge of the pergola. Note turns, narrow points, doors that swing into the path, gate latches and obstacles that may move into it. Include anything that is routinely left nearby, such as a bin or parked mobility aid. The route should reach a chosen dining position without weaving between chair backs or crossing a busy serving path. If people use more than one entrance, map each approach: the easiest way in for everyday meals may not be the best way for visitors.
A dining area beside the house needs to work with the doorway as well as the table. Check the door’s opening arc and the space beyond it, so a person can get through without meeting a chair or a pinch point. Include the movements needed to open and close the door, rather than drawing only a line through the opening. If someone carries dishes while another person enters, consider where they can pause without obstructing each other. For a layout beside the house, compare Bloomcabin Wall-Mounted Pergola with the measured doorway and approach. Keep the route usable beyond the pergola too. Check the return journey separately: reaching the table should not leave someone needing furniture moved before they can get back indoors.
Check thresholds and outdoor surfaces
A route without steps can still be awkward if there is a raised threshold, an uneven join or a sudden change in surface. Draw the transition from the indoor floor across the doorway and onto the patio, then any further change between the patio and garden. Look for loose stones, gaps, soft ground and grates where a wheelchair’s small front wheels or another mobility aid could catch. The surface should make the whole route practical to use, not just look continuous on a plan. Check the actual conditions with the person and equipment expected to use it.
Outdoor surfaces and drainage need to be considered together. A grate or channel through the main approach can interrupt movement, while water that collects on the route can change how it feels underfoot. Mark where water is expected to go and ask a qualified site professional to review any proposed changes to levels or drainage. Avoid assuming a surface will remain even or firm after weather and regular use. If the route crosses lawn or another variable surface, assess that part as carefully as the paved section rather than treating it as a harmless gap.
Measure the table with chairs pulled out
Use the full table-and-chair arrangement, not just the tabletop dimensions. Measure the table and each chair, then show the chairs both tucked in and pulled back for someone to sit down or stand up. Chair backs move into circulation space, and the amount of room needed can differ between seats. Include the positions used when the table is extended, if that is part of normal dining, and allow for diners’ elbows and the movement involved in serving. A plan that works only while every chair is pushed neatly under the table may not work during a meal.
The table base matters as much as its top. Legs, a central pedestal or an apron can obstruct a wheelchair’s footplates or the space needed beneath the table, so check the actual furniture rather than guessing from a photograph. Try likely wheelchair positions with the other chairs in their usual places. The Bloomcabin Pergola listing gives an area range from 9 to 24 m². Treat that as a product-area reference, not a measurement of clear interior passage; compare the exact configuration dimensions with the full furniture outline.

Reserve a wheelchair position at the table
Plan the wheelchair position early, rather than trying to squeeze it in after choosing the table. Depending on the person and the furniture, an approach may work at the side or at an end. Check that the wheelchair can come alongside, align with the table and leave again without another chair blocking the way. Use the actual wheelchair, including its footplates and armrests, when considering the table base and underside. The clear approach is a separate part of the layout; it cannot be counted as free space if it is occupied by a chair or fixed feature.
Consider the social experience as well as the physical fit. Ask the person who will use the position where they would like to sit, whether a companion’s seat is useful and how the chosen place works for conversation and serving. A wheelchair position should not be treated as a spare corner that leaves someone outside the group. Include plates and shared dishes when trying the arrangement, and ask whether the diner can use the table comfortably from that position. If assistance is wanted during a meal, show where the other person will sit or stand without blocking the way out. Compare Bloomcabin Bioclimatic Pergola only after including these positions in the layout. That keeps the whole dining group, rather than an isolated wheelchair space, at the centre of the choice.
Allow space to turn and leave
Moving straight along a path and turning at its end are different tasks. Mark where someone may need to change direction: at the entrance, before approaching the table, or when moving away from it. A turning area placed only at the edge of the pergola may not help if a chair or table corner blocks the next move. Use the actual mobility equipment to test the concept where the person is comfortable doing so, or ask an appropriately qualified access professional to review it. There is no universal turning dimension that can be assumed from a general sketch.
Check circulation with the chairs occupied, not only when the dining area is empty. A diner may need to leave while another person is serving, or someone may need to reach the house without asking others to move. Avoid making one narrow strip do several jobs at once, such as wheelchair access, chair pull-out and carrying food. If there is no room for a route around the table, make the way in and out clear and usable without shifting occupied furniture. Keep loose items and serving equipment out of that route during a meal.
Keep fixed pergola elements out of clear space
Once the route and furniture are drawn, add the actual pergola footprint and every fixed element shown for the chosen configuration. Mark supports, wall projections, gates and any planned screens or permanent planters. These can intrude into the approach or turning area even when the table fits beneath the overhead footprint. Use the Wall-Mounted Pergola model page when comparing configurations, then plot the relevant dimensions and support locations on your layout. Pay particular attention to places where a support would sit beside a pulled-out chair or where a screen would narrow an entrance. Show the space those elements occupy, not just a small symbol for their position, so the drawing does not overstate the room available.
Check how the opening into the pergola lines up with the approach from the house or garden. A clear path that reaches a support or screen at its end is not a useful approach, and a person should not have to make a tight detour around a fixed feature before reaching the table. Include any accessory or landscaping that is intended to remain in place when dining. If something is only temporary, note where it will go during a meal so it does not quietly take over the space reserved for turning or circulation.
Make furniture flexible without blocking the route
Choose a layout that works in its everyday arrangement, not one that depends on constant furniture rearranging. If chairs need to move for someone to reach the table, decide who will move them and where they will go. Leave a defined place for spare chairs, cushions or a serving trolley rather than parking them beside the entrance. If furniture is changed for a larger meal, check that the wheelchair position and way out remain available. Flexibility is useful when it is planned; it is frustrating when every meal starts with clearing a path.
Compare the complete furniture layout with the specific pergola footprint, including the places items occupy when they are not in use. Assess regular Bloomcabin Pergola configurations against both the usual arrangement and any occasional expanded set-up. Make a separate sketch for a larger gathering rather than assuming the everyday plan will still work with extra seats. Show which chairs will be removed to accommodate a wheelchair, where they will be stored and whether an extended table changes the approach. If the plan depends on moving furniture, agree on a straightforward arrangement that everyone can recognise and restore. Keep the everyday layout as the main basis for choosing: an occasional seating plan should not make ordinary meals harder to manage. This gives furniture flexibility a clear purpose without treating the access route as spare storage.

Consider light and weather at dining time
Check the approach and table at the times people are likely to eat. The sun’s position and reflected glare can affect one seat or stretch across the route, and a pergola should not be assumed to provide the same shade or shelter in every position. Orientation, site and the selected configuration all matter. When comparing the Bioclimatic Pergola listing, use the stated configuration details rather than inferring light or weather performance from the name. Record which dining positions you are assessing and at what time of day. If the preferred wheelchair position is uncomfortable at a usual mealtime, revisit the table’s orientation as well as the overhead arrangement; do not assume changing seats will be equally convenient for every diner.
If the dining area will be used after dark, check that the route and changes in surface are visible without a light shining directly into seated diners’ eyes. Keep portable lights and their leads out of the circulation space. Think about whether rain or wind would make the route or furniture arrangement less practical, and assess actual site conditions rather than relying on a general product label. For new fixed lighting, use an appropriately qualified professional; do not let a lighting plan introduce cables or fittings into the clear route.
Test the full layout before deciding
Draw the concept to a consistent scale, then mark the route, table, occupied chair positions, wheelchair position, turning area, door swing and fixed pergola elements. Use the actual furniture dimensions and, where practical, mark the layout on the ground to make tight points easier to see. Ask the people who will use the space to review it and try the route if they wish. Test the dining arrangement with chairs pulled out and ordinary items in place, not just an empty patio. Before deciding on the Wall-Mounted Pergola option, compare the tested plan with dimensions for the exact configuration.
Treat the drawing as a practical concept, not proof of compliance. Label it as a concept and record which furniture and mobility equipment you used to assess it. Note any parts that remain unresolved, such as a doorway transition or a support location, rather than hiding them within a general impression that the layout works. Site levels, drainage, installation details and any formal accessibility requirements need project-specific review. Where site changes or formal obligations are involved, take the measured plan and your specific questions to the appropriate local authority or qualified professional. After any proposed change, revisit the affected movement on the plan. A revised threshold, table position or pergola configuration should be considered alongside the rest of the dining arrangement, not as an isolated adjustment.
Frequently asked questions
How much space does an accessible outdoor dining area need?
There is no single footprint that suits every household. The space depends on the mobility equipment, table, chair positions and whether people need to pass while someone is seated. Measure those items in use and plan for approaching, turning and leaving. If a formal accessibility requirement applies, have it checked separately by an appropriately qualified professional.
Where should a person using a wheelchair sit at an outdoor dining table?
A side or end position may work, depending on the table and the person using it. Check the approach, table legs and underside, footplates and armrests with the actual wheelchair and furniture. Consider conversation and serving too, so the position is part of the dining group rather than an awkward space left over.
Does a step-free route have to be completely level?
Step-free describes a route without steps; it does not by itself confirm that every surface or transition will be comfortable to use. Small lips, loose material, soft ground or abrupt changes can still matter. Assess the actual route with the people and equipment that will use it, and get qualified advice if levels or drainage need to change.
Is a pergola’s listed area the same as its clear usable space?
No. A listed area is not a measurement of the open route or the space available around a table. Check the exact dimensions and configuration, then plot any supports and the furniture in use. The clear approach, chair positions and turning space all need to fit within the site layout.
Does a practical layout prove that a pergola is accessibility compliant?
No. A concept plan helps test everyday use, but it does not establish compliance. Requirements and site conditions depend on the project. Where formal obligations or significant site changes are involved, confirm the applicable requirements with the relevant local authority and an appropriately qualified professional.
A useful pergola dining plan shows the whole experience: the way in, the table with chairs in use, a comfortable wheelchair position, space to turn and a clear way out. When those details are drawn alongside the exact pergola configuration, it is easier to see where a layout works and where it needs adjustment. Keep the concept grounded in the people and equipment that will use it, and seek project-specific advice where site changes or formal requirements are involved.
