
To improve the quality of the content of this website and to adapt it to the needs of users, cookies are used - including third-party cookies. By continuing to use this website, you agree to the use of cookies and to possible communication when you enter your contact information in one of the forms on the site.

Bloomcabin Wall-Mounted Pergola

  • Fixed to the house wall
  • Practical addition to the terrace
  • Customisable design
The greater the purchase, the bigger discounts you get.
Estimated delivery:
We offer the opportunity to CHOOSE A SUITABLE DELIVERY WEEK, which you will find in the last step of the shopping cart.
The greater the purchase, the bigger discounts you get.
Personal Bloomcabin consultation
Personal consultation?
We are happy to help with questions about models, prices and delivery.
+49 152 28196712

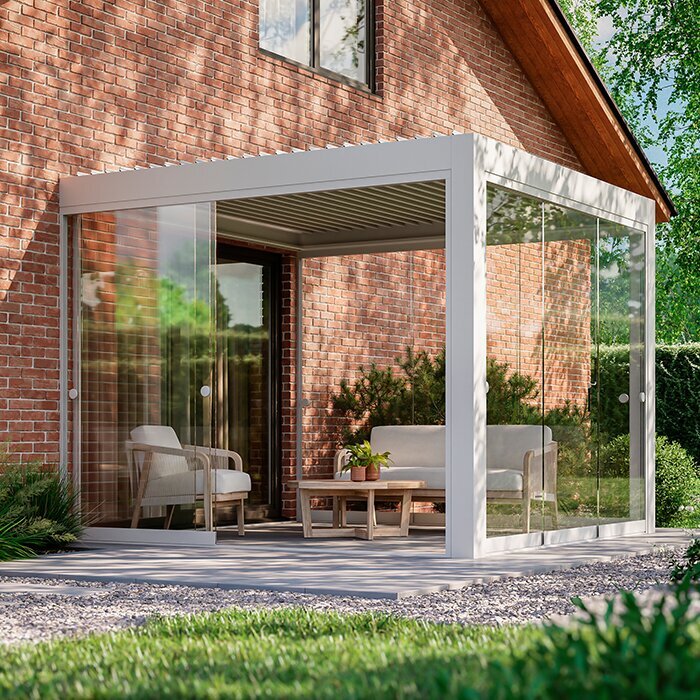
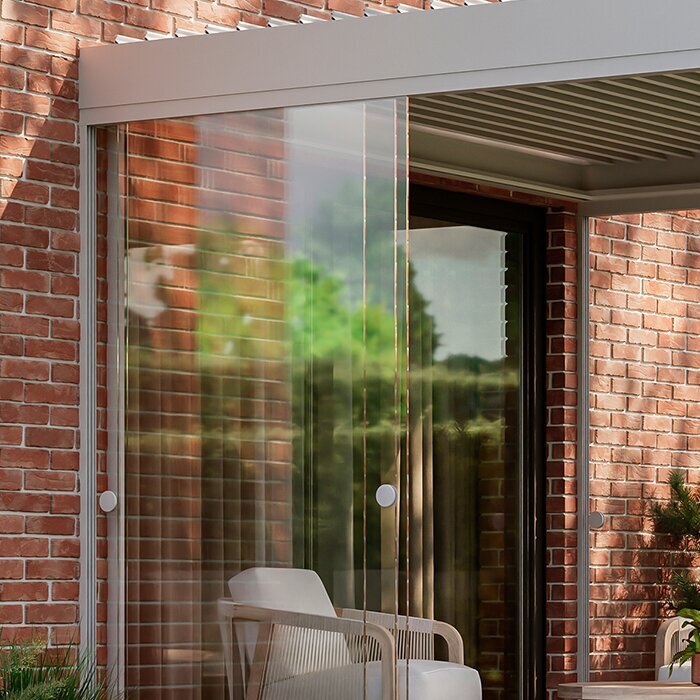
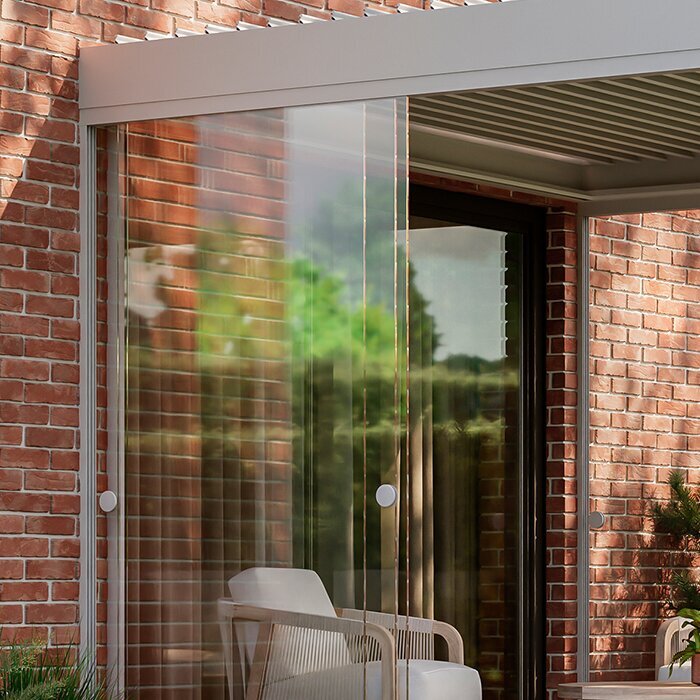
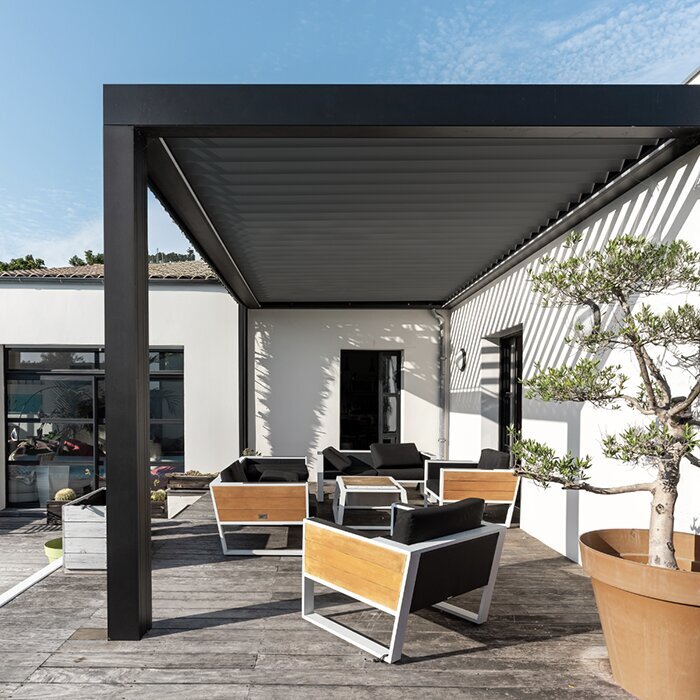
The Bloomcabin wall-mounted pergola is a practical, attractive way to extend your outdoor living area directly from the house. Combining contemporary design, carefully engineered construction and quality aluminium profiles, it delivers everyday comfort while complementing your home’s architecture.

Why choose a Bloomcabin wall-mounted pergola?

Fixed to the building wall
Securely mounted to the façade, this wall-mounted pergola offers excellent stability and makes the most of your outdoor space. It is ideal for terraces, balconies and relaxation areas right beside the home.

Functional terrace cover
The pergola provides welcome shade and creates a sheltered outdoor area while retaining an open, airy feel. It is well suited to everyday relaxation, outdoor dining and peaceful time on the terrace.

Wide choice of sizes
The Bloomcabin wall-mounted pergola is available in a range of sizes, covering 9 to 24 m² and can be matched equally well to compact or generously sized terraces.

Quality materials
The structure is made from aluminium, a particularly low-maintenance material that retains its attractive appearance for many years. It provides lasting durability and a stable construction for everyday use.

Customisable design
Available in a choice of RAL colours, the wall-mounted pergola can be coordinated beautifully with the building façade and its surroundings.

The pergola includes an integrated gutter and drainage system that directs water away efficiently while preserving a clean, architecturally balanced appearance.

With its precisely engineered design, the Bloomcabin wall-mounted pergola is straightforward to assemble. It is an attractive, practical investment that enhances terrace comfort and adds to the overall value of your property.

Customer reviews 

“The wall-mounted pergola complements our terrace and house façade perfectly. It is sturdy, visually elegant and extremely practical every day.”
— Thomas Schneider

“We chose a wall-mounted pergola to cover the terrace directly beside the house – the result feels genuinely high-quality and thoughtfully designed.”
— Julia Wagner

“I am very satisfied with the construction quality and design. The pergola performs its function exceptionally well and looks modern.”
— Markus Weber

Order today and receive a high-quality wall-mounted pergola that creates a comfortable, functional and attractive outdoor area at your home.
More information
SPECIFICATION

Dimensions:
9–24 m²

Height:
Overall height: 250 cm

Material:
High-quality aluminium profiles

Key features:

  • Robust, stable profiles for a secure structure

  • Integrated gutter system for efficient water drainage

Warranty:
12-year extended warranty

Key benefits:

  • Durability: Aluminium construction for lasting, reliable use.

  • Functionality: Integrated gutter system for water drainage.

  • Customisation: Available sizes: 9–24 m²; RAL chart colours.

  • Design: Modern pergola with clean lines.

Bloomcabin Wall Pergola

Modern patio cover with a direct connection to the house wall

The Bloomcabin Wall Pergola is fitted directly to the house wall and designed for patios and other outdoor areas beside the building. It gives the space in front of the façade a defined frame and links the home with the garden without fully enclosing the patio. This suits homes where the main dining or seating area sits directly outside the kitchen, dining room or living room.

The current version covers 9–24 m² and has an overall height of 255 cm with high-quality aluminium profiles. Its integrated guttering and drainage system channels water through the structure. The RAL colour selection allows the visible frame to be coordinated with windows, doors, the façade or other permanent features of the house.

Plan in a clear sequence: first have the wall construction, load-bearing fixing area, ground conditions and fall assessed. Then coordinate patio depth, doors, windows, furniture and access routes. Choose the final configuration only once the drainage outlet and cleaning access are also established. Bloomcabin New Zealand.

Bloomcabin Wall Pergola on a patio
Connect house and patio

A clearly defined outdoor area beside the house

A wall pergola is particularly useful where the patio and living area connect directly and the space beside the house will be used regularly. Being close to the kitchen, dining room or living room makes it easy to carry food, tableware and seat cushions outside.

Connecting it to the building gives the patio a clear edge. Unlike an enclosed extension, it remains an open outdoor area: views into the garden and side access around the property are retained.

Because the structure remains visible beside windows, doors and the façade, its proportions affect the overall appearance of the home. Its width can follow the position of windows and doors, while its depth must allow space for the intended use. Plan colour, post positions and furniture together.

Direct wall connection

For patios directly beside living areas

Open transition

Living space and garden remain directly connected

RAL colour selection

Frame colour coordinated with façade, windows or doors

Integrated drainage

Guttering and drainage system within the structure

Plan the patio practically

Furniture, door openings and walkways determine the right pergola size

The right size is not determined only by the empty paved area. What matters is which activities will take place beneath the pergola and how much circulation space they need. A simple seating area has different requirements from a combination of dining table, serving route and garden access.

Behind occupied dining chairs, allow room to stand and pass by. A lounge needs enough space between the sofa, armchairs and table. Outward-opening doors, sliding elements and regularly used garden paths must not be blocked by posts or furniture.

A wall pergola looks especially well balanced when it follows the lines of the house. Windows, doors and patio edges provide useful reference points. However, visual alignment must never compromise practical use or sound fixing.

Bloomcabin Wall Pergola above a patio
Before choosing a size

Four points form the basis for planning and installation

Prepare a scale plan for every configuration under consideration. Mark usable furniture areas, clear zones in front of doors and the intended post positions. Comparing them directly reveals which option uses the available space best without restricting important circulation areas.

01

Wall position

Have the fixing line, load-bearing base, wall construction, insulation, doors, windows and other façade details professionally assessed.

02

Furniture

Add the dining table, lounge, planters and required chair space to the patio plan at scale.

03

Movement

Keep direct routes between the home, seating area, garden and side exits clear.

04

Drainage

Coordinate the outlet, patio fall and onward drainage so water is directed away from the building.

Key technical details

Dimensions, construction and installation at a glance

Size range

9–24 m²

Base your choice on the area that can actually be furnished, not only the patio’s external dimensions

Overall height

255 cm

Allow for doors, windows and other façade details when coordinating the design

Construction and strength

High-quality aluminium profiles

Clean-lined aluminium construction for direct attachment to the house

Installation

Directly on a suitable building wall

Have the wall construction, fixing zone and appropriate fixings professionally checked first

Water management

Integrated guttering and drainage system

Set the outlet and onward water route before installation

Warranty

12 years

Integrated drainage on the Bloomcabin Wall Pergola
Material and care

Aluminium combines crisp design with straightforward care

The high-quality aluminium profiles give the wall-mounted structure a clean-lined, lasting presence. Its restrained appearance works with both contemporary and simple architecture. For a cohesive result, assess the profile colour and post positions alongside the defining lines of the façade.

With the integrated drainage system, gutters and water channels sit within the structure. Connection to local drainage is essential to its function. It must suit the existing patio and remain accessible for inspection and cleaning.

Record the selected RAL designation in your project documentation. This makes later coordination with other permanently installed elements or façade touch-up work easier. The actual selected colour is decisive, not a potentially different screen display.

Use and design

Four ideas for a patio beside the house

01

Covered dining area

A fixed table zone near the kitchen or dining room shortens everyday routes. Allow for pulled-back chairs and the serving route in the layout.

02

Garden-view lounge

A sofa, armchairs and low table create a calm place to relax. An open side towards the garden preserves views and makes access easier.

03

Guest area

When visitors arrive, indoor and patio areas can be used together. Keep the doorway and connection between seating groups clear.

04

Façade design

Aligning the aluminium construction with window lines or patio edges integrates it into the existing architecture and gives this side of the house a calm, clear structure.

Site and house connection

The connection to the house is the principal technical difference from a freestanding pergola. The building wall receives the fixings, while the front posts transfer loads to the patio base. Wall construction, fixing area, ground and water management must therefore be planned together. A purely visual assessment of the façade is not enough.

Façade construction and fixing zone

Brick façades, rendered surfaces and insulated walls differ greatly in their layered construction. With external insulation especially, the visible surface is not automatically capable of carrying the load. Fixings and connection details must suit the existing build-up so the structure is securely anchored without damaging the building envelope.

Before setting the wall line, note roller-shutter boxes, window sills, eaves, lights, downpipes, vents and externally run cables. Components beside the intended area can also obstruct installation tools, connections or later maintenance.

Have a competent professional establish the load-bearing zone and ground conditions before ordering the final size. If the desired position is structurally unsuitable, the plan can still be adjusted at this stage. Changes after the patio is finished or immediately before installation are usually far more demanding.

Sun path and existing shade

The orientation of the house determines when direct sun reaches the patio, façade and furniture. Neighbouring buildings, trees, roof overhangs and the building shape also change the conditions. Observe the area, where possible, at the times it will mainly be used.

On sunny patios, light façades and paving can reflect extra light, while dark surfaces absorb heat. Position seating so outlook and comfort work together. Sensitive plants or textiles should not remain permanently in a place with hours of direct sun.

More area does not automatically mean greater comfort. It is often better to position the table or lounge appropriately within the covered zone and retain an open transition to the garden. A sketch of the sun path supports a realistic assessment of the proposed furniture.

Patio base and front posts

The posts need suitable, load-bearing ground. Patio pavers or decking are only the visible surface; the construction beneath is what matters. Foundations, edging, voids, services or drainage components can affect possible post locations.

For an existing patio, establish whether the sub-base is suitable at the intended post locations or requires preparation. With a new patio, these areas can be coordinated early with the patio contractor. Finishes can then meet the posts neatly and later disturbance of completed surfaces can be avoided.

The existing fall must also be considered: it should take water away from the house, while allowing sound installation at the intended post positions. Record differences in level, steps and patio edges accurately. A patio that looks level does not necessarily have the same height everywhere.

Patio use and comfort

Comfort comes from clear zoning: seating and dining areas, door zones, serving routes and transitions to the garden all need adequate space. If lighting or power connections are planned, include them early and ask a licensed electrical professional to assess the outdoor installation.

Everyday life between home and garden

A surface near the door makes laying the table easier but must not narrow the passage. Test the route to the table with every seat occupied: people carrying dishes or trays should not have to squeeze between pulled-back chairs and the doorway.

Patio doors must remain fully operable. As well as the swing or opening area, space is needed to stand, carry items and move aside. Thresholds, steps and narrow passages need particular attention because furniture and walkways can quickly obstruct one another there.

The main route to the garden should be direct and not pass through the narrowest part of the seating area. Where there are two exits, one can serve daily passage and the other the dining or lounge area. This keeps seating calm without restricting garden access.

Lighting and technical preparation

For evening use, a combination of general lighting and focused table light is usually more pleasant than one very bright fitting. Wall lighting can emphasise the house connection, while lower lights highlight furniture. Avoid glare towards living areas or neighbouring properties when positioning lights.

Decide on switches, power outlets and cable routes before installation. Establish which connections come from the house and where cables would be visible. Cables added externally later can disrupt the design and make gutters or connections harder to reach.

Lights and cables must not interfere with fixing points or water routes. All components must suit their intended location; have installation and connection handled by a licensed electrical professional. Even if fixed lighting is not planned initially, conduits or connection points can be included during planning.

Furniture by intended use

For a dining area, table size, chair width and the space needed behind chairs are decisive. For a lounge, sofa depth, viewing direction and access to the low table matter instead. If both uses are combined, make one zone the clear focus rather than creating two permanently cramped areas.

Large planters, barbecues and storage furniture are easily overlooked in early sketches. Yet they need floor space and must not conceal important outlets or inspection points at the façade and posts. Movable items provide more flexibility when the patio is rearranged for visitors.

Do not assess the layout only with chairs pushed under the table. It works only when people are seated, someone is serving and the patio door opens at the same time. Use tape or movable objects to mark the outline of planned furniture on the patio before ordering.

Side access and low-barrier routes

Side paths matter when bins, bike storage, a garden shed or beds behind the patio need to be reached. A post in the wrong place can narrow a previously convenient passage. Consider not only table use but also items regularly carried through the space.

For access with as few thresholds as possible, the door threshold, patio finish and drainage must work together. The pergola does not alter requirements for the door connection. Account for existing heights and coordinate with building waterproofing when renewing a patio.

Prams, serving trolleys and larger garden furniture need more circulation space than one person walking. Show these requirements in the layout before finalising post locations and fixed planters. A sufficiently wide main route is more useful day to day than several narrow leftover spaces.

Drainage, care and long-term planning

For long-term use, size and colour are not the only considerations. Set the outlet for the integrated system and keep cleaning and inspection areas accessible. Structural decisions remain in place, while movable furniture and planters can later adapt to changing habits.

Colour selection in relation to the building

The frame colour determines whether the wall pergola blends into the façade or stands out as a separate feature. Repeating the colour of windows or doors creates a connected look. A contrast works when the pergola should clearly define the patio area.

Alongside wall colour, consider the roof edge, plinth, ground finish and permanently installed balustrades. Too many different tones can quickly make a small side of a house feel busy. Use enduring materials as references rather than replaceable cushions or seasonal plants.

View the desired RAL colour in daylight directly at the building whenever possible. Render texture, brickwork and reflective glazing can change its effect. Depending on the shade, dust or splash marks may also be more or less noticeable, which can matter on a frequently used patio.

Outlet for the integrated system

The guttering and drainage system needs a clearly defined connection to onward water management. Before installation, establish where water leaves the structure and how it will then be directed away from the house. Otherwise, water may escape uncontrolled at the patio edge and create puddles or splashback.

Existing downpipes, soakage areas or rainwater-storage options can be considered where local conditions and sound workmanship allow. Do not improvise connections. If unsure, coordinate the solution with the patio contractor or a suitable tradesperson.

Set the water route before new paving, slabs or drainage work begins. Pipe runs and transitions can then be integrated into the sub-base instead of adding visible channels or cut-outs later. For an existing patio, check that the proposed outlet area can be accessed.

Cleaning and regular visual inspection

Dust, pollen, leaves and other deposits collect on a structure beside the house. Inspect gutters and outlet areas regularly, especially where trees grow near the patio. Remove debris before it restricts water flow or dries onto visible surfaces.

Clean aluminium surfaces with gentle products suitable for the particular finish. Aggressive or abrasive products can damage the visible coating. Follow the product-specific care guidance before extensive cleaning and, if necessary, test the product in an inconspicuous area.

When carrying out care, inspect joints, visible fixings, the wall connection and water routes as well. If changes are found, do not conceal or ignore them; have them professionally assessed. Furniture and planters must not permanently block access to these areas.

Adaptable layout

Habits and garden furniture often change sooner than the pergola. A large dining table wanted today may later make way for a lounge or smaller seating group. Clear edge areas and well-positioned passages make such changes easier without altering structural elements.

Built-in cabinets, heavy planters and permanently fitted equipment limit this flexibility. Place them outside outlet, inspection and main circulation routes. Mobile storage or planters can be moved more easily for cleaning and rearranging.

Also consider views from adjacent indoor rooms. Posts and furniture remain visible there all year, even when the patio is not in use. A balanced arrangement preserves garden sightlines and avoids tall furniture directly in front of windows.

Prepare installation sensibly

Check existing conditions and prepare the work area

Before installation, confirm dimensions, wall construction, ground conditions, levels and the outlet point. Remove movable furniture and planters from the work area and keep the route from the delivery point to the patio clear. Protect sensitive façade and ground surfaces appropriately for the work planned.

Establish in advance whether external cables, lights or downpipes are in the work area or must remain accessible. Arrange any necessary access to the house so nobody needs to cross the installation zone. A clear space for components, tools and packaging also supports an orderly process.

After installation, inspect the wall connection, post areas and intended water routes. Fully furnish the patio only afterwards. This keeps all important points visible for final checking and avoids moving heavy furniture again.

Guidance for choosing

Wall pergola, freestanding pergola and bioclimatic pergola compared

Wall pergola

It is fixed directly to a suitable building wall and defines the immediately adjoining patio area. Its planning particularly depends on façade construction, doors and windows, and local water management.

Freestanding pergola

It stands independently of the building and can define a separate seating area in the garden. It needs its own site and ground planning; a load-bearing house connection is not part of its concept.

Bioclimatic pergola

A bioclimatic pergola is a version with an adjustable roof, allowing light and air to be regulated more flexibly. Whether this function is wanted depends on the intended use; assess it separately from whether the pergola is wall-mounted or freestanding.

Questions to answer before choosing

FAQ – Bloomcabin Wall Pergola

How do I plan the right area for dining or lounging?

Draw the dining table or lounge to scale, then add space behind chairs, passageways, open doors and the route into the garden. Choose the appropriate area within the available size range only after doing this.

What should I consider for doors, windows and shutters?

Compare the model’s fixed overall height with window tops, shutter boxes, eaves, lights and other façade elements. Doors and windows must still open and operate fully after installation.

How are the aluminium profiles maintained?

Remove dust and deposits using gentle products suitable for the particular surface. Avoid abrasive or aggressive cleaners and follow the product-specific care guidance.

What must be established before wall installation?

A competent professional should check the wall construction, load-bearing fixing zone and suitable fixing solution. Also allow for insulation, shutter boxes, cables, lights and downpipes.

How do I choose a suitable RAL colour?

Use permanent elements such as window frames, doors, balustrades or the plinth as a guide. Compare the desired shade in daylight directly against the façade and ground finish whenever possible.

How should I plan water drainage?

Before installation, establish where the integrated guttering and drainage system joins local water management. From there, water must be directed away from the building in a controlled way; keep the transition accessible for cleaning and inspection.

Can the wall pergola be installed on an existing patio?

Whether installation is possible depends on the sub-base at the intended post positions, the fall, level differences, services and existing drainage. Pavers or decking alone do not show whether the ground beneath is sufficiently load-bearing.

Which areas must remain accessible for care and inspection?

Gutters, outlet areas, visible fixings, the wall connection and post areas should remain accessible. Do not permanently place large planters, cabinets or other heavy furniture directly in front of them.

Complete your selection

Plan the Bloomcabin Wall Pergola to suit your house and patio

Complete your choice only after the building’s technical suitability and the intended use have been checked together in one plan. This lets the selected configuration be matched to the site. Before ordering, ask your council whether the roofed structure at this location requires building consent, resource consent or both; the answer depends on its actual design and use.

Bloomcabin New Zealand

Planning checklist

✓ Define the main use and choose a suitable area within the available size range

✓ Check the load-bearing wall zone, patio depth and ground beneath the posts

✓ Mark the planned layout on the patio and test door movements in practice

✓ Compare the RAL colour with the façade, windows and ground finish

✓ Set the outlet point and onward water route away from the house

✓ Keep installation access clear and plan accessible maintenance points

Close x
10 year warranty
Bloomcabin is proud of its high-quality products and maintains these standards every day through a range of manufacturing and quality-control processes. This is backed by a 20-year warranty against wood rot in timber structures and a 10-year warranty against functional defects.
45% BETTER PRICES WHEN YOU BUY ONLINE
Shopping online is convenient and cost-effective
Ask us!
Get in touch
Email:
This email address is being protected from spambots. You need JavaScript enabled to view it.
Reg. No.:
38944924
Address:
Thriges Plads 6, 5000 Odense C, Denmark
Social media
Follow us on Instagram, Facebook and Twitter to find out about news and offers from Bloomcabin:
X
Have questions and want us to call you back?
+64
−
✖