
After-Dark Pergola Privacy: Test Lighting and Sightlines
Pergola privacy guide
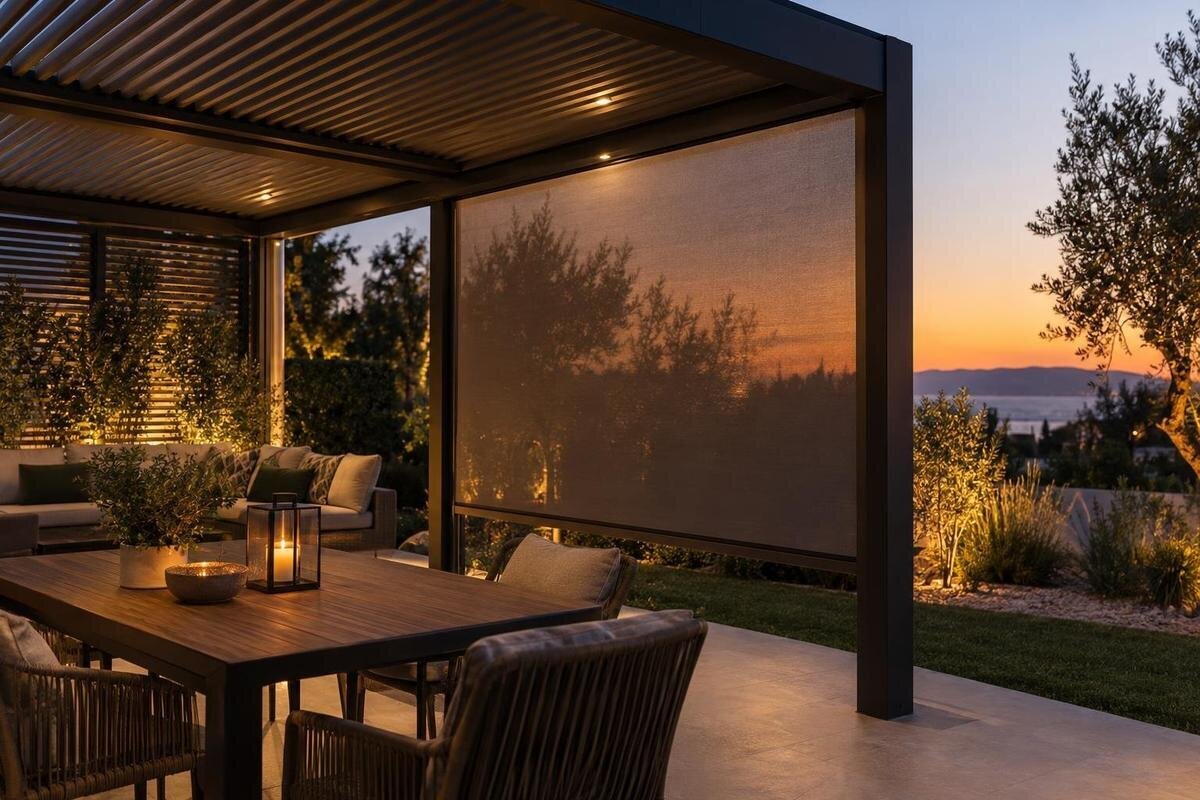
At night, pergola privacy depends less on how a screen looks in daylight than on the balance between light behind it and light around it. Fabric that appears solid in the afternoon may show silhouettes when the seating area is lit; glazing can reflect one viewpoint and reveal another. The practical test is to reproduce the lighting you actually use, then check the seating area from the approaches, windows and property edges that matter. This guide covers sightlines, fabric and glazing tests, and how to keep lighting from making occupants more visible.

Why pergola privacy changes after dark
Daylight usually lights the pergola and its surroundings from a broad source, so screen texture and gaps are easy to read. After dark, a lit seating area against a darker garden or path can make occupants and movement more noticeable to someone outside. The reverse can happen when the outside is brighter than the area behind the screen. The material has not changed; the contrast has. A panel that looks solid in afternoon light may show a person when a table lamp or nearby indoor lights are switched on. A window behind the seats can matter as much as a pergola light.
Treat brightness as part of the privacy test, not as a finishing detail after choosing a colour. Human vision takes time to adjust, so someone arriving from a bright room may see a dark outdoor area differently from a person who has been outside for several minutes. With glazing, reflections can add a second image over the view. A reflective or tinted surface does not guarantee one-way privacy: what it reflects or reveals depends on light levels, direction and angle. Decide what privacy means for you, too. Faces may be hard to distinguish while movement or a person’s outline remains obvious.
Map the views from seats, paths and windows
On a simple plan, mark the seats, table, doors and edges of the proposed pergola. Then add the places from which someone could see in: a path or gate, the back door, nearby ground-level windows and any elevated windows with a direct view. Think about ordinary lines of sight, not an imaginary observer standing precisely on the boundary. Someone approaching from an angle may see past the end of a screen even when the main seating position looks sheltered. Draw separate lines from each important viewpoint to the part of the seating area you want to protect.
If the structure is against the house, mark windows and doors before deciding which side needs screening. When considering the Bloomcabin Wall-Mounted Pergola listing, show its proposed position in relation to those openings on your plan. Include views from the house as well as views into it, especially where lit rooms face the outdoor area. Note whether a viewpoint sees the screen straight on or across a corner, and which seats fall within that view. Keep each important viewpoint labelled so you can return to it during the night-time test. This sketch turns a general wish for privacy into specific sightlines to assess.
Test the lighting combinations you actually use
Do not test only with the pergola lights off. Reproduce the combinations you expect to use: indoor lights on with the outdoor area dark, any pergola lighting on, both indoor and outdoor lights operating, and the softer setting you might use for a meal. If you often leave a door open, include that too. A test at dusk is useful, but repeat it once it is properly dark; the balance between inside and outside can shift as natural light fades. Use light sources in their intended positions rather than a bright torch held against the screen. If you use different settings, check the brightest and dimmest ones you are likely to keep.
Ask one person to sit or move in the pergola while another checks the viewpoints on your plan. Swap roles: people inside can underestimate what is visible from outside, while an observer may not notice how visible a lit room is through nearby glazing. Check from the distance a passer-by or neighbour would actually use, then repeat from an oblique angle. Give your eyes time to adjust at each position, and note whether you can identify a face, a gesture or only a general silhouette. Where a relevant viewpoint is not accessible, use the nearest practical position and avoid assuming a path and an elevated window offer the same view.
Fabric screens need a night-time sample test
With fabric, test the actual weave and finish, not just a colour swatch or photograph. Hold a sample in the same plane as the proposed side and light the occupied area as it would be during use. Look from both directions, at a close viewpoint and farther away, and check what happens when someone moves behind it. An open weave may leave direct gaps; a denser weave may still transmit enough light to show a silhouette. Keep the sample at the right orientation, and remember that a small piece cannot reproduce every seam or edge in a full screen.
Colour alone is a poor guide: the weave, brightness behind the cloth and angle of view all affect what stands out. Look for details that matter to you, not simply whether light passes through the fabric. When discussing a screen for the Bloomcabin Pergola model, identify the fabric you tested by its exact weave, finish and colour, rather than describing it only as dark or light. Check that the sample has the same construction as the intended screen. A visually similar curtain or shade cloth is not a substitute for testing the proposed material, especially if your main concern is recognising faces rather than noticing movement.

Glazing can blur a view without hiding silhouettes
Clear glazing leaves a direct line of sight, even if a photograph makes the pane look reflective. Obscure, frosted or patterned finishes can blur fine detail, but a person, movement or strong light source may still show through as a shape. The degree of obscuring varies with the finish and how close someone is to the panel. A surface that seems private from across the garden may reveal more to someone standing close to it. Check a sample while seated and standing, and from likely approaches, rather than looking only straight through it.
Reflections make the test more complicated, not more certain. At night, bright indoor or pergola lights can appear on a pane, while the view behind it changes with the observer’s position. Do not treat tint, reflectivity or a mirror-like daytime effect as a permanent screen. If you are considering glazing alongside the Bloomcabin Bioclimatic Pergola, record the proposed panel finish and position separately from the base model. Note whether an observer sees a reflection, the occupied area or both at each viewpoint. This helps distinguish a reflection that briefly masks the view from a finish that consistently obscures the details you want hidden.
How light position affects silhouettes
A light source’s position can change whether someone reads as a silhouette. Put a temporary light where a table or reading light would sit, then view the screen from outside. If that source is behind an occupant from the observer’s angle, it may outline them. A bright source aimed towards the observer can cause glare, but glare is not a dependable privacy barrier. Check the view along the side and from the ends, because a light that seems shielded from one point may be exposed from another. Consider the path or window receiving stray light as well as the seat being lit.
Try moving or dimming a portable lamp before choosing permanent positions, and note which settings provide usable light without making occupants stand out. A few sources used only where needed may be easier to assess than one bright source beside a screen, but the right arrangement depends on how you use the space. If you are considering the regular pergola product details, put your proposed lamp positions on the same sketch as the structure and screens. Record the arrangement that worked, including which indoor lights were on, so it can be reproduced. Have a suitably qualified electrician plan and install permanent electrical work.
Check panel edges, openings and standing views
Check the whole edge of every proposed screen or glazed panel: top, bottom, ends, corners and any gaps created by doors or access openings. A direct view may slip around the end of a panel even when the seated person is hidden from straight ahead. Walk the route a visitor might take, then look back towards the seats from each point. Pay attention to places where someone pauses, such as a doorway or turn in a path, not just the property boundary. Repeat the check with the side treatment in the position you expect to use.
Also check whether the view changes when someone stands up, enters the pergola or moves a chair. A sightline blocked while everyone is seated may become clear during normal use; an upper-level window may see over a side treatment altogether. If a panel can slide or be drawn aside, test both its usual position and the position used for access. When enquiring through the bioclimatic pergola product page, describe which opening needs to remain usable and where screening would end. Ask how the proposed side accessory would operate in that arrangement. Do not assume a third-party screen or panel will fit because its general dimensions look close.
Choose a side treatment for each sightline
Fabric and glazing solve different visibility problems, so compare them against the view you want to keep as well as the one you want to block. A denser fabric can obscure the scene behind it but may also hide the garden; a more open fabric can retain more light yet show movement. Clear glazing preserves a view but also preserves a sightline at night, while a more diffusing finish may soften detail without hiding silhouettes. These are tendencies to test, not guaranteed results for every weave, finish or light level. Compare samples from the same seat and under the same lighting.
Write down your priority for each side rather than choosing one material for the whole perimeter by default. You may need to interrupt one direct view while keeping another open; compare that exact arrangement, including the exposed end and the lighting beyond it. If your shortlist includes the Wall-Mounted Pergola model page, use your plan to explain which side faces the unwanted view and which faces the garden. Consider the result from each seat, not just from the centre of the pergola. A treatment that meets the privacy goal but removes a valued view may call for a different position or a more limited screened area.

Mock up the screen before settling on a material
A practical mock-up can be simple: mark the proposed panel edges and access openings, then position the table and chairs as you expect to use them. Place the material sample where the most important sightline crosses the proposed screen. Avoid testing cloth directly against a bright window if the planned screen will stand farther away; the space behind it affects the appearance. Use the marked edges to assess the overall layout separately from the sample’s ability to obscure detail. This lets you distinguish a view through the material from a view around it, rather than attributing both problems to the fabric or glazing finish.
Use the observer positions and lighting states from your sketch, and record what can actually be recognised: a face, clothing, movement or only a broad outline. A phone photo can help you remember an angle, but automatic exposure may brighten a dark scene or dim a bright one, so it is not a reliable substitute for seeing the space in person. Label the mock-up with the model under consideration, such as the Bloomcabin Pergola product listing, and note which parts were represented by samples or markings. If the arrangement fails in the main use condition, change one light or screen position at a time so you can identify what improved the result.
Record the privacy result for the model enquiry
Before committing, define the result in plain terms: for example, whether you want to stop a direct view of the seated area from a particular window, or make faces and activity less distinct from a path. Note the viewpoints, whether people will be seated or standing, which lights are normally on and which side treatments you tested. Separate views you want to block from those you want to retain, and record any trade-off you accept, such as losing a garden view from one seat. This is more useful than a broad label such as private fabric or privacy glass because it describes the conditions the design needs to meet.
Put that record beside the precise pergola model you are discussing, using the Bioclimatic Pergola listing if that is your choice. Confirm the exact screen or glazing finish, its proposed position and its compatibility with the model. Check whether each component is included or optional; a base-model name alone does not specify the side treatments or lighting supplied. Keep the agreed arrangement distinct from alternatives you considered, so an earlier sample result is not mistaken for the final choice. If the proposed finish differs from the sample, repeat the relevant test. That gives you a decision based on your site and lighting rather than a daytime impression alone.
Frequently asked questions
Can a fabric screen look private by day but show silhouettes at night?
Yes. Visibility depends on the weave, the light behind the screen and the observer’s angle, not just the fabric’s colour. Test a sample in the position and lighting you expect to use, and look from both sides.
Does frosted or patterned glazing hide people after dark?
It can soften detail without hiding movement or a person’s outline, particularly when the area behind it is lit. Check the actual finish at the distances and angles that matter to you; a small sample may not show the whole panel’s reflections.
Do tinted or reflective panels provide one-way privacy?
No finish guarantees one-way privacy in every lighting condition. Relative brightness and viewing angle affect what is reflected and what can be seen through the panel. Test from the occupied side and the likely outside viewpoints after dark.
Where should I stand when testing pergola privacy?
Check from the seats, doors, paths and windows that matter, from both seated and standing height. Include oblique views and the ends of each proposed screen. If a viewpoint is on neighbouring property, arrange an observation with permission rather than assuming a boundary view is representative.
Can a phone photo confirm that a screen is private?
Not on its own. A phone’s automatic exposure can brighten a dark scene or dim a bright one, changing how visible the screen appears. Use a photo to record an angle if helpful, but judge the result in person with someone observing from outside.
A dependable night-time privacy choice is the one that works from the viewpoints you have mapped, under the lights you will really use. Testing the material and full side arrangement together reveals whether fabric, a glazing finish or a lighting change is doing the job, and where a sightline remains. Make the choice on that observed result rather than on a daytime sample or a product label.
