
Planning Retractable Pergola Screens: Space and Guides
Pergola planning guide
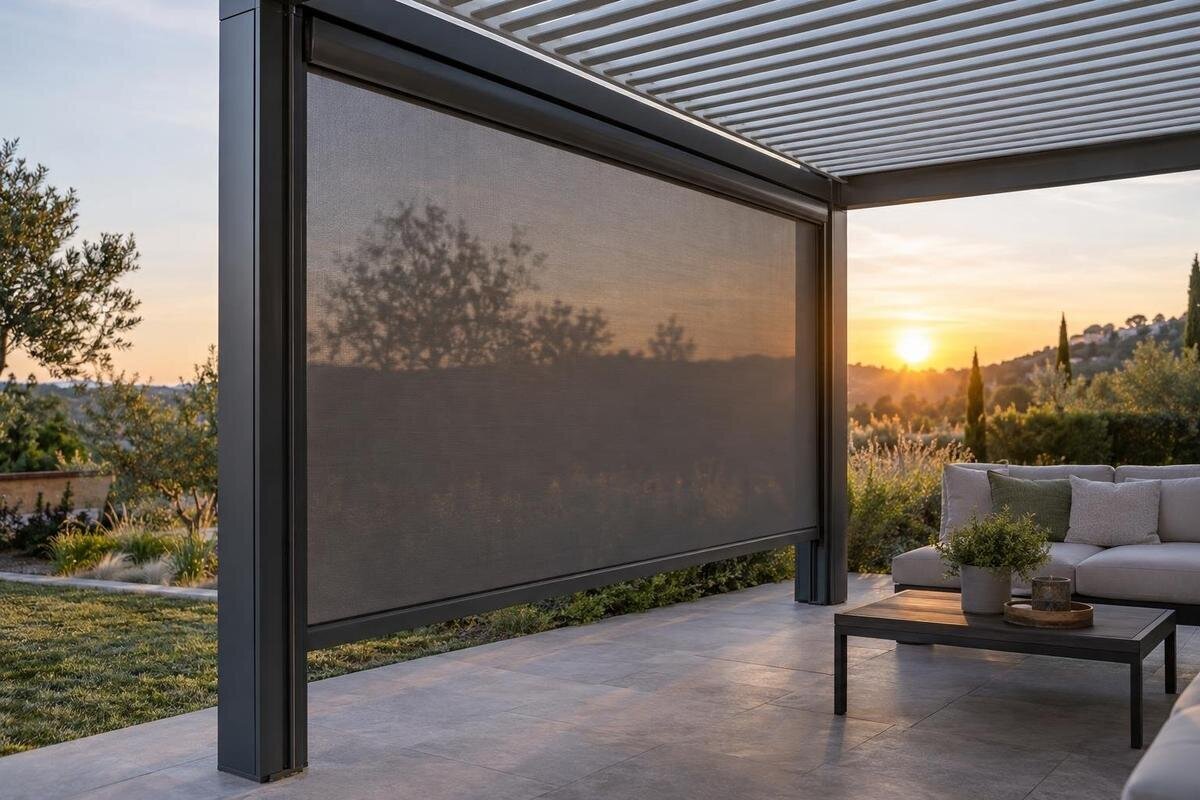
Planning a retractable pergola screen means accounting for more than the open span. The screen may leave a housing or another stowed component at an edge, side guides can reduce the usable opening, and the moving area must remain clear. Cleaning and inspection also need a practical route. Because designs and supported accessories vary, use a drawing for the exact screen and pergola model; do not assume a screen shown separately is included or compatible.

Plan the screen in both positions
A screen plan needs two outlines, not just the clear opening: the area it covers when deployed and the footprint it occupies when retracted. Mark which side of the pergola is being considered, the expected start and stop positions, the direction of travel and where the screen is meant to stow. Those details depend on the design; the word retractable does not tell you whether the screen rolls, slides or moves in another way. Ask for a drawing of the proposed system before reserving space. A simple rectangle on a plan can miss projections that matter in daily use. If a side has several bays, label each one rather than treating the full length as a single opening.
Draw the side in elevation as well as on the site plan. Record the clear width and height, the relevant post or wall faces, overhead members and any fixed fittings near the bay. Mark the proposed guide lines and the stowed outline using dimensions for the chosen screen. The elevation shows the vertical relationships that a site plan alone cannot explain, such as the space between a housing and an overhead member. If you are considering the Bloomcabin Pergola product page, use the model name to identify your enquiry. Keep unknown measurements blank until the supplier or installer provides them, and mark provisional measurements so they are not mistaken for confirmed clearances.
Allow for the retracted housing
Where a screen has a housing or cassette, that component still occupies space when the screen is retracted. Record the outside envelope shown on the drawing, not just the fabric width; end caps, brackets or other fixed pieces may add to it if the design includes them. Note the housing’s projection from its mounting face as well as its length and height. This is the difference between knowing that a screen covers a bay and knowing whether its stowed assembly sits clear of a nearby wall, post or overhead member. Do not estimate its size from a photograph, which may hide the ends or show a different configuration. Write down the reference surface used for each dimension so the plan and product information can be compared accurately.
Check the proposed position from the places where people actually approach the pergola: along the patio, beside a wall and near any doorway next to the opening. Note whether the housing would sit in front of a light, meet a downpipe or make another fitting harder to reach, then confirm the actual arrangement on a drawing. When enquiring about the model on the Bloomcabin Bioclimatic Pergola listing, ask for the proposed housing position, its outer profile and the space needed to reach any parts that require routine inspection. Compare those details with the nearby fittings, rather than assuming a housing will fit neatly inside an existing edge.
Check the footprint of the side guides
Where the proposed screen uses side guides, treat them as physical parts of the layout, not lines that can be placed anywhere on an elevation. They may sit on a post face, beside an opening or at another fixing point specified for the design. Their width and projection can reduce the usable opening and affect nearby handles, trims or fittings. Confirm the actual guide dimensions and intended position rather than relying on a generic sketch. Also check whether the guides sit within the opening or outside its line; that distinction changes the clear space available and how the screen relates to adjacent surfaces.
Ask for the guide’s full intended length, its position relative to the opening and any end pieces shown on the drawing. Check that the proposed layout does not put a guide across a hinge, handle or other part that needs to remain accessible. For an enquiry about the Bloomcabin Wall-Mounted Pergola page, identify the side to be screened and the nearby wall or post faces on your sketch. Have the supplier or installer confirm that the proposed screen and its fixing positions are supported for that exact model. Where the mounting surface or position is uncertain, get it assessed by a qualified professional rather than choosing a different fixing point by eye.
Keep the travel path clear
The screen needs a clear route between its deployed and retracted positions. Draw that route for the full movement, not only the final outline at either end. Depending on the proposed design, the moving part may travel down, across or along a guide; use the supplier’s drawing to show where it passes and where any moving edge or bar sits. This helps distinguish the screen’s travel area from the narrower space taken up by a guide. If a drawing shows only the open and closed positions, ask for enough detail to understand the route between them before deciding that the surrounding space is clear.
Mark fixed obstacles across the whole route, including door hardware, downpipes, taps, lights, wall trims and any fittings close to the opening. Then consider items that move, such as chairs or planters, in the arrangement you use most often. A screen that clears an empty bay on paper may still meet something when the patio is set up for everyday use. If you are considering the Bloomcabin Pergola model details, include this furnished layout in your screen enquiry so the proposed movement can be compared with it. If a movable item needs to be shifted each time, note that as part of the layout rather than treating the route as permanently unobstructed.

Leave room to use the screen
Allow space for a person to approach and operate the screen in the way its design requires. A manual system may need an accessible handle or edge; a powered one may have a specified control location. These details vary, so ask where the operating point is and whether it remains reachable with the screen in either position. Do not assume that an operating part will be on the side that is most convenient for your patio. Mark it on the same drawing as the housing and guides, then check that a wall, furniture or another fitting does not block access.
Include ordinary circulation around the pergola in the plan. A chair placed beside a guide, for example, may be easy to move occasionally but awkward if it blocks the usual route to the screen. Distinguish permanent obstacles from furniture that can be shifted, and decide whether moving it each time is acceptable. If the proposed system is powered, record the supplier-specified control position and have any related installation planning confirmed separately by a qualified professional. When discussing the model shown in the Bloomcabin Bioclimatic Pergola information, ask how the proposed screen would be operated, so you can assess access alongside the rest of the patio layout.
Make cleaning and inspection practical
Routine care needs space too. Depending on the chosen design, the housing, guides or other exposed parts may need periodic cleaning or inspection. Check the screen’s care instructions for which surfaces need attention and how they should be reached; do not assume that all systems are cleaned in the same way. Note whether the relevant parts face the patio, a wall or another side that would be difficult to reach. Leaves, dust or other deposits may make regular access useful, so consider how the layout will work after the screen has been in use, not just when everything is new.
Ask what access the manufacturer or installer expects around the housing and guides, and show that space on the drawing. If a planter, fixed fitting or narrow gap would have to be cleared each time, factor that into the maintenance plan. Avoid assuming that adjacent parts can be removed to make routine care possible; confirm any such requirement with the supplier. If you are considering the Wall-Mounted Pergola product listing, include the space beside the wall in your enquiry about screen maintenance. If inspection would require awkward access or work above normal reach, ask the installer to explain a practical method before the layout is finalised.
Resolve corners and neighbouring screens
A screen on one side can affect the space available for another side, especially near a corner or shared post. The guide for one screen may occupy the same area that a second screen needs, and the two moving parts may have different stopping points. Do not assume they can cross, overlap or meet neatly simply because each screen appears to fit on its own elevation. Ask for a drawing of the proposed corner arrangement, showing both guides and the retracted positions as well as the deployed screens.
Label each side separately and mark any wall, post or other fixed corner feature between them. Confirm whether the screens are intended to stop short, meet at a particular point or use a specific supported corner arrangement. That avoids trying to solve a clash later by shifting a guide or changing the screen position without checking the design. In an enquiry about the Bloomcabin Pergola entry, specify both sides and show their shared corner on the same plan. Get the layout checked for the actual combination of sides, not just for one screen at a time, so the proposed positions can be considered together.
Confirm the screen suits the exact model
Compatibility needs to be confirmed for the exact pergola model and the screen design you intend to use. Similar-looking frames or matching opening dimensions do not prove that a screen’s guides, housing or fixing arrangement are supported. Ask the supplier which screen designs are intended for the chosen model and side, and request the relevant dimensions or drawing. If a third-party system is being considered, ask for explicit confirmation rather than relying on a general statement that it is a standard size. Compatibility is about the whole arrangement, not simply whether the screen appears to span the opening.
Check what the quoted package actually contains. The screen, housing, guides, operating parts and any other required components may be listed separately, so ask which items are included and which are not. Confirm that the dimensions and layout relate to the model and configuration you are purchasing, not to a similar product or an example image. The Bloomcabin Bioclimatic Pergola page identifies the named model, but does not establish screen compatibility or what is supplied with it. Keep the supplier’s written answer with the drawing, and use the same model and screen names on both so there is a clear reference for the selected arrangement.

Record the site dimensions clearly
A useful site record shows the fixed features that limit the screen layout. Measure the opening between the surfaces that will actually define it, and note nearby posts, walls, overhead members and fittings. Use one unit throughout, label each measurement and say where it was taken from. Add photographs that show the same areas from more than one angle, but do not use a photograph as a substitute for dimensions. If the pergola or surrounding work is not yet complete, identify measurements as provisional and plan to check them again against the finished position.
Transfer the supplier’s screen outline onto both the plan and elevation, then compare it with the recorded site features. Removable tape or a paper template can help show where a housing or guide would sit, provided it is suitable for the surface; use the actual dimensions from the proposed screen rather than choosing a guessed allowance. Mark the usual positions of furniture and any route that needs to stay clear. This makes conflicts easier to spot while the layout can still be discussed. Keep the sketch current if a fitting, wall or pergola position changes, because an old drawing can give a false sense of clearance.
Get the final layout confirmed
Before committing to a screen, ask for a dimensioned plan and side elevation that show the exact pergola model, the proposed screen, its guides and its position when retracted and deployed. The drawing should make the housing or other stowed parts visible, show the intended travel route and identify any access needed for operation or care. If an essential clearance or fixing position is not shown, ask for it to be clarified rather than filling in the gap yourself. This is a practical way to compare the screen proposal with the site sketch and to identify questions while the design is still being considered.
Check that the written confirmation matches the configuration you intend to order, including the side or bay, the screen design and the parts included in the package. If the on-site position changes after the drawing is prepared, have the clearances reviewed again. Where a fixing surface or installation detail needs professional assessment, ask the supplier or installer who is responsible for confirming it. The aim is not to produce a complicated plan: it is to make sure the retracted assembly, guides, travel and access all belong to the same, model-specific layout.
Frequently asked questions
What should I measure for a retractable pergola screen?
Measure the clear opening and record the screen’s full outline in both its deployed and retracted positions. Include the housing or other stowed parts, guides and nearby fixed obstacles. Use dimensions for the exact proposed screen, not estimates from a photograph.
Does a pergola model automatically include a screen?
A model name or product image does not establish what is included. Check the written quote for the screen itself, its housing, guides and any other required parts, and ask whether that specific design is supported for the pergola model.
Can I fit a third-party screen?
Do not assume that a screen will fit because its nominal size looks right. Ask the supplier or installer to confirm in writing that the exact screen and guide arrangement are suitable for the specific pergola model and proposed side.
Can screens on two sides meet at a corner?
That depends on the supported layout. Request a drawing showing both guides and the moving parts at the corner, including where each screen stops. Do not assume the screens can overlap or form a continuous corner.
How much space should I leave for cleaning the guides?
There is no universal clearance. Follow the care instructions for the chosen screen and confirm the access needed to inspect and clean its housing and guides. If access would require moving fixed fittings or dismantling parts, resolve that before ordering.
A useful screen plan keeps the moving parts visible on the drawing even when the screen is put away. When the housing, guides, travel path and access for operation and care all fit around the actual pergola and patio layout, the retracted position is less likely to become an afterthought. A dimensioned, model-specific layout is a more dependable reference than a catalogue image or the nominal opening width alone.
