
Balancing Pergola Privacy With Cooling Breezes
Pergola planning
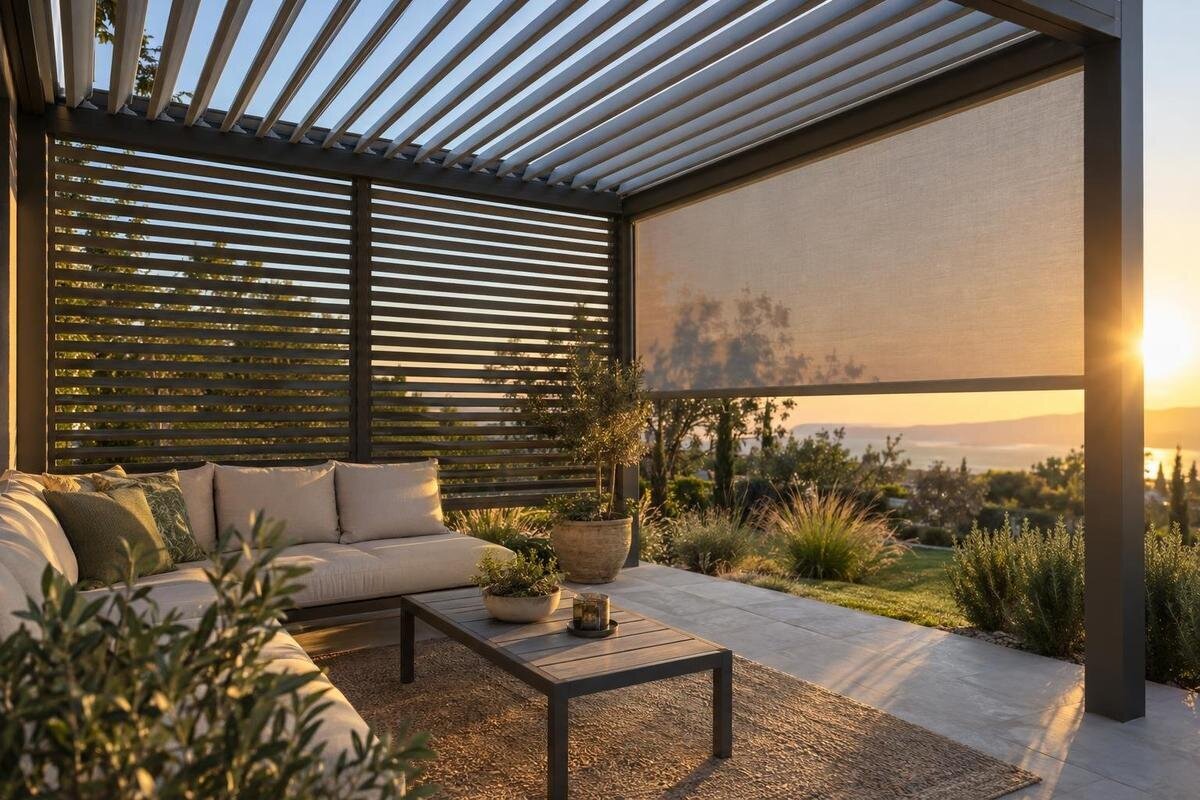
Keeping a pergola private without losing a useful breeze is mainly a question of where the screen sits and what openings remain. A panel can block a neighbour’s view while also interrupting air moving through the seating area; roof ventilation is a separate issue. Map the views from the places people sit, observe wind at roughly seated height, then screen only the sightline that needs attention. The aim is not to make every side equally enclosed. It is to protect the parts of the space that need privacy while retaining a clear, workable route for air to enter and leave.

Map the views from the seats you actually use
Draw the footprint and note how the space is used before deciding on a screen. Mark the chairs or dining table, where people normally sit, entrances and routes to the house or garden. Then note where privacy is actually needed: a neighbour’s deck, an upstairs window, a footpath or a nearby seating area. A boundary is not automatically the source of the most intrusive view, so don’t base the layout on the fence line alone. If the pergola serves different activities, include each regular seating position; one screen may protect a chair but leave the table exposed.
Add a quick side view as well as the plan. A panel can block an eye-level view from a seated position yet leave a clear line from someone standing or from a higher window. Existing walls, fences and planting also affect what can be seen. If comparing footprints, the Bloomcabin Bioclimatic Pergola is listed from 9 to 24 m²; use that range as a product-size reference, not as evidence of which sides accept screening. The drawing need not be architecturally precise, but seats, boundaries and openings should be clear enough to compare alternatives.
Observe the breeze at sitting height
A breeze at roof height is not necessarily a breeze where people sit. Visit the pergola during the hours you normally use it and notice which direction air comes from, whether it reaches the chairs and where it exits. Repeat the observation on more than one day if possible: wind shifts, and a corner may shelter one seat while another remains exposed. A light ribbon held briefly at sitting height can help show direction; it is an indicator, not a measure of speed or a promise about how the space will feel in different weather. Record whether the airflow is steady, intermittent or absent, rather than noting only a compass direction.
Add arrows to the plan at seat level, including any wall, fence or dense planting between an open edge and the chairs. These features can shelter, channel or turn a breeze, so the usual wind direction is only a starting point. If the structure is attached to a house, note which side the wall closes off and which openings remain. If you are considering a wall-mounted option, Bloomcabin Wall-Mounted Pergola is a named model to check against your site sketch, but its name cannot predict airflow beside your particular house. Local observation shows whether air can reach the seating area.
Place screening across the sightline
Use each marked viewpoint to test where a screen would intercept the view. In plan, imagine a straight line from the viewer to the seat; in side view, check whether the proposed panel crosses it. A screen on the side facing the view may be the direct solution, but an oblique view can pass around its end. Check from the actual neighbour’s window, deck or path, not only from the boundary at ground level. This can prevent a full-length panel being placed where a shorter, better-positioned section would cover the key line. If different people use different seats, test each one rather than assuming one viewpoint represents the whole pergola.
Test more than one position in the pergola. If a neighbour can see the table when people are seated but not the lounge chair, privacy may be needed only for that part; changing furniture orientation may help more than adding a low barrier. A raised viewpoint may still look over a screen, while a side angle may see around its end. If you are considering the Bloomcabin Pergola, use your sketch to ask which available side configurations would suit the proposed screen position. A marked layout makes the enquiry more specific than a general photo, which may not show the viewing angles that matter at your site.
Keep side airflow separate from roof ventilation
Side airflow and roof ventilation solve different problems. Warm air can rise and leave through a roof opening, but that does not ensure a breeze travels across the occupied area. If a screen blocks the side from which air normally arrives, movement may be reduced at seat height even when the roof is open. In the reverse situation, an open side may allow a cross-breeze without proving anything about how warm air leaves above. Treat roof and side openings as separate parts of the plan; one cannot be used as evidence for the other.
Draw a horizontal arrow for air entering and leaving around the seats, and a separate upward arrow for roof-level ventilation. If the horizontal route stops at a screen, do not count a roof opening as the missing side-level path. When assessing the bioclimatic pergola model, check any stated roof details separately from the side configuration you want; the model name alone does not establish how air will move through your seating area. The practical question is whether an open route remains where people sit, given the walls and screens around it.

Screen only as much of a side as needed
Once the view-facing side is clear, mark the smallest section that would interrupt the line of sight. A screen does not automatically need to run from post to post or continue around a corner; an open end may preserve a useful route for air and movement. But a gap placed directly in the viewing line can defeat the privacy goal, and a short panel may leave a diagonal view around its end. Check both effects on the plan before deciding the panel length. Where possible, put an opening on a less exposed edge, while making sure it connects to outdoor air rather than ending behind furniture.
Think of the space as an inlet, a seating zone and an outlet. The inlet and outlet need not face one another, but if every route passes through a dense screen, airflow may be reduced or redirected. Keep openings where they can serve movement and air circulation, and check that a table, barbecue or storage unit will not fill the gap later. A wall-mounted pergola has a wall-side edge to account for; draw that edge, the open sides and each proposed panel separately rather than assuming the whole perimeter is interchangeable. Keep access clear even when chairs are occupied.
Choose screen openness with privacy in mind
Opacity and airflow usually pull in opposite directions. A solid panel blocks direct views when it crosses the sightline, but it also blocks air through that part of the side. Slats, perforations or mesh provide openings, yet the view through them changes with the angle, spacing, distance and background. A material that looks private from close up may reveal more from a neighbour’s deck, while one that admits some air may still weaken the breeze. Avoid treating “privacy screen” as a single performance category; look at the panel from the exact angle of concern and distinguish a hidden view from a blurred one.
Ask for a sample or product description that explains how open the screen is, then look through it from the seat and from the viewpoint you want to obscure. Judge it against the actual background, rather than from close-up photos alone. Ask whether any stated openness measure refers to visibility, airflow or both; those are not interchangeable. Use the Bloomcabin Pergola model as the reference when asking which side-screen accessories, if any, are compatible. Do not assume a screen shown in another image is included.
Allow for changes in wind direction
A plan based on one pleasant afternoon can be misleading. Wind direction and strength vary over a day and between seasons, while nearby buildings, fences and trees can redirect it. Observe the pergola at the times it is most often used, including more than one typical condition if possible. Note whether an open side remains useful when the breeze comes from another direction, or whether air then meets a solid panel first. This does not require predicting every gust; it helps distinguish a layout suited to a common pattern from one that relies on a single direction. Make a note when the airflow is noticeably different.
Where wind shifts, preserve more than one possible route through the sides if the site allows, rather than closing every edge except a narrow gap. If screens are fixed, prioritise the directions that matter most and accept that airflow cannot be the same in every condition. If an adjustable screen is considered, ask whether it is approved for the exact model and how each position affects the open paths. When enquiring about the Bloomcabin Bioclimatic Pergola listing, include your wind observations and proposed screen positions so the supplier can discuss the layout you have in mind. Nearby planting also changes as it grows, so leave room to reassess.
Use seating and planting to reduce screening
Before adding a screen, try turning or relocating the seating so occupants face away from the exposed view. A chair moved a short distance or a table rotated can reduce direct visibility while leaving the breeziest edge open. A low side table, outdoor storage unit or planter may screen a narrow view for one seat, but position it without blocking the main route through the pergola. Check the result from the viewer’s side as well as from the chair: a furniture change may solve one angle and leave another untouched. This can help when only one part of the seating area needs privacy.
Planting can soften a view, but it behaves differently from a fixed panel. A young plant may offer little cover, while mature foliage can take up space or reduce airflow; seasonal growth also changes how much of the view is obscured. Consider eventual width, maintenance and whether a planter blocks an open edge, not just its height at purchase. Treat planting as a supplementary privacy layer unless it reliably interrupts the sightline you care about. Leave room for watering, pruning and access, and avoid placing dense foliage directly in the breeze route you are trying to preserve.

Confirm screen compatibility with the pergola
Do not infer screen compatibility from the fact that a pergola has posts or open sides. Ask which accessories are approved for the exact model and which edges can take them. Confirm the screen’s dimensions, attachment method, operating clearance and whether gaps remain around posts, doors or corners. If the answer depends on a model variant, give the supplier its exact name and configuration. A photograph or a screen sold for outdoor use does not establish that it fits the structure or is appropriate in the planned position. Nor does an image prove that an accessory is included.
Ask how the proposed arrangement affects the structure under the site’s wind exposure, especially if a broad, solid area is being added. Do not estimate structural performance from panel area or a generic diagram; ask the supplier and, where needed, a suitably qualified professional to review the specific combination and site. When enquiring about the wall-mounted Bloomcabin model, state which side you intend to screen and which sides will stay open. The product page identifies the model; approved accessory details still need confirmation for that configuration.
Test the layout before committing
Before committing, mark the proposed screen line on the ground and place chairs where they will actually go. With a helper at the viewing point, check which seats are visible and where the line of sight crosses the proposed screen position. This is a rough sightline test, not a substitute for a full-height sample, but it can expose missed angles and access conflicts. Repeat it with any other seating arrangements you regularly use. For airflow, sit in the planned positions during your usual outdoor hours and identify an unobstructed side route; do not attach a loose sheet or temporary panel to the pergola to simulate a screen in windy conditions.
Write the result as a short design brief: seating and main viewing points; the side or section to screen; the openness or opacity you want; the sides to leave open; entrances and paths; and the wind directions observed. Include the product model when asking about compatible accessories, clearances and any professional assessment needed for the proposed combination. A rough plan with arrows and a few measurements is more useful than a list of product features alone. It also keeps roof ventilation separate from the question that matters at the seat: whether air can reach and pass through the open sides.
Frequently asked questions
Will privacy screening stop the breeze?
Not necessarily, but a solid screen interrupts or redirects air through that part of the side. Open-weave, slatted or perforated screens may let some air through; the result depends on the material, wind direction and surrounding edges. Keep a clear side-level route into and out of the seating area, and assess the actual screen rather than relying on its label.
Does roof ventilation keep a screened pergola breezy?
Not by itself. Air may leave above while a solid panel still blocks the usual side-level path. Draw separate arrows for roof ventilation and for air moving through the seating area, then make sure the side openings still provide a route for the breeze.
Which side of a pergola should I screen?
Choose the side by tracing the sightline, not just by compass direction. Mark where people sit and the viewpoint you want to block, then identify which edge a screen must cross. Check seated, standing and angled views; the most exposed side may not be the only one people can see through.
Do mesh or slatted screens provide both privacy and airflow?
They can admit more air than a solid panel, but their openings may also allow views through. Privacy varies with spacing, angle, distance and background. Inspect a sample from the seat and the neighbour’s viewpoint, and ask what any stated measure of openness refers to; visibility and airflow are not the same thing.
Can I attach any outdoor screen to a pergola?
No. Confirm that the screen, fixings and position are approved for the exact model, and that access and operation remain suitable. A screen sold for outdoor use or shown in a photo is not proof of compatibility or that it is supplied. Seek qualified advice for site-specific structural questions.
Good privacy planning for a pergola is selective: map the views that matter, observe the breeze where people sit and keep a usable side-level path through the space. Check the open gaps as carefully as the screened sections, and treat roof ventilation as a separate consideration. A change to seating or a carefully placed planter may solve one view without closing a whole side. Once the sketch shows both sightlines and airflow, use it to confirm the exact screen options for the model you are considering.
