
Buying a Pergola Online: Pre-Order Measurement Checklist
Pergola buying guide
Buying a pergola online removes the chance to judge its size in person, so one rough patio measurement is not enough. Record the usable width, depth and overhead clearance, then mark the proposed footprint in the actual outdoor space. Note walls, fences, doors, trees, services and everyday access routes, and establish what the product listing’s dimensions refer to. This checklist helps you compare your site with information for the exact pergola, identify unanswered questions and repeat key measurements before committing to an order.
Choose the footprint before taking measurements
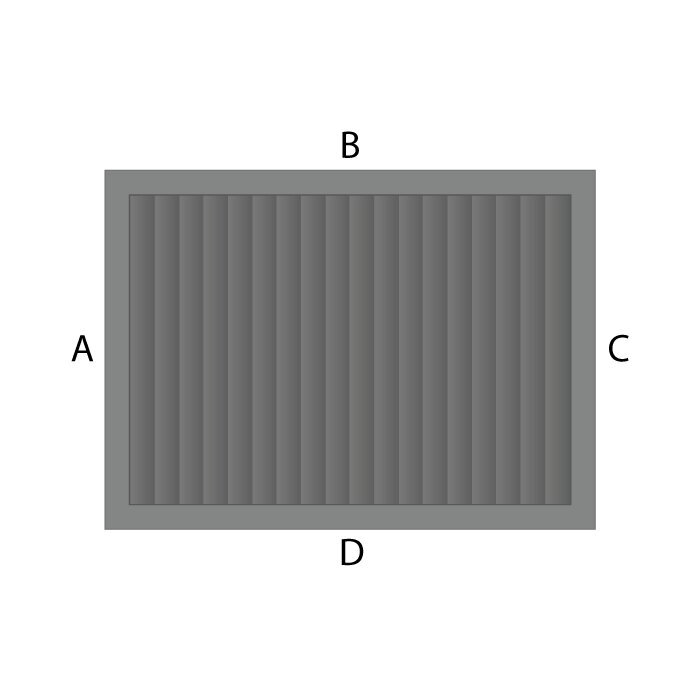
Begin by choosing exactly where the pergola is meant to sit, rather than measuring a general patio or lawn. Draw a simple plan and mark the intended outer corners. Label one direction width and the other depth, then keep those labels consistent in your notes. Include fixed edges such as a house wall, fence or paving edge, but distinguish a boundary from the usable limit: a door may need room to open, or a path may need to remain clear. If the area is angled or irregular, sketch its shape instead of describing it as a rectangle. Measure from reference points you can identify again, rather than from a pot, loose paver or movable chair. If an edge is curved, stepped or interrupted, note the precise point used for each reading. A plan with arrows and short labels helps prevent width and depth measurements being transposed when you later compare products.
Show both the space available and the space you are willing to allocate; they may not be the same. Lawn or paving can extend beneath garden beds, steps, furniture or access ways that should not be covered or blocked. Measure the clear zone after noting those exclusions, and mark which edge faces the house or garden. This makes a product comparison more meaningful: the Bloomcabin pergola product page gives you a specific listing to check, but its name alone is not a measurement. Keep your site sketch beside the product information so you can match each dimension to the same edges.
Measure width and depth at the intended edges
Measure width and depth at the points where the structure needs to fit, using a tape measure and recording both endpoints. Measure across the space, not diagonally from corner to corner; a diagonal does not tell you the usable width or depth. If walls or fences are not parallel, take readings at both ends and at the narrowest part. Record the smallest usable width and depth separately, noting where each reading was taken. If the paving edge is irregular, sketch the change rather than rounding it into a convenient rectangle, especially if it could affect a support position. For long measurements, keep the tape straight and level with the surface rather than letting it bow around furniture or planting. A second person can hold the tape at the marked point, making it easier to record the same measurement accurately on a repeat visit.
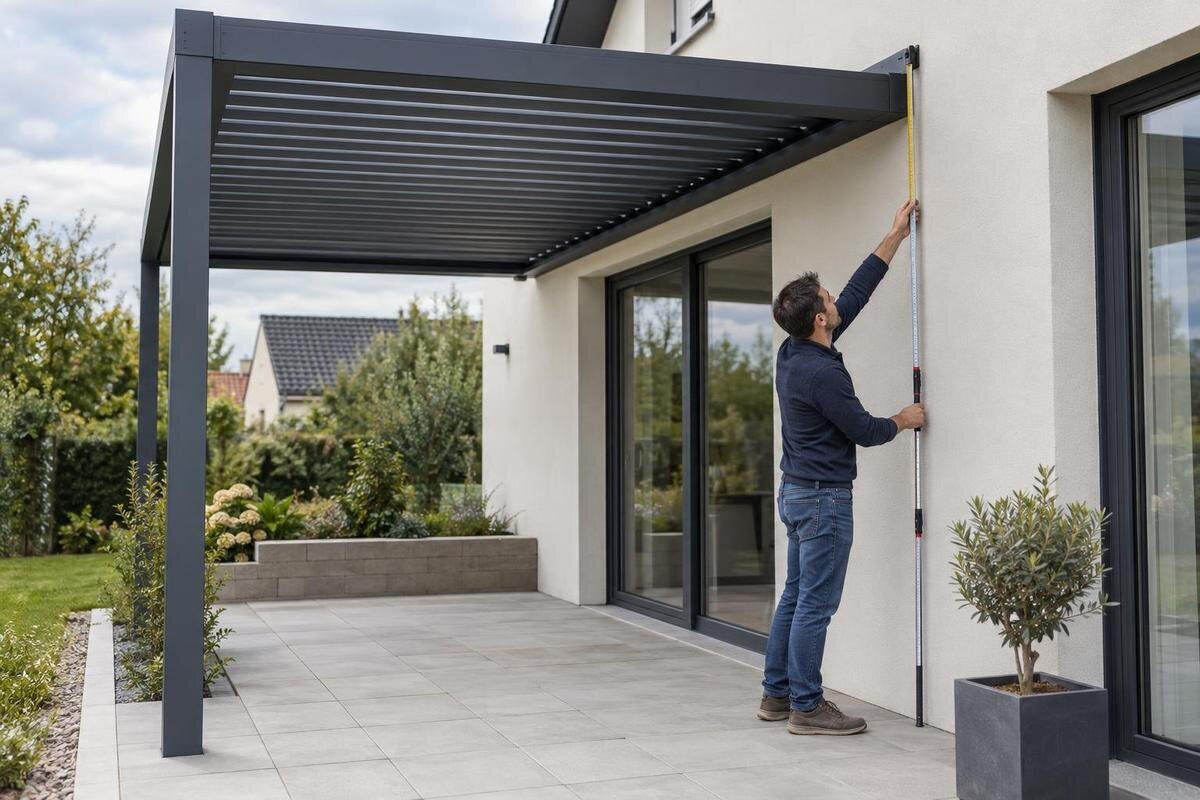
Use the same reference line each time, such as the finished face of a wall or the inside face of a fence. Write down whether your measurement is surface to surface or includes an edge you cannot use. For a wall-mounted design, measure the clear wall span as well as the available depth extending away from it. When checking the Bloomcabin wall-mounted pergola listing, match your notes to the dimensions the page or drawing actually defines. If it is unclear whether a width refers to outside edges, attachment points or another reference, ask rather than choosing the interpretation that gives the largest fit.
Check overhead clearance and listed height
Take a vertical measurement as well as a ground plan. Measure from the finished surface where the pergola would stand to the lowest obstruction above each relevant part of the footprint. Check more than one point if the patio changes level or the overhead line slopes. Eaves, gutters, balconies, open windows, branches, lights, clotheslines and service lines can all affect the available height. Record each obstruction and its location rather than writing one broad figure such as clear overhead: the centre of a space can be clear while an edge is not. Note whether a low point sits above a proposed corner, along an edge or over a route that must stay open. This makes it possible to discuss the specific constraint with a seller or professional instead of relying on a general impression of headroom.
Compare the measured clearance with the height information for the exact product and configuration. A listing may show a height without making clear which part of the structure it measures, so look for a dimensioned drawing or ask the seller to explain it. For the Bloomcabin bioclimatic pergola page, rely on written dimensions rather than estimating from an image; a product name or photograph does not establish the installed envelope. If overhead services or a complex roof edge are nearby, have a suitably qualified professional assess the site instead of assuming the space is clear.
Map obstructions and everyday access routes
Walk the proposed footprint and mark anything that intrudes into it or needs access. Include door and gate swings, window openings, steps, downpipes, taps, vents, outdoor lights, drain covers, bins, equipment and established planting. Note whether each item is fixed, movable or needs occasional servicing. A chair may be repositioned, while a door route or access to a drain may need to remain clear. If a fence or wall runs at an angle, plot its actual line rather than using its nearest point as the boundary for the whole structure. Also consider items that are used only at certain times, such as a washing line, rubbish-bin route or garden hose connection. Their absence on the day you measure does not mean the space can be permanently blocked.
Check the approach to each entrance and the route people regularly use across the space. A footprint can fit on paper yet make a back door awkward to open, narrow the path to a gate or put a support where people turn. Mark those routes on your plan and test them on site. When reviewing the Bloomcabin pergola listing, compare any support positions shown with the routes and obstructions you have recorded, not just the outer outline. Do not assume a product image shows the exact clearances for a particular installation.

Measure wall space for a wall-mounted pergola
If the pergola is intended to sit against a building, measure the usable wall section as well as the space in front of it. Mark corners, windows, doors, downpipes, meter boxes, vents, changes in cladding and any overhanging roof edge. Record the height at the proposed fixing area if you can do so safely. The usable span is the uninterrupted section that the product’s actual arrangement would need, not necessarily the full wall length. A tape measurement describes the space; it does not show whether the wall is suitable for an attachment.
Before ordering a wall-mounted option, find out what its drawing says about the wall-side dimension and attachment positions. If those details are not shown, ask for them rather than assuming a nominal width corresponds to your available span. The wall-mounted Bloomcabin pergola page identifies the product, but its name alone cannot confirm whether your wall, cladding or proposed fixing location is suitable. A qualified installer or building professional can assess the structure and attachment details where needed. Keep that assessment separate from the footprint check: a pergola may fit the patio and still need a site review.
Test circulation around the proposed footprint
Plan for how the space is used, not only where a structure can physically sit. Mark furniture and equipment that normally stay outdoors, then show the route between doors, seats, the garden and the gate. Consider whether chairs need to be pulled out and whether someone can pass without weaving around a support. There is no single clearance to add around every pergola: the space you need depends on your belongings, access and the dimensions the listing gives. Write down any walkway, opening or item that must remain unobstructed.
A practical test is to outline the proposed external dimensions on the ground with string, removable markers or another method suited to the surface. Place movable furniture roughly where it normally sits, walk the main routes, and open nearby doors and gates fully. This checks your layout; it does not replace a product dimension drawing. For the Bloomcabin bioclimatic pergola details, or any other listing, apply the stated outside measurements to the outline and check whether any support positions shown fall where you expect. Do not estimate dimensions by scaling a screen image.
Record slopes and changes in surface
Measure the surface at the intended positions and note how it changes across the footprint. A sloping lawn, raised deck, step, retaining edge or transition between paving and soil can alter the usable area and available overhead clearance. Mark drains, grates and surface joints too; they may affect where a support could go or whether a professional needs to review the location. Do not describe a site simply as level if it falls in one direction, and do not assume that every part of a broad paved area is available for a structure. Identify the finished surface at each marked corner, particularly where decking meets paving or a path meets a garden bed. A measurement taken from the wrong surface can make the planned height or clear depth appear more generous than it is at the actual position.
Keep this record beside your width, depth and height measurements, including any obvious change in level across the marked corners. A flat sketch shows the plan but not the site profile, so photographs from different sides can help explain what you measured when seeking advice. The Bloomcabin pergola product details cannot establish from a product name how a particular sloping or raised site should be handled. Ask a qualified installer or relevant building professional to assess support, ground or deck suitability if the surface raises questions; do not make structural decisions from a footprint measurement alone.
Read the product dimensions carefully
Read the dimensions for the exact product option you are considering and identify what each number measures. Check whether width and depth refer to the full outside edge, the area between supports, a roof outline or another reference shown on a drawing. Confirm which measurement is height and whether the listing specifies separate clearance or assembly space. Do not assume that products with similar names, photographs or thumbnails have the same dimensions. The bioclimatic pergola product listing should be assessed using its own written information; a catalogue name is not a technical specification.
Write each product dimension beside the matching site measurement, using the same units and the same start and end points. If a diagram is missing, unclear or ambiguous, ask the seller to confirm the overall dimensions and any shown support positions before purchasing. Check that the page describes the configuration you intend to order, and whether options or accessories change the outline or clearance. If the figures appear to fit only when rounded, treat that as unresolved rather than forcing the numbers to agree. A clear written answer is more useful than interpreting perspective in a photo.
Recheck the measurements on site
Before placing an order, return to the marked points and measure again rather than copying an earlier note. Confirm that the tape follows the same reference line, such as the finished wall face or inside fence edge, and repeat the reading at each critical boundary. Record measurements in one consistent unit. If you convert between metres and millimetres, check the conversion instead of mixing units in your plan. Note what each figure describes, for example, clear depth from wall face to inside fence, so another person can understand it without guessing.
If the product dimensions are close to your available space, ask another adult to verify the key readings independently and compare notes. Check the narrowest usable width, the lowest overhead clearance within the footprint and every fixed object that affects the proposed position. Keep a labelled sketch or photos with your notes; an unlabeled photo rarely explains where a tape began or which side of an edge you measured. Rechecking is useful when it can reveal a mistaken reference point, not just repeat the same estimate.
Measure the delivery route separately
Measure the route components would need to take to reach the chosen location, especially if access involves a gate, narrow side passage, turn, step or covered area. Note clear widths and overhead restrictions along the whole route, not only at its entrance. The assembled pergola dimensions do not tell you the size of its delivery packages or whether a component can pass through a particular turn. If access may be restricted, ask the seller or delivery provider about package dimensions and handling before ordering; do not infer them from the finished-product measurements.
Treat delivery access and the final position as separate checks: can the listed structure fit the marked site, and can its components reach that site? Review any delivery access information supplied for the exact order and ask about an unresolved restriction. If the route involves overhead services or a difficult lift, get appropriate professional advice rather than improvising. Recording access separately from the footprint can expose a practical issue that would not show up on a patio plan.
Frequently asked questions
What should I measure before buying a pergola online?
Record the usable width and depth, the lowest overhead clearance across the proposed footprint, and the position of fixed obstructions. Also note any routes that need to stay clear. Compare these with the dimensions for the exact product, making sure you understand what each listed measurement describes.
Should I measure between the supports or around the outside?
Use the product’s dimension drawing to tell you what its measurements refer to. The outside dimensions need to fit the available area, while any support positions shown need to avoid obstacles and access routes. If the listing does not define its measurements clearly, ask before ordering.
How much extra clearance should I leave around a pergola?
There is no single allowance that suits every site. Use the dimensions and any clearance guidance for the exact product, then allow for your own doors, paths, furniture and access needs. Mark those routes on the ground so you can check them against the proposed footprint.
What if my measurements are close to the listed dimensions?
Do not round the figures or assume a close fit will work. Measure again from the same reference points, check the narrowest usable width and confirm what the product dimensions include. If the figures still leave little margin, ask the seller to clarify the drawing before you decide.
Can the assembled dimensions tell me whether delivery will fit through my gate?
Not necessarily. The finished pergola dimensions do not establish the size of its delivery packages or whether a component can pass through a narrow entrance or turn. If access may be restricted, ask the seller or delivery provider about package dimensions and handling.
A useful pre-order measurement record brings the site plan, clearance notes and product dimensions together in one place. Define the exact position, mark what must remain accessible, and check that the listing’s figures refer to the edges you have measured. If the fit depends on an unclear dimension, wall attachment or site condition, resolve that question before treating the measurements as a match. A careful check of both the footprint and delivery route makes an online purchase decision more grounded than relying on a photo or a rough estimate.
