
How to Choose a Position for a Pergola Heater
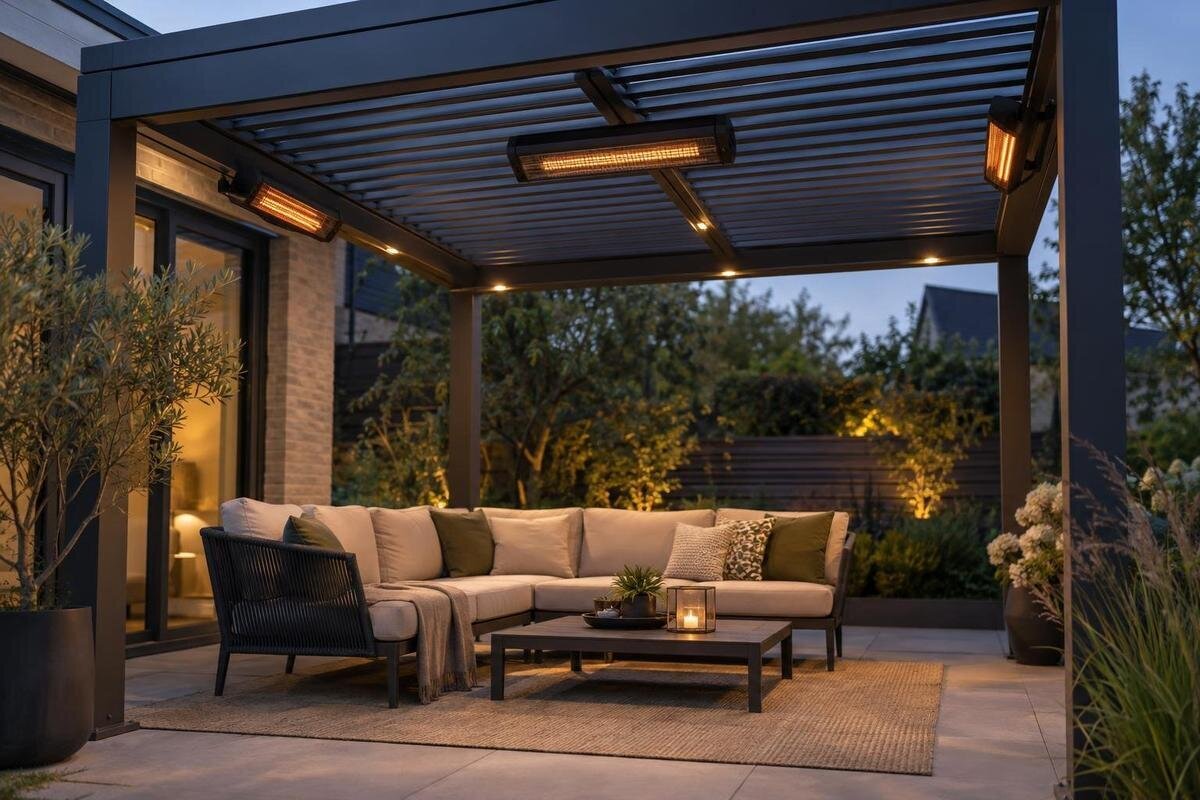
Pergola heater positioning
Choosing a pergola heater position is a layout and approval decision, not simply a search for a convenient beam. The useful spot depends on where people sit, how the particular heater directs warmth, the clearances in its manual and whether the pergola manufacturer has approved the fixing point. Start with the exact heater and pergola details before installation: a frame member that looks suitable may not be an approved support.

Map the seating and walking routes
Draw the seating and the heater’s intended position on a plan of the pergola, using the furniture you expect to use rather than the empty floor area. Mark the dining table, lounge chairs or bench, the routes between them and the space needed to pull chairs out. Note how many people sit together and where they gather for most of an evening, rather than planning around occasional use alone. This defines the area the heater needs to serve. A unit over the apparent centre of the floor may miss seats at the edges, while a fitting above a route can sit where people pass or stand. Start with occupants and furniture, not an attractive-looking point on the frame.
Keep separate marks for primary and secondary seating if the layout changes. A dining arrangement and a lounge arrangement can leave people facing different directions, so a position that suits one may miss the other. Decide which arrangement matters most before choosing a fixed point; do not move a heater closer or add an unverified extension just to make both work. For a broad size cross-check, the Bloomcabin Bioclimatic Pergola listing states an area range of 9 to 24 m². Use that figure only to compare overall scale. The exact dimensions of the proposed structure, furniture footprints and circulation space still need to appear on your plan.
Use the heater’s stated coverage and direction
Read the instructions for the exact heater, rather than general guidance for a similar-looking unit. Its stated coverage may depend on a particular direction, orientation, mounting height or distance; do not treat it as a circle that automatically fills the pergola when centred. Mark the manufacturer’s intended heat zone on your plan, then see which seats fall within it and whether a tall table, screen or person sits between the source and the occupants. This distinction matters when seating runs along one side or around a corner. If the documentation does not make the direction clear, ask the heater supplier to explain it rather than guessing from the casing or a product image. Coverage information is not a promise that every seat in an open space will feel equally warm.
Show the intended orientation on the plan, then compare it with the seats people use most. A heater directed towards one row may leave another row beyond its intended zone, even if the unit is centred over the floor. A wall or post may affect which positions are practical, but do not infer from a product name that either is an approved fixing point. When discussing an attached structure such as the Bloomcabin Wall-Mounted Pergola, distinguish a proposed fixing on the pergola frame from one on the adjoining wall. Be clear about which support you mean when asking the supplier to assess the position.
Check mounting height and angle in the manual
Mounting height and angle are controlled by the instructions for the exact appliance. Find the permitted orientation, required clearances and any specified height limits, then note the reference points the manual uses. Measure from the point it identifies on the actual support, not from a decorative beam or an estimated roof line. If the roof height varies across the frame, check each proposed location against its own measurements. Do not take a distance or tilt from another heater as a substitute: units with similar appearances may have different requirements. If the manual is unclear, ask the supplier before planning around an assumed position. This check can rule out a visually neat spot before other installation planning begins.
Measure from the proposed support point to the chairs, table and nearest sides, rather than checking only the distance to the pergola’s centre. A point that meets the permitted height may still direct warmth away from the main seating or leave an end seat outside the intended zone. Use the distances and diagrams in the manual; there is no universal mounting height or angle that can be applied to every heater. The Bloomcabin Pergola range is listed from 9 to 24 m². That area gives broad context for the structure’s scale. For this check, record the actual height at the proposed support point rather than relying on the overall floor area.
Apply clearances to the whole occupied area
Before judging whether a location is comfortable, identify the heater maker’s required clearances from the roof, sides, occupants and nearby objects. Follow the manual for the exact appliance and orientation: meeting the distance from one surface does not replace the separate requirement for another. Include curtains, cushions, shade material, screens, umbrellas and anything that may be stored under the pergola. An installation that looks unobstructed in an empty space may have less room once furniture and accessories are in place. Do not borrow distances from a diagram for a different model or assume that a roof makes the appliance suitable for any position beneath it.
Make a clearance check for each possible fixing point and remove any location where a required distance conflicts with a roof member, screen, furniture or occupied seat. Include items that move during normal use, such as a blind being drawn or chairs being shifted. A spot that only meets the manual when the pergola is empty is not a workable everyday choice. If the project includes the Bloomcabin Bioclimatic Pergola, identify the exact configuration on the clearance plan. Show the screens and furniture you intend to use alongside it, so the check covers the furnished space rather than the bare structure.

Keep clear of moving roof parts and fittings
Some pergola roofs, screens and shade elements move; others have fixed parts. Identify what actually moves in the proposed design. Check the heater position against the full travel of any louvre, panel, retractable canopy, blind or screen, as well as the access needed to operate and maintain those components. A fitting that clears the roof in one position could conflict when it moves, or obstruct a mechanism without touching it. If operation depends on a control or a particular setting, do not assume the pergola will always remain in the position used during your first check.
Also map existing lights, cables, gutters, drainage outlets and posts, along with any fittings being considered for the same area. The heater should not block access or create a conflict with these items; leave maintenance space where the relevant instructions require it. Never use a convenient crosspiece just because it is close to the seating. If you are considering the wall-mounted pergola listing, identify the exact configuration and ask which parts, if any, move. Use that information to check the proposed heater position against their full travel and the access needed for maintenance.
Account for weather and open sides
An overhead cover does not automatically make an outdoor appliance suitable for every position beneath it. Check the exact heater’s outdoor rating and the manufacturer’s limits for moisture, direct rain and other exposure, then compare them with the site. Wind can carry warmth away or make comfort uneven, while rain or water from the roof may reach a spot that looks sheltered on a fine day. Look at the pergola from all sides and note which edges stay open, where roof drainage could fall and whether nearby surfaces can remain wet. A sheltered product photograph is not evidence that a heater is suitable for your particular position.
Consider how the space is actually used: the breezes it receives, the side left open for access and any screen normally drawn across. These details may affect comfort and can change the conditions around the appliance, so include them in the information you give the supplier. A position that relies on closing a blind or screen needs to be checked against the heater and pergola instructions for that exact arrangement. Do not assume that adding an enclosure is harmless. If no location meets the appliance’s stated limits and suits the way you use the space, revisit the heater or pergola configuration with a professional rather than moving the unit closer to people.
Get approval for the exact fixing point
Treat fixing approval as a separate question from heater selection. A pergola member may look rigid, but appearance does not establish that it is designed for an added heater or bracket. Ask the pergola manufacturer or supplier to identify the precise permitted fixing point and method for the exact structure, and to confirm compatibility with the heater model. A general statement that accessories can be fitted is not enough unless it covers the heater and proposed position. Do not drill, clamp, suspend or adapt part of the frame until you have documented approval. A convenient beam is not a substitute for a mounting point that has been specifically confirmed.
If the structure connects to a building, clarify whether the proposed fixing is approved on the pergola, the building or both; approval for one does not automatically cover the other. The Wall-Mounted Pergola model page can help identify the product in that enquiry, but does not establish that a heater can be attached to its frame or the adjoining wall. Provide the supplier with the heater manual and the exact pergola configuration, and ask for a written answer. If no approved point is available, ask a qualified structural professional to assess possible alternatives rather than assuming that a new support will be suitable.
Coordinate the position with an electrician
Once a likely location passes the layout and mounting checks, give the exact appliance details and proposed position to a qualified electrician before committing to the installation. They can advise whether the supply, controls and cable route suit that particular heater and site. The route can affect where the unit is practical: a preferred angle may not work if the installation cannot be served there, while an improvised cable across a walkway can create a separate problem. Do not cut, extend or connect wiring yourself. Electrical work and advice about the proposed installation belong with a qualified professional.
Prepare an annotated plan showing the heater’s proposed position, its intended direction, the seating, nearby fittings and the proposed cable route. Attach the heater’s instructions and any written approval for the pergola fixing point. Ask the electrician to identify constraints that could change the location and what coordination is needed with the pergola supplier. If a heater is being considered as a supplier option, request confirmation of the exact fixture and mounting approval rather than relying on a display image or broad description. Settle these points before assembly or electrical work, while changes to the layout are still straightforward.

Keep access and everyday use clear
Check the proposed position against how people enter, stand up, serve food and carry items through the area. Keep it clear of door swings, the usual route between the house and seating, and places where someone might lift a chair or reach upwards. Consider the tallest regular user, not just a seated person’s eye line, and check the required distance from people in the exact heater instructions. Controls should be accessible as the manufacturer intends, without stepping onto furniture or passing directly beneath the appliance. A position that warms one seat but makes an everyday route awkward is not a practical layout.
Review the plan at full scale before fixing anything: mark furniture footprints, space for chairs to move and circulation routes, then compare these with the heater’s specified coverage and clearances. These marks can show whether a table edge, open door, standing area or likely furniture change competes with the proposed position. When comparing the Bloomcabin Pergola product page with your plan, use the exact dimensions and configuration of the structure you are considering rather than transferring a layout from a different one. If the plan only works when chairs stay in an unrealistic position, adjust the seating or ask about another heater option.
Record the position and supporting approvals
Before ordering or installing, gather the position drawing, the exact heater manual, the pergola’s relevant structure information and written confirmation of the mounting point. Put the heater on the same plan as the seating, moving roof parts, screens and nearby fittings, and note which instructions control each clearance. This helps when several people are involved: one may select the heater, another confirm the frame and an electrician review the proposed installation. If the heater, bracket, pergola configuration or furniture layout changes, revisit the checks affected by that change rather than assuming earlier advice still applies.
Identify the pergola by its exact product and configuration, not just a broad description, when recording the agreed position. If you are choosing the model shown on the Bioclimatic Pergola product page, use its product name in the enquiry and specify the version and heater model under discussion. Keep the supplier’s response with the corresponding drawing and instructions. The record should distinguish the proposed location from the approved fixing point and note any questions still awaiting professional review, so an installer is not left to interpret an unverified sketch.
Frequently asked questions
Should a pergola heater sit directly above the table?
Not automatically. The heater’s permitted position, specified heat direction and required clearances determine where it can go. Check whether its intended heat zone reaches the seats without placing the unit over a busy route or too close to people or surfaces. A central position only works if the manual and approved fixing point allow it.
Can I attach a heater to any pergola beam?
No. A frame member’s appearance or proximity to the seating does not confirm that it can support a heater. Ask the pergola manufacturer or supplier to confirm the exact fixing point and method for the particular structure and heater. Get this approval before drilling, clamping or suspending anything from the frame.
How can I check whether the heat will reach each seat?
Use the exact heater manual to understand its coverage and required orientation, then mark the intended heat zone on a plan of the seating. Check the mounting height, angle and any obstructions. If one approved position does not serve the main seating area, ask about changing the layout or heater choice rather than exceeding a clearance.
Does a moving pergola roof affect heater placement?
It can. Check the proposed position against every operating position of the roof or other moving parts, not just the position you use most often. The heater must not obstruct their travel or conflict with their instructions. Ask the pergola supplier to confirm the proposed fixing point for the exact configuration.
When should I involve an electrician?
Involve a qualified electrician while you are still choosing the position. Provide the exact heater details and proposed location so they can review the electrical requirements and whether the planned route and controls suit the installation. If that advice changes the location, revisit the clearance and pergola mounting checks too.
A good heater position reaches the seats people use, meets the model’s clearances, suits the site’s weather exposure and has approval for the exact pergola fixing point. Map the occupied area first, then check heat direction, moving parts and access. Involve the pergola supplier and a qualified electrician before installation. If no single position meets all these requirements, revise the layout or heater choice rather than compromising a clearance to keep the unit centred.
