
Designing a Garden Courtyard Around a Pergola
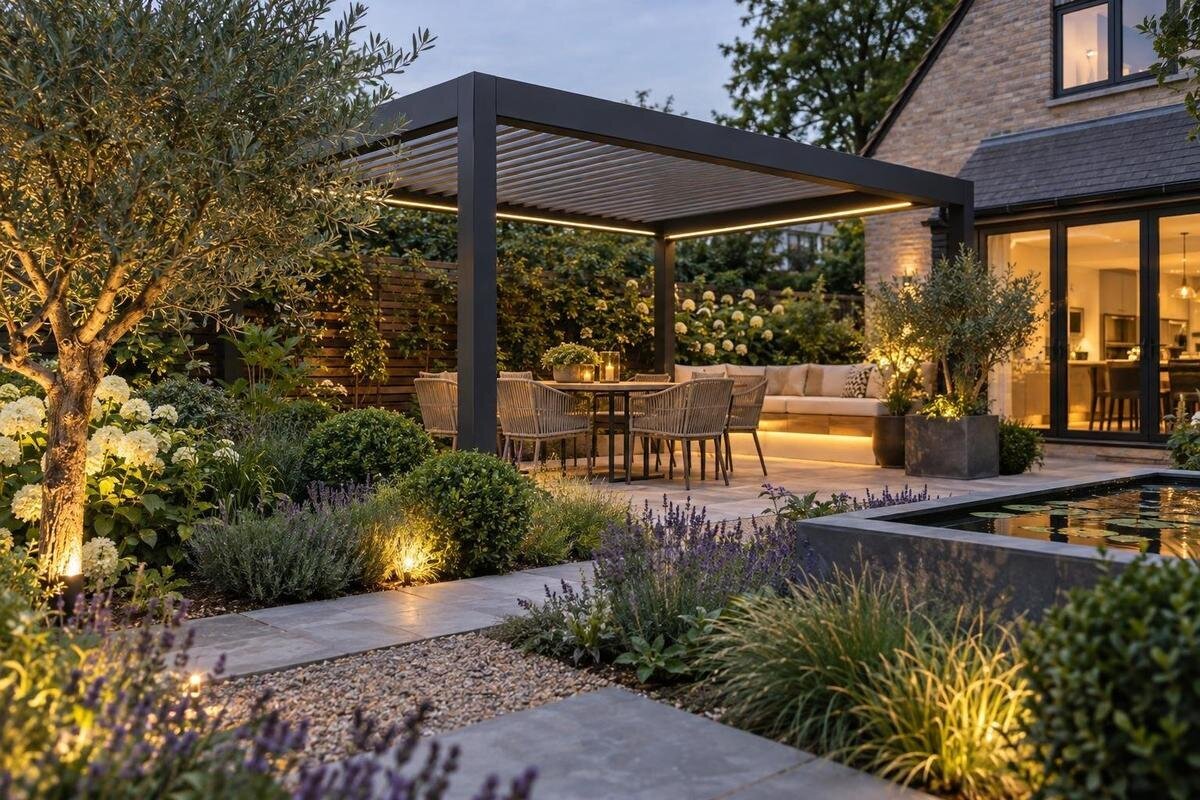
Garden design guide
An outdoor courtyard is more than a pergola with paving around it. Its character comes from how the structure relates to the house, planting, paths and garden edges—and whether people can move through it without awkward crossings. Plan the routes and existing water flow first, then use surfaces, seats and planting to give the space definition. A dimensioned landscape drawing helps reveal conflicts before you commit to permanent work.

Define the courtyard’s purpose before its boundaries
List the activities the courtyard needs to support before deciding where an edge goes. A dining area, a quiet seat and a route to the lawn can compete for ground if they are all added at once, so decide which use is essential and which can share space. Note how many people usually gather, whether furniture needs to move, and whether access to a door, gate, garden shed or washing line must remain direct. These everyday details help determine whether the pergola should frame one destination or sit beside a route rather than across it. Mark fixed items such as taps and bins at the same time; they can affect where the usable seating area begins.
Sketch the view from inside the house and from the garden. The courtyard should read as a coherent place from both directions, but it does not need to be enclosed on every side. A change in paving, a low planted edge, a screen or a garden wall can define a seating area while leaving an opening towards the wider garden. Mark the main activity, the view you want to keep and the route that must stay open. Later choices can then reinforce these priorities instead of adding competing features, such as a screen that hides a valued view or a planter that narrows the route. This gives the design structure without making the pergola the only feature.
Relate the pergola to doors, paths and the house
Locate the pergola in relation to how people actually arrive. On the plan, draw the route from the back door to the seating area, then continue it to the gate, lawn or shed if those destinations are used. A position near the house can suit frequent meals or short visits; a garden location can create a separate destination, but only if the path to it is convenient. Neither position is automatically better. Mark thresholds, door swings, downpipes, outside taps, bins and existing paths. Seeing these together makes it easier to avoid putting a post or planter where it interrupts the usual way through. Check the view from often-used rooms as well, so the structure and boundaries sit comfortably within the outlook.
When comparing a wall-mounted and a freestanding layout, consider how the courtyard boundary will meet the house. A directly connected space needs doors, downpipes and thresholds shown alongside the proposed beds and paving. For this arrangement, include the Bloomcabin Wall-Mounted Pergola in your product comparison and confirm its dimensions and attachment requirements before fixing those landscape edges. Have a suitable installer assess the building connection and coordinate that advice with the landscape plan. Keep the area beside the house practical as well as visually connected: planting and seating should not interrupt access to the features already marked on the drawing.
Map the pergola’s dimensions and post positions
A site plan is useful only if it shows the outline of the chosen configuration. Mark the frame’s outside dimensions and post positions, then add surrounding doors, gates, trees, steps, drains, walls and existing paving. Where the ground changes level, note the transition rather than drawing a flat rectangle over it. Measure usable ground on site and record fixed points so the landscape designer and installer are working from the same layout. Keep the drawing to scale and label the frame, the proposed paving edge and the clear walking area separately. A product image or top-down sketch can hide the space taken by supports; the roof outline is not the same thing as clear floor area.
The Bloomcabin Bioclimatic Pergola listing gives a range from 9 to 24 m². Treat that area range as one piece of product information, not a substitute for the chosen configuration’s overall dimensions or post layout. Add confirmed dimensions to the same drawing as chairs, a table, planter edges and the route through the courtyard. If available information does not show where the supports sit, ask before deciding where paving or permanent planting will go. Those details are difficult to accommodate after the landscape is fixed, and an area figure does not show how the frame relates to a doorway or existing drain.
Keep a continuous route through the courtyard
Draw the route between the house, gate and any part of the garden used every day before placing chairs or planters. A path that skirts a seating area can feel more natural than one that cuts between a table and chairs; avoid making the route depend on moving furniture. Check each narrow point between a post, wall, raised edge and plant. Door and gate leaves, bins and garden tools also occupy space when in use, so include their movement in the drawing rather than considering only the closed position. If a path crosses the courtyard, decide where it should pass before choosing the seating layout.
Test the layout at full size with chalk, a hose or temporary markers. If you are comparing the Bloomcabin Pergola catalogue model, use its confirmed outline and post positions for the test. Walk from each entrance and notice where you have to turn sideways, step over a border or pass close to furniture. Repeat with a gate open and chairs pulled back, rather than testing only an empty space. Adjust awkward corners before choosing a permanent surface, and mark where the route enters and leaves the courtyard. Keep it visually easy to follow, with planting that defines the passage rather than concealing a turn or the way through.

Plan paving and drainage as one system
Look at where water already goes before covering the ground. After rain, note puddles, soggy patches, downpipe outlets, drain grates and the direction of surface flow. Record these on the landscape plan, including water that arrives from the house roof or higher ground. A new paved courtyard can change how quickly water moves and where it collects, so a neat border must not block a drain or channel that is doing a job. Note features that need to remain accessible for maintenance. If the site is hard to read or you are unsure about levels, ask a landscape or drainage professional to assess it before changes are made.
Choose surfaces with their water behaviour and maintenance in mind, not simply their appearance. Permeable paving, gravel and solid paving handle water differently, so consider the site and its drainage plan; no surface choice by itself guarantees a dry courtyard. Avoid directing water towards the house, across a frequently used path or into a planting bed that cannot take it. When considering the bioclimatic pergola listing, confirm any model-specific water details and include relevant outlets on the landscape drawing. Show these alongside existing drains and downpipes so the surrounding paving and bed edges can be considered together. Keep the courtyard’s runoff part of the overall site plan rather than treating the pergola as a separate drainage solution.
Choose planting for its mature size
Planting gives the courtyard softer edges and can connect the pergola to the rest of the garden. A narrow border of repeating plants may provide a calmer boundary than a mix of unrelated pots, while a larger bed can mark the change from paving to lawn. Choose plants for the light and soil conditions at the actual planting spot, then record their expected mature height and spread. A plant that fits neatly in a new bed may later reach a path, window or sitting area, so allow for its eventual shape rather than its nursery-pot size. Think about how the planting will look across different seasons, too.
Plan soil volume, watering access and maintenance at the same time as the bed outline. Keep plants clear of door openings, drains, inspection covers and the space needed to clean paving or reach the pergola. Avoid thorny or easily snagged growth where a route narrows, and consider what leaves, flowers or fruit may fall onto the seating surface. If planting near a wall or existing structure, get suitable advice on roots and required clearances rather than assuming a shallow-looking bed will remain contained. Record plant names and care requirements so future pruning can preserve the intended route.
Privacy screens and planted boundaries
An outdoor room feels defined when one or two edges have a clear purpose. A hedge can soften the view, a screen can shield a particular sightline, and a low planter can mark the edge of paving without becoming a tall barrier. Combining every feature around the full perimeter can make the courtyard feel boxed in and reduce space for routes. Decide which view you want to screen from the seat, then add a boundary there and leave a deliberate opening towards the house, gate or wider garden. This keeps the courtyard connected to the rest of the landscape.
Consider how each boundary will look and work as plants mature. A newly planted hedge offers less coverage than it will later; a high solid screen may hide a view you wanted to keep. Draw these elements at their expected height and width, and check their footprint against routes, windows and pergola posts. For a courtyard beside the house, compare the wall-mounted model listing while considering the outlook from both the seating area and nearby rooms. A screen that improves privacy from one seat may also close off an important garden view. Use the sightlines marked on your plan to decide where a tall boundary is useful and where a lower planted edge would better suit the space.
Plan seating and furniture around the main use
Place furniture on the plan before choosing a table size or fixing a paved shape. Draw the table with chairs pulled back, or show the full position of loungers and side tables, then keep the route past them clear. The pergola’s outer footprint does not automatically equal space for people to sit and move comfortably: posts, garden edges and a path all reduce the area available for furniture. Make sure the main seat has the view you intended and that someone can get to it without cutting through another activity. Allow for the way furniture is used, not only its position when neatly arranged.
Leave some flexibility for how the courtyard will be used. Freestanding chairs can shift for a larger gathering, but a permanent bench, storage box or planter fixes the layout and needs a dedicated footprint. If you are comparing the Bloomcabin bioclimatic model page, add the chosen version’s confirmed dimensions to the furniture plan and test the arrangement at full size. Try both the everyday seating arrangement and the occasional larger gathering you expect to accommodate. Note where moved chairs will sit and whether they interrupt the route or access to planting. This helps you decide which pieces can remain flexible and which permanent features would make the courtyard difficult to rearrange.

Use paving transitions to connect the courtyard and garden
Let the ground surface show where the courtyard begins and where the garden route continues. One consistent paving finish can make a space read as a single room; a narrow change in finish or border can distinguish the path from seating. Keep the pattern simple enough that the main route remains easy to recognise. Where paving meets lawn, gravel or a planted bed, draw the edge and consider its access and maintenance requirements so a crisp line does not obstruct water movement or make routine care awkward.
Choose edge details around real use: where chairs sit, how leaves will be swept, where pots may be moved and how the path will be cleaned. A surface transition beside a post can create an awkward sliver, so align paving joints or borders with the layout where practical. If the Bloomcabin Pergola product listing is the model under consideration, place its confirmed footprint on the landscape drawing before setting the paving perimeter. Then trace the joins between seating, path and garden, checking that each edge serves a clear purpose. Keep decorative borders separate from the clear route, and avoid adding small changes of surface that complicate the layout without helping define the courtyard.
Coordinate the pergola and landscape on one drawing
Bring the separate decisions together on a dimensioned plan: existing boundaries, finished ground levels, pergola frame and posts, water outlets, clear routes, paving, mature planting and furniture. Label features that need to stay accessible, and note plant names with their mature sizes and care requirements. A second view or simple cross-section can help show how a bed, paved edge and level change meet, especially where a plan might otherwise hide a step or low point. The aim is not a decorative concept alone; it is a layout another person can check against the site.
Before committing to fixed paving or established plants, walk the proposed routes on site and revisit the plan after rain if water behaviour is uncertain. Use the drawing to resolve any remaining conflicts between posts, furniture, bed edges and access points. Confirm model dimensions and building-connection or installation requirements with the supplier or a qualified professional; the wall-mounted pergola page can serve as the product reference for a wall-mounted option. Record agreed changes on the same plan so the pergola and landscape are not set out from different versions. The completed drawing should show how the courtyard boundary meets the garden beyond, as well as the routes and water paths that need to remain clear.
Frequently asked questions
How do I make a pergola courtyard feel enclosed?
Give the space a clear ground surface and define one or two edges with planting, a screen or a low wall. Keep an opening towards the house or garden, and check the view from both inside and outside. Enclosure does not require a boundary on every side.
Does the pergola need to be in the centre?
No. Place it where it supports the courtyard’s main use and leaves a convenient route between the house and garden. The best position depends on how people reach the space, the views you want to keep and the ground available.
What should I plan first: paving or the pergola?
Draw the whole layout first, including the selected pergola’s confirmed dimensions and post positions. Add paths, furniture, planting and existing drainage features before fixing paving edges. This makes it easier to spot conflicts while the design can still be adjusted.
How should I manage water around the courtyard?
Observe where water flows and collects after rain, and mark downpipes, drains and low spots on the plan. Paving can change where water travels. If the site’s levels or drainage are unclear, get advice from a suitable landscape or drainage professional before changing them.
How much clearance should I leave around a pergola?
There is no single clearance that suits every courtyard. Use the chosen configuration’s confirmed dimensions and post positions, then add furniture in use, door and gate movement, clear routes and space to maintain planting. Test the layout on site before setting permanent edges.
A successful courtyard feels defined without becoming a barrier between the house and garden. Let the pergola give the space a focus, then use clear routes, considered paving, well-sized planting and carefully placed boundaries to shape the room around it. When those features are planned together with the site’s water flow, the result is more likely to work as part of the whole garden.
