
Pergola Dining Layouts for an Extendable Table
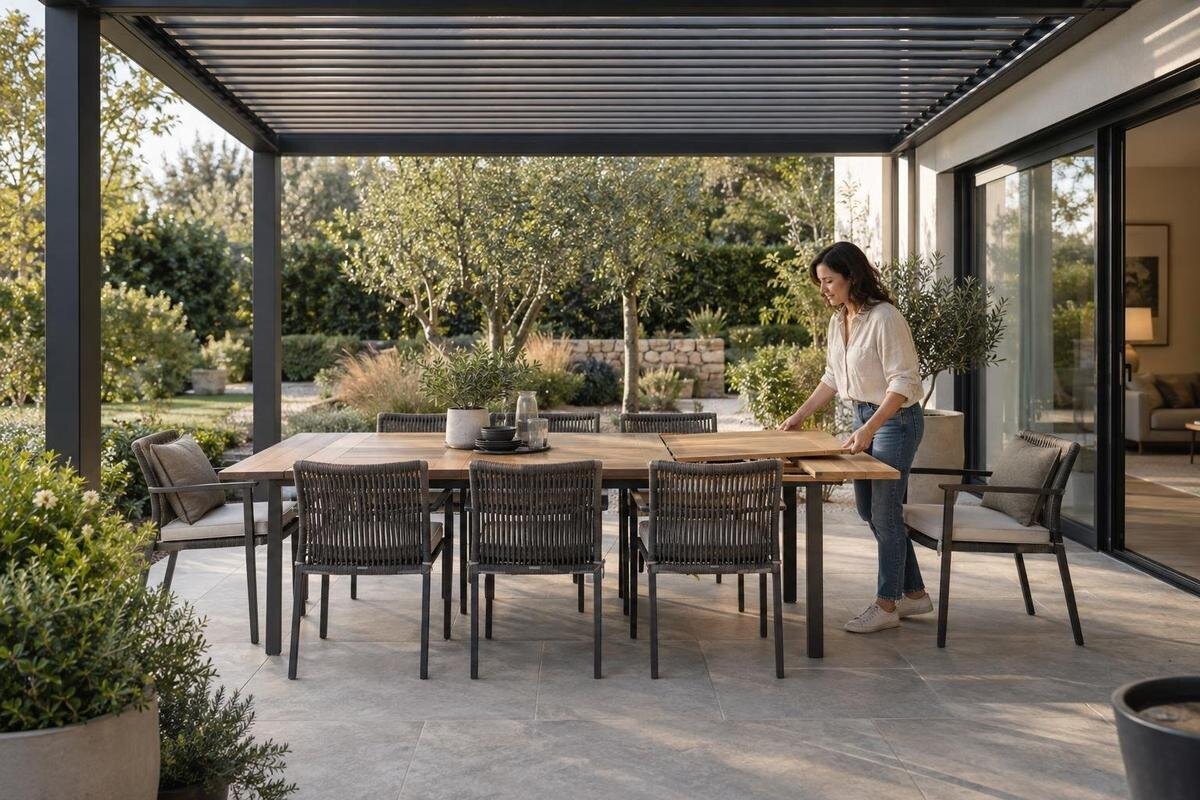
Outdoor dining layout
An extendable dining table changes the space a pergola dining area needs. In its compact position, chairs may leave an easy route to the house; fully extended and in use, end seats, pulled-back chairs and people carrying food can take up that same space. Plan for both table lengths, not just the largest tabletop. Measure your own table and chairs, mark the route from the kitchen or door, then compare that full-use arrangement with the posts and usable floor of a proposed pergola.

Measure the table in both positions
Measure the actual tabletop with the extension fully closed and fully open. Record its length and width in both states, including any drop leaves or extension panels in the position you expect to use. Note which end extends, whether the top shifts along its base and how much room the opening mechanism needs. A table that extends at one end affects the layout differently from one that extends at both ends, even if their open tabletops are similar in area. Use a fixed point on the ground to record where each end finishes, rather than noting the total length alone. This shows whether the extra length will occupy space near a doorway, a support or an end chair. If the table has more than one extension setting, record the intermediate length you regularly use as well as the maximum.
Also note how the extension works as a task. Some tables need someone to stand at the end; others need chairs moved before the top can be opened or a leaf fetched from storage. Measure the table base and legs as well as the top, because these can affect where chairs fit. Record any extra space needed to open the table and return the chairs to use. The final open shape is important, but it may not show the full space needed to get there.
Draw the closed and extended footprints
Sketch the deck or patio to scale, even if it is only a simple grid drawing. Mark the house wall, doors and their swing, steps, fixed posts, railings and anything else that cannot be moved. Draw the table in the same position twice: once closed and once extended. Add chair outlines in their usual positions and again with the chairs pulled back far enough for someone to sit down or stand up. Keeping both versions on one plan makes it easier to spot where the open arrangement blocks a doorway or route. Use different colours or line styles for the two table positions and label the measurements so the outlines remain easy to follow. Keep one common reference point, such as the table base, when drawing the extension. If you intend to move the whole table for gatherings, show that as a separate arrangement; otherwise, the sketch may hide the work needed to change from one layout to the other.
Concept example, not a product plan: imagine a table measuring 180 × 90 cm when closed and 240 × 90 cm when extended. If you sketch a 90 cm zone beyond each table edge for chair use, the open arrangement covers about 420 × 270 cm, or 11.3 m². That is only an illustration of how quickly the furniture envelope grows, not a universal clearance or pergola recommendation. It does not include a separate path for people to pass behind occupied chairs. Add that route as its own space if you need it.
Use the extended layout to test the covered footprint
The pergola needs to work around the full-use furniture layout, not just the tabletop. Compare the extended table, pulled-out chairs and any separate walking route with the intended pergola outline. Keep roof boundaries and support locations distinct on your drawing: the covered area and the unobstructed floor area answer different questions. A post within the table-and-chair envelope can make a seemingly generous footprint awkward to use, so do not assume the furniture will sit neatly in the middle.
The Bloomcabin Wall-Mounted Pergola is listed with an area range of 9 to 24 m². Treat that figure as a starting point for comparison, not proof that a particular table layout fits. An area number does not reveal the shape of the footprint or how a chosen configuration relates to your furniture. Compare the measured envelope with the dimensions and support positions for the exact option you are considering.
Measure the chair zones, not just the seats
Measure the widest and deepest points of the chairs, including arms if they have them. Draw each chair where it sits at the table, then show how far it moves back when someone gets in or out. Repeat this for end chairs as well as those along the sides; an end seat can use the space needed to open the table or reach a door. If you use a bench, check how people get on and off it rather than treating it like a row of individual chairs. Label the seats you expect to use in each table position, especially if the extra places need different chairs from storage. Do not assume that dividing the tabletop length evenly will give every place enough room: compare each chair position with the table legs and base you measured earlier. Check neighbouring seats together, including whether their arms meet when people pull them towards the table.
Think about the layout with people in the seats, not only with chairs neatly tucked away. A chair may need to angle out, and space that looks clear on a drawing can feel tight once a person is seated. When comparing the Bloomcabin Pergola, match your measured chair zones to the specific configuration you are considering. A model name or area figure cannot tell you whether an armrest clears a support or whether an end chair can be pulled out.

Keep a serving route clear when seats are occupied
Trace the usual route from the kitchen or house door to the table in both table positions. Mark where the door opens and whether someone carrying food would have to pass between a chair and a post. A route that works with the table closed may be pinched off once the table is extended or the end chairs are in use. Measure the clear passage between the outer edges of furniture and fixed obstacles, rather than measuring from the table edge alone.
Try the route with a tray or large serving plate, and consider where food can be set down without blocking the way. If the space beside the house is part of the plan, the wall-mounted Bloomcabin model is one configuration to compare; map your door and serving route against the selected layout rather than assuming the strip beside the wall will stay clear. The useful question is whether people can reach every occupied seat without repeatedly moving a chair. Include the return trip with used plates, not just the walk out with food. Decide whether you will serve from one end, carry dishes along a side or place shared dishes on the table. These tasks use the space differently. If you plan to use a small serving table, draw its footprint and the space needed to stand beside it, so a convenient set-down point does not become another obstacle.
Locate supports, doors and fixed obstacles
Mark each pergola support in its actual proposed position, along with steps, thresholds, downpipes, railings and permanent planters. If the plan for a configuration shows the roof outline and the support positions separately, draw both. Check whether a support would sit beside an end chair, narrow the serving route or interfere with the space needed to open the table. Then see whether turning the table changes the layout without blocking access to the house.
When comparing the Bloomcabin Bioclimatic Pergola, ask for the footprint and support layout for the particular configuration under consideration. The product name alone does not show where a post would fall in relation to your chairs. If the proposed position depends on attachment to a building or other site constraints, have those matters checked by the appropriate qualified professional. A furniture sketch helps assess use; it does not confirm that a site or fixing is suitable.
Make the closed table work for everyday meals
Plan the compact arrangement as carefully as the full gathering layout. Check whether the closed table leaves an easy path to the door, whether the usual chairs can be used without crowding another seat, and whether there is room to reach the extension mechanism. Shifting the table off-centre may improve access, but only if it still leaves useful space at the end where the table opens. Avoid relying on a perfect centre position if it makes daily movement harder.
Decide where spare chairs and extension leaves will go when they are not in use. Stored furniture can take up the route or the very space needed for the open arrangement, even when it is not part of the dining set-up. Once both furniture layouts are drawn, compare them with the specific configuration of Bloomcabin’s regular pergola you are considering. A plan that fits only when chairs, leaves or other everyday items are moved elsewhere may not suit the way you use the area. Add the storage location to your sketch and trace the route for bringing the extra pieces to the table. Consider the changeover in order: where the chairs wait while the table opens, where you put a removable leaf before fitting it, and how everything returns to storage afterwards. This helps distinguish a layout that is easy to rearrange from one that requires several items to be moved before every larger meal.
Check sun and weather from the dining position
Think about when you usually eat outdoors and where the extended table will sit at those times. Observe how sunlight reaches the deck or patio in the morning and later in the day; the open table may place some chairs in a different patch of sun from the closed arrangement. A roof does not automatically provide shade at every angle, and an open side can leave seats exposed to low sun or wind-driven rain. Assess the specific positions where people will sit rather than judging only from the table’s centre.
If you are considering the Wall-Mounted Pergola option, assess its proposed position against your home and the actual dining area rather than assuming the wall-facing side will be sheltered. Confirm what the selected configuration includes if shade or weather cover is a deciding factor. This check is about the conditions at your table, not just the outline of the pergola: a larger open-table footprint may put some seats closer to an exposed edge.

Test the plan at full scale on the deck or patio
Mark the pergola boundary, table edges and chair positions on the ground with a removable marker or suitable tape. Use the actual table and chairs if you have them. Open the table, move the chairs as you would during a meal and walk the serving route with a tray. Check door swings and the space to stand at the end while opening the extension. A quick full-scale test can reveal a narrow gap that is easy to miss when comparing rectangles on paper. Test a few ordinary moments rather than keeping everyone still: someone arriving after the others are seated, an end guest getting up, and a person carrying dishes back inside. Note exactly where you have to turn sideways, pause or ask someone to move. Adjust one feature at a time, such as the table position or the serving route, then repeat the same task so you can tell whether the change has helped.
If the bioclimatic pergola model is on your shortlist, test your furniture layout against the selected configuration’s confirmed footprint and support positions, not a general image. If you do not yet own the furniture, use the measured dimensions of the pieces you are considering and mark their full-use zones. Ask another person to sit, stand and pass through while you check the arrangement; one person moving a chair can change whether a route works.
Compare the layout with a specific pergola configuration
Before choosing a size, compare your drawing with the dimensions and support locations for the exact configuration under consideration. Check how its outer footprint relates to the usable floor area, and whether the post positions leave space for the extended table, chairs and a route to the house. The Bloomcabin Pergola configuration is listed within an area range of 9 to 24 m², but a square metre figure does not tell you the shape of an option or where its supports sit. Do not turn an area range into an assumed rectangle. If you are comparing two configurations, place the same furniture drawing within each outline rather than changing the seating arrangement to make each one appear to fit. Record any compromises beside the plan, such as moving the table for gatherings or leaving out an end seat. That makes the practical differences between options clearer.
If you are discussing the layout with a pergola supplier or planner, share the table measurements in both positions, chair dimensions, extension method, door location and serving route. If the plan is tight, first consider a different table orientation, fewer end seats or a clearer route before accepting a layout that only works when everyone is seated perfectly still. The most useful comparison is the one that accounts for both a quick weekday meal and the larger gathering, without treating either arrangement as an afterthought.
Frequently asked questions
Should I size the pergola for the table when it is open or closed?
Use the fully extended table as the largest furniture position to test, with chairs pulled out for use. Then check the compact arrangement too, including the route you use on an ordinary day. The table alone is not the whole footprint.
How much room should I leave behind a dining chair?
There is no single clearance that suits every chair and layout. About 90 cm from the table edge to an obstruction can be a useful first sketch allowance for chair use, but it may not allow people to pass behind someone who is seated. Check with your actual chairs.
Can the serving route go behind the chairs?
It can if the route remains usable while the chairs are occupied and pulled back. Test the open-table layout with someone carrying a tray. If people regularly need to pass through, a separate route is usually easier to keep clear.
Does a pergola’s stated area tell me whether my table will fit?
No. An area figure does not show the shape of the footprint or where the supports sit. Compare your measured layout with the dimensions and post positions for the specific configuration you are considering.
What if I have not bought the table or chairs yet?
Use the dimensions of the furniture you are considering, including its fully extended length and the chairs’ width and depth. Leave room for the extension mechanism and chair movement, then confirm the plan against the actual furniture before committing to a final layout.
A well-planned pergola dining layout makes room for the table at its longest setting, the chairs people actually use and a clear way to serve the meal. When the compact arrangement works just as well for everyday use, the space is ready for both quick dinners and larger gatherings.
