
How to grow ginger successfully in a greenhouse
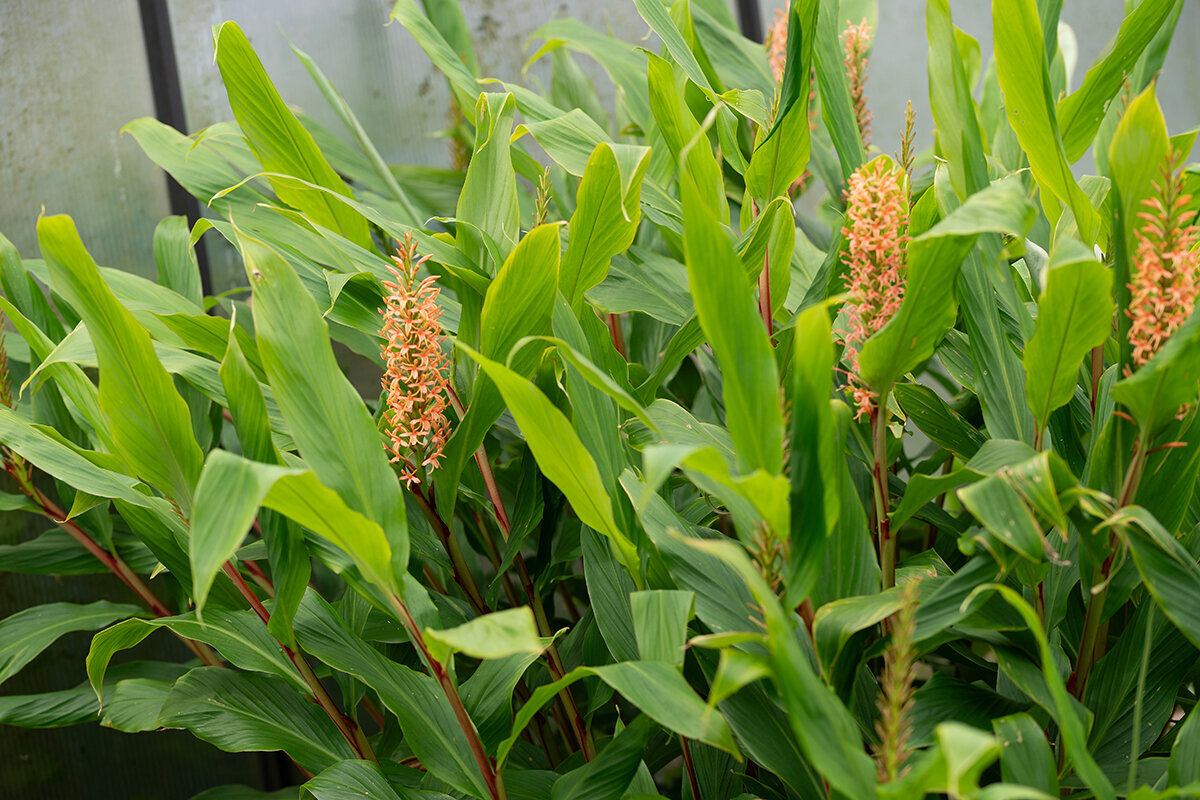
Classic aluminium greenhouseGreenhouse crop profile · New Zealand
Stored warmth / slow growth / aromatic harvest
Grow ginger successfully
in a greenhouse
Ginger does not need a tropical spectacle, but a long season with reliable warmth, humid air and patience for its sideways-growing rhizome.
The greenhouse advantage
For ginger, a greenhouse is less a shelter than a way to hold on to summer.
Edible ginger is a warmth-loving rhizome plant. In many parts of New Zealand, an exposed season can be too cool or changeable to produce strong, well-branched rhizomes. A greenhouse offers more than occasional hot days: it provides a protected start, steadier root-zone temperatures and a gentler transition into cool autumn nights.
That control matters because the real harvest develops below ground. Ginger dislikes swings between cold soil, waterlogged substrate and sudden dryness. It grows best in a broad, freely draining planting area that stays warm and evenly moist, never wet. Pre-sprouting warmly, then growing on without lengthy pauses, is therefore the most dependable approach.
Cool southern regions Pre-sprout indoors or with gentle heat; cool nights make a protected start particularly worthwhile.
Inland and elevated areas Watch for late cold snaps, then prevent summer heat build-up with timely ventilation.
Warm northern regions Ventilate early in hot weather, shade when needed and monitor container moisture closely.
Wet coastal areas The greenhouse supplies continuing warmth while good airflow helps foliage and substrate dry.
01 / Underground structure sets the outcome
Choose rhizomes as though the season depends on them.
It does. Ginger is propagated from pieces of rhizome, not seed. Buy planting material that is as fresh and healthy as possible from a nursery or specialist supplier. Grocery-store ginger may sprout, but is not necessarily disease-free and may have been treated to inhibit sprouting. Do not begin a carefully managed greenhouse crop with soft or questionable material.
Choose
Firm, plump, alive
- Smooth, plump skin
- One to two visible buds
- Dry, clean cut surfaces
- Fresh scent and good weight
Reject
Soft tissue is a warning.
- Mould or fermented smell
- Dark cavities or mushy nodes
- Severe shrivelling
- Very small, weak pieces
For home gardens, the Bavarian State Institute for Viticulture and Horticulture recommends rhizome pieces of roughly 30 to 40 g, each with two growing buds. Divide larger hands with a clean knife. Let fresh cut surfaces heal completely in a clean, well-ventilated place before placing pieces into moist propagation medium. Firm tissue, clean tools and air around cuts are simple, effective precautions against rot.
02 / The hidden beginning
Pre-sprouting follows a warmth calendar, not impatience.
Ginger may appear inactive for several weeks while the rhizome wakes and forms its first roots. For this phase, use a shallow container with drainage holes, lightly moist coconut fibre or loose seed-raising mix. A heat mat or consistently warm indoor spot at around 22 to 26 °C provides good conditions; about 24 °C is a useful guide.
Day 1–2Cuts healDry and airy.
Week 1–2Warm restMoist, never wet.
Week 3–4Roots and shootsWatch for green.
Week 4–6Plant with momentumProtect, then transplant.
Keep the propagation medium lightly moist, never saturated. Let the surface dry a little between waterings, then moisten it gently rather than flooding the container. Open any cover daily so stale, still air can escape. Once strong green shoots and fine roots are visible, prepare the permanent position. If pieces remain crowded together too long, their delicate roots tangle and are unnecessarily damaged during planting.
03 / Broad room for sideways growth
Plant shallowly, point buds up and leave room for mounding.
Ginger spreads horizontally. A broad container is therefore more valuable than an unnecessarily deep pot. Allow roughly 25 to 35 litres and at least 30 to 35 cm of substrate depth for each starter piece. Several plants can grow in a wide trough or bed at about 30 cm spacing. Multiple large drainage holes are essential; slightly raised containers let excess water drain reliably. Leave enough access for watering, checking and later mounding.
Bud upwards
The growing point faces the surface.
The growing point faces the surface.
Cover lightly
Only 3–5 cm at first.
Only 3–5 cm at first.
Drainage below
Loose substrate, clear outlets.
Loose substrate, clear outlets.
Use high-quality peat-free container compost, enriched with mature compost and an airy mineral ingredient such as perlite, pumice or fine expanded clay. Heavy clay garden soil compacts in containers, drains poorly and makes moisture harder to manage. Set the rhizome with buds facing up, cover it lightly and water gently once. Do not keep it constantly wet afterwards. When new rhizome tips press up at the surface in summer, add 2 to 4 cm of loose substrate or mature compost. This keeps branches away from light without burying the stem base deeply.
04 / Climate management, not a tropical display
Give ginger humidity, oxygen at the roots and an escape route for heat.
Greenhouse ginger is often mistaken for a crop requiring constant wetness. It does not. The plant appreciates a warm, pleasantly humid atmosphere and a consistently moist root zone. At the same time, the rhizome needs drainage, oxygen and a watering rhythm that lets the top layer of substrate breathe. Think warm, living conditions—not an enclosed steamy room.
Warmth
Root zone first.
Around 25–30 °C in active growth
StartHigh summerMaturity
Moisture and air
Moist below, never airless.
Water the substrate, ventilate consistently.
Light
Bright, filtered, adaptable.
Protect leaves from heat stress.
Warmth
During pre-sprouting, 22 to 26 °C is very useful. After transplanting, the root zone should ideally not fall below 20 °C for active growth; in summer it often works productively at 25 to 30 °C. Measure the substrate as well as the air. A sunny early-spring day warms the glazing, but does not replace a warm night. Cold container soil can hold back a healthy rhizome for weeks.
Moisture and ventilation
Water deeply enough to reach the root zone. Wait until the top 3 to 5 cm has noticeably dried before watering again, while the substrate beneath remains slightly moist. Drip irrigation or slow watering directly onto the soil is better than repeatedly wet foliage. Ventilate in the morning before the house heats up, and again in humid weather during the afternoon. If glazing, leaves and pots stay wet for a long time, reduce watering frequency and increase air exchange.
Light and summer heat
Ginger tolerates filtered light, but grows weakly in a permanently dark greenhouse. Choose a bright position and protect leaves from intense midday sun through the glazing. In persistent heat, external shade cloth of around 30 to 40 percent can be useful. Open roof vents and doors early and in coordination to create cross-ventilation. Shade must not replace heat release; it complements effective airflow.
A classic aluminium greenhouse creates a clearly managed setting: protection for the spring start, effective ventilation on warm days and enough room to separate tall ginger shoots from lower, sun-loving crops.
05 / Growth-phase journal
Care for ginger with small, repeatable routines.
A well-cared-for ginger plant looks calm above ground: upright green shoots, clean leaves and no dramatic daily changes. This result comes from measured action at the right time, rather than frantic corrections once stress is already visible.
Watering routine
Feel first, then water slowly.
Check the top 3 to 5 cm with your fingers. If it is dry while the zone beneath is still slightly moist, the next watering is close. Water slowly and thoroughly at the stem base until excess runs from the container, then empty the saucer. In a bed, drip irrigation or gentle deep watering brings moisture into the rhizome area without puddles. In sunny, warm greenhouse weather this may be needed every one to three days, and far less often in cloudy weather.
Feeding routine
Feed without salt build-up.
The compost component supports the crop initially, but ginger grows through a long season. Once strong shoots are established, apply weak organic liquid fertiliser every two to three weeks, or use a balanced controlled-release fertiliser according to the manufacturer’s directions. A moderate nutrient supply with sufficient potassium is useful. Pale leaves can signal a deficiency, but check temperature, drainage and roots before adding fertiliser. Cold or waterlogged substrate blocks uptake even when nutrients are present.
Mounding routine
Cover rhizomes, keep the base clear.
If growing rhizomes press up to the surface, add 2 to 4 cm of fresh loose substrate or mature compost over them. Repeat only when needed, usually one to three times during summer. A thin mulch of shredded leaves, straw or untreated hemp fibre moderates evaporation and temperature peaks. Keep it slightly away from the stem base so this sensitive area remains airy.
Keep a short greenhouse journal. Note planting date, first shoots, heat periods, fertiliser applications and the start of autumn yellowing. Memory can be misleading during a long crop. A few precise observations help distinguish normal maturity from a problem. Growing space, access and ventilation routes should also suit the crop from the outset; a classic aluminium greenhouse provides a framework for lasting use.
06 / The local season sets the rhythm
The crop plan should answer New Zealand weather, not tropical wishful thinking.
Cool spring starts
Start in late winter or early spring at a warm indoor spot, on a heat mat or in a gently heated greenhouse. An unheated greenhouse becomes suitable only once nights are reliably milder and container soil stays clearly above 15 °C. Around 20 °C soil temperature is useful for launching strong growth. In southern, elevated and frost-prone areas especially, this warm head start determines the length of the harvest period.
Hot inland summers
During hot spells, check not just air temperature but dark containers and areas close to the ground. If the substrate stays well above 30 °C for long periods, ventilate earlier, shade if needed and water in a controlled way. Sudden flooding with large amounts of water does not solve heat stress and can displace oxygen around the roots.
Humid, rainy areas
Here, a lack of humidity is rarely the issue; slow drying is more critical. Raise containers slightly, avoid water standing in saucers and leave space around each pot for air movement. Open doors and roof vents in coordination. If surfaces remain wet for a long time, reduce watering frequency first instead of adding further moisture to the system.
Long, mild autumns
Maintain the crop moderately while foliage remains healthy and green. Mature rhizomes gain size and flavour with extra warm time. Only when shorter days, cooler nights and even yellowing show natural slowing should watering be reduced gradually. Not every yellow leaf needs fertiliser.
A well-proportioned structure makes these adjustments easier. Explore the classic aluminium greenhouse if you are planning broad container zones, clear paths and thoughtfully placed windows and doors for warmth-loving crops. For more inspiration for a garden structure used year after year, see the classic aluminium greenhouse.
07 / Read warning signs before treating
Symptoms point the way; they are not a blanket diagnosis.
First examine the substrate, root zone and pattern across the whole plant. An evenly yellow leaf in autumn means something different from a suddenly wilting green shoot in high summer. If rot is possible, isolate the container. Do not transfer substrate or irrigation water to healthy plants with tools or hands.
Autumn yellowing
Possible seasonal maturity
Brown leaf tips
Sun, heat or dry root ball
Stalled growth
Cold, nutrient shortage, compaction
Speckling or webbing
Check for spider mites
Wilting or soft rhizomes
Act quickly; suspect rot
Follow the clue
Even yellowing at season’s end: This often indicates natural maturity. Gradually reduce watering, stop heavy feeding and decide whether to harvest now or let the rhizomes mature a little longer.
Brown tips or pale leaf areas: Check for direct sun through glass, dry soil and an overheated root zone. Filter midday light, even out watering and improve air exchange. Do not keep the pot permanently wet as a countermeasure.
Weak growth and slowly yellowing lower leaves: Check substrate temperature, drainage holes, compaction and feeding so far. A pot that is too small can also restrict growth. Correct only one limiting factor at a time so the plant’s response remains clear.
Fine speckling, webbing or dull foliage: Look beneath leaves for spider mites, especially in hot, dry, poorly ventilated corners. Isolate the plant if necessary, rinse leaves carefully and reduce an early infestation mechanically. Improve airflow at the same time.
Sudden wilting of green shoots, soft tissue or dark-smelling rhizomes: Treat possible root damage or serious rot as urgent. Remove and isolate the affected plant with its substrate; diseased material does not belong in compost. Clean containers and tools thoroughly, and check drainage and watering practice for neighbouring plants. Do not use affected rhizomes for propagation. Clean planting material, separate substrates and a long crop rotation are more reliable than a late rescue attempt.
08 / From moist growth to harvest
Harvest for the kind of ginger you want to use.
Two harvest forms are especially appealing. Baby ginger is tender, juicy and covered only by thin pale skin. More mature ginger is firmer, spicier and better suited to somewhat longer storage. The greenhouse gives you this choice instead of ending the crop abruptly with the first cold night.
Baby ginger
Tender and fresh
- Harvest with green foliage
- Rinse gently
- Use promptly
Mature ginger
Firm and storage-ready
- Harvest after natural die-back
- Air-dry away from sun
- Save flawless planting pieces
Baby ginger
According to the LWG, fresh ginger can be harvested after as little as three to four months. Choose a vigorous plant and carefully lift an outer rhizome section, or empty the whole container. The pale skin is tender, the flesh juicy and less fibrous. Baby ginger is particularly good in tea, syrup, delicate dishes and pickles. Use it soon after rinsing, or store it briefly in a cool place. Disturb the main branching as little as possible when taking a partial harvest.
Mature ginger
For firmer, more aromatic rhizomes, leave the plant until foliage naturally declines. Once leaves are mostly yellow and nights are cooler, gradually reduce watering. Harvest on a dry day. Empty the container carefully or loosen a bed with a garden fork; do not pull on stems. Remove stem remains, brush away loose soil gently and let the rhizomes air-dry for several hours.
Freshly harvested rhizomes must not dry in blazing sun or be tightly packed while wet. Store healthy pieces for a short time somewhere cool, dry and frost-free, checking them regularly. Particularly firm, undamaged sections with clearly visible buds can be kept separately as planting stock for next year. Remove suspect substrate after harvest, and clean containers, tools and drainage areas. This quiet hygiene is already part of a successful next season.
Questions from the potting bench
Greenhouse ginger FAQ
Can ginger grow in a greenhouse all year?
Only in consistently reliable warmth. Most home gardeners in New Zealand sensibly treat edible ginger as a long, heat-demanding seasonal crop. An unheated winter greenhouse does not keep the root zone warm enough and may stop growth completely. It is usually better to pre-sprout warmly in late winter, grow the main crop under cover through summer and harvest deliberately in autumn.
How much sun does greenhouse ginger need?
Bright light matters, but intense summer sun through glazing can overheat leaves and substrate. Position ginger brightly and filter midday sun in persistent heat. What matters is the actual leaf response, root-ball moisture and measured root-zone temperature—not a fixed number of sunshine hours.
Can ginger grow in a greenhouse raised bed?
Yes. A raised bed works well when the substrate is loose, freely draining and warm enough in spring. Keep roughly 30 cm between planting positions and leave space to top up substrate around visible rhizomes later. Containers remain more practical if you need to isolate individual plants, manage moisture more precisely or move the crop during cold snaps.
Why is my ginger not sprouting?
Common causes are a dormant or treated rhizome, a root zone that is too cold, constantly wet propagation material or simply insufficient patience. Check that the piece is firm and free of dark, soft areas. Keep the medium only lightly moist and provide around 22 to 26 °C. Healthy ginger often needs several weeks before a visible shoot appears.
Should ginger be misted every day?
Not as a replacement for watering the root zone correctly. Light misting can help during pre-sprouting or in very dry air. Permanently wet leaves, a closed cover and poor air exchange, however, encourage problems. Evenly moist substrate, free drainage, dry leaf surfaces overnight and regular ventilation take priority.
Which greenhouse layout suits ginger?
Ginger does not need a huge footprint, but benefits from wide containers, a warm ground-level zone and good air movement around its tall shoots. A classic aluminium greenhouse is particularly practical when one side has a generous container or bed area and clear paths make watering, mounding, checking and harvesting easier.
Sources and further reading
A working library for a long-season crop.
These specialist sources underpin the advice on temperature, pre-sprouting, substrate, water management, plant health and harvest. Recommendations have been adapted to manageable home-garden quantities and the varied greenhouse seasons of New Zealand.
More from Bloomcabin: Setting up a greenhouse: layout, plants and care · Classic aluminium greenhouse overview · Frequently asked questions about Bloomcabin aluminium greenhouses
- Bavarian State Institute for Viticulture and Horticulture – Growing your own ginger
- LWG – Ginger: growing information and cultivation tips PDF
- FiBL – Ginger guide for protected cultivation PDF
- University of Illinois Extension – Watering and Soil Moisture Guidelines for Ginger
- University of Illinois Extension – Fresh Ginger Rhizome Cultivation: Pre-Sprout Process
- University of Florida IFAS Extension – Ginger, Galangal, and Turmeric Production
- Bavarian State Institute for Viticulture and Horticulture – Practical ginger-growing experience
