
Pergola Droplets: Is Rain or Condensation the Cause?
Pergola moisture guide
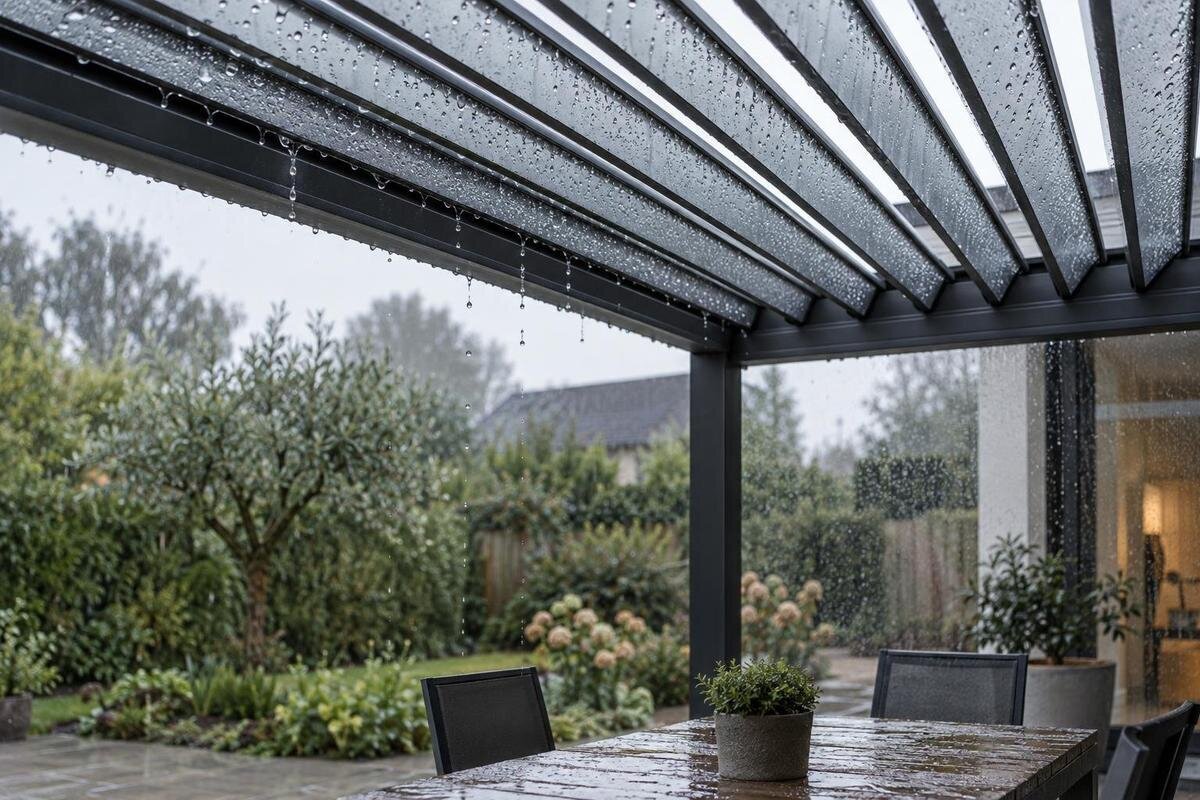
Droplets under a pergola can look like a roof leak, but appearance alone rarely settles it. Condensation forms when moist air meets a surface that has cooled enough; rainwater can enter at an opening, follow a joint or reach you after travelling along the roof. The most useful clues are when the wetness starts, what the weather was doing and whether it appears as a broad film or a repeatable track. Use those clues together before deciding what needs attention.

01
Why droplets form under a pergola
Condensation is water vapour from the air turning into liquid when it touches a surface cool enough to be below the air’s dew point. A pergola need not enclose a room for this to happen: damp outdoor air can sit beneath the roof while the roof surface cools overnight. Tiny beads may form, join into larger drops and eventually fall. The same process can occur at other times if the surface is sufficiently cool. You do not need to calculate a dew point; the idea explains why a roof can be wet when no rain has landed on it. Cloud, wind and nearby wet ground affect conditions, so there is no single overnight pattern that proves condensation.
Rain reaches the underside by a different route: it may pass through an opening or joint, blow in from the side, or run along a surface before dripping. These possibilities do not automatically mean a faulty roof; an open-sided pergola may admit wind-driven rain, and water can emerge some distance from where it entered. Moisture may also be left from an earlier shower or arrive from a nearby structure. Treat rain and condensation as leading explanations, not the only possibilities. A drip point by itself cannot identify the source, so note when the wetness first formed, not just when you spotted it.
Signs that point to condensation
Condensation is more plausible if the underside is dry after previous rain, then droplets appear overnight or early in the morning before a new shower. It may look like a light film or many fine beads across a wider area rather than one clear track. Beads can merge and fall, while the surface may dry as it warms or air movement increases. A rain-free night followed by early wetness is a useful clue, not proof: a brief local shower may go unnoticed, and water can travel from another part of the roof. Check the outside roof and nearby surfaces for fresh rain as well.
Look at what is damp as well as when. A beaded underside with no visible trail from a seam makes condensation worth considering, especially if similar moisture appears on other cool surfaces nearby. Side panels or screens can collect droplets too. The pattern need not be even: surfaces differ in temperature and drying, and a sheltered corner may hold moisture longer than an exposed one. Conversely, a few dry patches do not rule condensation out. Humidity, surface temperature and airflow vary across the same structure, so look for the overall pattern rather than expecting a uniform coating.
02
Signs that point to rain entering
Rain is more likely when droplets begin during a shower or soon afterwards, and the same area becomes wet again in comparable rain. Wind direction helps explain why a zone facing the weather or an open edge gets wet even when the central roof looks dry. A narrow track that appears to start at a seam, edge, opening or wall junction deserves attention, particularly when nearby areas remain dry. A delayed drip is not automatically condensation: water can remain on a surface or travel before it falls. Record what was happening outside at the time the first wet mark appeared. Rain at the site matters more than a broad forecast.
Follow the visible trail upwards rather than assuming the drop marks the entry point. Water can cling to an underside, run towards a low point and fall away from where it first got in; the shape of the roof and its intended drainage path matter. If comparing a product such as the Bloomcabin Wall-Mounted Pergola, check the exact model and installation documents for its roof arrangement and intended water route. A product name alone gives no weather limit and cannot show whether a particular drip is expected. One wet event is less persuasive than the same route recurring in similar rain.
Match the wetness to the weather and roof position
Build a simple timeline for each episode: when the first droplets appear, whether rain is falling then, how long it has been since rain stopped, and when the surface has dried. Add approximate temperature and wind direction if you know them, and note whether the night was clear, cloudy or damp. A nearby weather report provides context, but conditions at the pergola are more useful than a report from elsewhere; a brief shower or gust can be missed by a distant station. Write observations down at the time rather than relying on memory, especially if several hours pass between rain and dripping.
Record the roof position and side configuration as well. If the roof is adjustable, note the setting without changing it simply to provoke a drip; follow the operating guidance for that model. For a louvred roof, use the terms in the instructions so your notes clearly identify the position. Screens, glazing or open sides can alter airflow and drying, so include their arrangement in each entry. When comparing the Bloomcabin Pergola, ask how its roof settings relate to the intended drainage route. Compare episodes with similar settings first; changing several conditions at once makes it harder to tell which difference matters.

03
What the droplet pattern can tell you
Map the damp area with a quick sketch or a photo from the same safe viewpoint. Broad, scattered beads or a fine film across parts of the underside can fit condensation, particularly after a rain-free night. A repeatable line of drops along one joint, edge or fixed connection fits a rainwater route more readily, but it still does not prove a leak. Condensation may collect at a cooler edge, while wind-driven rain can wet a wide area. Read the pattern alongside the timing and weather; neither a broad patch nor a straight line has a single guaranteed cause.
Compare the underside with visible surfaces above and beside it: where is the first wet mark, where does a trail begin, and does it line up with an opening or joint? Distinguish fresh wetness from an old stain, which may remain after the surface has dried. When discussing the Bloomcabin Bioclimatic Pergola, use these observations to ask about the relevant part of its roof layout rather than inferring hidden construction from the name. Mark any point where the visible trail disappears. That gives you a clear boundary between what you have observed and what remains uncertain about the water path.
Trace the water path from a safe viewpoint
From ground level, look for a visible route from the wettest mark towards a joint, edge or support. Note whether the surface is broadly beaded or whether a narrow streak seems to run from one point. A drop may form only at the end of a route, so mark both the first visible wet area and where it finally falls. Use a sketch with a simple orientation—wall side, garden side, left and right—so an installer can compare your notes with the structure. Take photographs from a safe, accessible position; do not climb onto the roof or reach over an edge to trace water.
For a wall-mounted setup, the building interface is one place a qualified installer may need to assess, but a drip near that side is not proof that the connection is responsible. If considering the wall-mounted pergola listing, ask which installation and drainage information applies to the exact model and configuration. Follow the supplied inspection guidance rather than loosening parts or trying sealant as a test. An unplanned change can hide the original route and may not address condensation, wind-driven rain or another cause. Keep the investigation visual unless the manufacturer or a suitably qualified professional advises otherwise.
04
Compare observations in dry and rainy weather
Choose observation periods that can be compared safely and naturally: one dry spell after the structure has dried, and one ordinary rain event viewed from a sheltered place. Before each, note the roof setting and whether sides are open; take a photo from the same angle at the start, when droplets appear and after they dry. Do not hose the roof or use a pressure washer to simulate rain. A directed spray can create conditions unlike real weather and may drive water into places ordinary rain would not reach. Do not stay outside to observe if conditions become unsafe.
Repeat the comparison if the first result is unclear, changing as little as possible between observations. Record whether drops form in a rain-free period, follow a particular wind direction or recur at the same point. Keep each photo series with its weather notes so you can compare the sequence, not just the wettest moment. The regular pergola model page can help identify the product when organising your records alongside the installed unit’s paperwork. If conditions differ substantially, record that rather than treating the events as a direct test. An unclear result is worth recording too; it prevents an uncertain observation becoming a firm conclusion.
How side screens and airflow affect moisture
An open pergola is exposed to outdoor humidity, but side screens, glazing or curtains can change how quickly air moves through the space. People, plants, drying laundry or wet furniture may add moisture locally, with the effect depending on the layout and conditions. After a cool night, a sheltered zone may dry more slowly than an area in open air. Note these surroundings alongside the weather, rather than treating them as a diagnosis: a sheltered pattern can still come from rain entering at a joint. Condensation remains possible outdoors wherever moist air meets a sufficiently cool surface.
If you plan to add an enclosure, or are assessing one already fitted, confirm that the exact arrangement is suitable for the pergola model. Do not assume a screen or glazed wall is compatible just because it can be physically attached, or that enclosing the sides will solve roof moisture. When considering the bioclimatic pergola model, ask which enclosure options are permitted and how the guidance applies with those sides fitted. Keep a record of the existing side arrangement before making changes. This gives you a useful comparison if airflow, drying or the location of visible droplets changes afterwards.

05
When to ask an installer or supplier
Ask the installer or supplier to investigate when the same track reappears during rain, when water is concentrated around a connection, or when the source cannot be seen safely from ground level. Share your timeline, photographs, wind direction, roof position, whether sides were open, and the model or installation paperwork. Ask which weather-performance information and drainage diagram apply to that exact configuration; general statements about pergolas do not establish an individual model’s limits. If you can see damage, or water appears in a place you cannot inspect safely, stop trying to trace it yourself and arrange a professional assessment.
Keep the description observational: report where it is wet, when it starts and how it changes, rather than labelling it a leak before the cause is known. If the Wall-Mounted Pergola model page identifies your product, include that name along with the installed configuration and any side enclosure. Separate recurring observations from a single unusual event, and explain which parts of the water trail you could not see. Do not work at height or dismantle roof parts to fill those gaps. A suitably qualified installer can assess the installation details and determine whether further inspection is appropriate.
What to check when choosing a pergola
When choosing a pergola, compare the exact roof design, how it is intended to operate, the drainage route and the model-specific weather limits. Ask what is expected around open edges, how rainwater is managed in the selected configuration and whether adding side enclosure changes the guidance. Those details matter more than a general claim that a roof is rainproof. No single promise applies to every model, position, site exposure or installation, so use documents for the exact product and configuration instead of relying on a category name, photograph or assumptions about how similar structures behave.
The Bloomcabin Pergola product page lists sizes from 9 to 24 m²; that range describes listed options, not how a roof manages rain or condensation. Compare the size and intended configuration with your space, including where you want to place seating beneath it. If avoiding drips over that area is a priority, ask the supplier to explain the expected water path for the proposed layout and what observations would indicate an issue. Request the matching roof, drainage and enclosure information as part of that comparison. An area measurement, adjustable-roof label or visual similarity is not a performance guarantee.
Frequently asked questions
Can condensation form under an open pergola?
Yes. An open pergola is still exposed to humid air, and its roof surface can cool below the air’s dew point. That can produce beads or a film underneath without rain falling on the roof. Whether the sides are enclosed is not the deciding factor; the important conditions are moisture in the air and a sufficiently cool surface. Check the timing and droplet pattern as well.
If it drips after rain, is it definitely a leak?
No. Rainwater can remain on a surface or travel along the roof before it drips, so the moment you notice a drop may be later than the rain itself. Wind-driven rain can also enter through an open side. Note when the wetness first appears and whether the same trail returns in similar rain before deciding what to investigate.
Do droplets under louvres always mean rain has entered?
No. Condensation can form on a cool underside, including beneath a roof with louvres. Rain can also follow a route affected by the roof’s design and position. Record the louvre setting and check the instructions and drainage information for the exact model; one general rule cannot describe every system.
Should I hose the roof to test for a leak?
A hose test can create a pattern unlike ordinary rain, especially if water is directed at an opening or joint. Start with observations during natural weather instead: note when droplets appear, photograph their location and compare the result across more than one event. Follow the product guidance or ask an installer before attempting any test.
What should I record before asking an installer?
Note when the droplets first appeared, whether it was raining, the wind direction if known, where the wet marks were and when they dried. Include the roof position, whether sides were open, photographs from a safe viewpoint and the exact model or installation paperwork. These details help the installer compare what you saw with the relevant product documents.
The most reliable explanation comes from combining timing, weather and the shape of the wet area. A broad film after a rain-free, humid night makes condensation more plausible; a repeatable trail that appears with rain gives you a reason to check the roof’s water path. Neither pattern is definitive on its own. Keep a clear record, compare it with the exact model documentation and seek a qualified assessment when the same rain-related route returns or cannot be inspected safely.
