
Electric infrared heaters under a pergola: what to check
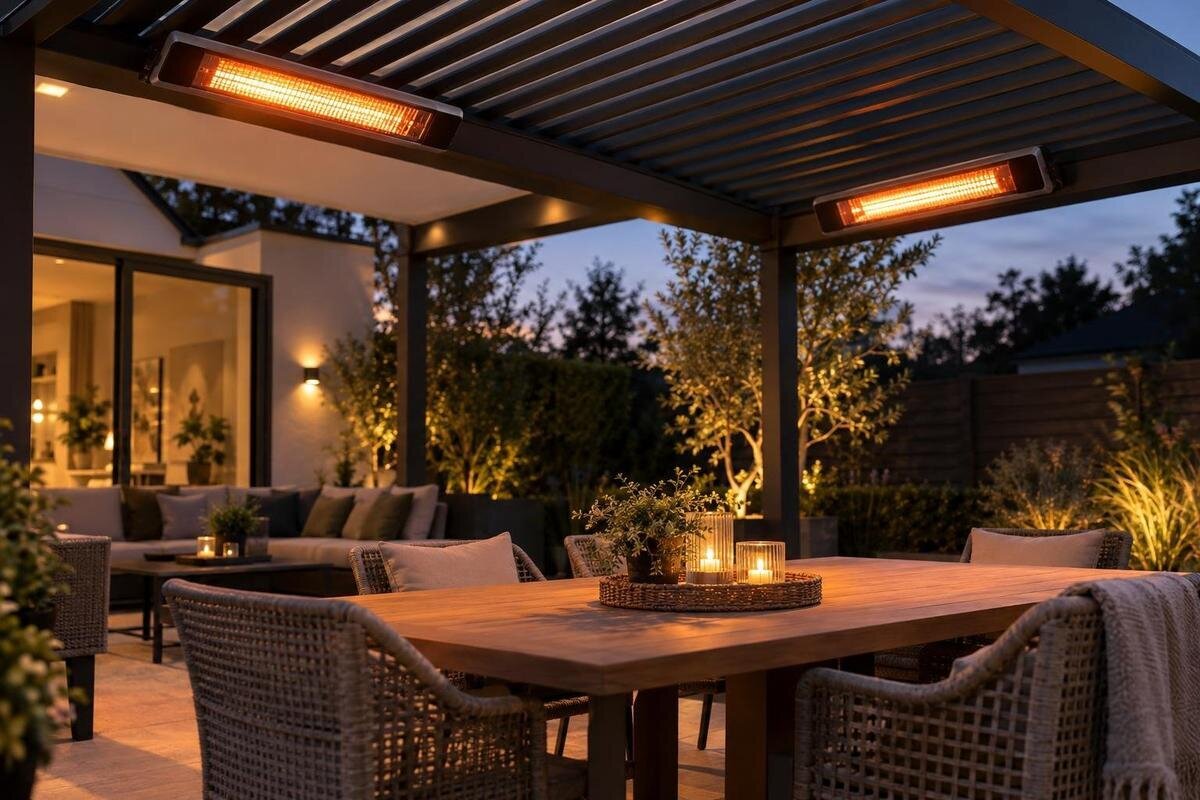
Pergola heating
An electric infrared heater can add radiant warmth to a covered outdoor area, but a pergola is not automatically an approved mounting surface or a dry, sheltered location. The heater's manual sets conditions for that exact appliance; the pergola instructions set limits on what can be attached to its frame. Both have to agree before you buy or install anything. Check the approved mounting point and orientation, clearances to nearby materials, exposure at the actual location, and the electrical plan with a qualified electrician. If one manual is silent or the requirements conflict, get written confirmation instead of treating a product photo or a similar model as approval.

Use the exact heater and pergola manuals
Start with the exact heater model and variant, plus the pergola model and configuration. A range name, retailer photograph or manual for a similar-looking unit may omit limits that matter to its bracket, orientation, electrical connection or outdoor use. The heater instructions need to say whether the appliance is intended for the proposed location and how it may be mounted; the pergola instructions need to say whether that point on the structure may be used. Treat these as two separate checks, not one general claim that the setup is suitable. Keep both manuals and model codes together while you compare them, and record any model suffix that distinguishes one version from another.
Read the installation sections, diagrams, warnings and any list of approved accessories, rather than relying on a short product description. Check that each document applies to the precise version you plan to buy, and note any conditions on mounting orientation, location or service access. If you are considering the Bloomcabin Wall-Mounted Pergola, use its full model name when requesting the relevant installation information. If a manual is missing, unclear or refers to a separate mounting guide, request that document before choosing a heater. Keep the maker's reply with the matching product information so you can distinguish instructions for your selected model from those for other versions.
Confirm the approved attachment point
A heater that physically fits between two frame members is not necessarily approved for that mounting point. Look for instructions naming a suitable support, attachment method, bracket and orientation. Ask the pergola maker whether the proposed point is permitted and whether any specific mounting accessory or conditions apply. Do not judge support by appearance or material alone; a beam that looks substantial does not tell you what fixing it can accept. If approval depends on a particular frame member, bracket or fastening type, have that specific point identified rather than accepting a general assurance that the pergola is strong enough. The heater's included bracket is not automatically compatible with every pergola frame.
Keep approval to attach the unit separate from the heater's required clearances and the electrical design: satisfying one does not settle the others. Avoid drilling, clamping or modifying a frame member that the pergola maker has not identified as suitable. If the documentation refers you to a particular installer or professional assessment, follow that route rather than improvising a bracket. When enquiring about a Bloomcabin Pergola, identify the proposed attachment point on the plan and include the heater's bracket details. Ask for the answer in writing, with any conditions clearly stated, so the installer can work from the same information.
Measure every clearance from the right reference point
Clearances come from the exact heater instructions, not a universal rule for infrared models. Depending on the appliance and mounting orientation, the manual may set different minimum distances above, below, beside or in front of it, or to particular materials and objects. Find every applicable distance and read what the measurement starts and ends at. A drawing may refer to the heater body, bracket or another surface; do not assume the gap is measured from the centre of the heater. If the instructions distinguish combustible from non-combustible surfaces, apply their wording to each nearby material rather than treating the frame construction as an answer. Never copy a figure from a different model or infer a distance from a photograph. If no relevant clearance is stated, ask the manufacturer.
Compare those requirements with the complete installed outline: heater casing, mounting bracket and any part that projects beyond the pergola frame. Include fixed roof members, walls, trim and other fixtures at the proposed location. Use a measured plan or a site visit to record actual gaps, then check the manufacturer's diagram against it; do not scale distances from an illustration. If you are planning around the Bloomcabin Bioclimatic Pergola, identify the exact configuration on that plan and label each measurement's reference points. This lets the person reviewing it see how you have interpreted the heater diagram. If a clearance cannot be met as written, change the plan instead of reducing it by judgement.
Assess rain, wind and other exposure
Being underneath a pergola does not, by itself, make a heater suitable for outdoor exposure. The amount of shelter can vary with roof position, open sides, wind direction and nearby surfaces, while wind-driven rain, splashing or other site conditions may still reach the appliance. Check the heater instructions for the permitted environment and compare them with the actual position in which it will be used. Do not treat a broad 'outdoor' description as approval for every exposed spot. Check conditions during the full range of ordinary use, not only on a calm day or with the roof in a single position. If the manufacturer limits where the heater can be installed, confirm that your intended place fits those stated conditions.
Check the whole exposed assembly, not just the heater body: a bracket, connector, control or cable route may have its own requirements. Ask the heater maker which exposure details matter, and have the electrician assess whether the specified components suit the proposed location. In a coastal or especially exposed setting, raise that fact explicitly rather than assuming a general outdoor rating covers it. When discussing a site for the wall-mounted Bloomcabin pergola, describe where rain or splashing could reach the proposed heater and connection points. Keep the heater's exposure instructions and the pergola's site guidance together, with any location-specific questions noted for the relevant manufacturer.

Check moving roofs and planned accessories
If the pergola has a moving roof, retractable cover, screen or other adjustable part, check the heater position against the full range of movement. The unit and its bracket must not conflict with any operation that the manufacturer permits, and the heater's stated clearances must remain achievable in every relevant position. Check both the moving component's path and where it rests when open or closed. If roof position affects the heater area, note each position in which the pergola is intended to operate and ask about any limits on heater use during movement. A single view of the roof in one position is not enough to establish compatibility. If the instructions do not explain the combination, ask the pergola maker before settling on a mounting point.
Include planned add-ons and future changes in the same review. A screen, blind, fabric panel, extra light or other fitting could occupy space that is clear in an empty frame, or affect access to a control or service point. Do not assume an accessory is suitable near a heater because it is sold for a pergola; check both products' instructions for the combination. For a proposal involving Bloomcabin's bioclimatic pergola model, list the exact accessories alongside the roof positions being assessed. Ask whether the heater needs to be off while a roof or screen moves, and how any stated restriction applies to the proposed arrangement. Seek a documented answer before ordering parts that depend on the layout.
Have a qualified electrician assess the supply
Give a qualified electrician the exact heater manual and its stated electrical requirements before committing to the installation. They can assess the supply at the property, the planned circuit, the proposed connection and any protective or control equipment required for that appliance and location. Pass on the rating plate information exactly rather than estimating from a similar unit. A nearby power point is not proof that the supply is suitable, and this article cannot establish whether an existing circuit is adequate. Do not select a heater on the assumption that any outdoor socket or spare switch can supply it. Ask the electrician what needs to be confirmed before work starts, including whether the proposed connection method matches the manufacturer's instructions.
Include other planned pergola electrical equipment in the discussion, such as lighting or a motor, so the electrician can review the intended arrangement rather than a heater in isolation. Confirm which controls are compatible and whether the heater must be operated independently; do not assume a dimmer, timer, remote or smart control is suitable unless the heater instructions say so. If you are considering Bloomcabin's pergola model, include its installation information with the heater manual and details of the other planned equipment. This gives the electrician a common set of documents to work from. Keep electrical decisions with the qualified person who has the exact site and equipment details.
Plan cable routes and controls before work begins
Plan the cable route and connection point with the electrician and pergola maker before any part of the frame is drilled, covered or enclosed. A route that appears neat may pass through a moving section, pinch point or exposed area, or make future inspection difficult. The manuals and the professional's assessment should determine what can be routed where; do not hide or secure wiring inside a beam simply because it is convenient. Ask how the planned route remains compatible with the heater's operating environment and the pergola's movement, and whether its path needs to stay accessible. This is a design question for the people assessing the equipment and site, not a reason to improvise with the frame.
Check the position and operation of switches, isolators or other controls specified for the heater without assuming the pergola's existing controls can be reused. They should be reachable and identifiable in the arrangement described by the manuals, rather than buried behind furniture or an added screen. Agree how the installation can be inspected or serviced without removing unrelated structure. These are planning questions, not a do-it-yourself wiring guide: the electrician should decide the suitable components and route. Have the agreed route and control locations shown on the site plan, so the person doing the work can see what was planned. An empty conduit, spare switch or lighting connection is not proof of heater provision.
Include furniture and fabrics in the clearance check
Assess clearances in the space as it will actually be used, not only around an empty pergola. Note the height and position of tables, chairs, umbrellas, outdoor blinds, curtains, cushions and any other material near the heater. Include movable items that are likely to be left beneath it, along with fixed walls and screens. The heater manual may give rules for people or particular materials as well as the frame; apply each instruction to the real arrangement. Consider temporary changes too, such as pulling a chair closer or moving a parasol. Do not assume a gap is acceptable because the heater is above head height or because an item is used outdoors.
Mark the heater body and bracket, the manual's required clearance boundaries and the surrounding furniture on a simple plan. This makes conflicts visible before you buy, especially if chairs move or a shade accessory is added later. For a layout using Bloomcabin's wall-mounted model, show the nearby house wall and furniture as well as the pergola frame, using actual measurements and the selected heater's manual. If the only workable arrangement puts an object inside a required boundary, move the object, reconsider the layout or choose a different documented heater setup. Do not rely on people remembering an invisible limit in daily use.

Keep the operating and handover information
Read the heater's user and care instructions as well as its installation pages. Check what the maker says about controls, permitted use in changing weather, cleaning, inspection and service, and whether access around the appliance must be maintained. Do not add a maintenance routine based on a different heater or assume a unit needs no attention because it is mounted out of reach. If the instructions separate owner care from service work, follow that division and ask a service person about anything they do not cover. If the manual does not address an aspect of the pergola setting, ask the heater maker or installer how it applies. The aim is to understand the operating conditions before the unit is used, not to improvise later.
At handover, ask for the exact heater model and mounting position to be recorded, along with the documents used to approve the arrangement, applicable clearances, control details and any stated use or maintenance limits. Keep the pergola instructions and electrician's information with them. Ask which changes would require a fresh check, such as replacing or moving the heater, adding a screen or changing how the roof is used. A handover note is not a substitute for the manuals, but it gives future owners or tradespeople a clear starting point instead of leaving them to guess what was intended.
Resolve unclear or conflicting instructions before buying
If the manuals are silent about the proposed mount, use different reference points or appear to conflict, treat the issue as unresolved. Do not choose the less restrictive distance, borrow instructions for a similar heater or assume that an installer can approve a frame attachment on the pergola maker's behalf. A general outdoor label, retailer image or accessory advertised for another model cannot fill a gap in the exact instructions. Note any conflict between a diagram and written text rather than guessing which to follow. Pause before purchasing accessories or altering the structure. Where the manuals refer to an approved installer or written manufacturer confirmation, obtain that information before treating the design as settled.
Send both manufacturers the exact model names and variants, the planned bracket and attachment point, measured clearances, roof positions, nearby materials, exposure and intended electrical arrangement. If your enquiry concerns that model, include the Bloomcabin Pergola product page alongside the site plan to identify the structure. Ask direct questions: Is this heater approved for this pergola and mounting point? Which orientation and distances apply? Are there restrictions on movement, accessories or weather exposure? Have a qualified electrician assess the electrical side from the same documents and site details. If the answers do not establish a compatible combination, choose another setup with clear approval or leave the heater out of the pergola plan.
Frequently asked questions
Will any infrared heater labelled for outdoor use work under a pergola?
No. The word 'outdoor' does not establish that a heater suits every covered location. Check the exact unit's permitted exposure, mounting position and clearances, and confirm that the pergola maker approves the attachment. A qualified electrician should assess the electrical arrangement for the site.
Can I attach a heater to a beam if it looks strong enough?
Not on appearance alone. Check the pergola maker's mounting instructions for that exact model and attachment point. A substantial-looking beam or a bracket supplied with the heater does not establish that the combination is approved. Ask the maker before drilling, clamping or altering the frame.
Do heater clearances change with a moving pergola roof?
The applicable clearances come from the heater manual and may depend on mounting orientation and nearby surfaces. If the roof or a screen moves, check the arrangement in every relevant position. Get model-specific guidance if the documents do not explain the combination.
Can an existing outdoor power point run the heater?
Not necessarily. Give a qualified electrician the heater's exact electrical requirements and the pergola plan so they can assess the supply, circuit and connection method. A nearby outdoor power point or lighting connection is not evidence of suitability.
What should I do if the instructions are unclear or conflict?
Pause and treat compatibility as unresolved. Send both manufacturers the model codes, proposed mount, measured gaps, roof positions and exposure details, and ask for written clarification. Have a qualified electrician assess the electrical side. If the combination cannot be confirmed, choose another documented arrangement or leave the heater out.
Treat the heater, pergola and electrical supply as one planned installation, but verify each against its own instructions. A compatible choice is one where the pergola maker approves the exact mount, the heater's specified distances and exposure can be met at the site, and a qualified electrician confirms the electrical arrangement. Keep the written answers, manuals and final layout together so the installation matches the plan. If a dimension, attachment point or rating remains uncertain, resolve it before purchasing or fitting the heater rather than guessing from a similar pergola or appliance.
