
Planning a Pergola Below Low Eaves or a Roof Overhang
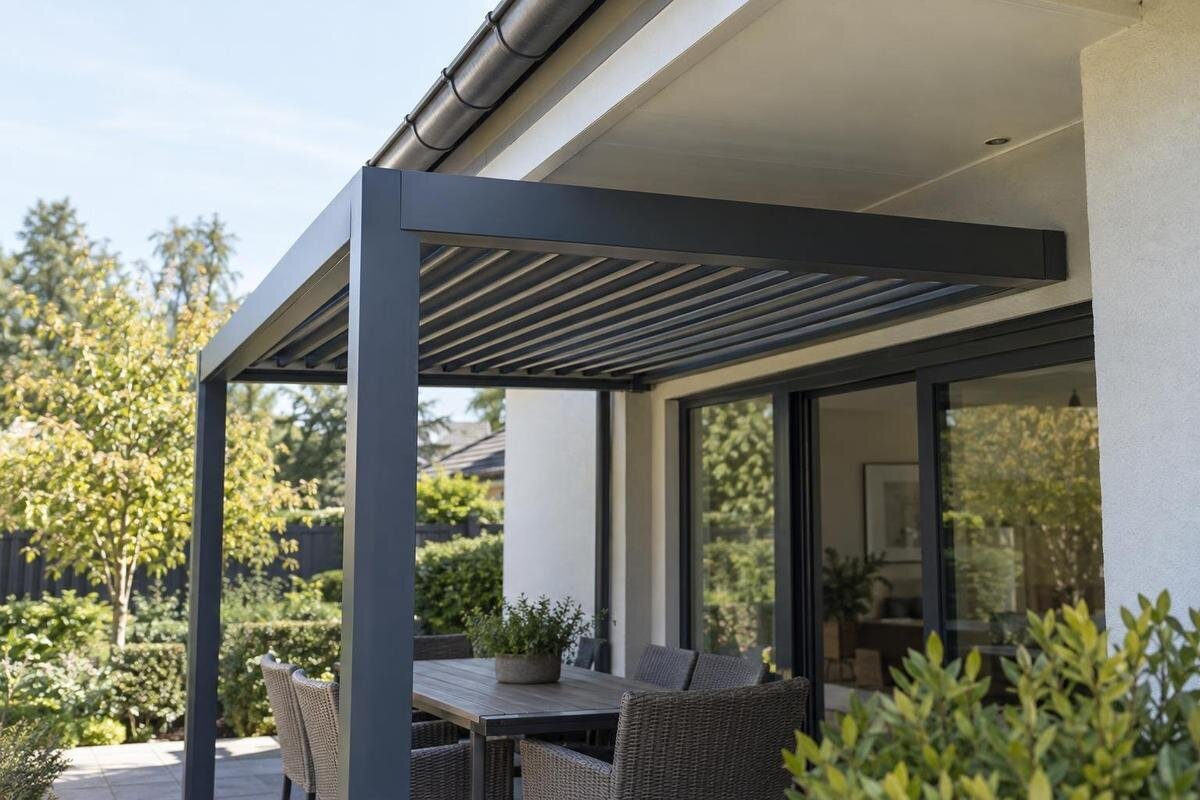
Pergola planning
Low eaves do not automatically rule out a pergola, but a clear-looking gap is not proof that it will fit. The roof edge can affect overall height, horizontal reach, drainage, attachment points and access to guttering at the same time. Measure the actual eaves, fascia, gutter and finished ground level, then compare those measurements with drawings for the exact pergola configuration. The layout also needs to account for movement and future roof maintenance, with a support arrangement verified for the actual wall and ground. The house roof is not a convenient fixing point simply because it sits nearby.

01
Survey the eaves and pergola position
Before comparing designs, draw a simple plan and a side elevation of the area. Mark the house wall, outer edge of the eaves, fascia, gutter and downpipe, finished paving or deck, nearby doors and windows, and the footprint you would like the pergola to cover. Add fixed items such as steps, lights and vents if they sit near the proposed frame. Note whether the pergola would meet the wall, run parallel to it or sit at an angle. A photo can help a designer understand the geometry, but perspective distorts scale, so it cannot replace measurements.
Measure vertical clearance from the finished surface beneath each part of the proposed structure, rather than assuming the ground is level. Record where paving rises or falls and whether a deck or new surface is planned. Take measurements at the closest points along the house and at each proposed post location; the eaves, gutters and wall are not always parallel. Note exactly what each measurement reaches—the soffit, gutter underside or outer fascia—so another person can interpret it correctly. When comparing the Bloomcabin Pergola listing with your sketch, keep the listed area range separate from the height and clearance measurements. Mark unknown dimensions instead of estimating them, and distinguish existing surface levels from any planned finished levels.
Measure the lowest clear height
Use the lowest overhead point, not an average eaves height. The underside of a gutter, fascia, soffit or other projection may sit below the roof line; on the pergola, the highest beam, bracket or other assembled part may be the limiting point. Compare a dimensioned side elevation for the exact model with the ground level beneath it, including any base or support detail specified in the design. If the eaves slope or change around a corner, measure at several points instead of assuming one height applies along the whole run. Do not assume a frame can be lowered or altered to make up a shortfall; confirm what the specified installation allows.
Check the whole proposed span, not just one convenient corner: sloping ground, uneven paving or a changing gutter line can make clearance vary from one post to the next. Measure the approach route and doorway where people will pass beneath the lowest part, and note fittings that must remain reachable. The Bloomcabin Bioclimatic Pergola page lists area options from 9 to 24 m²; that figure does not establish assembled height. Ask for full installed dimensions, including selected options, and any required clearance before deciding that it fits. If ground levels will change, use the planned finished surface as the reference.
02
Measure the full roof overhang
The wall face is not the outer limit of the house roof. Measure how far the eaves extend from the wall, then include the fascia and gutter, which may project farther. Show this distance in plan alongside the proposed pergola beam and post positions. Include gutter end caps, downpipe offsets, corners and any part of the roof that returns around a wall; one measurement on a straight section will not describe the full edge. Where the eaves are irregular, record the projection at more than one point, particularly where the usable gap narrows.
Where the pergola would sit beneath or beside the eaves, check whether a beam, post or roof edge overlaps the gutter’s space, even if the main footprint looks clear. Map where house-roof water is collected and discharged; do not assume a pergola can receive or redirect that runoff. If the proposed pergola has its own defined outlet, mark it separately. When considering the model on the Bloomcabin Pergola product page, request a dimensioned drawing showing its exact projection and compare that with the measured overhang. Keep the two drainage routes separate in your plan until a professional confirms any proposed connection or shared route.
Allow for movement and future roof work
A gap that is only just visible on a still day is not a dependable clearance. Existing roof edges and building components can move or deflect under changing conditions; the amount depends on the structure, its condition and the way the pergola is supported. Do not design the frame to touch, wedge against or hang from the gutter, fascia or soffit. Even small movement may matter where two parts nearly meet. Have the necessary separation assessed for the actual house and model by a qualified designer or installer; there is no universal margin to take from a photograph.
Allow for later work as well as everyday movement. A gutter may need inspection, adjustment or replacement, and roof repairs or re-roofing can change the working space. If any part of the selected pergola moves during operation, ask how much space it occupies through its full movement rather than judging from a static image. For the model on the Bloomcabin Bioclimatic Pergola listing, request model-specific information showing the operating space and required clearance from the eaves. Compare that information with the proposed position, and have uncertain building movement assessed before fixing the layout.

03
Keep gutters and downpipes accessible
Gutter access means room to inspect and clean the whole run, not merely a line of sight from the ground. Consider the safe method normally used to reach the channel, joints and corners, and whether tools can be used without a pergola beam blocking the work area. A narrow slot may look open yet be too tight to see into or clear debris from. Do not plan to stand on the pergola or treat it as a maintenance platform; agree a suitable access arrangement with whoever maintains the roof. Check access at the ends of the gutter as well as along its straight length.
Mark every downpipe and its connections from gutter to ground, including offsets that may be hidden behind planting, steps or the edge of a deck. Trace where the outlet discharges so a proposed post or base does not obstruct it. Keep outlets visible and accessible for inspection and repair. If you are considering the model on the Bloomcabin Wall-Mounted Pergola page, include gutter and downpipe access when reviewing its position beside the house. A route that can be seen but not reached by the normal maintenance method is not practical access. Ask the installer and, where needed, a roofing professional to confirm drainage and access before fixing the layout.
Compare wall-mounted and freestanding layouts
Wall mounting may seem attractive where low eaves make a second row of posts inconvenient, but it does not remove the height or overhang problem. The proposed connection still needs to reach a suitable part of the building structure through a detail designed for that wall. Cladding, fascia, soffit and guttering should not be treated as structural support simply because they are close to the frame. Confirm where the connection would sit relative to the roof edge, whether it remains inspectable after installation, and whether it leaves room for the gutter to be serviced.
A freestanding layout avoids relying on the house for support only if its own support and anchoring design is complete and suitable; it can still place posts close to a downpipe or across a route you want to keep open. Compare actual post locations and usable space under the eaves, not just the area shown in plan. For the model on the Bloomcabin Wall-Mounted Pergola model listing, request connection drawings and mark the proposed attachment points on your site elevation. Compare those positions with the wall structure and roof edge, alongside the post positions for any freestanding alternative. Either layout still needs a drainage and maintenance route.
04
Verify the wall and ground support
Before accepting a wall connection, the person assessing it needs to know what lies behind the external finish and what condition that substrate is in. A tidy-looking wall does not show whether a proposed fixing point reaches suitable structure, and fascia or soffit is not a substitute for that assessment. Ask for a structural assessment and approved anchoring drawings that match the actual wall, plus evidence for the substrate relied on. If the construction or condition is uncertain, have it investigated by a qualified professional rather than guessing from the surface. Keep any weatherproofing detail within the documented design.
Posts need a verified support arrangement at ground level too. Paving, a deck surface and the material beneath them are not interchangeable, and the visible surface alone may not establish a suitable anchor point. Request the site-specific anchoring detail and substrate evidence, and check that post positions do not obstruct drainage or access mapped earlier. There is no footing size that suits every site, and another property’s installation is not a substitute for assessment here. If you select the model on the Bloomcabin Pergola model page, ensure the support drawings cover that model and the conditions at each proposed post position. Include any planned changes to the finished surface in the assessment.
Use drawings for the exact model
Ask for a dimensioned plan and elevations for the exact configuration under consideration. They should establish assembled overall height, beam and post positions, projection from the wall, the location of any connection, and required clearance for moving parts or selected accessories. If a key dimension or clearance is missing, treat it as an open question. A photograph or sales illustration shows appearance; it cannot confirm whether the pergola clears a gutter, fits under the eaves or can be anchored to your wall. For a wall-mounted arrangement, compare the vertical connection location on the elevation as well as the plan.
Lay the drawings beside your site sketch and compare each closest approach, rather than matching only the headline area. Confirm which model, configuration and installation detail the drawing covers; a change in options may change the dimensions that matter. If you are considering the model on the Bloomcabin Bioclimatic Pergola product page, use its exact name when requesting drawings so the supplier knows which configuration you mean. Keep the current drawing and measurements together so the installer checks the same proposed position. If the drawing does not show the lowest point or required edge clearances, ask for those details.

05
Coordinate the site assessment and installation
Give the installer the measured plan, side view, photos and notes on guttering, downpipes, wall finish, surface levels and any planned roof or paving work. Ask for a site assessment to confirm that the frame clears the eaves, preserves a usable maintenance route and places posts and connections where the drawings show. If existing roof drainage needs alteration, involve a roofing professional; if the wall or substrate is uncertain, arrange the relevant structural assessment before a connection is accepted. An installation enquiry is more useful when these details are included, because it shows what still needs checking.
Ask the assessment to record its assumptions and unresolved items, such as a concealed substrate, an unmeasured gutter projection or a future deck that will change finished levels. Confirm the exact model and approved anchoring detail before ordering or setting out work. If conditions on site differ from the drawing, pause for a revised assessment rather than accepting an improvised cut or fixing. Make sure the installer and any roof professional are working from the same dimensions. Agree the final position only once clearance, support and access questions have been resolved.
Review the finished space before committing
Once height, projection and support have been checked, review the layout from the places you will actually use it. Keep the walking route, doorway, opening windows and nearby external fittings clear, and make sure a post does not block a downpipe or the access a roofer needs. Check doors and windows through their full opening movement, not only when closed. Look at the overhang from both the house and garden; a small projection can be easy to miss from one viewpoint. These practical checks do not replace the dimensioned drawing or structural assessment.
Base the final comparison on finished ground levels and the actual roof edge. If you later add paving, a deck, gutter guards or other work, recheck clearances instead of assuming the original measurements still apply. Consider where water from the house roof could reach a route or seating area, and keep the drainage plan clear. Your site plan should show the pergola’s outer dimensions, lowest overhead point, drainage route, maintenance access and verified connection and support details. When those elements agree on site, you can decide whether the covered area is practical without concealing a problem above it.
Frequently asked questions
Can a pergola be installed under low eaves?
Sometimes, but there is no reliable visual rule. Compare the exact assembled height and projection with the lowest eave, gutter and fascia points, then confirm movement allowance, drainage, wall and ground support, and maintenance access. If a measurement or connection detail is missing, treat the fit as unconfirmed until a qualified installer assesses it.
How much clearance should I leave below an eave?
There is no single gap that suits every house and pergola. The required clearance depends on the building, the pergola’s full height and projection, any moving parts, and the space needed to inspect and maintain the gutter. Use model-specific drawings and a site assessment to agree the allowance; do not guess from a photo or copy a measurement from another property.
Can I fix a pergola to a fascia or gutter?
Do not assume those parts can support a pergola. The connection needs to be shown in approved anchoring drawings and matched to suitable structure behind the wall finish, with the substrate assessed. Ask a qualified professional to confirm the detail for your site; being close to a convenient fascia, soffit or gutter is not evidence that it is a suitable fixing point.
Will a wall-mounted pergola solve a low-roof clearance problem?
Not by itself. A wall-mounted layout may change where the supports sit, but the frame still needs clearance from the eaves and gutter, a suitable wall connection, and room for maintenance. Compare the mounting drawing with the measured roof edge and actual wall. If the connection is not verified, another layout may need assessment rather than an improvised attachment.
Can the house gutter drain onto the pergola?
Do not assume that it can. Keep the house roof’s drainage route clear and serviceable, and only consider discharge onto or through a pergola if the drainage arrangement has been specifically confirmed. Map the existing gutter outlets and downpipes, then ask the pergola supplier or a roofing professional to assess any proposed change.
A pergola beneath low eaves needs room both below the lowest overhead point and beside the full projection of the roof edge. Movement, drainage, accessible guttering and verified wall and ground support determine whether the layout remains workable beyond installation day. Bring the measured site sketch and exact model drawings together in a site-specific professional assessment. The right position leaves usable space beneath the pergola while keeping the house roof and guttering accessible.
