
Managing Ground-Level Splash Around Pergola Seating
Pergola planning guide
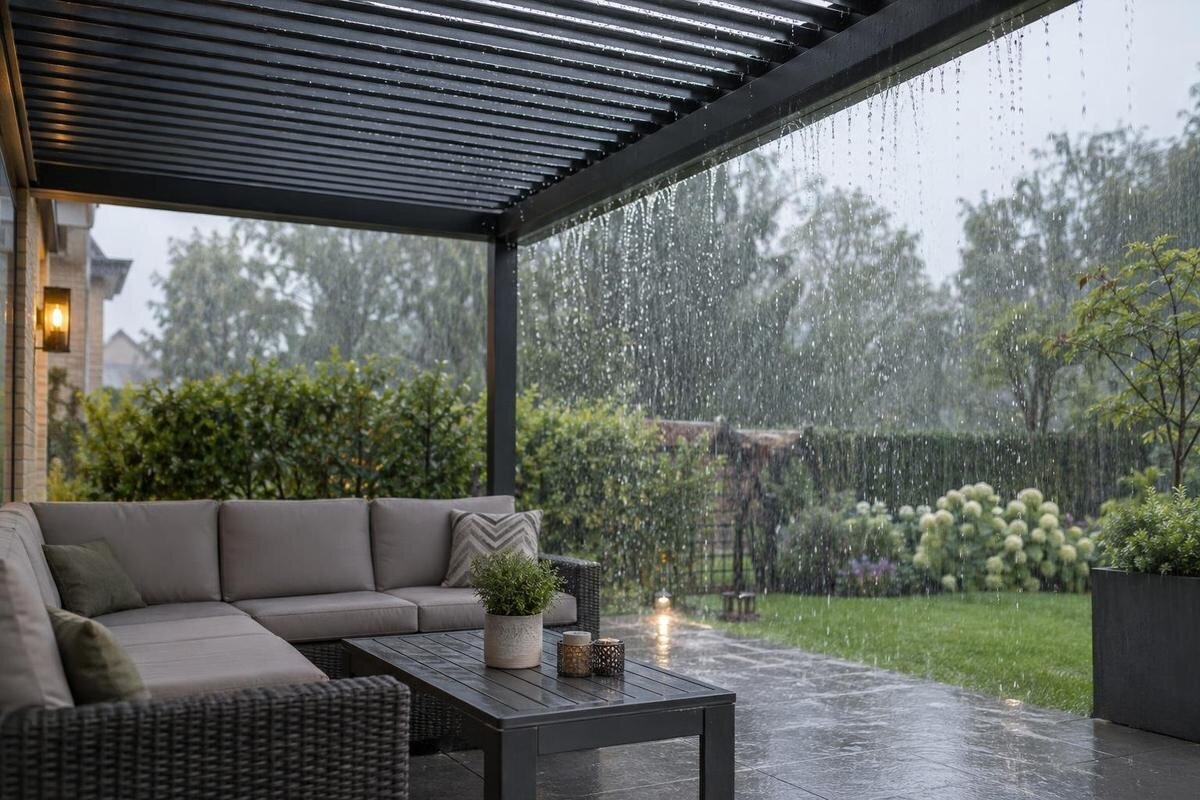
A pergola roof can limit rain landing directly on the seating, but it cannot stop every drop from reaching the ground around it. Water hitting hard paving or a puddle may bounce beneath the edge; water flowing across a patio can creep under chairs without any rebound at all. The practical fix depends on which route is wetting the seating. This guide follows water from its impact point through the paving and furniture layout, with side screening treated as supplementary shelter rather than a substitute for managing surface water.

Why seating gets wet beneath a pergola
Ground-level splash is different from rain entering through a roof. Drops landing on uncovered paving at the perimeter can rebound onto chair legs, low cushions or feet, especially when the surface is already wet. A shallow puddle can throw droplets farther than a dry patch, while a thin sheet of runoff may simply flow under a table and leave a damp area without any obvious spray. The roof can reduce direct rain on the seating, but it cannot make the paving beyond its footprint dry. Wet feet, droplets on the outward-facing sides of furniture or a floor-level wet patch are clues to investigate, not proof of a particular cause.
Look for the first wet point, not just the final wet seat. Marks concentrated on one side may correspond to an exposed edge; dampness that begins below a roof joint or near an outlet needs a separate check. Wind can also carry rain through an open side, so ground splash is only one possible route. Keep roof performance and surface behaviour as separate questions when considering the Bloomcabin Pergola product listing. Match weather-performance claims to the exact model documentation, then assess the paving and planting around the covered area independently. For your seating plan, distinguish the area covered by the roof from the area that remains dry in the conditions you observe. This gives you two useful questions to answer: what protection the chosen structure offers, and where furniture can sit without being reached by water from the surrounding ground.
Observe splash during rain
Observe during ordinary rain from a safe, sheltered place, or inspect once conditions have eased. Avoid standing on wet paving to follow the water, as it may be slippery. Note where drops first hit, where a visible stream enters the sitting area, and whether dampness appears at floor level, on furniture faces or from above. A few photos taken from the same viewpoint, along with a note about which side faces the wind, make patterns easier to compare. The aim is to find a likely route, not to judge the whole area from one storm or one damp cushion.
Sort what you see into likely sources: rain striking uncovered pavers and bouncing; water flowing across the surface; soil or mulch reaching the paving; or wind-driven rain passing through the sides. More than one can happen at once. A simple sketch of the cover, seating and first wet spots can show whether the issue is confined to an edge or follows a route across the floor. Mark the direction of each visible flow rather than shading the entire wet area as one problem. If you are assessing the Bloomcabin Bioclimatic Pergola, use its exact model name to find matching weather information and keep those details alongside your site observations. Note what you actually saw separately from what you suspect: a damp chair alone does not tell you whether water bounced from paving, travelled across the floor or entered through the open side.
Follow water across the paving
Start at the wettest spot and follow the water’s route both upstream and downstream. Look for shallow depressions, settled pavers or changes in level where water can collect or change direction. A surface that looks even when dry may still guide rain towards a chair once water is moving across it. Check beyond the pergola as well as beneath it: the source may be an exposed strip, a garden edge or a low point some distance from the furniture. Do not assume that the visible puddle marks the place where the water first landed.
Look for concentrated flows from higher paving, a downpipe outlet, a retaining edge or another part of the property. A small amount of rain can gather into a stronger stream where several paths meet. Map where that stream exits rather than redirecting it towards a doorway, building or neighbouring property. For a Wall-Mounted Pergola, include the adjoining building and its doorway in the sketch, as well as the proposed seating positions. Follow the route beyond the wet chair: moving water out of the sitting area is not a complete solution if it then collects on the access path. If the levels are hard to read or water crosses boundaries, ask a qualified drainage professional to assess the site instead of guessing at a slope or drain. Explain both where the water enters and where it currently leaves, so the assessment covers the whole route.
Choose paving with splash behaviour in mind
Consider the uncovered strip around the pergola, not just the surface beneath the roof. Smooth, hard paving can hold a shallow film or puddle, and drops hitting water may send droplets further than drops hitting a dry patch. Texture, joints, stone size and how even the surface remains can all affect the pattern, so a rough finish does not guarantee splash-free seating. After rain, note whether water remains on top, enters the joints or arrives from elsewhere. A dry sample gives little indication of how the complete surface will behave when wet.
Permeable paving, gravel or planted strips may help in a suitable setting, but only if the ground and the layers beneath can accept the water and the area is maintained. If the soil is saturated, compacted or unable to drain, water may still pond; loose aggregate can also migrate onto paths. Existing paving may be worth assessing before replacing the whole area. When planning around the regular pergola model page, use the matching layout information to mark the actual roof footprint and the uncovered strips beside it. These strips deserve attention even if the paving beneath the furniture looks suitable. Compare the observed problem with the proposed change: replacing a splash-prone landing surface and correcting a route that carries water towards the chairs are different tasks. Ask what the change is intended to address before choosing a finish mainly for its appearance.

Place chairs beyond the observed splash zone
Position seats and low tables outside the area where impacts or moving water have been observed, rather than relying on a generic setback. Test the layout with furniture in its normal position: a chair that is dry when pushed in may sit within the splash path once someone pulls it out. Include the space needed for chair movement, doors or gates, and everyday access. The useful dry zone is the space that stays dry in the rain conditions you want to use the area in, not simply the area beneath the roof. Keep enough room to move without stepping into a recurring puddle.
Furniture placement depends on the pergola’s precise footprint as well as on the surrounding ground. Use the applicable layout drawing and site measurements when considering the bioclimatic pergola option, rather than inferring a dry clearance from its name or headline coverage. Mark both the tucked-in and occupied positions of chairs on your plan. A layout should account for people sitting at the table, getting up and walking past, not just furniture arranged neatly for a photograph. Check whether the chair nearest the exposed edge remains outside the observed splash zone when pulled out, and whether the route behind it stays clear. Moving cushions or lightweight furniture before a shower can be a useful temporary measure, but frequent rearranging is not a cure for a runoff route. If one side repeatedly gets wet, investigate the water path as well as the seating position.
Check garden edges, soil and mulch
Bare soil, mulch and loose decorative stone can send droplets or particles onto paving when rain strikes them. A garden bed above patio level may also shed water onto the hard surface, where it can then travel towards the seating. Look for splash marks on lower walls, chair legs or pavers, and check whether they appear after rain hits the bed. Plant cover, a stable bed edge or a different transition between garden and patio may reduce exposed soil, but each choice needs to suit the planting, maintenance and route for excess water.
Avoid building up soil, bark or a border as a quick splash barrier without considering where the water will go. A raised edge can hold water against the paving, redirect it towards a doorway or leave a narrow channel beside furniture. When diagnosing the cause, distinguish rain splash from irrigation leaks, hose discharge or water from a sloping bed. If the soil remains saturated, changing the top dressing may only hide the symptom. A landscaper or drainage professional can assess persistent flow or a garden bed that repeatedly sends water into the seating area.
Side screens and ground-level splash
A side screen may help with wind-driven rain and can intercept some low splash when it is on the exposed side. It cannot prevent water travelling beneath its lower edge, remove a puddle or correct paving that drains towards the chairs. Screens can also affect access, airflow and cleaning, so consider those needs alongside the amount of shelter you want. Treat a screen as supplementary protection, not a seal around the whole space. In an open pergola, water may still enter from another direction or rebound just inside the boundary.
Check whether the exact pergola system allows the side element you are considering, and ask for the applicable weather limits and configuration details. Do not assume that a generic screen fits a particular frame or is designed to keep all rain out. If you are considering the Wall-Mounted Pergola model listing, confirm the suitable enclosure arrangement and relevant clearances for that configuration. On your layout, mark where the screen would begin and end, where people would enter, and where surface water already crosses that line. This keeps the enclosure choice connected to the actual splash problem rather than treating any screened side as a complete solution. Examine the floor at the screen’s ends as well as along its lower edge: a barrier may shift splash or flowing water to another part of the seating area rather than removing it.
Keep drainage routes clear and safe to use
Allow surface water a clear route and keep walking routes clear too. A drain inlet hidden beneath a table, rug or pot is harder to inspect, while leaves and sediment may collect where paving directs water. Clear accessible inlets as part of routine upkeep and note whether water reaches them or passes by. Avoid placing furniture where it blocks a threshold, narrows a route or forces people through a puddle. Wet surfaces can be slippery, so keep changes in level easy to see and avoid hiding them under loose mats.
A drain that accepts water still needs a suitable discharge route; the grate alone does not show whether the whole system works. If water repeatedly pools, backs up or flows towards a building, arrange an assessment by a qualified drainage professional rather than adding a channel by guesswork. For a planned enclosure around the Bloomcabin Bioclimatic Pergola model, request the relevant layout and drainage information and compare it with the existing surface-water route. Keep roof water and water moving across the ground separate on the plan so neither is overlooked. Also show the space needed to inspect and clear accessible inlets once the furniture is in place. A layout that leaves an inlet visible but difficult to reach can make routine upkeep awkward. Consider this access before settling on the table position or adding pots around the perimeter.

Check changes in different rain conditions
Recheck after changing paving, planting, furniture or screening, as each may alter where water travels. Observe in light rain and in the heavier or windier conditions that commonly expose the problem, but do not treat one observation as a guarantee for every storm. Note the direction of the rain, whether water was already on the ground and how far it reached from the edge. Clear leaves from accessible inlets before comparing results; a blocked outlet can make a surface appear to be the cause. Record if the issue happens only in unusual conditions rather than assuming a single change has resolved every case.
Photographs of the first impact points and wet areas, together with the furniture layout, make discussions with an installer or drainage professional more concrete. Use comparable viewpoints and note what changed between observations, such as a moved chair, a cleared inlet or a different rain direction. This helps you judge whether water is reaching a different place rather than simply appearing less noticeable. If the pergola itself may be involved, the Bloomcabin Pergola page can help identify the product before you consult its model-specific weather limits and any controlled observation conditions. A drainage diagram may explain the roof route, but it does not, by itself, show how water travels across the paving beyond the cover. Keep your ground-level observations alongside that information, including any remaining wet spots, so a successful change at one edge does not obscure an unresolved flow elsewhere.
Match the response to the source of the water
Choose a response after identifying where the water first goes wrong. Rebound from exposed paving calls for attention to the landing surface and furniture position; a stream across the patio calls for a better-understood runoff route; soil splatter calls for a review of the garden edge; rain entering from the side calls for a check of the exposed opening and any approved screen configuration. More than one route may need attention. Keeping these causes separate helps avoid buying a screen when the real issue is pooling under the seats, or replacing paving when the water is coming from an uphill garden bed.
Before finalising a pergola and seating plan, sketch the roof footprint, exposed paving, low points, garden edges, outlets, doorways and usual furniture positions. Ask for model-specific weather information and layout drawings if the structure or enclosure choice affects your decision. Have a suitable professional review uncertain surface levels or discharge routes. No single surface, setback or side panel suits every site. The aim is a seating area with a visible, maintainable route for water away from places people walk and sit, and a clear understanding of the chosen pergola’s limits.
Frequently asked questions
Why does rain reach pergola seating when the roof is closed?
The roof can reduce rain falling directly onto the seating, but drops can still hit uncovered paving or a puddle and rebound underneath the edge. Wind-driven rain may also enter through an open side. Check where the water first lands before deciding which route is responsible.
Will permeable paving stop splashback?
Not necessarily. Its performance depends on the ground and layers beneath it being able to take the water, as well as on maintenance. If the area is saturated or water arrives faster than it can drain, it may still pond or splash.
How far back should I place the furniture?
There is no reliable fixed distance for every site. Observe where water reaches during the rain conditions that matter to you, then allow for chairs being pulled out and people moving around. Keep the walking route clear of puddles and drainage points.
Can a side screen prevent ground-level splash?
A suitable screen may intercept some rain or splash from an exposed side, but it will not remove a puddle or stop water flowing beneath it. Check the approved configuration for the exact pergola and manage the surface-water route separately.
How can I tell floor splash from a roof issue?
Look for the first wet point and note the rain direction. Water appearing at floor level after drops hit nearby paving suggests a surface route; water appearing under a roof joint or outlet needs a separate check. If the source remains unclear, compare observations with documentation for the exact model.
Ground-level splash is easiest to manage when it is treated as a surface-water problem before it becomes a furniture problem. Find where rain first hits, follow its route, then adjust the paving, garden edge or seating position to match. Side elements may add shelter where suitable, but they cannot make standing or flowing water disappear. Separating roof performance from water moving across the ground makes both the pergola choice and the seating plan more realistic.
