
Creating a Cohesive Minimalist Garden with a Pergola
Garden design guide
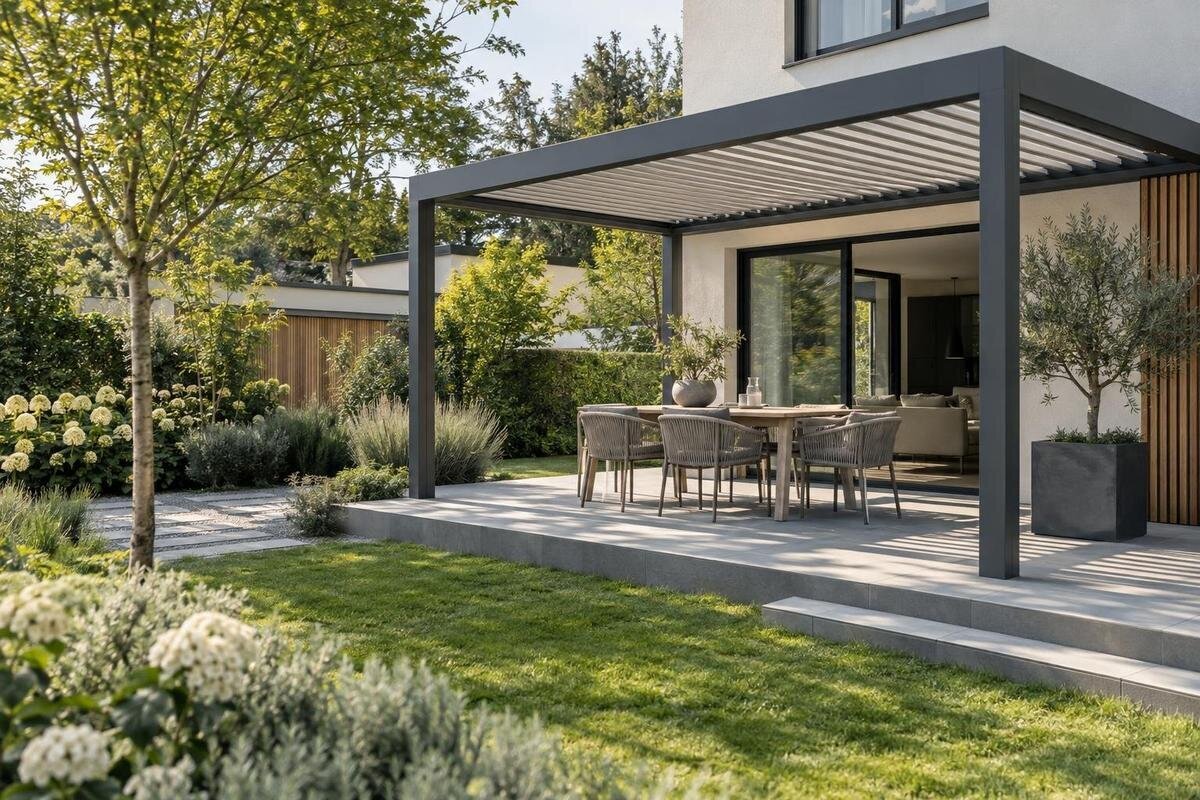
A restrained garden is not simply a collection of fewer objects. It feels finished when the pergola, paving, routes and planting share a clear order and their meeting points are deliberate. This guide develops one coherent landscape composition: establish the main view, position the structure, set out paving and boundaries, then refine the planting and junctions that can make a plan feel resolved or unfinished. The aim is a garden with enough detail to work well, while a few repeated lines and materials do most of the visual work.

Before you choose 1
Choose the view that will organise the garden
Choose a primary view before placing the pergola. In many gardens, the strongest everyday view is from the living-room doors, a kitchen window or an outdoor seat; focus on the one that matters most rather than trying to compose every angle equally. Mark what already holds attention: a mature tree, a boundary, a change in level or an open patch of sky. Then decide whether the pergola should frame that feature, sit beside it or become the foreground focus. This gives the rest of the plan a clear hierarchy instead of leaving several elements to compete. There is no need to centre the structure automatically; an existing garden may have an asymmetrical layout that works better.
Next, consider what sits in front of the frame and what remains beyond it. If the pergola is the destination, let the path arrive clearly and keep the strongest view beyond it relatively open. If a tree or boundary is the focus, avoid stacking furniture, a large planter and another feature in the same sightline. Check the composition from both standing and seated positions: the view can feel balanced on paper but be blocked from the seat used most. Mark a possible outline with string or a garden hose, walk the route and look back towards the house. This is a simple way to assess the main lines before paving or planting fixes their position.
Set the pergola's relationship to the house
Decide whether the pergola should look like a continuation of the house or a separate garden destination. A wall-mounted arrangement can follow a strong line from the building, while a freestanding layout can establish a distinct area further out in the garden. These create different compositions; one is not automatically more coherent than the other. Trace the house edge, openings and main path on the same plan before comparing them. If you are considering the Bloomcabin Wall-Mounted Pergola, place its selected outline against the house on the drawing and review how that arrangement relates to the wider garden.
For a wall-mounted layout, ask a qualified installer to assess the proposed wall and attachment details. With a freestanding arrangement, think about how the route from the door reaches the garden and whether the structure would become an accidental barrier. Check the composition from indoors as well as outdoors: the relationship with a window may matter more from the living room than it does from the lawn. Consider whether the structure’s lines relate to the house without competing with every opening. That keeps the choice grounded in the actual garden rather than in an isolated product image.
Before you choose 2
The pergola footprint and usable space
Treat the pergola’s footprint as part of the landscape composition, not just a space to fit around. The catalogue listing for Bloomcabin Bioclimatic Pergola gives sizes from 9 to 24 m². That range helps with an initial sense of scale, but it is not the outline for your plan: use the exact dimensions for the option you are considering. Record the structure and the dimensions of the surrounding area on a measured drawing, so the relationship between the building, paving and garden boundaries is visible before you settle the layout.
Add the practical details that can alter the usable space: door movements, access routes, existing planting and furniture positions. A stated area does not by itself tell you how much clear space remains for walking or sitting. If useful, mark the proposed footprint on the ground and walk around it. Check that the route to the garden stays clear and that the layout does not rely on narrow leftover strips to connect areas. Any projections or other details shown in the selected product information should be included in the drawing. Keep circulation and access visible alongside the pergola, rather than assuming they will fit once the hard landscaping is in place.
Paving joints, paths and alignment
Choose one main direction for the paving and relate it to a strong line in the plan: the house, a garden boundary or the pergola’s outline. A consistent direction can make separate areas feel connected. The Bloomcabin Pergola catalogue listing gives sizes from 9 to 24 m²; once you have selected an option, use its exact dimensions to explore how the paving pattern meets the structure. Look at the pattern across the whole paved area, rather than treating the space beneath the pergola separately. The point is not to make every line coincide, but to decide which lines are dominant and where a deliberate change makes sense.
Draw the path and paving pattern together. If the route turns, show where its direction changes rather than allowing the paving joints to drift without a clear reason. Check the edges around the footprint and at the house threshold, where awkward narrow cuts can distract from an otherwise simple layout. Sometimes a pattern needs to shift to suit the measured space; make that change at a clear edge or transition. The same principle applies where paving meets a garden path: one readable alignment is usually easier to follow than several competing directions. Confirm the final set-out with the people responsible for the work, using the site dimensions and chosen product details.

Before you choose 3
Details where materials meet
A restrained palette depends on tidy junctions, not on using just one surface everywhere. Mark where paving meets planting, lawn or another path, and where the pergola’s supports meet the ground surface. These points appear repeatedly in a garden, so inconsistent gaps or abrupt changes can make the whole layout feel unresolved. Show the edges on the plan and, where the detail is not clear from above, add a simple section drawing. This makes it easier to discuss how a transition should look and which professional needs to confirm its construction.
Pay particular attention to the house interface and any visible edge where the structure meets the building. If you are considering the wall-mounted pergola option, show that junction on the drawing so it can be discussed alongside the paving edge and house threshold. Distinguish the appearance you want from the construction details the installer needs to resolve. For other boundaries, decide whether a consistent narrow border or a direct meeting between surfaces best suits the plan. Avoid leaving small, inconsistent pieces of paving as an accidental detail. The aim is a clear finish that relates to the main lines, not extra trim everywhere.
A restrained planting palette
A limited planting palette can still create a full garden. Repeat a small number of forms or groups so the beds relate to each other, then use differences in foliage, height or seasonal interest where a change is needed. If the bioclimatic pergola listing is among your options, consider how the surrounding planting would connect that structure to the rest of the garden. Carry a repeated group from one bed to another where it supports the main view, rather than giving every corner a separate treatment. Base the planting layout on the actual footprint and the site conditions you have observed.
Give each bed a role within the composition. Lower planting can keep a path edge visually open, while taller groups may define a boundary or frame a view; the right arrangement depends on what is already in the garden and what you want to see through it. Record plant choices, mature dimensions and growing requirements, and check that the selected plants suit the site. A local nursery or horticultural professional can help assess that fit. Repeating a group is more effective when it has enough room to develop, so avoid filling every gap with a different plant simply to make the plan look busy.
Before you choose 4
Consistent lawn and planting boundaries
Decide how the paved area meets the lawn, gravel or planted beds before those boundaries are set. A simple composition might use a clear paved field, a defined planting edge and an open lawn area; it does not need a new material at every change of use. Keep curves, corners and straight edges in a considered relationship to the main plan. If the pergola and paving establish strong straight lines, an unrelated curve can make the garden feel divided. A curved boundary may still work, but give it a clear purpose and carry its shape consistently where it appears.
Think about everyday access as well as the view. Leave a route to the beds that is practical to use and maintain, and avoid ending a main edge in small, awkward triangles. If you are comparing the Bloomcabin Pergola model with other options, assess the shape of the garden left around each proposed layout, not just the space beneath the structure. Follow each lawn or gravel boundary to its end on the drawing. A border that looks proportionate beside the pergola may become an awkward strip near a path or corner. Resolve those ends as part of the same composition, rather than treating them as leftover space.
Furniture and lighting within the layout
Draw the furniture you expect to use, rather than leaving the pergola as an empty rectangle on the plan. Include the table or seating footprint and consider the space needed to move around it or pull a chair out. This helps distinguish the structure’s overall area from the part that will feel comfortable for its intended use. Keep the main route visible and avoid placing a large item directly in the view you chose to organise the garden. A small number of well-positioned pieces usually supports a restrained layout better than filling every open patch.
Treat lighting as part of the same composition. Decide which areas need practical light and where a softer point of emphasis would be useful, rather than adding a fitting to every feature. When considering the wall-mounted model, review the seating and lighting positions in relation to the house openings, so the view from indoors remains part of the design. Look at the fittings themselves as well as the areas they are intended to light; visible equipment should fit the restrained palette. Have an appropriately qualified professional assess electrical work and any product installation requirements, and consider visible fittings and cable routes alongside the garden’s other details.

Before you choose 5
Dimensions and planting requirements on the plan
Bring the design decisions together in a dimensioned landscape drawing showing measured site features, the selected pergola footprint, paving boundaries and the routes that connect them. Include relevant openings and existing features, and note any changes in level or drainage questions that need professional assessment. A separate planting plan can record the selected plants, their mature dimensions and documented growing requirements. If you are considering the Bloomcabin Bioclimatic Pergola range, identify the exact option on the plan. Keep that product reference alongside the dimensions used, so the proposed structure and the surrounding landscape can be discussed as one composition rather than as separate purchases.
Use the drawing to record questions as well as decisions. The landscape designer or installer can identify details that need a site visit or professional review, such as a proposed wall attachment, changes in level or the way water moves across the area. Keep unresolved details clearly labelled rather than allowing a neat drawing to make them appear settled. Store the product information, measured plan and planting requirements together so the people involved are working from the same choices. This also makes revisions easier to assess: if the footprint moves, trace the effect on the adjoining path, surface edge and planting bed before accepting the change.
Review the composition at garden level
Once the main lines are on paper, review the layout as someone moving through it. Start at the house, follow the path to the pergola, then look towards the garden beyond. Check whether the paving direction, planting boundaries and furniture placement still make sense from those viewpoints. A plan may appear orderly from above while a junction feels abrupt at eye level or a planting group interrupts the view. Mark those points for revision rather than adding a new feature to distract from them. A walk-through using a temporary outline can reveal where the composition needs adjustment.
For the final edit, look at each material and feature in turn. Ask whether it supports the route, view or use you identified, and whether its edge has a clear end. Remove unnecessary changes in paving direction or one-off planting accents if they make the plan harder to read. Restraint does not mean leaving a space unfinished: it means keeping the details that help the garden work and making their relationships deliberate. When the pergola, paving, planting and boundaries read as parts of one layout, the garden can feel complete without relying on extra decoration.
Frequently asked questions
How can a minimalist garden avoid looking empty?
Give it a clear focal view, connected routes and a few repeated forms. Finished edges, purposeful planting and space for everyday use make a restrained layout feel complete without adding decorative features for their own sake.
Does minimalist planting mean using very few plants?
Not necessarily. A limited palette can still fill a garden; repeating groups and shapes creates continuity. Choose plants for the actual site and record their mature dimensions and growing requirements before setting bed sizes.
Should a pergola be wall-mounted or freestanding?
Neither is right for every garden. Consider whether you want the structure to read visually as part of the house or as a separate garden destination. Have a qualified installer assess any proposed wall attachment.
How much paving should go around a pergola?
There is no single amount that suits every layout. Draw the structure, furniture, door movements, walking routes and areas you need to maintain, then set the paving boundary around those uses.
What should a garden plan show before planting is chosen?
Include measured site features, the selected pergola footprint, paving edges, doors and routes, plus a planting plan with documented requirements. Ask a suitable professional to assess levels, drainage or installation questions.
A minimalist garden with a pergola comes together through precise relationships: the structure supports the main view, paving edges meet deliberately, planting forms repeat and routes remain clear. Let the drawing resolve those relationships before adding small decorative details. The result can give the pergola a defined role without asking it to carry the whole design, and lets restraint feel considered rather than sparse.
