
Overflowing Pergola Gutters: Checking the Water Path
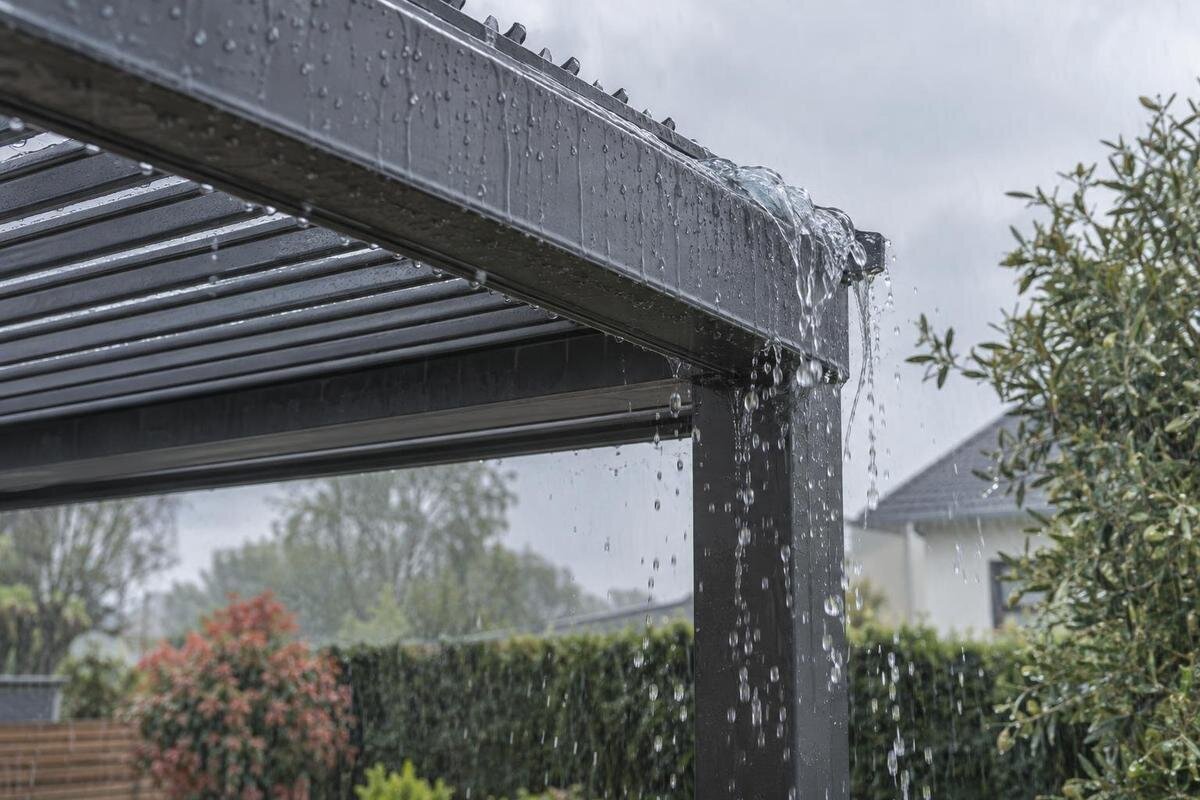
Pergola drainage guide
An overflowing pergola gutter is not automatically a gutter failure. Water may be held back by debris in the collection channel, restricted at the outlet, obstructed farther down the run, or arriving faster than the system can carry it under the observed conditions. Trace the route in order, note the weather and roof position, and compare what you see with the drainage guidance for your exact model.

Find the first point where water leaves its route
Begin with the first point where water leaves its intended route, rather than the dampest patch underneath. During rain, watch from a safe position and note whether water spills over a visible gutter edge, escapes at a joint, runs down a support, or appears to fall from another part of the roof. A puddle is only the end of a path: water can travel along a beam or splash from nearby paving before landing. The useful clue is where continuous flow first breaks. If that point is hidden from ground level, record the uncertainty rather than climbing onto the structure. A stain found later may have dried or spread, so its position alone may not identify the cause.
Sketch the route from the roof’s collection surface to the channel, then each outlet, downpipe or built-in route, and final discharge. Give the outlets simple labels and mark the first one that spills; note which others keep flowing. Record whether water is backing up before the outlet or bypassing the channel altogether, as those clues point to different checks. Add the unit’s exact model and layout to the sketch. If you are unsure of the product name, use the Bloomcabin Pergola listing as an identification reference. Keep the product name separate from your observations of the installed drainage route: don’t assume the nearest support is the drain.
Record the weather and roof position
Record the weather and the roof position when overflow begins. Note whether the rain is steady or arriving in short, heavier bursts, whether wind is driving it from one side, and whether the spill starts straight away or after the channel has been carrying water for a while. Where a roof has an approved adjustable position, write down which position it was in; don’t move it in unsafe weather just to reproduce the problem. A repeated pattern under similar conditions is more informative than a single observation, so note the start and end of the event as well as the first spill point.
Also note water arriving from neighbouring eaves, a higher roof, a shade sail or surrounding paving. Runoff from another surface can look like a pergola gutter problem when it joins the same wet area. Separate what you can observe: where the flow starts, which outlet receives it, and where water goes after it leaves. For a unit identified through the Bloomcabin Bioclimatic Pergola listing, include that product name alongside the roof position in your notes. This keeps the product identification and the conditions during the overflow together when you discuss the event. A short video from a safe viewpoint can help show the sequence.
Look for debris in the collection channel
Look at visible parts of the collection channel for leaves, seed pods, small twigs, grit or settled dirt that could narrow a low point or cover an opening. Debris is a useful clue when its position matches the first overflow: a build-up before a spill point may hold water back, while clean sections elsewhere do not rule out a hidden obstruction. Note where the material sits rather than assuming that debris found on the ground came from the gutter. Inspect only from ground level or another safely accessible position. This is an event-focused check, not a seasonal cleaning plan; the aim is to find material that could explain this particular overflow.
Don’t push material deeper into an outlet or dismantle a cover, screen or channel unless the model’s instructions allow it. A strainer or guard may be present on some installations, but don’t assume every pergola uses the same parts. If the relevant channel is high, enclosed or difficult to reach, leave it to a qualified installer or maintenance person. For a unit matching the Bloomcabin Wall-Mounted Pergola listing, use that name when asking which parts of the collection channel can be accessed for cleaning. If loose material is safely accessible and the instructions allow its removal, record where it was found and whether the overflow recurs in later rain. That comparison helps distinguish a relevant obstruction from incidental debris.
Check the outlet opening for a restriction
Once the channel is visible, inspect the outlet throat—the point where collected water enters a downpipe or built-in route—without probing inside it. Leaves, grit or a partly obstructed guard, if fitted, can restrict the opening even when most of the gutter looks clear. A rising water level before one outlet, paired with little visible flow beyond it, makes a local restriction worth checking. It is a clue, not proof: the downstream run could also be blocked, or water may be bypassing the gutter from another source. Compare the affected outlet with the others rather than with an assumed standard layout.
Use the drainage diagram for the exact unit to identify where each outlet should be and whether a visible feature is intended to be open, covered or connected. Don’t remove a cap or filter simply because it looks like a blockage, and don’t force a rod or hose into an unfamiliar opening. When requesting help for a unit matching the Bloomcabin Pergola product page, describe the affected outlet as well as giving the model name. Explain whether water rises before the opening and whether any flow is visible beyond it. If the opening cannot be inspected safely, note what is visible and leave the investigation there.

Follow the downpipe beyond the gutter
A clear gutter and outlet do not rule out an obstruction farther along. Follow the visible downpipe, channel or other intended route from the outlet towards its end, checking from a safe position for a crushed section, a sharp bend, a slipped connection or wet marks where water may be escaping. Some pergolas route water through parts of the frame; others use a visible pipe, so don’t assume every support is a drain. The model diagram is what identifies which parts belong to the water path. Where a route disappears inside a support or wall, its condition cannot be confirmed just by looking at the top opening.
Notice what happens at the outlet during rain: continuous flow, intermittent drips, no visible discharge, or water escaping at a joint. These patterns help narrow down where to investigate, but none proves a single cause; a concealed blockage can resemble an outlet fault. Don’t pull apart a support or pressure-flush a hidden line to test it. Note the visible joints and where flow stops, then ask a qualified installer to inspect concealed sections if the route cannot be followed. A simple sketch and photos taken at different points in the event are more useful than a guess about the hidden pipe.
Inspect the final discharge point
Follow the route to its actual end, not just to the bottom of the downpipe. Depending on the installation, water may discharge onto a surface, into a grate, into a connected tank or into another drain. Check whether the end is submerged, surrounded by leaf litter, visibly blocked or spilling back onto the ground. A clear downpipe that empties into a blocked receiving point may still leave water backed up in the system. If the final part is underground, don’t lift heavy covers or assume it is clear because the surface looks tidy.
Separate pergola discharge from water arriving from other roofs, drains or sloping paving. Observe the end point during the same rain event and note whether flow stops before or after the gutter starts overflowing. If a tank or diverter is fitted, record its connection and visible state without altering it; a restriction downstream can mimic an internal gutter blockage. For a unit matching the Bloomcabin Bioclimatic Pergola page, include the product name and a sketch of the final discharge point when requesting advice. The sketch should show where the pergola’s route ends and where other runoff joins it. Hidden drainage should be assessed by someone equipped to trace it.
Separate a blockage from a drainage limit
Consider a drainage limit only after checking the visible collection channel, outlet and downstream route. If a clear system spills along a length or several outlets overflow together during a particular event, the cause may be a design limit under those conditions, a mismatch between parts or an installation issue. By contrast, one outlet that repeatedly backs up while others keep flowing is more consistent with a local restriction, though it still needs verification. Note whether the spills begin together or one after another; that timing can help locate the trouble. These patterns guide the next check but do not give a capacity rating.
Don’t decide from a generic rainfall figure, a neighbour’s pergola or an assumption that every roof handles the same storm. Wind direction, roof position, the catchment and the outlet arrangement all affect what an observation means. Check the model-specific drainage diagram and stated weather limits, then compare them with the conditions you recorded. The documentation—not a universal promise of watertightness—is the reference for the particular product and configuration. If the route is clear but performance remains inconsistent with that guidance, ask the installer or manufacturer to review the evidence rather than enlarging outlets or changing components yourself.
Check roof position and nearby junctions
Check whether water behaves differently with a change in the roof’s approved position or with wind from one side. On an adjustable system, the collection route may depend on the design and position; on a fixed roof, water may still be carried to a particular edge or channel. These are reasons to compare observed conditions with the manufacturer’s diagram, not to assume that all pergolas drain in the same way. Record whether the first spill moves when conditions change. Don’t move a roof component to reproduce overflow in unsafe weather, and don’t force a mechanism or alter a stop to send water elsewhere.
If the pergola sits beside a house, note whether the first water appears at its channel, at a wall junction or under an adjacent eave; those sources can converge on one patch of paving. The label wall-mounted does not establish the installed water path, so match the exact unit and layout. Use the wall-mounted Bloomcabin Pergola page to identify the product family if needed, then mark the wall junction and adjacent eave on your sketch. The installer should compare the documented route with the actual connection and nearby surfaces, especially where part of the path is concealed. Keep observations of water at the wall separate from confirmed gutter overflow.

Look for a leak or installation issue
Water overflowing over the upper edge of a gutter is different from water escaping through a seam, join or connection below the channel. If the channel is not full but water repeatedly appears at one joint or attachment, consider a leak, displaced part or installation fault alongside blockage. Look for visible gaps, movement, staining or fresh wet tracks from ground level, but don’t tug a support, tighten fixings, reseal seams or realign the frame yourself. Rain can make unrelated parts wet, so relate any mark to the observed flow and the same weather event. Water may also travel along a frame before it becomes visible, so note where it first appears.
Keep a record of what changed and when: whether the issue is new, whether it followed work on the pergola, and whether the same point recurs. Photos taken safely before, during and after rain can show whether water came from the channel edge, a joint or the structure above it. If the Bloomcabin Pergola model listing matches your unit, include that model name with the configuration and repair history in your request for an assessment. Describe the visible symptom rather than calling every escape of water a gutter blockage. Persistent overflow, loose or visibly damaged parts, or a concealed leak calls for an assessment by the installer or a qualified professional rather than a trial repair.
Compare observations with the model’s drainage guidance
Put your observations beside the drainage diagram and weather limits for the exact model. Confirm where the channel should collect water, how it reaches the outlet, and where discharge is intended to go; note any differences between that drawing and the installed arrangement. If you cannot obtain a diagram, say which part of the path is uncertain rather than treating a likely route as confirmed. When an installer or manufacturer reviews the case, provide the first overflow point, the outlet affected, roof position, weather and downstream observations. That makes the question specific: is there a blockage, an assembly issue or a limit in the documented configuration?
If you are choosing a replacement or considering an enclosure, ask for drainage and weather-performance documents for the exact model and proposed configuration before relying on a product name or appearance. Check how water is meant to leave and whether that route fits the site; don’t infer a storm rating or suitability from a category label. When considering the Bloomcabin Bioclimatic Pergola product page, make the proposed enclosure arrangement part of that enquiry so the drainage discussion covers the intended configuration. For the existing pergola, the observations should help establish whether the next assessment needs to focus on an obstruction, the installation or a documented drainage limit.
Frequently asked questions
Where should I start when water spills from a pergola gutter?
Start at the first visible point where water leaves its intended route, then follow the channel, outlet, downpipe and final discharge in order. Record which outlets are affected, along with the weather and roof position. A wet patch on the ground alone may not show where the route failed.
Does one overflowing outlet mean it is blocked?
It makes a local restriction worth checking, especially if other outlets continue to flow, but it is not proof. A downstream blockage, diverted water or faulty connection can produce similar signs. Compare the outlet with the drainage diagram for the exact model and follow the route safely.
Can I test the gutter with a hose?
Do not pressure-flush or pour water into an unfamiliar opening. That could move debris deeper or send water somewhere you cannot observe. Use only a test method allowed in the instructions for your model; otherwise, record what happens in natural rain and ask an installer.
Why does overflow happen only in wind-driven or heavy rain?
The amount and direction of water reaching each part of the system can change with the weather and roof position. That pattern can expose a restriction or a model-specific limit, but there is no universal rainfall threshold that proves a fault. Compare your observations with the exact model's guidance.
What if the visible gutter is clear?
Follow the route beyond the outlet, including joints and the final discharge. A concealed or downstream restriction, an obstructed receiving point, or water from an adjacent surface may be involved. If the route disappears into a support, wall or ground, avoid dismantling it and arrange an assessment.
A useful diagnosis identifies where water first stops following its intended route, when the overflow happens, which outlets are affected and what is visible at the discharge point. That record is more informative than simply describing the pergola as leaking. Clear only material that is safely accessible and covered by the model’s instructions. If the route is concealed, damage is visible, or overflow continues despite a clear path, use the exact model documents and seek an installer’s assessment. The aim is to locate the restriction or limit, not to force a generic fix onto a particular drainage system.
