
How to Pair Raised Planters with a Pergola
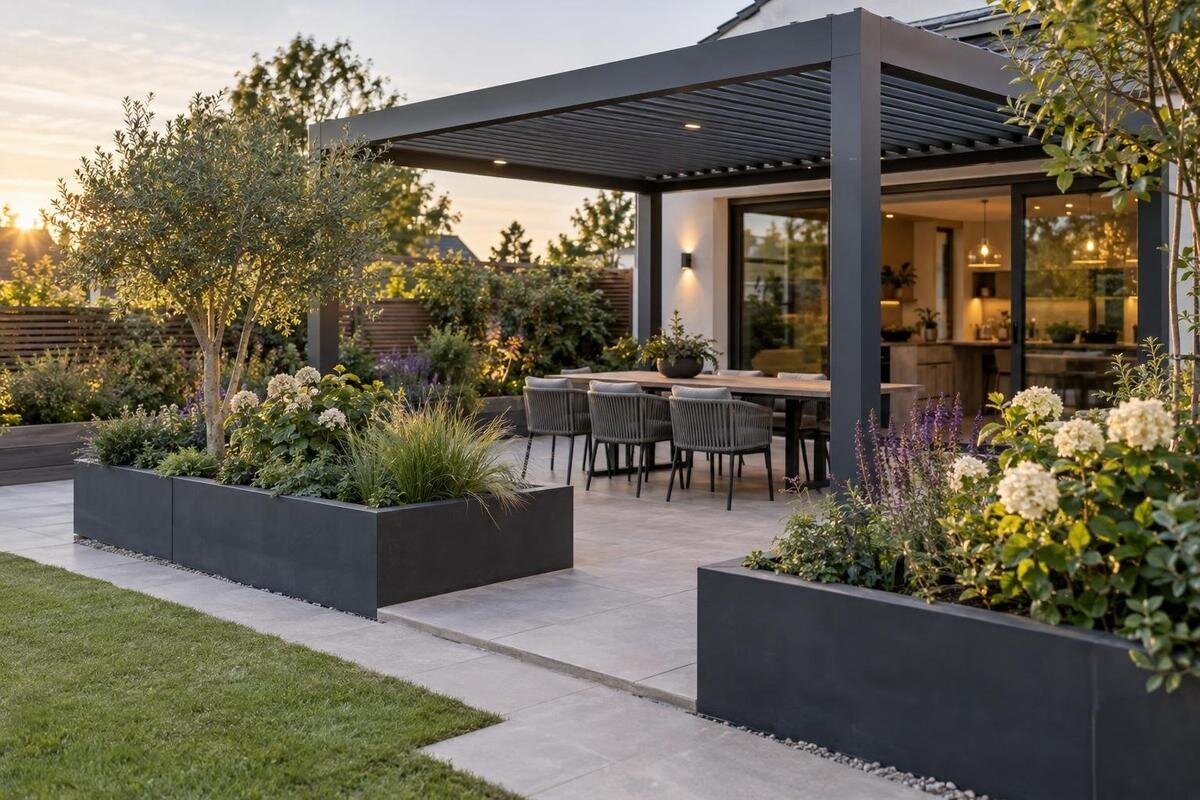
Pergola planning
Raised planters can connect a pergola to the wider garden and bring foliage closer to the seating area. They also take up space, need suitable root volume and must drain somewhere that can cope with the water. Plan those requirements separately from the pergola frame, then bring the layers together on one measured drawing. The useful question is not simply whether a planter fits beside a support; it is whether roots, routes, water and routine care still have room once the structure and mature plants are in place.

01
Draw the pergola, planters and routes together
Begin with a measured plan of the whole area, rather than drawing the pergola and fitting planters into whatever space remains. Mark walls, doors and their swing, steps, gates, drains, paving edges, existing beds and the furniture you use. Add the pergola’s external outline, each support position and any projection shown on its dimensioned plan. Draw each planter by its outside measurements, then mark clear routes to seating, doors and the rest of the garden. Include room to open doors, pull out chairs and reach drains. Record changes in ground level and fixed obstacles as well. This separates the frame’s footprint from the space needed to use the finished area.
Compare exact dimensions rather than relying on an area figure alone. The Bloomcabin Pergola listing shows options from 9 to 24 m²; that range helps with an initial product shortlist, but it does not establish where the supports sit or how much space your planters and routes need. Ask for the dimensioned plan of the option you are considering and place it over the site drawing. If a key measurement is missing, leave it unconfirmed instead of estimating from a photograph. A styled image can suggest an arrangement, but it cannot show whether the same layout fits your property.
Separate planter footprint from root volume
Treat a planter’s outside dimensions and its usable root volume as separate measurements. Thick walls, an internal liner, a base or other fittings can reduce the space available for growing medium. Shape matters too: a narrow, deep box does not offer the same root space as a wider container with similar overall capacity. Record the internal length, width and usable soil depth, or the maker’s stated growing volume, rather than estimating from the outside. For a built-in bed, work from its finished internal measurements after the edging and any specified components are accounted for.
Match that usable space to documented planting requirements, not to the leftover strip beside a post. A planting schedule can note the intended species or variety, root-space needs and the number of plants, so the box is sized for the planting rather than the other way around. Keep this schedule alongside the layout for the Bloomcabin Bioclimatic Pergola if that is the model you are considering. Record planter capacity separately from the pergola dimensions, and check each proposed container against its intended planting. If the plants need more room than the layout allows, revise the planting selection or the planter dimensions rather than squeezing the same planting into a smaller box.
02
Choose plants for the position and their mature size
Check the light requirements of each intended plant against the actual spot where its roots will sit. A position under a pergola may receive a different amount of light from an open bed, and nearby walls or trees can change conditions further. Observe the site at different times, then compare what you see with the plant label or advice from its grower. Include expected mature height and spread in your choice. A small plant at purchase can later occupy much more of the planter or path, so allow for its growth rather than using its current size as the layout limit.
If several plants will share a long box, check that their requirements can be managed together. Plants with different needs for soil depth or watering may not be an easy match in one continuous planter, even when they look compatible at planting time. Consider how often each section will need attention, whether you can reach it without leaning across furniture, and whether mature foliage will obscure a doorway or view. Where needs differ, separate containers can make the planting plan easier to adjust and care for than one uninterrupted row.
Give planter water a clear route
Plan for water from the planter itself, irrigation and rainfall as separate parts of the layout. Mark where each planter’s drainage and overflow will go, and check that an outlet will not discharge onto a walking route or against a wall or support. For a model shortlisted from the Bioclimatic Pergola product page, use the selected design’s drainage information to map water from the structure alongside water from the planters. Do not assume the pergola will collect, shed or redirect water unless its documentation explains how it does so. Identify any unclear discharge points on the drawing and ask the supplier about them before deciding where the containers will sit.
Keep outlets accessible after the planter is in position. Check the planter maker’s guidance before adding a liner, tray or other fitting that could alter drainage, and avoid arranging paving or edging so that an outlet is hidden. Think about where overflow would run during heavy watering, not just where a small amount of water appears to go. On a paved terrace or deck, confirm that the surface and its drainage arrangement are suitable for the proposed water route. If that is uncertain, ask a qualified landscape or building professional rather than guessing from the surface appearance.

03
Keep supports and planting beds distinct
Show every pergola support and the access it needs on the structure plan before deciding where built-in beds or large containers will sit. Do not let a planter conceal a support, obstruct access for installation or make later inspection difficult. Keep the planter independent of the frame unless the design documentation explicitly describes an integrated arrangement; do not assume that soil or a planter box is part of the pergola’s support or restraint. Where the bed is close to a support, check the specific clearance with the supplier or installer before fixing its position. A neat edge around a post is not evidence that the post can safely be covered.
Consider the surface beneath a filled planter before choosing its position. A planter can be heavy, and water adds weight, so do not assume that an existing deck, terrace or other surface is suitable for every proposed container. The Bloomcabin Wall-Mounted Pergola listing gives a product-area range from 9 to 24 m²; that figure is not a site assessment of a wall or the surface carrying planters. Where the existing structure or supporting surface is in question, have a suitably qualified professional assess it. Avoid trying to resolve an uncertain capacity by calculating from appearance or by treating the pergola as a convenient stand for the planter.
Keep walking and seating space usable
Plan circulation around the furniture in use, not just the empty paving. Mark where chairs sit when occupied and pulled out, how people enter and leave the seating area, and whether anyone needs to pass while another person is seated. Include the route to garden gates, doors and nearby beds, as well as the space needed to carry a watering can or gardening tools. There is no single clearance that suits every household and layout; measure the route you need and keep it visibly separate from the planter footprint.
Check the whole path for pinch points where a planter, support and chair could narrow the same section. Also consider door swings, changes in paving level and the growth of plants that may eventually extend over an edge. When comparing the Bioclimatic Pergola options, draw the chosen option’s support positions alongside the furniture and planter outlines, then trace the route through them. Check the approach from both directions, including the turn into the seating area rather than just the straight stretch beside it. If the main way through depends on moving a planted container or shifting a chair every time someone passes, revise the arrangement before committing.
04
Leave room for cleaning and plant care
Plan access to the parts of the pergola that need routine cleaning or inspection. Depending on the selected design, that may include accessible faces, supports or other components described in its maintenance information; do not assume that every pergola has the same features or care requirements. Leave a practical working space rather than placing a planter hard against every side. Also consider how you will clear fallen leaves and soil from paving, and how to reach the area behind the planter without damaging plants or squeezing past furniture.
Plant care needs its own working area. Allow room to prune, top up growing medium, harvest or remove plants, and to bring in the tools or hose you actually use. Do not make a full planter’s removal the only way to reach a cleaning point; moving a planted container may be impractical. If the model on the Bloomcabin Pergola product page is on your shortlist, ask for its care guidance and mark the relevant access points on your drawing. Check where you would stand to tend each part of a long planter, and leave room to set down tools without blocking the route through the seating area.
Check light, planting height and views
Consider how the pergola’s shade and the plants’ own foliage will affect the planting position and seating area. Observe the light at different times and, where possible, across more than one season; a single visit gives only a snapshot. Compare those conditions with the requirements of the chosen plants. Avoid assuming that a particular pergola style will provide a specific amount of shade without information for the actual model and site. If light is a deciding factor, record the observations and use them alongside the plant guidance rather than relying on a general description of the area.
A simple side view can reveal problems that a plan view misses. Sketch the frame, planter height, mature plant height, seating and any window or garden view you want to keep. Tall foliage may interrupt a sightline or make a route feel enclosed; dense growth can also make a planter harder to reach for pruning. Use the mature dimensions in your sketch, and position taller planting where it will not block access or the view you want from the seating area. This makes the relationship between structure and planting easier to judge before choosing a permanent bed.

05
Compare freestanding and wall-mounted layouts
The choice between a freestanding and a wall-mounted arrangement affects where the frame sits in relation to beds, doors and routes. With a freestanding layout, plot the actual support positions and leave their access clear; do not assume a planter can simply surround or hide them. For a wall-mounted option, include the relevant wall, openings and access to the building in the drawing. Have a qualified professional assess any questions about the wall or attachment. In either arrangement, keep the planter’s role separate from the pergola’s support unless the product documentation specifically confirms otherwise.
For the wall-mounted pergola option, compare the selected design’s exact drawings with the measurements around the building, including the planter’s depth and the space needed to care for it. Show the doors both closed and open, and mark the route between the house and the seating area. This lets you see whether a proposed planted edge leaves the entrance usable or creates an awkward corner beside the wall. If you are comparing it with a freestanding option, use the same furniture and planter outlines on both drawings. Assess the resulting layouts side by side rather than assuming that one mounting type will automatically leave more useful space.
Mock up the layout before committing
Test the drawing at full scale on site with tape, chalk, string or lightweight boxes. Mark the outside edges of planters and the support positions, then walk the routes with doors open and chairs pulled out. Check whether you can reach drainage points and work around the planters. Use a side sketch or temporary marker to show the mature height and spread of plants; a box on the ground will not reveal whether future foliage could block a view or narrow the path. Do not use filled planters as test pieces. Adjust the layout until ordinary movement and routine care still feel practical.
Keep the final plan tied to the information that shaped it: the pergola’s dimensioned drawing, the planter’s usable internal measurements, documented planting requirements, the drainage route and the spaces reserved for access. When comparing Bloomcabin Pergola options, keep a separate version of the layout for each shortlisted size so measurements from different options do not get mixed together. Note any changes made during the full-scale test, including a moved planter or a wider route beside the chairs. Record unresolved questions about the wall, deck or other supporting surface for a qualified professional to assess. The final drawing should distinguish settled measurements from details that still need confirmation.
Common questions
How much space should I leave between a planter and a pergola support?
There is no single gap that suits every frame and planter. Use the support layout to keep the planter clear of the base and any access needed for installation, inspection or cleaning. Allow for the plants’ mature spread too, then confirm any required clearance with the pergola supplier or installer.
Can I put a raised planter beneath a pergola?
It can work if the plants suit the light at that spot and the planter does not block supports, routes or cleaning access. Check where water from the planter and pergola will go, and consider how the light changes through the day and year. The model name alone cannot establish whether the arrangement will suit.
How deep does a raised planter need to be?
That depends on the plants’ root requirements, including their need for soil depth and width. Check guidance for the species and variety with a nursery, grower or other suitable horticultural source. Measure the usable space inside the planter; its external height does not tell you how much room the roots will have.
Where should a raised planter drain?
Plan for water to leave the planter without pooling on a walking route or running against a wall or pergola support. Keep the outlet accessible and check where overflow will travel. If the planter is on paving or a deck and the drainage route is unclear, get advice from a qualified landscape or building professional.
Can I attach a planter to a pergola or use it as a support?
Do not assume the frame or planter is designed to carry or support the other. Keep the two independent unless the product documentation explicitly confirms an integrated arrangement. Check the drawings and any relevant installation guidance before putting a planter against, over or around a support.
A successful pairing gives the frame, growing space, drainage and day-to-day access room to do their separate jobs. When the plan shows those elements together, it is easier to see whether the arrangement will remain usable as the plants mature, not just whether it looks balanced on day one. Keep the final drawing specific to the chosen pergola, planter dimensions and planting requirements so the finished layout is based on measurements rather than appearance alone.
