
Attaching a Pergola to an Externally Insulated Wall
PERGOLA INSTALLATION GUIDE
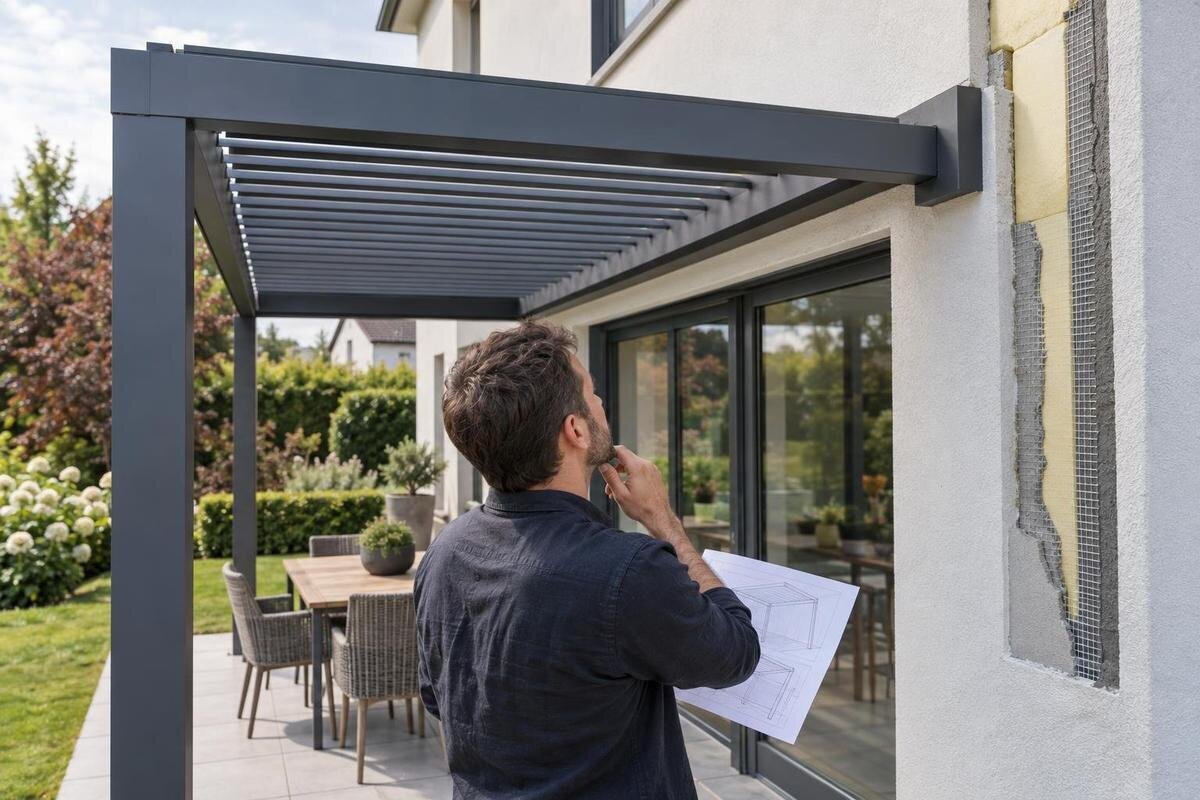
Attaching a pergola to an externally insulated wall involves both a structural connection and a building-envelope detail, not simply a longer screw. Insulation and its outer finish sit between the pergola and the load-bearing part of the house. The connection must transfer the pergola’s forces to a verified substrate without relying on the insulation or outer finish for support, while the wall junction still sheds water as intended. What lies behind the finish, how the insulation system is built and what the selected pergola requires all matter. Confirm those points and obtain a designed, model-specific detail before installation positions are finalised.

Why external insulation changes the connection
An externally insulated wall is a layered assembly, and the arrangement is not the same in every house. The visible face might be render over insulation or cladding over a cavity, while the backing may be masonry, concrete, timber framing or a separate structural support. The finish and insulation do not reveal whether the backing is continuous at the intended bracket positions. Nor does knowing the insulation type prove that its own fixings are designed to carry a pergola. Some walls have framing or rails behind a non-structural outer layer, and the location of those members must be established rather than inferred from the façade. The attachment must engage a substrate shown to be suitable, with the route between bracket and structure understood. A wall described simply as “brick” or “timber” is not enough information for a connection design.
That matters because a pergola transfers more than its static weight to the house. Depending on its geometry and site exposure, wind can create outward pull, sideways force and twisting at the wall connection; the size and distribution of those actions need a design assessment. If a bracket bears on a soft or brittle layer, it may compress or damage the finish without creating a reliable structural load path. Fixing details used on bare masonry cannot automatically be transferred to an insulated wall. Treat the attachment as two coordinated tasks: supporting the pergola through the structural wall and preserving the performance of the insulated exterior. The insulation’s retention system is not, by itself, evidence that the wall can support an added structure.
Identify the wall build-up at the fixing point
Identify the wall build-up at the proposed attachment zone. Begin with original drawings, construction specifications, renovation records and information from the insulation or cladding installer, if available. Record the outer finish, insulation type and thickness, whether there is a cavity or rail, and what lies behind it. Note any recladding, repairs or later penetrations; one elevation may include more than one construction type. Mark each item as confirmed, inferred or unknown. A drawing from the original build can help, but it should not be treated as current evidence if later work may have changed the wall. A description such as “masonry wall” also needs enough detail to locate the actual structural backing.
When records do not settle the question, a suitably experienced professional can specify how to verify the build-up. That may involve a planned inspection at a representative point, but it needs to be coordinated so the exterior layers are identified and then reinstated properly. Do not strip back the finish casually: an unplanned opening can let water in or miss the support line needed for the fixing. Surface appearance, wall thickness measured at a window reveal, or tapping the cladding does not establish what an anchor can engage. If Bloomcabin Wall-Mounted Pergola is under consideration, its name identifies a wall-mounted model, not your wall construction; provide site evidence before choosing a connection. The investigation should relate to the actual proposed fixing locations.
Obtain drawings for the exact pergola configuration
Ask for technical information and installation drawings for the exact pergola model and proposed configuration. Useful documents should identify the part that meets the wall, which arrangements are permitted and what support conditions the instructions assume. Request the connection or anchoring detail and any design data available to the structural professional, including stated limits or exclusions. If a drawing shows the overall frame but not the wall interface, ask what additional documentation is available; do not infer a bracket arrangement from an image. The information needs to apply to the product as it will be installed, not simply to a similar-looking pergola. Also clarify whether the documentation covers a wall-supported layout or one with independent posts.
Keep the intended configuration stable while it is assessed. A different projection, roof arrangement, support position or accessory can change the forces and the route those forces take into the house. Ask whether the drawings cover the proposed layout and whether their fixing detail applies to your type of backing. Use the wall-mounted pergola model page to identify the product in your enquiry, alongside the proposed configuration and wall information. If the documentation leaves a gap, put the question to the supplier and designer in writing before work is planned. Keep the relevant drawing with the site information so everyone is reviewing the same model and configuration.
Design the connection across the insulation
Once the wall is understood, the connection can be designed to bridge the insulated zone and engage the structural backing. Depending on the verified construction, a designer might specify a purpose-made stand-off assembly, a structural carrier or another engineered arrangement. These are examples of design approaches, not options to select from a generic checklist: each has limits, and a detail suited to one wall system may be unsuitable for another. The designer needs to resolve how forces pass from the pergola bracket into the structure, what supports the connection across the insulated layer, and how the assembly will be aligned. Where a stand-off spans a compressible layer, the detail must address how that layer is protected from damaging compression. Ask for the complete connection, not just a fastener.
A longer screw only adds reach; it does not establish how the load is transferred, whether the backing can accept the fixing or how a gap through a compressible layer is supported. It also says nothing about weather sealing, movement, material compatibility or thermal bridging. Do not choose the screw type, embedment, spacing or sleeve dimensions using a general online rule or a hardware counter suggestion. When discussing Bloomcabin Pergola, ask the structural professional to assess the complete connection against the measured wall build-up and proposed configuration. The specification should explain how the components work together, rather than leave the installer to assemble a detail from separate suggestions.

Protect the wall’s weatherproofing
An attachment penetrates or interrupts the exterior wall system, so structural design alone is not enough. Depending on the build-up, water control may rely on render, flashing, a membrane, cavity drainage or a combination of layers. The connection detail should show how each affected layer is treated and how water continues to drain or shed away from the wall. A bead of sealant on the visible face is not a universal replacement for a compatible penetration detail, nor does it explain how the layers behind the face remain protected. Different exterior systems may need different repair methods, so do not assume that a detail for rendered insulation suits cladding over a drained cavity. Confirm who specifies the weatherproofing approach, who supplies compatible materials and who reinstates the finish.
Mark proposed brackets in relation to windows, doors, flashings, cladding joints, vents, eaves, gutters and existing penetrations. The detail must not block a drainage route, cover a junction that needs inspection or make routine maintenance impractical. Also consider where water from the pergola is intended to go, so it does not create an avoidable wetting point at the wall. Set the finished height and position on a drawing before installation rather than leaving those decisions to be made around a bracket on site. If comparing Bloomcabin Bioclimatic Pergola, include the proposed wall junction in your enquiry and ask how the pergola information will be coordinated with the wall’s weatherproofing detail.
Check wall condition and hidden services
Look for signs that could affect the assessment, such as cracked or loose render, bulging cladding, open joints, staining, damp, patched penetrations or previous repairs. These signs do not diagnose a cause or prove that the substrate is unsuitable, but they are reasons to investigate before covering the area with a bracket. A sound-looking face likewise does not prove that concealed framing or masonry is in good condition. Record what is visible and have the appropriate professional decide whether further checks or repairs are needed. Do not treat a surface patch as evidence that the wall is ready to carry a new load; the condition of the backing matters as well as that of the finish.
Map existing services and concealed building features in the proposed fixing zone. Wiring, pipes, ventilation paths, flashings and structural framing may be hidden behind the exterior finish, and a surface detector alone cannot establish that a route is clear or that a suitable anchor point exists. Provide plans and renovation information to the relevant tradesperson or designer; have any scanning or inspection work selected by someone competent for the task. For the Bloomcabin wall-mounted model, include the proposed attachment area in the site information so the wall can be assessed at the actual locations, not at an unrelated sample point. If the wall construction changes along the elevation, flag that transition before the connection is designed.
Compare wall-mounted and freestanding layouts
If the wall cannot provide a verified support point, compare a layout with its own posts rather than trying to make the insulated wall carry an undocumented connection. A genuinely independent arrangement can avoid a fixing through the wall, but it does not remove structural design. Its posts and supports still need to suit the actions on that specific pergola and the conditions at the site. Paving, a raised deck or a thin slab should not be assumed to provide suitable anchorage simply because it is easy to access. A separate support plan needs its own assessment, including how the proposed locations relate to the surface and what lies beneath it.
Check what the selected model permits rather than assuming that any pergola can be arranged either way. Some configurations may rely on a wall connection or combine wall and post support; others may allow a different layout. Ask for the documented arrangement and its support details. When reviewing the Bloomcabin Pergola model listing, establish whether the proposed independent layout is permitted before comparing its footprint with a wall-supported option. Check clearances around doors and paths, drainage routes and access for maintenance. Keep the support positions shown in the assessed design; a layout that fits the available space is not sufficient if it requires an undocumented change to the number or position of posts.
Agree who is responsible for each design detail
Set out responsibilities before hardware is ordered. Ask the pergola supplier for information and drawings for the exact model; a structural professional can assess the verified substrate and specify the load path and anchoring; and a building-envelope specialist can coordinate how the penetration preserves the wall system. The installer can then work to the agreed documents. One person or business may cover more than one role, but the project should make clear who is accountable for each decision. The person fixing the bracket should not be expected to invent missing structural or waterproofing details at the wall. Agree who will review the final position against the design before installation begins.
Get written agreement on who confirms the wall build-up, who decides whether more investigation is needed and who resolves the connection drawing. Also establish who reviews any departure from the design if actual conditions differ from the plans. No one should move an attachment point, substitute a fixing or omit a weatherproofing detail on site without the responsible designer reviewing the change. An installation enquiry is more useful when it includes the exact product, the known wall construction and the proposed layout, and asks what assessment or drawings are available. Include a reference to the Bloomcabin Pergola page if that is the model being assessed, so the supplier, designer and installer can identify the same product.

What to record in a site assessment
Make the site information specific enough for someone else to understand the proposed connection. Record the attachment elevation, exact pergola model and configuration, intended location, relevant clearances, and the evidence for the wall build-up. Include available wall drawings, renovation notes and photos of the exterior; add information from the inside face where it helps identify the construction. Note visible defects, existing openings, penetrations and known services. Distinguish measured or documented facts from assumptions, and identify any unknowns that may need investigation. If the wall construction changes near a proposed bracket, flag the transition rather than treating the whole elevation as uniform.
A useful design response should state whether the substrate at the attachment zone has been verified, what assumptions remain and what further investigation is needed. It should coordinate the structural connection with the insulation and water-shedding layers, and identify the fixing components, positions and installation sequence for the assessed case. Those details should come from the design, not a generic sketch. Ask how the completed work will be checked and recorded, and who is responsible for repairing the exterior finish. If the chosen model is Bioclimatic Pergola, keep its configuration details with the site assessment and connection drawings. This gives the installer a coordinated record of the product, wall and agreed attachment.
Confirm the design before installation
Treat the connection as ready for installation only when the wall material and condition at the fixing zone are established, the pergola configuration is fixed, and the connection has been designed for both. The exterior weatherproofing detail also needs a clear owner. Give the installer the current drawings and site information, and make sure there is a way to raise a discrepancy before work continues. If the exterior finish needs repair, coordinate that work with the connection design rather than leaving the treatment to be decided after the bracket is in place.
Pause if the substrate is unknown, the wall is damaged, the proposed method is described only as a long fixing through insulation, or drawings do not cover the intended configuration. Ask the designer to explain the load path and weatherproofing detail against the site evidence. If the actual wall differs from the drawing, stop and have the change assessed rather than moving a bracket or trying a different fixing on the spot. Resolving those questions before drilling leaves room to change the location or support layout and avoids making the wall opening the first test of the design.
Frequently asked questions
Can a pergola be attached through external wall insulation?
It may be possible, but the connection must be designed to transfer the pergola’s forces into a verified structural part of the wall. The insulation and outer finish are not a substitute for that backing. A professional needs to assess the wall build-up, the exact pergola configuration and how the penetration will be weatherproofed.
Is a longer screw enough if it reaches the wall framing?
No. Length alone does not confirm that a fixing reaches a suitable structural member, transfers the required forces or supports the connection across the insulated layer. The fixing type, position and complete connection need to be specified for the actual wall and pergola. Avoid choosing those details by rule of thumb.
Can a pergola be fixed to render or cladding?
Do not assume that render or cladding can carry a pergola. These outer layers are part of the wall system, but their presence does not prove they are suitable structural backing. Identify what lies behind them and have the proposed attachment assessed against evidence for the wall and its condition.
Would a freestanding pergola avoid the wall issue?
A genuinely independent layout may avoid a connection through the insulated wall, if the selected model permits that arrangement. It still needs a designed support system suited to the pergola and the site. Posts cannot be assumed to be adequately supported just because paving or a deck is accessible.
Who should design and install the connection?
A structural professional should assess the substrate and specify the connection. A building-envelope specialist can coordinate the penetration detail with the exterior wall system, while the pergola supplier can provide information for the exact model. The installer should work to the agreed drawings and refer any unexpected site condition back to the designer.
A reliable connection brings together the actual wall build-up, the exact pergola configuration and a detail that protects the exterior wall system. The key is a clear load path into suitable structural backing, with the insulation and weatherproofing properly accounted for. If the wall cannot support the proposed attachment, an independently supported layout may be worth assessing instead. Resolve the support arrangement before installation so the finished pergola suits both the house and the intended outdoor space.
