
Pergola Height: Headroom, Roof Movement and House Proportions
Pergola planning
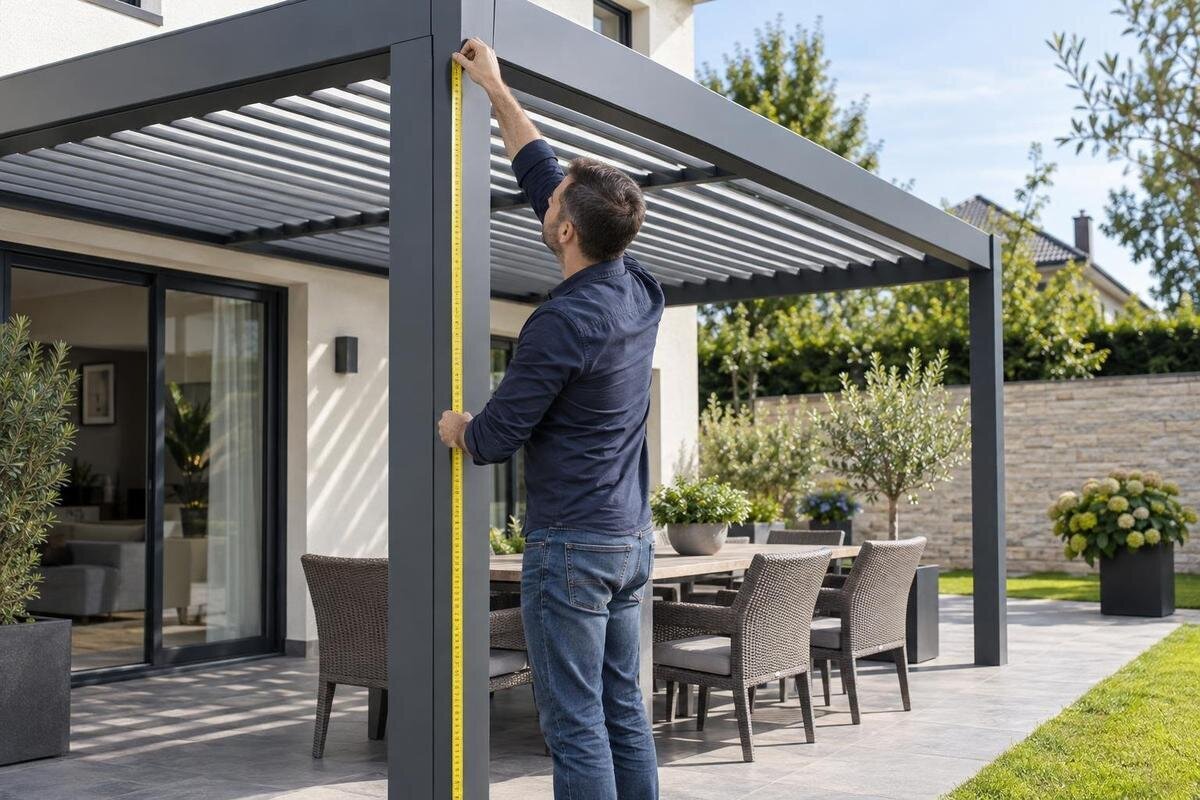
Pergola height is not a single number. A product image can make a pergola look spacious, yet leave unclear how much room there is above a doorway, how much space the roof needs as it moves or whether its top line suits the house. A measured cross-section answers those questions together: it shows the wall, finished outdoor surface, frame, roof and openings in one vertical view. Use it to compare usable headroom and house proportions before settling on a configuration.

What a measured cross-section should show
An overhead plan tells you where the pergola sits, but not whether a beam feels low beside a door or how the roof aligns with a window. A cross-section is a vertical slice through the proposed position, from the house wall across the terrace to the pergola’s outer edge. It puts the structure and ground in one view, while the plan remains useful for post locations. Choose the slice that passes through the busiest or tightest part of the patio, not an empty area. If the roof moves, show the positions that could change headroom instead of relying on one attractive view.
Draw the section at a readable scale and label dimensions rather than estimating from an image. Mark overall height, the underside of the main beam, the lowest fixed projection and the clear space below; these are different measurements. State which surface each dimension starts from, and distinguish site measurements from the supplier’s stated size. Include openings, eaves and nearby obstructions at their measured positions, then note the exact model and roof configuration. A page for Bloomcabin Pergola identifies the product, but its image is not a substitute for a configuration-specific drawing showing your dimensions and reference levels. Request a matching front elevation if the frame or roof varies across its width.
Use the finished paving or decking as your height datum
Take the height from the surface people will use when the work is complete, not from soil or an unfinished base. If the terrace will have new pavers or decking, note the intended finished build-up and show it separately from what is there now. Include the threshold at the house, nearby steps and any change from paving to lawn. A pergola dimension measured at one point can read differently when the surface beneath another post is higher or lower. Label the datum plainly—top of pavers, deck boards or another finished surface—and record the units so site and supplier measurements start from the same level.
On a sloping terrace, record levels at each proposed support and across the path beneath the roof; a single centre measurement can hide a step at the edge or doorway. Show existing and proposed surfaces as separate lines, and mark the direction of the slope without turning the section into a structural design. Ask whether the stated overall height is measured from the base, paving or another reference. This matters for a Bloomcabin Wall-Mounted Pergola as much as for a free-standing layout: the wall does not make the terrace level. Have the installer reconcile the drawing with actual finished levels, including any raised threshold, before agreeing the height dimensions.
Measure clear headroom where people pass and sit
Clear headroom is the open distance from the final walking surface to the lowest part above it, not the height to the roof’s highest edge. Measure it where people pass through and stand beside a table or seating; a beam or fitting at the perimeter may sit lower than the middle. Draw the doorway and main route under the structure, then label the narrowest relevant clearance separately from overall height. This gives you a more useful comparison between frame profiles than a headline dimension alone. If the frame has different levels along its length, note the point at which each clearance applies.
Consider routine use rather than an empty patio. Show exterior doors, places where people stand to serve food, move chairs or walk around furniture, and any fixed item under the roof. A section may need a companion plan to show lateral door swings and circulation, because a vertical cut cannot describe every obstruction. If you may add a hanging light, heater or shade later, note its expected projection separately instead of assuming it sits flush with the frame. There is no universal headroom figure for every household and layout; compare the labelled clearance with the people and activities you need to accommodate.
Check the roof movement envelope in every position
A moving roof needs a vertical allowance for the full path of its parts, not only the closed position. Depending on the design, panels or blades may tilt, slide, fold or travel to a parking area; the movement and resulting high or low point vary by system. Request a diagram for the exact configuration that shows where components go as the roof changes position. Keep the fixed frame, moving parts and any housing or track identified separately, so the drawing makes clear which component controls clearance. Do not infer the movement from a product name or still photograph; check how the operating space relates to nearby openings and fittings.
Compare fully open and fully closed positions, and include any intermediate position that changes the space above a door, window or usual standing area. The lowest point while moving may not be the lowest point when parked, so have the supplier identify clearance for each relevant state. For Bloomcabin Bioclimatic Pergola, request a product-specific movement diagram if the selected configuration has a moving roof; the model name alone does not provide pivot or parking dimensions. If the drawing omits a motor cover, rail, control housing or another protrusion, ask for it to be added before using the height for a site comparison. A plan view may also be needed if a component travels sideways beyond the section line.

House-side clearance around eaves and openings
Draw the house-side edge accurately. Include eaves or soffit, fascia, gutter, downpipes, window heads, door openings and any existing canopy or wall light that could overlap the proposed roof. A line marked house wall is not enough if the pergola is being considered close to an overhang or gutter. Note the height and projection of each item, not only its position on a photograph. For a wall-mounted pergola layout, show its proposed relationship to the actual façade and have the installer assess the connection; a catalogue image cannot confirm a fit or tell you what the house can support. If the roof line changes across the width, request a matching elevation too.
Check access as well as collision: a window may need to open, a door must swing, and gutters or services may need future access. A side section can show vertical overlap, but a front elevation or plan may be needed to locate a downpipe or fitting along the wall. Photograph the façade straight-on and from the side, then mark measured heights and distances rather than relying on perspective. Record which nearby items are fixed and which move. Any attachment to the building or alteration near existing services should be reviewed by an appropriate installer or building professional; the drawing is a coordination aid, not an installation method.
Compare the pergola outline with the whole façade
Height affects how the pergola reads against the home as well as how it feels beneath the roof. Compare its proposed top line with the eaves, fascia, window heads and any strong horizontal bands on the façade. A tall structure may look visually dominant against a low wall, while a roof set unusually low may interrupt the relationship between windows and the outdoor space. These are visual judgements, not a formula: there is no universal height-to-house ratio that suits every building. Draw the house and proposed pergola to the same scale before judging the proportions, and include the roof profile rather than a simple line.
Use a front elevation to see the full width and a cross-section to check depth and height; neither view tells the whole story. Mark the pergola outline on a straight-on photo or scaled elevation, keeping the roof in the position you are reviewing and including posts, beams and any fascia projection. View it from the garden and from the rooms that face the terrace, since it may feel different from inside. When looking at Bloomcabin’s regular pergola model, compare dimensions on the drawing with your façade instead of using the product image as a scale reference.
Check views and daylight from inside the house
Stand inside at the windows and doors that look onto the terrace, then consider what the roof edge will cover in each position. The roof may block part of a sky view or change how much daylight reaches an opening, but the effect depends on the site, house layout, nearby trees and roof configuration. A section through a window and the pergola can show their vertical relationship; add a plan for side-to-side position and a photo for context. Do not judge from a perspective image alone, which can make a roofline appear higher or further away than it is.
Record the view that matters most: perhaps the kitchen sink, living-room sofa, dining table or a frequently used doorway. Mark the viewing position on the plan and review the proposed roofline from there; a small shift in roof height or depth may alter the visible strip of sky or the line across a window. If the selected configuration has a moving roof, request its relevant positions on the same drawing when comparing the bioclimatic model. One fixed outline cannot represent every position of a moving roof. Visit the terrace at times you normally use it, but treat what you observe as context, not as a substitute for measured product dimensions.
Include fittings and accessories in the height check
Accessories can reduce the clear headroom shown in a bare-frame drawing or increase the space needed above the frame. A screen cassette or track, light, heater, motor housing, sensor or decorative trim may project below or above the main beam, and each item needs checking against the selected configuration. Ask which items are included in the quote and which are optional; a fitting shown in a photo is not proof that it comes with the pergola. Put confirmed accessories and their dimensions on a separate layer or note, so you can see their effect on clearance without confusing them with the base frame. If an item is still undecided, identify it as an allowance rather than a confirmed inclusion.
Consider where components and their service routes will sit relative to windows, doors and moving roof parts. If a future screen or light would make the space feel lower, allow for it when comparing options instead of comparing an equipped layout with a bare frame. For Bloomcabin’s bioclimatic option, request a drawing that identifies the accessories included in that exact set-up and the clearance beneath them. Have electrical or heat-producing equipment specified and installed by appropriately qualified professionals, following the equipment instructions. The height sketch should flag possible conflicts, not provide wiring or fire-safety design.

Give the supplier one consistent drawing brief
Give the supplier a concise site brief so the proposed height relates to your terrace rather than a generic setting. Include measurements to finished paving or deck level, levels at the supports, doorway and sill heights, eaves and gutter positions, nearby fittings and a straight-on photo. State the headroom you want to compare, which roof position matters and any accessories under consideration. Ask for a dimensioned section and matching elevation for the chosen model. A quote that gives one overall height may not show where that measurement starts or how much space remains below, so request the reference points as well.
Review alternatives on the same basis: the same finished-level datum, the same section through the house opening, the same included fittings and the same roof position. Put each drawing beside the site section and compare total height, lowest fixed point and movement envelope as separate measurements. Link the drawing to the quote or configuration record, and request a revised version if the model or options change. For the regular pergola range, clarify which dimensions on the supplier’s current drawing apply to the proposed set-up, rather than relying on a single figure on a page. Confirm corrections in writing before proceeding.
Check local requirements separately from the dimensions
A drawing that fits between the terrace and the eaves does not settle whether the project needs local approval or meets site-specific requirements. Do not infer a consent outcome from a generic height rule, a product page or a neighbour’s installation. Ask your local council or a suitably qualified building professional what applies to your property and proposed work; the answer may depend on the site and design. If the pergola could affect an insurance policy or insured property, ask your insurer about its requirements rather than assuming cover. Treat these as separate checks from measuring headroom and appearance.
Keep the section as a coordination document, not an engineering or consent certificate. Where the proposal is close to the house, existing services, drainage routes, boundaries or other structures, have the relevant professional assess those interfaces. Confirm that the final surface levels and selected configuration are the ones shown; otherwise, even a carefully labelled headroom dimension may no longer describe the finished arrangement. Keep the dated drawing with the quote and written inclusions so everyone is referring to the same height information. This connects appearance, clearance and project checks without mistaking one for another.
Frequently asked questions
What is the difference between overall pergola height and clear headroom?
Overall height is the distance to the structure’s highest point, measured from a stated level. Clear headroom is the open space from the finished surface to the lowest part above it. A beam, fitting or moving roof component can reduce headroom, so check both figures on the dimensioned drawing.
Should I measure from the paving I have now?
Use the finished surface you expect to walk on. If new paving or decking is planned, show its intended level separately from the current surface, and include steps and thresholds. This keeps the pergola’s height dimensions tied to the level that will actually be under the structure.
How much extra clearance does a moving roof need?
There is no reliable universal allowance. The space required depends on the selected mechanism and configuration. Request a drawing that shows its movement and any parked position, with the lowest clearance identified in each relevant state. Do not estimate the movement envelope from a product image.
Can a pergola sit below the house eaves?
It may be possible, but a side view alone will not confirm the fit. Measure the eaves, gutter, downpipes, openings and other nearby features, then have the proposed relationship reviewed by the supplier and an appropriate installer or building professional.
Can I judge pergola height from a product photo?
A photo can help you consider the general appearance, but perspective makes it unreliable for dimensions or house proportions. Compare a measured site section with a drawing for the selected product configuration, and use a scaled elevation or marked-up photo to review its appearance.
A pergola height decision becomes clearer when a figure on a page is translated into a measured section of your site. Show the finished surface, meaningful level changes, the lowest overhead point in each relevant roof position, nearby house details and planned fittings. With overall height, clear headroom and the façade relationship labelled separately, you can compare configurations on what matters from the terrace and from inside the home—not on one height figure alone.
