
Setting Up a Pergola for Outdoor Film Nights
Pergola planning
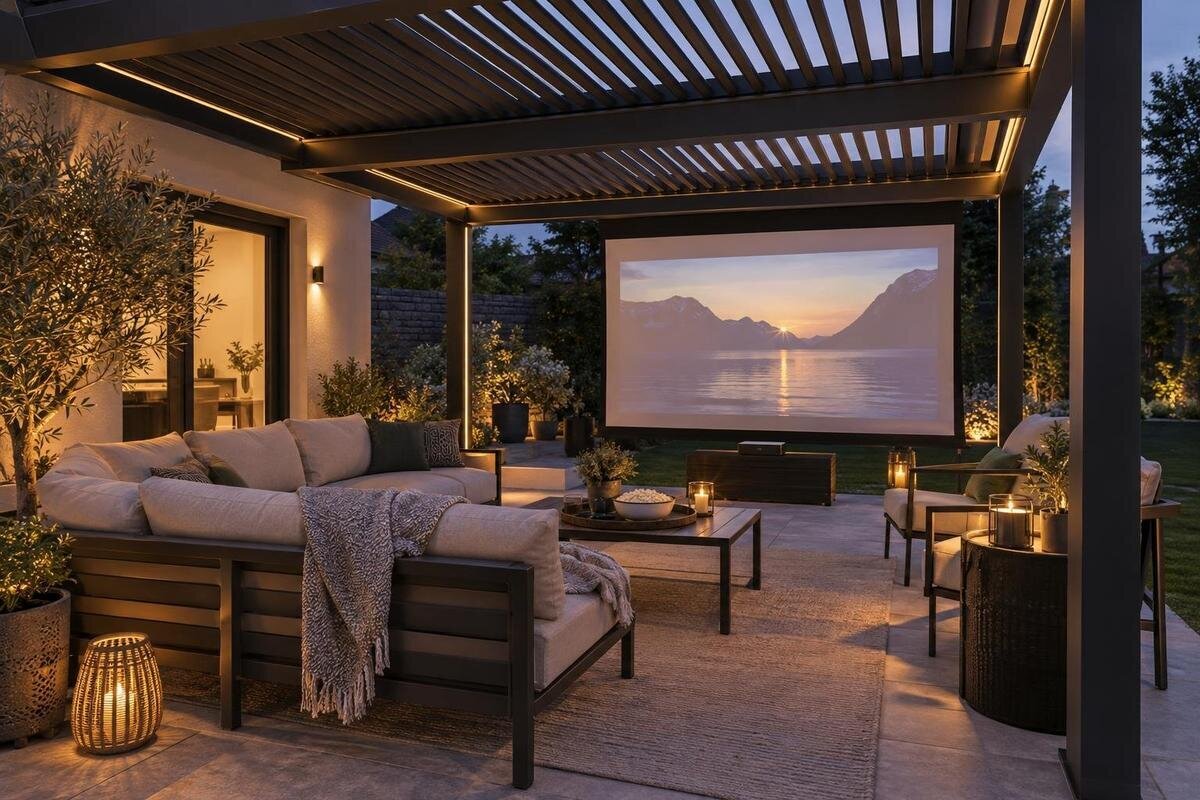
An outdoor film night works best when the pergola is planned around the image rather than treated as a ready-made cinema room. The screen, projector, seats, movement routes and fading daylight all compete for the same footprint; wind, moisture and sound also matter beyond the roofed area. Begin with where the screen will face and what the view is like at the intended start time. Then map the furniture, equipment and access before comparing pergola configurations. That order helps you spot problems while the layout is still easy to change.

01
Plan around the whole viewing area
Measure the area you can actually use, including the pergola’s supports, nearby walls, doorways and the route in from the house or garden. Mark the screen first, then the projector’s likely position and each seat. A film layout needs a clear lens-to-screen path as well as enough room for people to sit without blocking the way through. Allow for someone arriving after the film starts, setting down a drink or leaving without crossing in front of the image. A plan based only on the outer footprint can miss these clearances and make a generous-looking space awkward once chairs are in place. Work from the layout you intend to use, not an empty rectangle.
Measure the chairs at the angle they will be used, including recline or footrests, and mark the screen and seat edges with tape or a simple scale drawing. The Bloomcabin Pergola is listed with area options from 9 to 24 m², but a stated area is not a drawing of usable floor space. Ask for the selected configuration’s overall dimensions and support positions, then compare them with your layout. Note raised edges or uneven paving around seats and equipment stands. Decide on a realistic guest number before adding spare seats: squeezing in another row can spoil sightlines or turn the access route into a narrow gap, even if every chair fits within the pergola’s footprint.
Choose a screen direction that avoids late sunlight
Check the sun at the actual viewing time rather than deciding by compass direction alone. Low light may arrive from a side that is shaded earlier, and the amount of twilight changes by date and place. Observe the proposed screen location on a clear evening; note when the sun leaves the screen and when the image becomes easy to see. If you plan to use the space through the year, compare the light on more than one date. Choose a direction that keeps viewers from looking into direct glare if the site allows, but also consider light from house and garden fittings, neighbouring windows, reflective glazing and pale walls. A pergola roof cannot control all these sources, particularly when its sides are open.
An existing house wall may affect where the image can go, but do not assume it is a suitable projection surface or a safe fixing point. If one option on your shortlist is a wall-mounted model, show the host wall, doors and proposed screen on the same plan, then confirm what surfaces may be used for any screen or equipment fixing. The product name alone does not establish that a wall can carry additional equipment. A separate screen on a stand made for that purpose makes it easier to test locations; set it up and secure it as its maker directs. Check the view from the farthest seat at dusk as well as from beside the screen, and look for reflections from windows.
02
Control ambient light around the screen
A pergola can define a comfortable outdoor spot, but it does not automatically create a dark room. Daylight can arrive under or around a roof; nearby wall lights, garden fittings and the glow from the house can wash over the screen. Judge the image from the seats after twilight, including its corners, rather than assessing it from beside the projector. Turn off or redirect unnecessary lights, close curtains where practical and keep only enough controlled lighting for people to move safely. If a bright fitting is the main problem, moving or shielding that source may work better than changing the entire seating plan or adding extra screening. Make a note of which lights need to stay on for access.
A bioclimatic pergola model should be assessed by its exact supplied configuration, not by an assumption based on its name. Ask whether any compatible roof setting or shading part helps with the particular light you want to control; do not assume blackout, side screening or cinema-grade darkness. Added curtains or panels can affect wind exposure and movement routes, so use only components intended for the selected structure and site. Check that any proposed shading will not obstruct a doorway or the view from an outer seat. If the location cannot be darkened without closing it in, a later start and reduced garden lighting may be a simpler, more practical solution.
Match projector position to the screen
Use the projector maker’s guidance for screen size and lens-to-screen distance; there is no single measurement that suits every projector. Mark the lens position in your proposed layout and measure from there to the screen, then check whether your intended image size falls within the device’s stated range. Confirm that the screen format suits the projector’s output. Pergola supports, lights or people walking past can interrupt the beam. Placing a projector to one side may affect image shape or require adjustment, so check the arrangement using the manufacturer’s instructions rather than assuming the image can be corrected without trade-offs. The pergola’s area alone cannot tell you whether the required throw will fit.
Choose a screen surface intended for projection and for outdoor set-up, with support arranged as its maker directs. A clear view from the outer seats matters more than placing the screen where it is easiest to attach. Avoid shiny glazing or a surface with strong reflections, and check for fittings or window light landing across the image. If using a freestanding screen, keep its base out of the access route and follow its stability instructions for outdoor use. Do not assume pergola members are suitable mounting points; confirm compatibility before fixing anything to the structure. Test the whole image from each seat, not only the centre, and check that the frame does not cut off the picture.

03
Arrange seats for clear sightlines
Arrange seats so everyone can see the whole image without leaning around a support, another person or the screen frame. Mark the nearest, farthest and outermost seats before placing the rest, then sit in them and check whether heads interrupt the view. A shallow arc or gently staggered rows can help within the available width, but the right shape depends on audience size and screen position. Include children or anyone who prefers a different seat height in the test. Check whether subtitles are still readable from the farthest seats. Leave room to get in and out without dragging chairs through the viewing line, and check that people at the sides can see the image’s edges.
If the regular Bloomcabin pergola is on your shortlist, use its dimensioned plan to check how the supports would sit beside or between your planned rows. Measure the chairs, any small side table and the gap needed to move a seat. Tape on the paving can reveal whether the back row has to sit too close to a wall or entrance. Test the arrangement with someone seated while another person passes behind them, and with any reclining chair extended. Keep tables within easy reach without putting them in the aisle. If there is not enough room, reduce the number of seats, move the screen or rotate the layout rather than squeezing the access route.
Keep access routes clear
Plot a clear route between the house, the viewing area and any gate or path before the chairs go down. Include the space needed to open a door fully and pass behind seated viewers; do not make people step over screen feet, projector stands or bags to reach a seat. If someone needs to leave during the film, a route along the edge or behind the seating avoids crossing the beam and blocking the image. Think about where hosts will move with refreshments and where equipment will be packed away afterwards. These small movements are easy to overlook on a seating sketch, but planning them helps prevent the screen and furniture becoming a barrier to normal access.
Doorways and openings matter especially when comparing the Bloomcabin Wall-Mounted Pergola. Request the exact footprint, support positions and connection details for the configuration offered, then compare that drawing with doors, windows and the proposed screen. Do not assume from the model name that a particular wall, cladding or fixing is suitable; have the connection and supporting structure assessed by an appropriately qualified professional. Check that the final arrangement does not block access you need to retain. This is a site-specific question, not something that can be settled by a product area figure alone.
04
Place the projector and plan power safely
Give the projector a firm, stable place outside the main walking route and at the distance required by its instructions. Keep it where people will not bump it or cast shadows as they move, and leave vents, controls and any required clearance unobstructed. Put streaming devices, remotes and batteries somewhere dry when not in use, rather than leaving them on the ground beside the screen. Avoid an improvised cover that blocks airflow or hides controls. Check the projector’s operating and environmental instructions for the actual conditions; the pergola overhead is not a substitute for the equipment’s own protection requirements. Test your playback source before guests arrive so troubleshooting does not interrupt the film.
Plan how each device gets power before the chairs are arranged. A lead across a path or under a seat creates a trip risk and may be exposed to moisture. Use equipment and power arrangements intended for their actual outdoor conditions, and follow the makers’ instructions rather than improvising a connection for one evening. Have any new fixed outdoor supply or wiring planned and installed by a qualified electrician. The Bloomcabin Bioclimatic Pergola name alone does not confirm that a projector, socket or cable is protected from weather. Check the supplied configuration and equipment requirements separately, and keep connections away from walking routes.
Plan for wind and moisture
Treat weather exposure as a separate question from whether the pergola feels comfortable in dry conditions. Open sides can leave a screen or equipment exposed to wind-driven rain; moisture can settle on surfaces as the evening cools, and a breeze can move a light screen. Do not infer full weatherproofing from the roof or from the fact the event is outdoors. Check the instructions for the structure, accessories and electronics against the actual exposure at your site. Look at the forecast before setting up and pay attention to conditions during the event. If the setup becomes unsuitable, postpone, move equipment indoors or use another venue rather than stretching its stated use.
For a wall-mounted pergola, confirm the exact supplied roof and side configuration and what it is designed to handle at your site. Plan where the screen, speakers and cables will be stored afterwards, following their own instructions, and keep the route to storage clear while guests are seated. This makes it easier to pack away if conditions change during the film. Agree on a simple fallback—indoors, another date or a shorter gathering—so there is no pressure to keep running when equipment or guests are getting wet. Do not add a tarp or side cover unless the structure maker confirms that the component and mounting are suitable.

05
Keep sound and light considerate of neighbours
Sound carries beyond a pergola, so arrange speakers for the seats rather than aiming them across the garden or towards a neighbouring home. Keep dialogue clear at a moderate volume; increasing bass or turning up the whole system can make a small set-up intrusive without improving the experience for people close to the speakers. Decide in advance when the film will start and finish, and consider arrivals, conversations and pack-up as well as the screening itself. If you share a boundary, a brief conversation with neighbours about the plan can prevent an avoidable surprise. Keep voices low when guests arrive or leave, too.
Check light spill after dark from the edges of your own property: the projector beam should land on the screen, and garden or house lights should not shine into nearby windows. Close curtains where practical, switch off fittings you do not need, and aim necessary path lighting away from homes. Keep enough light for people to move safely without shining it towards neighbours. Ask someone to check from the seats and from a boundary-side spot where you have access; do not enter another property. If you are unsure about local expectations for sound or lighting, look up current council or community guidance instead of guessing.
Test the layout before choosing a configuration
Run a short rehearsal at roughly the same time of evening as the planned screening. Use the actual screen and projector, sit in each planned seat, and check the picture as the sky darkens and any necessary lights are on. Have someone walk the intended access route while the image is running: note shadows, blocked views, trip hazards and whether anyone has to cross the beam. Listen from the seats at a comfortable level, then check sound and stray light from the side of your own property. Turn lights on or off one at a time to find which changes the image. A trial catches problems a daytime sketch cannot.
Take your measured plan and rehearsal notes into the product conversation. When comparing the Bloomcabin Pergola model with your layout, ask for drawings of the configuration you are considering, plus details of accessories and intended installation conditions. Show where the screen, projector, seats and access route need to go, and identify any positions you could change. Compare the proposed configuration with any professional advice on site attachment or power. If the drawing calls for a different screen or seating position, test that change before committing. Choose a configuration that preserves a clear image path, comfortable seating and access, rather than relying on area or the name of a roof type.
Frequently asked questions
Will a pergola make an outdoor film night dark enough?
Not necessarily. Light can reach the screen from open sides, nearby fittings and the house, even when the area is shaded from above. Check the picture from the seats after twilight, then adjust the screen direction and unnecessary lighting. A later start may help more than adding improvised covers.
Can I attach the screen to the pergola?
Do not assume a pergola member or nearby wall is suitable for fixing a screen. Check the structure and screen makers’ guidance, and have any proposed structural attachment assessed by an appropriate professional. A freestanding screen can be useful for testing different positions before you settle on a layout.
How far should the projector be from the screen?
There is no single distance that suits every projector and image size. Use the manufacturer’s guidance, measure from the planned lens position to the screen, and check that posts, lights and people will not interrupt the image. Test the arrangement before securing equipment or finalising the seating.
Will a pergola keep a projector dry?
Do not count on it. A roof does not necessarily protect equipment from wind-driven rain or moisture, particularly when the sides are open. Check the structure and projector instructions for the actual conditions, keep equipment within its stated use, and have an indoor or rescheduled option.
How can I be considerate of neighbours?
Aim speakers towards the seats, keep the volume comfortable and plan a clear finish time. After dark, check that the projector and garden lights are not shining into nearby windows. A brief conversation with neighbours can help avoid surprises, and local council or community guidance is worth checking if you are unsure.
An outdoor film night is easier to enjoy when the screen, seats and routes have been tested together in the fading light. Confirm the pergola’s real footprint and configuration against that layout, then plan for weather exposure, power, sound and light spill. Keep equipment movable and have an indoor alternative if outdoor conditions become unsuitable. A clear view and an uncrowded route make a more practical set-up than adding chairs or coverings at the last minute.
