
How to Plan an Outdoor Exercise Zone Under a Pergola
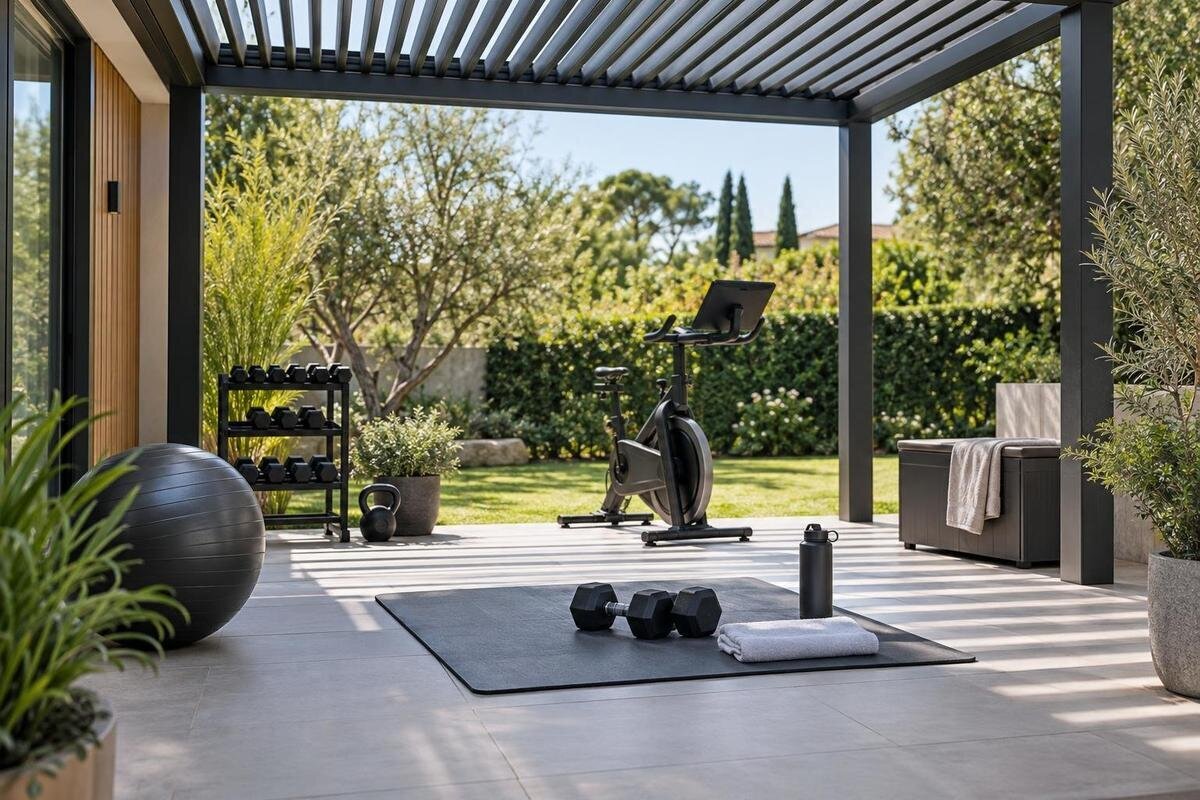
Pergola planning guide
An outdoor exercise zone under a pergola works best when it is planned around the exercises you intend to do. Map your largest movements, then check the floor, posts, access routes, equipment storage and overhead space against them. Pergola area alone does not tell you how much clear floor remains, and an overhead structure is not automatically a weatherproof gym. Treat anything suspended from a beam or post as a structural matter requiring approval for the exact setup.

Define the workout the space needs to support
Start by listing the sessions the space must accommodate, not by selecting a pergola footprint. A mobility or floor-based routine may stay close to a mat; lunges, step-ups, skipping and circuit movements can travel in several directions. A stationary bike, bench or set of weights also takes up floor space and needs access, whether or not it is being used. Record each activity, its equipment, whether it includes floor work or standing movement, and how many people will exercise at once. A solo session and two people following a workout together call for different layouts, so do not size a shared zone for one person if simultaneous use is expected.
Separate regular exercises from occasional extras, but use the largest movement in the regular routine as your sizing test. Note where equipment is put down and collected, where you turn, and whether you need room to move from standing to the floor. Also decide what may stay beneath the pergola when no one is exercising. A dining chair, barbecue, pot plant, laundry rack or storage box can occupy the very area you counted on. Mark those objects as fixed or movable in your notes. This early list makes later measurements reflect the way the space will really be used, rather than an ideal empty rectangle that rarely exists.
Measure the full movement, not just the equipment
Measure the movements of the people who will use the space, along with their equipment, rather than relying on a generic exercise diagram. Mark the mat or machine where it will sit, then note the furthest reach of arms and legs, any step, lunge, turn or travelling movement, and the space needed to get down to and up from the floor. A routine can use more room than its start and finish positions suggest. If more than one person will move at once, mark both paths; do not assume individual footprints can simply be placed side by side without overlap. Repeat the outline for each regular user, as differences in movement and equipment can change the area needed.
Include vertical clearance as well as floor space. A raised arm, jump or lifted piece of equipment may meet a beam even when the floor outline fits, so note the location of posts and the height of overhead parts in your plan. There is no universal clearance that suits every routine. A Bloomcabin Pergola listing can help you compare a product footprint, but an overall area figure does not establish the clear floor or overhead room in a specific layout. Use confirmed details for the configuration you are considering and compare them with the movements you have marked.
Keep walkways and posts outside the active area
Draw fixed obstacles and everyday routes onto the same plan as the workout zone. Include pergola posts, steps, doorways, gates, railings, garden paths and any door or gate that swings into the area. A clear patch of floor may still be awkward if someone has to walk through it to reach the house, or if an open door cuts across a lunge or mat. Keep the route into and out of the exercise area distinct from the space where a person is moving. If the available area is tight, decide which equipment can be moved away before a session rather than leaving it beside the active zone.
A wall or post can affect circulation even when it sits outside the mat’s outline. If you are considering a wall-mounted Bloomcabin Pergola, plot the house-side route and every edge or post shown in the exact plan; do not assume that the whole floor beneath the structure will be clear. Mark where people will pass while someone is exercising, and where equipment is stored between sessions. This makes it easier to spot pinch points before the pergola and furniture are in place, rather than discovering that a usual route crosses the most active part of the layout.
Check traction on the actual floor
The surface underfoot is a separate decision from the overhead structure. Concrete, pavers, a timber deck, tiles and lawn can feel different during exercise, and even one surface may change at joins, repairs or areas that stay damp. Calling a space a patio or deck tells you little about its grip during a side-step or turn. Inspect the exact area you plan to use in your usual footwear and consider the movements on your list. Simply standing on the floor may not reveal how it behaves when you pivot, change direction or place a hand on it during floor work.
Begin with a clean, dry surface and look for leaves, grit, moss, standing water, loose pavers, moving boards, cracks or lifted edges. Dampness can affect grip, so do not perform dynamic movements on a surface that feels slippery or unstable. Include any uneven edge or step on the route into the area in your plan. A mat may move on an unsuitable base, so do not rely on it to hide a floor problem. If the surface needs repair or levelling, have the work assessed by an appropriate tradesperson before treating the area as ready for exercise.

Give mats and portable equipment their own space
Mark the full dimensions of any mat, bench or floor-standing machine, then add the movement area around it. Check that the mat lies flat on the surface you will actually use and does not slide or curl at the edges during the movements in your routine. Leave room to step on and off it without landing on stored gear. If you use more than one mat, mark them together to see whether users’ arms or legs overlap. A mat can define a workout area, but it does not replace a stable, suitable floor underneath.
Plan a separate place for weights, shoes, bottles, towels and resistance bands so they are not left in a walkway or where someone will step during a movement. Put away loose items before starting, and check that any equipment left outside is intended for those conditions. The Bloomcabin Pergola size options are listed from 9 to 24 m²; that is pergola area, not a measurement of clear exercise floor after equipment, posts and circulation are accounted for. Add the storage footprint to your sketch before deciding whether a configuration leaves enough room for the activity itself.
Get structural approval before suspending equipment
Rings, suspension trainers, pull-up bars, hanging bags and resistance bands anchored to beams or posts are not ordinary floor equipment. Repeated movement, swinging and sudden changes in direction can place forces on a structure that are not apparent from looking at it. Do not hang or fix exercise equipment to a pergola unless a qualified structural professional has approved the exact structure, attachment point and intended use. Ask for approval that covers the equipment and the way it will be used; do not infer it from a general statement about the pergola or a visual inspection.
A model name is not evidence of an approved attachment point. The Bloomcabin Bioclimatic Pergola listing identifies a product, but it does not establish that a particular beam or post can carry suspended exercise equipment. Do not improvise with hooks, straps, clamps or brackets while waiting for advice. If the exact setup has not been approved, keep the routine to equipment that rests on the floor or is held by the person exercising, and follow the equipment maker’s instructions. Check that any floor-standing item fits without reducing the movement area or blocking the route.
Allow for sun, rain and changing conditions
Think about when you expect to exercise, not just what the space looks like at one point in the day. Sun and shade move, and nearby buildings, trees and the pergola’s exact configuration affect where they fall. Observe the intended workout area at the times you are likely to use it. Note whether the whole mat remains shaded, whether parts of the floor are exposed, and whether the light makes it harder to see the surface clearly. Do not assume that an overhead pergola covers every part of the exercise zone throughout the day.
An overhead structure does not automatically enclose the sides or keep the floor dry. Wind can bring rain onto the area, while dew or damp conditions may change the feel of the surface. A mat or loose accessory can also be affected by wind, so put away anything not intended to stay outdoors. When considering the Bloomcabin Bioclimatic Pergola, ask what the proposed roof configuration covers and which parts of your marked workout area remain exposed at the sides. Relate those details to your observations of the site rather than assuming the entire area will stay dry. Plan a different place or time to exercise when the floor or weather makes movement unsafe.
Choose a position that leaves the exercise area usable
Place the planned movement zone on the site plan before settling on where the pergola will sit. Check how the usable floor relates to the house, paths, steps, trees and other everyday activities. For a multipurpose patio, draw separate arrangements for exercise and its other regular uses, such as dining or hanging out the washing. Show where movable furniture will go during a workout; moving it to the edge of the mat is not enough if it still occupies the movement area. Also trace the route used to carry equipment between storage and the workout zone. Comparing these arrangements helps you choose a position that works when the patio is in normal use, rather than only when it is empty.
If a wall-mounted option is being considered, treat the house wall and openings as constraints to confirm, not as free extra workout space. The Bloomcabin Wall-Mounted Pergola is a named wall-mounted model; its identity alone does not confirm the installation details for your site. Map doors, windows, the intended exercise area and the proposed structure together, then have the exact fixing arrangement assessed by an appropriate professional. Do not assume that an existing wall or convenient position is suitable. The final layout needs to work for both the exercise movements and the confirmed installation.

Compare exact configurations with a measured plan
When comparing pergolas, ask for the details of the exact configuration rather than relying on a product image or a general area figure. Useful points to confirm include the overall footprint, the positions of posts and the available clear floor beneath the structure. Check overhead positions against the vertical movement you recorded as well. A gallery view can help you picture the setting, but it is not a measured plan of your site or a guarantee of the space left for exercise. Keep your activity list and marked layout beside the product information so gaps are visible.
A size and layout consultation is more useful when it starts with your activity list and measurements. Use them to explain the room needed for movement, equipment, storage and access, rather than asking only for a particular overall area. Keep the Bioclimatic Pergola model information alongside your site sketch so you can identify the option being discussed and record any configuration details still to be confirmed. Ask which measured plan applies to that option, then compare its post positions and overhead dimensions with your marked layout. If you are comparing several options, use the same exercise requirements for each. Any sketch made before those details are confirmed is a concept, not a final layout.
Mock up the layout before finalising it
Use tape or another removable marker to outline the mat, equipment, walkways and movement limits on the actual surface. Boxes or other temporary markers can represent equipment that is not on site yet. Walk the entry route and carefully try the movements in your plan, checking for overlap with posts, furniture, doors and other people. This is a practical way to find awkward turns or a storage spot that blocks access. A floor-level mock-up will not show overhead clearance, so compare raised movements with the confirmed beam and roof positions as a separate check.
Treat the marked layout as a concept until the exact pergola configuration and its position on site are confirmed. When you compare it with a specific Bloomcabin Pergola configuration, use confirmed measurements rather than estimating from a photograph. If the arrangement feels cramped, reduce the number of activities or equipment pieces, move the storage, or reconsider the location before committing. Recheck the floor and clear routes when the space is in use, and revise the plan if you add equipment or change how the area is shared. A useful exercise zone is one that still works on an ordinary day, not just in an empty drawing.
Frequently asked questions
How much clear space does an outdoor workout need?
There is no single clearance that suits every activity. Measure the largest movements in your routine, including reach, steps, turns and floor transitions, then mark the equipment and access route as well. Check the layout against the actual posts and other obstacles.
Can I exercise under a pergola when it is raining?
Do not assume the area will stay dry. Wind can bring rain onto the floor, and moisture can affect traction. Check the actual surface and roof configuration; if the floor is slippery or conditions make movement unsafe, use another space or wait for it to dry.
Can I hang a suspension trainer or rings from a pergola?
Only if a qualified structural professional has approved the exact structure, attachment and intended use. A product name or a beam that looks sturdy is not approval. Without that sign-off, keep exercise equipment off the pergola.
Is an exercise mat enough to make a patio suitable?
Not necessarily. Check the floor beneath it for unevenness, loose parts, dampness and debris, and see whether the mat stays in place on that surface. A mat should not be used to cover up a floor problem.
Does a pergola’s stated area equal the usable workout area?
No. A stated area does not show how much clear floor remains after accounting for posts, movement space, walkways and equipment. Compare a measured plan with the exact configuration rather than relying on the overall area alone.
Plan from the exercises outward: map movement, confirm reliable footing, leave circulation clear and account for the weather before settling on a pergola configuration. A full-scale mock-up makes a proposed layout easier to judge, while confirmed measurements show whether it can work on the actual site. Keep suspended equipment off the structure unless its exact use has structural approval. If the planned movements do not fit comfortably around posts, routes and stored gear, adjust the activity list or choose another location rather than squeezing the workout into the remaining space.
