
Plan Your Pergola Before the Patio Is Built
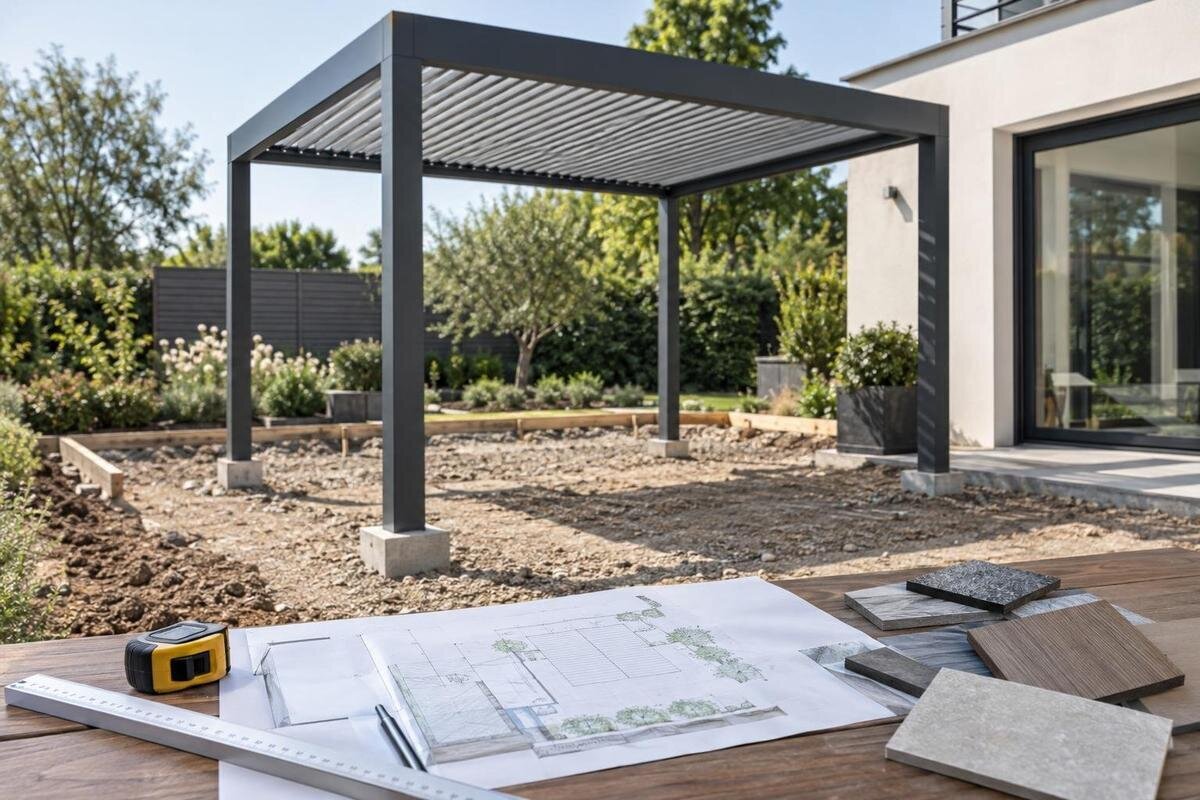
Pergola planning
Once patio levels and paving are fixed, changing a pergola’s supports, service routes or drainage plan can mean revisiting finished work. Choose the intended model while the patio is still at the design or groundwork stage, then coordinate its measured footprint, support details, finished levels and trade responsibilities. The useful early commitment is a documented configuration, not a guess at foundations or a decision made from a product photo.

Why choose the pergola before patio construction?
A pergola affects more than the shape of the finished patio. Its supports or wall connections may need a prepared base, while drainage and service routes can cross the same area. Leaving these decisions until paving is complete may mean cutting the finish or changing a route. Whether rework is needed depends on the selected model and patio design. Resolve these details while the ground is accessible, rather than assuming the pergola can go wherever it looks best afterwards. Include its footprint in the patio plan to show where it meets joints, steps and edges.
Choosing early does not mean ordering before the site has been checked. It means identifying a likely model and configuration soon enough to request its drawings, compare them with the patio plan, and ask the builder what information is needed before groundworks. For example, the Bloomcabin Pergola can be a named starting point for a quote, but its product page is not a site-specific installation plan. Distinguish a preliminary layout from an approved support or connection detail. Agree a date for receiving the necessary information and name who will follow up any missing detail, so the patio team is not left to improvise. If some information is unavailable, record it as outstanding and agree when it must be resolved, rather than allowing a provisional sketch to look final.
Draw the pergola on a measured site plan
Use a scaled top-down plan showing the house wall, proposed patio boundary and pergola’s overall dimensions. Mark its orientation, its relationship to doors and windows, and each intended support or wall connection. Locate steps, retaining edges, downpipes, drains, inspection covers, taps and service boxes with measurements; labels alone will not reveal conflicts. Measure from stable reference points and distinguish measured dimensions from provisional ones. This gives the supplier and patio contractor a common layout. Include room to move around the dining area or other intended use, not only the furniture footprint, and mark the edges that must stay clear for everyday access.
The listed Bloomcabin Pergola configurations are shown with areas from 9 to 24 m², but an area range does not settle the required outline, orientation or clearances on your site. Match the quote to the exact configuration and its drawing; do not estimate the footprint from a gallery image or nominal floor area. Check whether the stated overall dimensions include any parts that project beyond the support line, and ask the supplier to identify the measurement reference points on the drawing. Then compare the plan with the patio border and any planned changes, such as a larger table or new path. A small shift may improve the layout, but only the supplier can confirm whether it remains within the specified arrangement. Label the drawing with its date and status so provisional dimensions cannot be mistaken for final set-out information.
Confirm support positions before groundworks
Treat support positions as a groundworks decision, not a detail for the paver to solve. Request a plan for the selected model and configuration that identifies each support or connection point in relation to the finished surface. Ask separately for the product’s written base or fixing requirements and for any site-specific design needed for the property. The Bloomcabin Wall-Mounted Pergola page identifies a wall-mounted model, but it cannot establish whether your particular wall is suitable or where a connection belongs. Do not transfer post positions from an illustration or move a support to avoid a drain without approval. A supplier drawing and project-specific review must answer those questions before the patio team sets out the work. Where the plan shows both posts and a wall connection, confirm their locations together.
Overlay the support plan with the paving pattern, edges, drainage channels and service routes. Tell the patio contractor what preparation is required at each support location; ‘allow for supports’ is too vague. If groundworks reveal a pipe, unsuitable ground or an existing slab at a proposed support, pause the affected work and refer the issue to the supplier and relevant designer or installer. Moving a post, changing a base or improvising a fixing can alter the design. Record the agreed revision and give it to everyone responsible for setting out, preparing or installing the supports.
Coordinate patio levels and drainage
Plan patio levels and drainage together. The builder or drainage designer needs the intended finished surface level, nearby thresholds, steps, channels and the proposed surface-water route. Mark falls and drain locations on the drawing, leaving gradients and drainage design to the qualified person responsible. Pay particular attention to door sills and adjoining ground; the pergola footprint does not resolve water movement across the patio. Record transitions to thresholds or existing paths before preparing the base. Show how water will be managed at the patio edge, and identify whether any connection to existing drainage is confirmed or still needs a decision.
Keep water from any pergola surface distinct from water on the patio. Do not assume that a chosen configuration collects rain or discharges it in a particular direction. Ask the supplier whether the exact configuration has any water collection or outlet requirements and, if so, obtain the specified outlet positions before drainage routes are fixed. For a Bloomcabin Bioclimatic Pergola configuration, request the relevant product documentation rather than inferring drainage behaviour from the name or appearance. The patio designer can then assess how any stated discharge fits the overall site drainage plan. Write down who provides, connects and checks each part; otherwise, each contractor may reasonably expect another trade to handle it. Keep any product-related discharge and patio falls on drawings that use the same finished levels.

For a wall-mounted pergola, plan the building connection
If the proposed pergola connects to the house, draw that wall as well as the patio. Show doors and windows, eaves, gutters, downpipes, vents, visible cladding joints and existing services, with dimensions to the intended connection area. A plan view alone cannot show whether the proposed height or position conflicts with an opening or roof edge. The wall-mounted Bloomcabin model may be worth including in a comparison, but the model name does not confirm that a particular façade can support it. Have the supplier provide connection information for the exact configuration, then ask an appropriately qualified building professional to assess the existing construction and proposed interface. Include the wall height and nearby roofline on an elevation, and do not rely on photographs alone for dimensions.
Agree responsibility for wall penetrations and weatherproofing before signing the patio contract. Confirm who checks for concealed services, who supplies or approves the connection detail, how flashing or sealing is specified, and who makes good the wall. Neither contractor should assume the other is responsible for this work. If the wall is unsuitable, consider another layout with revised product and site drawings. Keep the wall detail coordinated with patio levels so adjustments do not compromise access or water management. Wall work should follow the detail accepted by those responsible for the building and installation.
Plan electrical services before paving
Decide which services are genuinely wanted under or beside the pergola before the paving route is fixed. For example, you might be planning lighting, an outdoor socket or a control point; treat each as a separate requirement, not a vague request for ‘power’. Mark intended fixture or outlet positions on the plan and show a proposed route only after the relevant trade has advised it. Ask for the product documentation for the selected package; if considering the Bloomcabin Bioclimatic Pergola, identify the exact configuration in the enquiry. A model name alone does not establish whether a connection is needed or what it would require. Have a qualified electrician specify the electrical work and confirm the layout against the product information. If services are not needed, record that decision too.
Agree who provides ducting or other service provision, who installs cables and equipment, and who checks the completed work. The patio contractor needs the routes that must be prepared before paving; the electrician needs finished levels and required access points. Record each route’s start and end locations, responsibilities and exclusions. An allowance without an identified destination may not serve the intended position. Label provision for possible future use separately from services included now. Do not leave the paving crew to guess electrical routes or connections, and arrange a handover of route information before it is covered.
Set finished levels and check clearances
Show the finished patio level, not just the current ground line. A section drawing should identify the base and surface build-up advised by the patio designer, alongside thresholds, steps and edging. Pergola dimensions taken from a provisional level can leave the structure at a different relative height after paving. Ask the supplier for the configuration’s overall height and clearances, and have the installer identify measurements taken from the finished surface. Show variations in ground level across the footprint. Use the same level reference on all drawings so the builder, supplier and installer are working towards the same finished height.
Check how people will use the space with furniture in place. Show door swings, the route between house and garden, furniture and steps on the plan, then check vertical clearance where people pass or stand. If a patio edge, step or support would narrow the route, adjust the layout before paving lines and levels are set. The supplier can confirm product dimensions, but you decide what clear space works for your household. Revisit these clearances if furniture or access plans change.
Write down what each contractor includes
Write an interface schedule that separates the product, groundworks and finishing work. For each item, state who supplies it, who installs it, who checks it and who makes good if another trade has to alter it. Include excavation or base preparation, product supports and fixings, paving cuts, drainage connections, wall work, electrical services and final sealing where relevant. A Bloomcabin Pergola product page and a patio quote are not one combined scope, so compare actual written inclusions rather than expecting one contractor to cover the other’s work. If several trades are involved, name the lead coordinator and agree when they will exchange drawings and measurements. Give every contractor a copy of the responsibility schedule before work starts.
Ask each contractor to make exclusions explicit. Does the price stop at a prepared base or include paving around it? Does the supplier provide installation, or will another installer follow its instructions? Are service connections, drainage, delivery handling and spoil removal included or arranged separately? Put the answers in the quote or contract, not just a phone conversation. For tasks that depend on another trade, record the required input and its deadline. This helps avoid a base prepared without confirmed fixing details or an installation crew arriving before the area is ready.

Information for a pergola quote
Give the supplier a useful site pack, not just a mood image. Include a measured plan, photographs of the house wall and patio area, a side view where levels change, and the current patio drawing showing boundaries, finished levels, drains and planned services. Add dimensions to stable reference points, note obstructions and explain which figures are provisional. Include your preferred footprint, orientation and any wall connection under consideration, plus a brief description of how the area will be used. If comparing the Bioclimatic Pergola model, identify it by name but request the exact proposed configuration and its matching drawing. Clear information can reveal missing details before the patio design is final; update the pack if site measurements change.
Ask for the quote or configuration document to identify the model, selected size or layout, options, dimensions and supporting drawings. Check that the drawing matches your site orientation and shows the relevant supports or connections. Mark undecided dimensions, connections or services as outstanding; a provisional sketch is not approval to manufacture. For configuration changes, obtain a revised, dated drawing, pass it to affected trades and clearly mark older versions as superseded. The quotation and patio drawing should use the same footprint and finished-level assumptions, with someone responsible for resolving each outstanding item.
Set a hold point before final paving
Agree a hold point with the patio contractor before paving hides the preparation. Walk the area with the current drawing and check the footprint, support locations, door access, drainage route and service positions against the measured set-out. If a support or connection lands somewhere unexpected, pause and consult the supplier or responsible designer before altering it. Record agreed changes on a dated revision and send it to affected trades, including the pergola installer. Resolve differences between the site and plan before continuing the affected work.
Proceed past the hold point when the exact configuration, applicable installation details, finished levels, drainage plan, service routes and trade responsibilities are confirmed. Resolve consent questions with the relevant local council or qualified adviser, and insurance implications with your insurer; neither can be inferred from a product page. Keep the final drawings with the project documents. If a critical detail remains unresolved, leave that part of the work accessible rather than paving over it. The builder and pergola installer should receive the same confirmed arrangement.
Frequently asked questions
Should I order the pergola before patio work starts?
Not necessarily. The important timing is to select the intended model and configuration early enough to obtain accurate drawings and settle support, level, drainage and service interfaces before finishes are laid. Confirm order and installation timing with the supplier and builder; site information or configuration details may still need checking before a purchase is final.
Can the patio be paved first and the pergola added later?
It may be possible, but it can limit access to support locations or buried service routes and could mean lifting or cutting finished paving. Ask for the selected model’s base or connection details before the patio is signed off, then have the contractor confirm whether the prepared surface suits those details.
Do pergola supports always need separate footings?
There is no safe universal answer from a product name or image. The required support and fixing arrangement depends on the exact model, site and construction. Obtain the supplier’s relevant installation detail and have the responsible qualified designer or installer specify the project-specific base before groundworks.
Who should plan drainage and electrical services?
The patio or drainage designer should coordinate surface-water routes with the site; a qualified electrician should define electrical routes and connections. Assign who supplies, installs and checks each item, and show the agreed locations on the same current drawing before paving.
What information should I send with a pergola quote request?
Send a measured site plan, dated photos, wall and level information, the intended patio layout, service and drainage locations, and your preferred pergola footprint and orientation. Mark estimated dimensions clearly and ask the supplier for a drawing of the exact proposed configuration. Update the pack if measurements change.
Selecting the pergola while the patio is still being planned lets the base, paving, drainage and service plans be coordinated before construction. A measured footprint, model-specific drawings, agreed responsibilities and one current set of plans give each trade a clearer handover. Once those details are confirmed by the people responsible for them, the patio can be built to suit the chosen arrangement rather than adapted around an uncertain one.
