
Can a Pergola Feed Rainwater to a Garden Tank?
Pergola rainwater planning
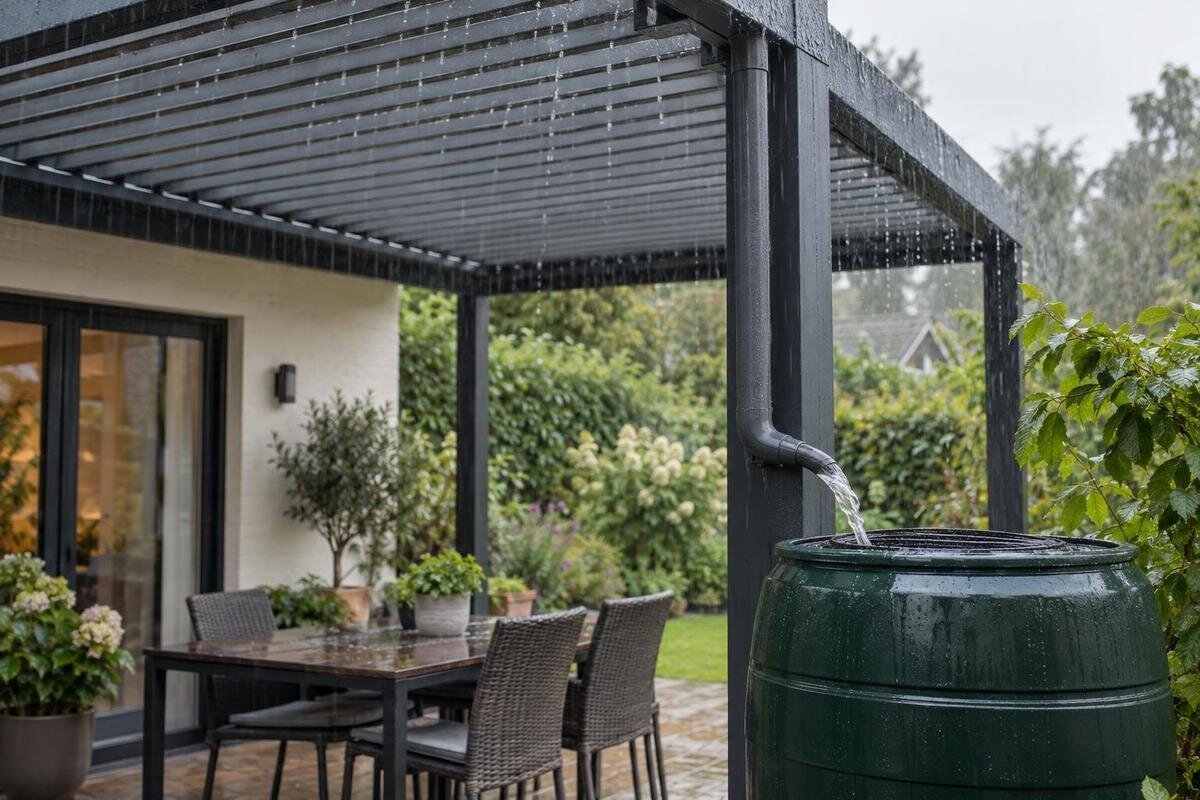
Pergola rainwater can be collected in a garden tank only when the selected roof configuration captures runoff and directs it to an outlet. Plan the outlet-to-tank connection, realistic yield and overflow together. A pergola frame, product name or attractive roof image alone does not show that rain will reach a tank.

Can a pergola collect rainwater?
Yes, but only if the roof or cover captures runoff and directs it to a defined outlet. A pergola frame by itself is not a catchment. Rain may pass through open slats or gaps between panels, while wind-driven showers can blow over an edge. Even a roof that can be closed collects water only if its designed drainage path carries it to a gutter or outlet in the relevant position. The key question is not whether rain lands on the pergola; it is whether a known roof area delivers water to the point where a tank can connect. Confirm which roof surfaces are intended to feed that outlet.
Treat drawings for the chosen configuration as more reliable than a category name or product photo. Confirm which surfaces collect water, the roof position required during rain and where runoff exits. The Bloomcabin Wall-Mounted Pergola listing identifies a model, but its name alone does not establish that a particular setup can feed a tank. Ask for its drainage diagram and applicable enclosure or roof details before buying a connector or tank. If a drawing covers only one roof position or enclosure, make sure it matches what you plan to use. Do not assume a nearby house gutter, pergola post or visible channel belongs to the same drainage system.
Measure the area that actually feeds the outlet
Work out the effective catchment area for the outlet you plan to use, not simply the floor area beneath the structure. For a basic estimate, use the roof's horizontal projected area that can shed water to that outlet. Exclude uncovered or open sections and any parts that drain elsewhere; note overhangs, breaks and separate roof panels. If different sections discharge at different corners, calculate the area served by each outlet separately. A plan view with roof edges and outlet locations marked is often clearer than relying on a nominal pergola size. Include an overhang only if it actually drains into the collector; a drip edge over the garden does not count as tank catchment.
Catalogue dimensions are a starting point for layout, not proof of water capture. The Bloomcabin Pergola size options are listed across a 9–24 m² range, but that does not confirm the effective catchment for a selected roof configuration or which outlet serves it. Check the selected model's dimensions and drainage drawing, then confirm the collection surface with the supplier. If the roof includes open or adjustable elements, use the catchment area stated for the position used in rain rather than treating its entire footprint as permanently roofed. Ask whether multiple outlets divide the catchment, especially if you intend to connect only one of them to a tank.
Estimate yield before choosing tank capacity
Use a simple volume estimate to judge whether collection is worth planning: effective catchment area in square metres multiplied by rainfall depth in millimetres gives a theoretical volume in litres, before losses. One millimetre over one square metre is one litre, so 12 m² receiving 10 mm represents 120 litres before runoff is lost or diverted. This is an illustration, not a promise of delivery. Wind, splash, leakage, roof position and first-flush diversion can reduce the amount reaching storage. If you use a runoff factor from a calculator, make sure it reflects the actual roof and collection setup; do not choose one just to inflate the estimate.
Use rainfall information for the site and period that matter, comparing ordinary events with the longer gaps between them. A heavy shower may fill a small tank quickly, while a dry spell can leave a large one partly empty. When considering the Bloomcabin Bioclimatic Pergola product listing, base your yield estimate on the effective collection area for the exact roof configuration and position used in rain. Ask the supplier for that figure rather than calculating from the listed size alone. If no verified figure is available, use your calculation as a planning estimate, account for losses and avoid treating a single storm as the supply you can rely on all season.
Match the pergola outlet to the tank inlet
Before choosing a connector, map the route from the pergola outlet to the tank inlet. Record the outlet's location, shape and stated size, how water is released, and whether a gravity-fed layout needs a particular difference in height. An adapter that appears to fit may still restrict flow, leak or stop the outlet draining as designed. Use components compatible with both manufacturers' instructions; do not cap or narrow an outlet to make an improvised connection. If the intended link needs a diverter, connector or pipe extension, confirm its suitability for the outlet and tank rather than matching parts by appearance alone.
For the Bloomcabin Wall-Mounted Pergola model, request the drawing for the exact roof and enclosure configuration, including every outlet and its termination point. A wall-mounted structure may sit near existing building downpipes, but proximity does not show that the systems can be joined or that the house gutter receives pergola runoff. Have an installer check any connection that alters building drainage, crosses a wall or requires buried pipework. Do not drill, enlarge or seal a channel based on a generic connector; ask the supplier how to make the connection without disrupting the designed drainage. Keep fittings accessible for inspection.

Choose a tank for supply and demand
Choose tank capacity by balancing inflow, use and available space. Estimate how often it may refill, how much water the garden will use between rain events, and how much storage remains when the next shower arrives. If demand is low, extra capacity does not create extra runoff; the tank may stay full and overflow. If capacity is small, it can fill quickly during one event, so the overflow route matters just as much. Think about water available between showers, not only the maximum volume that will fit beside the pergola. Seasonal changes in watering demand may also affect the useful size.
Compare a smaller tank that is easier to place and maintain with a larger one that needs more ground space and a deliberate overflow route; neither is automatically right. If you are considering a model from the Bloomcabin Pergola range, settle the roof arrangement and verified catchment first, then combine that figure with local rainfall and realistic watering demand. Consider a typical rain event and a dry interval rather than sizing around an exceptional downpour. A storage tank can buffer the timing of supply, but it cannot compensate for a roof that sheds water away from its outlet. A supplier or tank installer can help test assumptions for the complete setup.
Keep debris out without assuming the water is clean
Rain washes dust, leaves and other material from a roof into its drainage path. A leaf screen at the collection point and an inlet screen on the tank can limit larger debris; a first-flush diverter, where suitable for the design, can direct early runoff elsewhere. Each part needs to suit the route and remain accessible. Screens and first-flush devices do not make water potable or remove every contaminant. A dirty screen can restrict flow, so follow the component maker's maintenance instructions and clear debris before it blocks the system. Check where diverted water goes as well; it should not simply pool beside a building.
Ask which screen or diverter arrangement, if any, is compatible with the roof's actual outlet. For Bloomcabin's Bioclimatic Pergola option, use the drainage details for the selected roof configuration and position during rain to identify where a suitable attachment could connect. Confirm that it will leave the outlet able to drain as intended. Plan access to the screen, diverter and tank inlet so they can be checked without dismantling the pergola. A simple sketch showing where the first flush goes and where runoff enters the tank can prevent a diverted line being connected to the wrong opening. Follow the tank manufacturer's advice on covers and screens.
Plan the overflow before connecting the tank
Every tank needs an overflow plan for the point at which it is full. Further rain must leave through an outlet that can accept the incoming flow and lead to a suitable discharge point. Route it so water does not pond against the pergola or a building foundation, erode soil, cross a path where it creates a hazard, or run onto neighbouring property. A short hose laid on the ground is not a complete plan unless its end point and behaviour in wet weather have been checked. Include the full route, not just the tank's overflow fitting, and check that it cannot be blocked by garden debris or become disconnected.
Confirm the tank maker's overflow connection and have the route assessed against the site's slope, soil and existing drainage. Suitable soakage or garden dispersal may work on some sites, subject to conditions and local requirements; ask the council or a qualified drainlayer or plumber if unsure. With a Bloomcabin wall-mounted pergola, draw the building downpipes and tank overflow as separate lines rather than presuming a nearby pipe can take both. Do not assume an existing stormwater connection is available for a new discharge. Keep the final outlet visible or accessible for inspection where practical.
Allow space for a stable tank and access
A full garden tank is heavy, so plan it as a ground-supported item on a stable base suited to the tank maker's instructions and the site. Do not hang a tank from the pergola, suspend it from a beam, or assume the structure can carry its weight. Place the tank where the inlet and overflow can be reached and where a tap or hose can be used without blocking a doorway or main path. If the ground is uneven or soft, or the location is close to a retaining wall or building, ask a suitably qualified person to check the base and location rather than improvising. Allow for routine access to its lid and fittings.
Draw the pergola, tank, door openings, paths and overflow route together before settling the position. When comparing options on the product page for Bloomcabin Pergola, use confirmed external dimensions for the selected model in your layout, then allow additional space for the tank and service access. Leave room to reach screens and fittings, use the tap, and remove or replace the tank if required. A tank in the easiest spot to connect may be awkward to maintain or send overflow towards a wall. Check that installation access is possible too, rather than discovering the tank cannot be moved into its planned position.

Choose a suitable use for collected water
Treat rainwater collected from a pergola as non-potable unless a properly designed system provides treatment and is assessed for that use. For ordinary garden watering, consider what the roof, gutters and tank may contribute: leaves, dust, bird droppings or residues from roof surfaces can enter runoff. The condition and material of catchment surfaces, upkeep and storage all matter. A screen or first-flush device may reduce some material, but it is not a guarantee of water quality. Keep the tank covered as advised by its manufacturer, and do not assume clear-looking water is suitable for every purpose.
For edible crops, consider the catchment surface, how well it is maintained and the intended watering method; follow reliable local guidance rather than assuming every roof catchment is suitable. Do not drink the water, use it for cooking or connect it to household drinking-water plumbing on the strength of a pergola outlet alone. If household or another higher-standard use is intended, ask a qualified rainwater-system professional about treatment, separation and ongoing maintenance. Keep any garden-water outlet clearly separate from drinking-water taps; tank capacity says nothing about quality.
Ask for model-specific drainage information
Before buying components, ask the pergola supplier for model-specific drainage drawings showing the catchment, channels, outlets and discharge direction for the exact roof or enclosure configuration. Confirm whether any stated weather-performance information applies to the configuration and operating position you will use. Controlled observations and model limits are useful only within their stated conditions; they are not universal promises that a pergola is watertight in every storm. Check the tank maker's inlet and overflow requirements against the actual pergola outlet, rather than assuming the fittings match. Keep the documents with the final site plan.
Your plan is ready when it records which roof area feeds which outlet, what connector suits that outlet, how much water is likely to arrive, where excess water goes and what the stored water will be used for. Also record the chosen tank location and access to screens, inlet and overflow. If a drainage drawing, compatible connection or safe overflow route cannot be confirmed, do not rely on a guess or block an existing outlet. Ask the supplier and a qualified installer or drainlayer to resolve the unknowns, or choose a separate documented collection point instead.
Frequently asked questions
Can I connect a pergola outlet straight to a garden tank?
Only if the outlet is designed to carry runoff from the pergola and is compatible with the tank inlet. Check its position, size and drainage route in model-specific information. A pergola post is not automatically a downpipe, and an adapter must not obstruct the outlet.
Will an open pergola roof collect rain?
Not reliably if rain can pass through gaps or open slats. A roof that can be closed may collect water in a specified position, but only if its drainage system directs runoff to an outlet. Check the instructions for the exact configuration.
How can I estimate the amount of water collected?
Multiply effective catchment area in square metres by rainfall depth in millimetres to get a theoretical volume in litres, before losses. For example, 12 m² receiving 10 mm represents 120 litres before runoff is lost or diverted.
Where should a full tank's overflow go?
Plan a route to a suitable discharge point that will not pond against a building, erode soil, create a path hazard or send water onto neighbouring property. Check the tank maker's requirements and get local advice if the route is unclear.
Can I use pergola rainwater for drinking or edible crops?
Treat it as non-potable unless a properly designed and assessed system provides the treatment needed for that use. For edible crops, consider the catchment surface and maintenance, and follow reliable local guidance rather than assuming all roof water is suitable.
A pergola can help fill a garden tank only when collection is designed into its roof and outlet. The useful measure is runoff that reaches the tank, not the structure's footprint; the rest of the system must handle surplus safely and suit the intended use. With the drainage route and tank layout confirmed, storage can be sized around a realistic garden supply rather than an assumed yield.
