
Low Evening Sun: Where Should a Pergola Screen Go?
Pergola planning
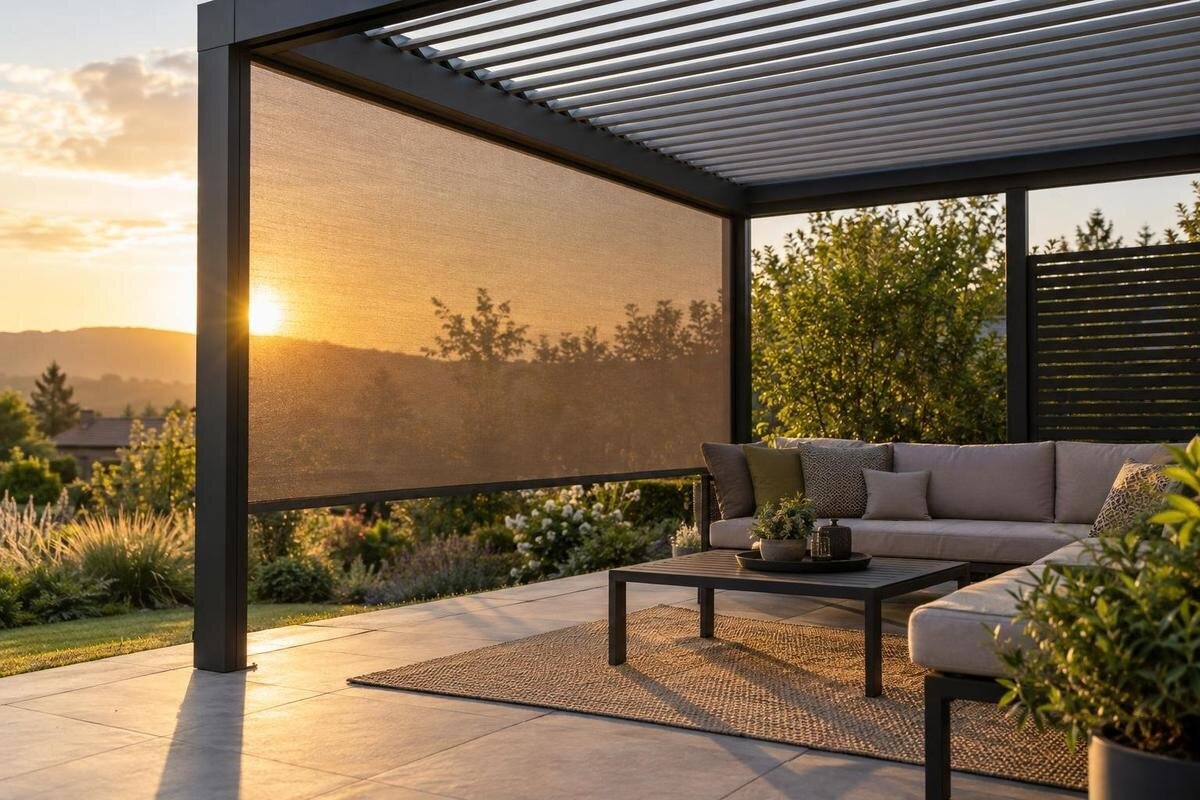
Midday roof shade can look generous while the late sun still reaches a face or table from the side. For an evening meal under a pergola, the useful screen position is the open edge that low rays cross on their way to the seats you want to protect. That edge is not automatically the one labelled west: the pergola’s orientation, the sun’s changing path, nearby obstacles and where you sit all matter. A simple plan and a short observation at the time you actually use the space can show whether one side is enough or the light turns around a corner.

01
Seating positions and evening glare
Use one real routine as the test: the table, chairs and people in the places they usually occupy during a summer evening. A roof can shade the table from overhead sun yet leave an open side exposed once the sun is low. Notice whether direct light reaches your eyes, a book, the food or only an unused patch of paving; those are different targets. If glare is the problem, map the seated eye line. If a bright strip on the table matters, map that surface as well. Do not judge the screen position from a standing view alone: a ray that misses your face upright may reach you when seated.
Choose an evening with a clear enough sky to see direct light, then observe from the time you begin using the pergola until you normally leave. For example, use an evening meal as your test: mark where everyone sits when the meal starts, then check those same places as you finish and linger at the table. Note the first moment light gets under the roof, where it lands and when it moves away. A single snapshot at sunset can miss an earlier beam that causes most of the glare, while a midday check says little about a low-angle path. If the pergola serves different routines, map the most common one first and note any second time that matters. Record whether the bright patch moves past the same chair or sweeps across the table; that helps distinguish brief glare from a seat left exposed for longer. Keep the furniture in its usual position during this first check so the notes describe how you actually use the space.
Map the evening sun on a simple plan
Draw an outline of the pergola and mark north, the open sides and nearby boundaries such as a building, fence, hedge or tree canopy. For a New Zealand site, summer sunset is generally south of due west and winter sunset north of it, but the bearing changes with latitude and date. Local ridges and buildings also alter the visible horizon. Treat a compass or sun-path app as an orientation aid, not a substitute for observing what reaches your table. The useful reference is the sun’s direction at your property during the time you usually use the space.
At the beginning, middle and end of that period, record the time and take a photo from the same position. On your plan, draw an arrow from the sun-facing opening towards each target and note where the first bright patch appears and when it leaves. Give the arrows their observation times so you can tell the early and late paths apart. A photo taken from behind the table can help you record the overall pattern, while your notes identify which seated person was affected. Mark whether a wall or tree cuts off the sun before it reaches the pergola. If possible, repeat the check in the month you use the space most: the setting point shifts through the year, so one evening describes that date, not every summer evening.
02
Which opening lets the sunlight in?
On a top-down sketch, trace the sunlight from outside the structure towards the eye position or table point you want shaded. Mark the perimeter edge crossed by that line. That is the candidate screen side: it needs to sit between the incoming sun and the target. If light enters through the long open side, a screen on the short end may not interrupt the ray; if it comes through the end, screening the long side may achieve little. The compass label matters less than the actual crossing, especially when the pergola sits at an angle to the house.
Label each edge on the drawing, using both a practical description such as house side or garden side and a compass direction where helpful. If you are comparing Bloomcabin Pergola for the site, use the sketch when asking about the exact side configuration. Give the corners simple labels too, so an arrow crossing near a corner is not mistaken for one passing through the middle of an opening. Refer to those labels in your enquiry: identify the edge, the seat affected and the observation time. This is clearer than asking for a screen on the left, which changes meaning depending on where someone stands. Ask the supplier to use the same labels when describing the proposed layout, so you can compare their response directly with your plan.
How low sunlight passes under the roof
A plan shows which side the light comes through, but not whether it travels under the roof at the right height. Add a small side-on sketch from the seat towards the opening. Picture a straight line from the sun to seated eyes or the tabletop: if it passes below the roof and through the open edge, overhead cover has not interrupted it. A vertical screen only helps that target if its plane intersects the ray. This explains why a pergola can feel shaded from above yet still let a bright band reach a face or plate late in the day.
Mark approximate seat and table heights rather than working out a technical sun angle. Check where a proposed screen’s top, bottom and ends would fall relative to the line, and note any gap beside a post or adjoining edge. Keep the eye-level line and the tabletop line separate: the part of the opening that matters for one target may not be the same for the other. Label the target on each sketch rather than drawing an unexplained diagonal across the structure. When enquiring about Bloomcabin Bioclimatic Pergola, include this side view alongside the plan and ask for the selected model’s approved screen arrangement and stated coverage. The two views let you discuss both the correct edge and the relevant height without assuming a panel reaches the roof or paving.

03
When sunlight reaches an adjoining side
Do not draw only one arrow if the sun reaches the pergola over an extended evening. Trace the line when the first direct beam reaches the seating, at the time of strongest glare and near the end of use. If all three lines cross the same open edge, one screen side is the likely starting point for an enquiry. If a later line slips around a corner and reaches a seat, a short return on the adjoining edge may be relevant. That depends on the footprint and seat positions; avoid adding a second side simply because the plan is roughly west-facing.
For a wall-adjacent layout, include the building face and every open edge in the drawing, then test the rays separately rather than assuming the wall solves all late-sun exposure. If you are considering Bloomcabin Wall-Mounted Pergola, ask which remaining side can accept a compatible screen in the selected layout. Show the earlier and later lines together, with the affected seats labelled. If only the late line crosses the adjoining edge, record how much of your usual evening remains at that point. That helps you decide whether the extra side addresses a regular problem or just a brief period after the meal. Keep any proposed return clearly marked as an option until its availability and coverage have been confirmed for the configuration.
Shade coverage across the table
Check more than the centre of the table. Mark each seat you regularly use and, if glare on a surface matters, the corners of the table or bench. Draw the early and late rays to those points. A screen edge that blocks the beam for the chair nearest it may leave a far chair exposed; a larger table can catch a bright strip even when faces are shaded. This does not mean every position must be dark. It helps you decide which seats need relief and whether shifting the table slightly would solve the problem without covering another side.
When discussing the regular pergola listing, send the seating sketch rather than asking for a generic west-facing screen. Identify the most important seat and time, then ask the supplier to show how the proposed panel covers that line and whether the layout supports it. If coverage changes across the table, ask them to mark the exposed area. You can then compare that proposal with a small furniture adjustment: sketch the table’s alternative position and repeat the observation from the seats, rather than assuming the move will help everyone equally. Check whether the chair that previously had relief becomes the exposed one. Keep the original and revised positions on separate drawings so the supplier knows which arrangement you intend to use. This gives you a practical comparison between screening and rearranging the furniture.
04
Existing shade and access routes
Mark existing shade sources on the same plan: the house, neighbouring buildings, fences and trees. Note when a structure or tree already stops the beam. If a fence blocks the low sun before it reaches the pergola, a screen on that edge may add little; if a branch shades only the early part of the evening, later light may still enter. Tree cover can change with season and growth, so record what is actually there rather than treating one photograph as proof of the shade at another time of year.
Add doors and your normal walking route beside the pergola. A screen across the only route to the garden or beside a frequently used doorway may solve the sun line but make daily use awkward. Mark the route with the chairs pulled out as they would be during a meal, not only with everything tucked neatly under the table. Include where people approach the seats and carry food through the space. If considering the bioclimatic pergola model, include those openings in your enquiry and ask for a drawing of the proposed side arrangement. Where a screen can be opened or moved, ask how access works in the position needed for evening shade. The useful comparison is the layout during use, not just its appearance when the pergola is empty.
Screen position and screen type
Keep two decisions separate: where the screen needs to be, and what compatible screen is available. The sunlight sketch answers the first; visibility, privacy and operation are questions for the second. A screen that lets you see through it may not block light in the same way as a solid panel, so do not assume the two provide equivalent shade. Describe the outcome you want in concrete terms: relief from a direct beam at the dining seat, shade across the tabletop, or both. Those are more useful requirements than simply asking for more shade. If keeping a view through that edge matters too, state that alongside the shade requirement so the trade-off is clear. First identify the edge and the area that needs protection, then ask what approved option can address that particular line.
Check whether the proposed screen is approved for the exact model, which edge it fits, whether it can cover the required length and whether it comes with the base structure or is specified separately. When enquiring through the wall-mounted model page, keep the question specific to the open side in your drawing; the page identifies a model, not a universal screen package. Do not infer inclusion or compatibility from a lifestyle photograph, a general accessory listing or another pergola’s setup. Ask the supplier to name the proposed accessory in their response, so you can distinguish the screen being discussed from other options.

05
Views and everyday use
A side screen also changes what you see through the pergola. From the dining seat and from inside the house, look across the proposed edge: does it block a garden view or a sightline you want to keep? Mark those viewing positions on the plan, separately from the seats where glare occurs. This makes the choice specific: you may want relief at one chair while preserving a view from another. The useful screen may be the one at the sunward opening, without covering the other sides. If the glare occurs only during a short part of the evening, consider whether a permanent screen on a second edge would solve enough to justify the visual change. Assess that second edge on its own merits rather than treating a more enclosed layout as the automatic answer.
Use the Bloomcabin Pergola model page to identify the product you mean, then request a side layout that matches your plan. Compare the proposed arrangement with the seats, views and routes you marked. Work through one evening in order: arriving at the table, sitting through the glare period and leaving the space afterwards. Note any point where the proposed screen would need to change position, if that is an available option, or where furniture would need moving. This checks whether the arrangement suits your routine as well as the sunlight sketch. If it leaves a direct ray at the priority seat or blocks a doorway, revise the proposed layout before ordering rather than assuming a wider screen will solve it.
Confirm the exact screen configuration
Send a compact brief with the pergola’s orientation, the model you are considering, seat and table positions, and photos taken at the relevant evening times. Put the main requirement first, such as shading the two regularly used dining seats throughout the meal. Then attach the labelled plan and side view, with the observation times beside the sunlight arrows. Include nearby walls, fences, trees and doorways where they affect the proposal. Ask the supplier whether an approved screen is available for that exact model and configuration, whether it can be fitted to the marked edge, and what part of the target area it covers. If the sun reaches an adjoining side later, show that line separately and explain whether protection at that time is essential or a preference. This keeps the main requirement clear when options are discussed.
Get clear information on what is included with the base pergola and what would be a separate accessory; do not treat a third-party screen as a supplied feature. For the Bioclimatic Pergola listing, use the model name to identify the product in your enquiry, then ask for the accessory match against your drawing. Confirm dimensions, gaps and operation from model-specific information, not an assumed standard. If the edge or coverage remains unclear, treat it as unresolved rather than relying on an illustrative image.
Frequently asked questions
Should a pergola screen always go on the west side?
No. The useful side is the open edge the low sun crosses on its way to the seat or surface you want to shade. That could be a west-facing edge, but the pergola’s orientation, your seating position and the time of evening can change the answer.
Can the pergola roof block low evening sun?
A roof may shade you from overhead sun while low rays still pass through an open side. Check the line from the sun to your seated eye position or table. A side screen only helps with that beam if it crosses the line.
Will one screen side be enough?
It may be, if the rays cross the same edge throughout the times you use the pergola and the seats you want to shade. If the sun moves around a corner, or different seats need protection, check whether an adjoining side is needed and can be fitted.
Are side screens included with a pergola?
Do not assume they are. A model name or product image does not confirm which screens are compatible or whether one is included. Ask about the exact model and layout, and whether the proposed screen is an approved accessory or a separate item.
When should I check the sun’s position?
Observe it at the time of day and during the season when you expect to use the pergola. Record the beginning, middle and end of that evening period. The sun’s setting position changes through the year, so one observation does not describe every summer evening.
The best side for a pergola screen is the boundary crossed by the low sun on its way to the seat or surface you want to shade. Trace that line at the time you use the space, account for the sun’s movement and any existing obstructions, and check whether it turns around a corner. Then get the exact model and approved accessory confirmed against the drawing. This keeps the design focused: enough screening to interrupt the unwanted beam, without placing panels on edges that do not solve the evening problem.
