
Planning Pergola Drainage Away From Neighbours
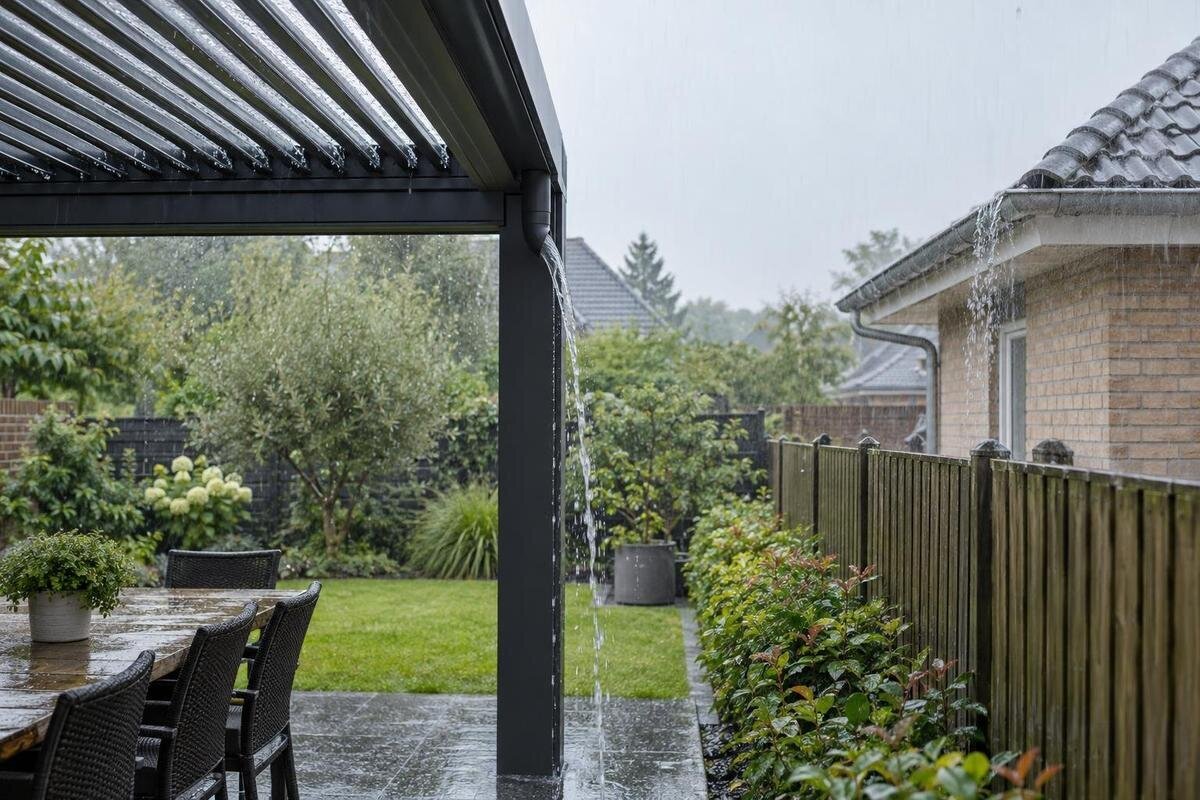
Pergola drainage planning
Keeping pergola rainwater on your property depends on planning the whole route, not just the gutter or downpipe. Identify what the chosen roof or enclosure configuration collects, mark every outlet, then follow the flow across your section to a suitable destination. Existing ground falls, paving, low spots and neighbouring levels can change where water travels. A product name or generic sketch cannot confirm a drainage solution for your site, so include local checks and qualified advice where needed.

Draw the whole water route before choosing an outlet
Prepare a site plan showing the pergola footprint, property boundaries, house and other buildings, fences, paved areas, gardens, visible drains and obvious low points. Add retaining edges and changes in surface height you can see. Mark known house downpipes or surface channels separately, as they may already affect the same part of the section. Note which areas are hard and which are planted, without assuming garden soil will absorb all runoff in heavy rain. Show adjoining ground where it helps explain levels, while keeping the proposed route on your own site. Use a consistent scale when dimensions are available, and label estimates clearly.
During rain, use arrows to record where water flows, where it ponds and whether standing water remains after the shower. Note the date and conditions so your plan reflects observation rather than memory. A sketch is useful for discussion, but it does not establish accurate levels or reveal buried services. The Bloomcabin Pergola listing shows a 9–24 m² size range; plot the exact footprint you are considering, since floor area alone does not show the outlet position or route after discharge. Include planned paving or enclosures too, so later changes are not left out.
Check what the pergola actually collects
Find out what the selected pergola actually collects before deciding where it can drain. Depending on roof design and operating position, rain may fall through, shed at an edge or be directed into a channel; those arrangements produce different outlet patterns. Do not assume a visible edge is a gutter or that water exits through a post. Ask for the model-specific drainage diagram and installation instructions, and check that they cover the exact roof, louvre position and any enclosure you plan to use. If the roof can be operated in different ways, confirm which position the drainage information describes.
Record the model, size, roof configuration and location of each shown outlet before drawing a route on the ground. If the Bloomcabin Bioclimatic Pergola is on your shortlist, use that product name to request documentation for the particular configuration; do not infer outlet locations or weather limits from the name. Confirm whether the drawing identifies collection points, discharge points and any overflow route. If your proposed enclosure or operating arrangement differs from the one shown, ask which parts of the drainage information still apply and which need clarification.
Map existing water flow across the site
Walk the site during and after rain, from safe ground, and note where water already travels before the pergola is installed. Look at house downpipes, paved areas, garden edges, retaining walls, slopes and existing drains; a low spot beside proposed posts may be receiving runoff from elsewhere. Record whether water flows towards or away from the boundary, and where ponding occurs. This baseline helps separate existing drainage behaviour from extra water the pergola may collect or redirect; it also shows whether the preferred position sits on an already wet route. Note any visible flow from higher ground as well.
Observe more than one ordinary rain event if practical, because a dry-day view can hide a shallow channel or low point. Do not estimate precise gradients by eye where the route is close to a boundary, crosses uneven ground or must connect to a drain. A qualified drainage professional can assess levels and existing infrastructure on site. For a wall-mounted option such as the Bloomcabin Wall-Mounted Pergola listing, pay particular attention to ground beside that wall, nearby downpipes and paving; the product name alone does not identify how those existing flows are managed. Mark unknown pipes or grates as unverified until their destination is established.
Trace every outlet to its final destination
Trace the flow from every outlet across the plan until it reaches a named final destination; do not stop the line at a post, pipe end or garden edge. Mark whether the intended path is a pipe, channel, tank connection or surface route, and note where it passes beside doors, paths, garden beds and boundaries. Include any overflow route, because a tank or channel can fill, become obstructed or overflow. If a route changes direction underground, identify the connection from reliable drawings or a professional check rather than assuming an old pipe goes where expected. Label the endpoint plainly so everyone reading the plan knows where the water is intended to go.
Check that the ground and proposed pipework can carry water to that destination without sending it across a neighbour’s land or into an unwanted low point. Gravity routes depend on actual site levels, which cannot be confirmed from a catalogue image or simple sketch. When assessing the Bloomcabin Pergola product page, use documentation for the exact configuration to locate its outlets, then have the site route reviewed separately. If a planned path has no clear destination, revise the layout before construction rather than treating the boundary as a convenient overflow. Mark any point where a surface route could leave its planned line.

Plan discharge points away from the boundary
Set outlets so their intended discharge remains within your property and reaches the destination planned for it. A downpipe that ends just inside the fence is not a complete solution if water then runs beneath the fence, crosses paving or follows the fall onto neighbouring land. Nor should an outlet point at a boundary and rely on the neighbour’s garden to absorb the flow. Mark the discharge point itself and the route beyond it on the plan; the boundary is a location to manage carefully, not an endpoint for runoff. If the fence sits on a retaining edge, record that too, but do not assume it contains the flow.
When a post or proposed outlet sits near the boundary, allow room for a suitable pipe or channel and future access to inspect it. Check where water will go during overflow or temporary blockage, not only under normal operation. If there is not enough space to keep the discharge and overflow on your property, reconsider the pergola position or outlet arrangement with a qualified professional. When placing the Bloomcabin Bioclimatic Pergola model on your site plan, show the space between its proposed outlets and the boundary, including the route beyond each discharge point. This makes a narrow strip easier to assess than a footprint drawing alone.
Choose a destination that suits the site
Choose the final destination only after checking what is feasible on the site. A suitable connection to an existing stormwater system, an assessed soakage option, a tank with a planned overflow or controlled surface dispersal may all be considered, but none is automatically right for every property. The route must handle normal discharge and show what happens when the chosen point cannot accept water. Do not connect into an unknown pipe or direct water into a neighbouring drain, public area or another system without first checking its purpose, suitability and local requirements. A destination is only complete when its overflow is addressed too.
Local soil, slope, groundwater, retaining structures, foundations and buried services all affect whether an option works. A garden bed can become saturated; a shallow-looking depression may collect water from a wider area, not just the pergola. Ask a qualified drainage professional to assess the destination and overflow route, especially where a slope or buildings make the consequences more significant. If comparing the Bloomcabin Wall-Mounted Pergola, include its intended footprint and outlet positions in that discussion; the product listing cannot establish whether a particular soakage area or connection is suitable. Avoid selecting a destination solely because it is close.
Account for paving, slopes and other runoff
Account for the surface beneath and beyond the pergola. Paving can move water quickly towards a low edge, while planting may slow or absorb some flow in some conditions but cannot be treated as unlimited capacity. Mark how a path, patio, driveway, lawn or garden bed meets the proposed outlet route, including steps, kerbs and retaining edges that could redirect water. A new hard surface or enclosure can change where rain reaches the ground, so plan the pergola and surrounding works together rather than checking the frame in isolation. Note whether existing paving or roof downpipes already feed the same low area.
Check whether the route could pond beside a door, cross a frequently used path, soften a garden edge or collect against a boundary fence. Do not assume that adding a channel fixes those effects unless it has a suitable downstream connection and an overflow plan. Where surface falls are subtle or the adjoining section sits lower, have levels reviewed rather than relying on a visual impression. If considering the Bioclimatic Pergola by Bloomcabin, compare its documented water collection with the actual paving and ground layout you have planned; the final route still depends on the site. Allow room for people to move around any visible channel or discharge point.
Keep drainage documents aligned with your plans
Keep the drainage diagram, installation instructions and model-specific weather-performance information together with your site plan. Record the exact model, size and configuration they cover, including the roof or louvre position and any enclosure. The product drawing explains the collection and outlet arrangement; your site plan should show how those outlets connect to the proposed discharge route. Check that the two drawings agree rather than leaving the installer to reconcile different layouts. Keep the document version used for your design and any supplier clarification with the plans. Read stated test or observation conditions alongside performance information, rather than treating them as a universal guarantee for every storm.
Use the Bloomcabin Wall-Mounted Pergola product page to identify the model in your enquiry, then refer to the applicable documents when discussing its drainage arrangement. Record any unresolved questions about outlet locations, drainage capacity or the proposed configuration alongside the relevant drawing. Separate these product questions from site questions about levels, connections and the final destination, so the supplier and drainage professional can address their respective parts. If the intended layout cannot be confirmed, leave it marked as unresolved before proceeding. When plans change, check whether the documents and supplier advice still describe the arrangement to be installed, rather than carrying an earlier assumption into the revised design.

Check local requirements and talk with neighbours
Check project-specific requirements before arranging drainage work. Ask your local council what approvals, stormwater conditions or connection rules may apply to your property and proposed work; requirements can depend on location and project scope. A qualified drainage professional can help identify existing private drains, easements, service routes, suitable connections and any information needed for a review. Do not assume that a nearby grate accepts roof water, or that an existing arrangement can take added discharge simply because it is already there. Keep relevant drawings, site details and advice with your pergola plans, and ask what records may be needed for an enquiry.
If a route is close to a neighbour’s boundary, explain the proposed outlet and final destination before installation, and invite concerns while there is still time to adjust the layout. This is especially useful where ground levels differ between the properties or existing runoff paths cross the boundary. A conversation does not replace site assessment or local checks, and a neighbour’s agreement should not substitute for a route that has not been verified. Show both the normal path and any overflow route, rather than simply saying the water will stay on your section. Clear drawings make it easier to discuss a practical change.
Verify the drainage route after installation
After installation, observe the route from safe ground during rain when conditions allow. Check each outlet, joints and visible discharge point, then follow the flow to its intended destination. Look for water spilling over an edge, pooling beside a post or building, crossing a path unexpectedly, or travelling towards the boundary. Compare what happens with the drainage drawing and note the conditions and any changes. One observation cannot establish performance in every weather event, but it can reveal a mismatch that needs attention. Do not climb on the structure or enter a wet, slippery area to inspect it.
If water does not follow the plan, identify where the change starts and contact the installer or a qualified drainage professional before altering pipework, ground levels or discharge points. A blockage, overflow, unexpected surface fall or unsuitable destination calls for a different response, so do not improvise by extending a pipe towards the fence. Recheck after changes to paving, planting or enclosure configuration, since they can alter the route. Keep the final drawing accessible for future maintenance and anyone modifying the outdoor area, and note any adjustments made. This record helps distinguish the original design from a later change.
Frequently asked questions
How can I keep pergola runoff off a neighbour’s property?
Mark every outlet, then trace normal discharge and overflow to a destination on your own site. Check the route against actual ground levels, paving and existing drains. If water runs towards the boundary or the plan depends on a neighbour’s ground, have the layout reviewed before construction.
Can pergola water drain onto my lawn or garden bed?
It may be a suitable destination, but that depends on the site and intended flow. Soil can become saturated, and an outlet can concentrate water in one spot. Check the route, overflow and effects on nearby buildings and boundaries with a qualified drainage professional rather than assuming planting will absorb it.
Will a fence stop runoff?
No. Water can pass beneath a fence, through gaps or around an end, and surface flow can follow the ground regardless. Plan a complete route to a defined destination on your own property; a fence is not a substitute for drainage.
How do I find a pergola’s outlet position?
Ask for a drainage diagram and installation information for the exact model, size and configuration you intend to install. Confirm every outlet and overflow point. A product image or a drawing for another configuration may not give you the information needed to plan your site.
Can I connect a pergola to an existing stormwater drain?
First identify where the drain goes and whether it can accept the proposed discharge; a nearby grate or pipe is not enough evidence. Ask your local council about requirements for the project, and have a qualified drainage professional assess the connection and overflow route.
A pergola drainage plan is complete when it shows what the structure collects, where each outlet sits, how water moves across the site and where it ends up, including the overflow route. Keep that route away from neighbouring land by checking real ground levels and project-specific requirements before installation. If any part of the flow is uncertain, resolve it while the outlet position and surrounding works can still be changed.
