
Planning Pergola Footings Beneath Porcelain Paving
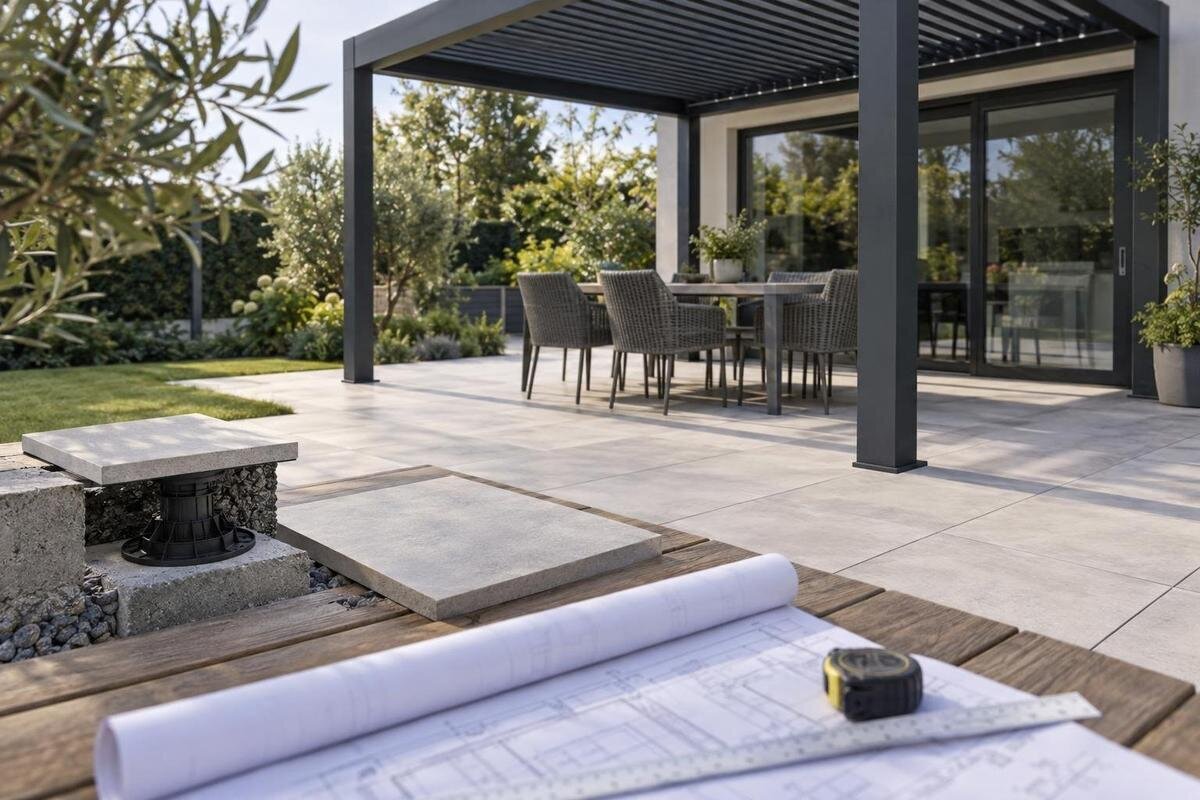
Pergola footings and paving
Porcelain paving and a pergola can share a patio, but they do different jobs. The paving is the finished surface; the pergola needs a structural support designed for the structure and for the ground or existing construction beneath it. If footing positions are left until after tiles are laid, the result can be awkward cuts, damaged paving or conflicts with drainage. Set out the pergola’s supports, confirm the paving build-up and agree finished levels and tile openings together, before excavation and paving work are scheduled.

Before you confirm the layout 1
Structural support beneath porcelain paving
Porcelain paving is the finished surface, not a structural anchoring surface. A pergola post base must not rely on the tile, bedding, adhesive or grout to resist structural loads. The designed load path needs to continue through a specified connection into a suitable footing or verified existing structure. A tile that feels solid, looks uncracked or is bonded to concrete does not, on its own, prove that this connection is suitable. If the finish is treated as the anchor, it can crack or loosen while the support beneath remains unverified.
That distinction affects the whole set-out. Mark each post centre as a structural point from the approved anchoring arrangement, then plan the tile grid around it. Depending on the design, a footing may extend below the finished surface with a planned opening around the connection, or an assessed existing support may be used. The appropriate detail depends on the pergola configuration and what lies below the patio. For the Bloomcabin Pergola, request the current model drawing and approved anchoring detail before fixing tile positions. Product photography cannot confirm post centres or a site-specific footing design.
Identify the layers beneath the tiles
Start with the full paving build-up, not just the porcelain you can see. Outdoor porcelain may be bonded over a concrete base, installed over a flexible pavement construction, or laid on pedestals. These are different assemblies, and the surface alone does not reliably identify which one is present. Look for landscaping drawings, invoices or notes from the paving installer, and establish what lies below each proposed post position. Note where the construction may change near a step, drain or patio edge. If the records are incomplete, record that uncertainty instead of designing a footing around a guess.
Concrete beneath a tile is not automatically a suitable structural support for a pergola. It could be a bedding layer or a patio slab with unknown thickness, reinforcement, edge conditions or support; appearance alone does not establish its suitability. Pedestal paving may conceal a membrane, services or a different supporting surface. Have an appropriate professional verify any layer the anchoring proposal relies on, and identify where excavation could affect drainage or waterproofing. For the Bloomcabin Bioclimatic Pergola, obtain the current approved anchoring information and consider it alongside confirmed site evidence. The model name cannot describe the construction beneath your patio.
Before you confirm the layout 2
Set post centres from the approved pergola layout
Use a drawing for the exact pergola model and configuration, not just a roof outline or product image. Overall external dimensions may not show post centres, support offsets, base connections or the points where loads reach the ground. Ask the supplier or installer to identify the reference dimensions clearly, including any options that change the layout. Establish a fixed datum on site, measure each centre from it and check the positions against the drawing before excavation. Do not assume that posts sit at the roof corners or calculate their positions from an outside dimension alone.
A wall-connected design also needs its ground supports set out correctly. For the Bloomcabin Wall-Mounted Pergola, confirm the ground-post positions and wall connection from the approved arrangement rather than inferring them from the product name. Overlay the centres on a site plan showing doors and their opening paths, steps, downpipes, taps, garden edges and drain channels. Mark the centres and proposed footing areas on the patio, then check the clearances in person. A post should not be shifted simply to land on a full tile; any structural change needs approval.
Match the footing design to the site
Footing type, size and depth cannot be selected from patio area or copied as a standard detail from another property. The chosen pergola configuration and its anchoring design must be considered alongside verified ground or structural conditions. Soil, fill, previous excavation, nearby retaining features, slope, groundwater and buried services can all affect what is practical. This is why one footing dimension will not suit every site. A structural professional assessing the project should specify what each support bears on and what evidence is needed to verify it. Some sites may use a designed connection to existing construction; others may need new footings.
Before the paving layout is finalised, ask for a structural assessment, approved anchoring drawings and evidence of the substrate being relied on. The drawings should link each post centre to a defined support and show how it relates to the finished surface level. For the regular Bloomcabin model, make sure the information matches the exact configuration being considered, rather than a general sketch for another pergola. If the actual substrate differs from the design assumptions, return to the responsible professional before changing footing dimensions or locations.

Before you confirm the layout 3
Coordinate post positions with the tile grid
Set out the porcelain using the actual tile size and planned joint width, not nominal measurements alone. Ask the tiler to map the proposed grid over the confirmed post centres and footing openings. Decide where the first full tile or border will fall, how cuts meet the patio edge and whether movement joints or drainage channels cross the area. This helps avoid narrow slivers, awkward corner cuts and conflicts between joints and supports. The aim is a practical pattern that works with the structural set-out, not a visually tidy grid that forces posts away from their designed positions.
Compare each post centre and support footprint with the tile edges and grout lines on the approved drawing. A centre on a grout line is not automatically preferable: the post base, fixings or planned opening may still conflict with it. A full-size template can show how the support will sit in relation to the grid before any tile is cut. Ask the installer and tiler whether shifting or rotating the grid, or changing the border cuts, would resolve a clash. For this bioclimatic model, make the comparison against the approved configuration, not an assumed footprint.
Design each tile opening around the support
Once the post centres are confirmed, plan each tile opening from the approved support detail, not from a guessed post width. Depending on the design, the opening may need to clear the post, a connection, fixings or the edge of a pier. The drawings should state the relevant dimensions and any required separation. Keep the tile clear of parts that need to bear directly on the footing or be accessible for installation and inspection. Porcelain should not be wedged beneath a base or used as a shim. If the support arrangement changes, review the opening with the designer and tiler before cutting.
Porcelain edges and small corner pieces can be vulnerable to poor cuts, so consider the shape of each opening while setting out the grid. The tiler needs accurate dimensions, suitable cutting methods and enough room to install the specified connection without damaging the surrounding finish. Agree how the gap will be treated: a movement joint, cover or other finish detail may be specified, but grout and adhesive are not structural fixings. Nor should a decorative trim be assumed to provide a water seal. For the Bloomcabin model you select, have the post and tile details matched before paving work starts.
Before you confirm the layout 4
Set finished levels and drainage together
Finished height needs its own set-out. Record the existing or proposed patio level, tile and bedding thickness, intended top elevation of each support, and the levels of nearby thresholds or steps. A sloping patio can have different surface levels at different posts; the pergola’s required geometry and anchoring detail determine how the supports relate to those levels. Do not use the tile surface as the automatic datum for a footing, or raise a base with loose pieces to make up an unplanned difference. Ask the designer to state the target levels and check them against the paving plan before work begins.
Drainage must still work once the posts and tile cuts are in place. Check how water travels to channels, outlets and patio edges; avoid blocking an inlet or creating a pocket where water can collect. A neat cut is not enough if it allows water to sit against a connection or enter the paving build-up. Identify buried drains and any membrane that excavation or cutting could affect, particularly near a building. For Bloomcabin’s bioclimatic pergola, overlay the approved support layout on the drainage plan, and agree who is responsible for the drainage and paving interfaces.
Schedule footing, paving and pergola work in order
For a new patio, coordinate the information before the tiles are laid. Confirm the pergola layout and footing design, locate services, set out the supports, then construct or verify them in the sequence specified by the responsible professional. Record the actual centres and finished heights before the paving crew sets out cuts. Allow for any required inspection and for concrete or other materials to meet the project specification before the next stage; a generic curing period is not a substitute for that specification. With the support positions recorded, the tiler can work to known dimensions rather than discover them through a finished surface.
Give the pergola installer, footing contractor and paving contractor the same marked-up plan and agree who checks post centres, support levels, tile openings and any variations. Keep spare tiles from the same order if practical and plan how the area will remain accessible for installation. If excavation reveals fill, a drain, an existing structure or a different paving build-up from the information provided, pause and get the design reviewed. Do not shift a footing on site and expect a revised tile cut to resolve the mismatch. For the wall-mounted Bloomcabin model, coordinate the wall connection and any patio-side supports as part of the same installation sequence.

Before you confirm the layout 5
Assess an existing porcelain patio before cutting
If the porcelain is already in place, establish what needs to be investigated beneath it before making the first cut. A grout line, tile edge or clear patch does not reveal where a structural slab ends or where services and membranes run. Review available installation records and have the proposed support area assessed by a suitable professional before deciding whether to lift tiles, excavate or use an existing substrate. A surface that has remained intact under normal foot traffic does not, by itself, show that the material beneath it can support a pergola connection.
Possible approaches include exposing and verifying a support area, designing new footings through planned openings, or revising the proposed location. The right option depends on the approved pergola detail and the patio build-up. Tile removal and reinstatement can also affect nearby joints, drainage and any waterproof layer. Have the structural and paving teams agree on an approach before coring, cutting or drilling. If no suitable support can be verified at the proposed point, do not attach to the porcelain as a workaround; return to the design stage and agree on a suitable location or connection.
Record the agreed layout before construction
Prepare one coordinated plan showing the pergola’s post centres, the defined footing or support at each point, and dimensions from a fixed site datum. Overlay the porcelain module, grout lines, cuts and movement joints, then add finished levels, thresholds, surface falls and drainage features. Include the opening and clearance details around each support, along with notes about any services or membrane that need protection. This gives the installer, structural professional and tiler the same geometry to check. Separate sketches can each look reasonable while placing a post, footing and tile cut in conflict.
Keep the evidence behind the plan together: the structural assessment, approved anchoring drawings and verified information about the substrate. Agree who can approve a change if excavation or tile removal reveals different conditions, and record revised dimensions before work resumes. Confirm post centres, support levels and tile openings on site before the paving contractor commits to cuts. If the planned surface level or support cannot be achieved, resolve the issue with the responsible professional rather than trimming a tile to hide it. These checks keep the finish separate from the structural work it surrounds.
Frequently asked questions
Can I anchor a pergola directly to porcelain tiles?
No. A tile, its bedding, adhesive and grout are finishing materials, not structural anchorage. A fixing may pass through a planned opening in the paving, but it must connect to a footing or verified existing structure using the approved detail. The material beneath the tile needs to be assessed too.
Can pergola footings sit beneath an existing patio?
They may be planned below the finished surface where the design and site conditions allow, but there is no universal retrofit method. The paving build-up, buried services, drainage, any membrane and the approved anchoring arrangement all matter. Have these checked before cutting or excavating.
Should I move a post to line it up with a tile joint?
Not unless the change is approved for the pergola’s structural design. Set post centres from the model-specific drawing, then adjust the tile grid or border cuts around them. A grout line may still conflict with the post base or its fixings.
Does concrete beneath the tiles mean I can skip new footings?
Not by itself. The concrete could be a bedding layer or a patio slab with unknown construction and condition. A qualified professional needs to assess whether the proposed connection can rely on it. Porcelain paving does not show what the concrete can support.
What information does the tiler need before cutting porcelain?
Provide a coordinated setting-out plan showing post centres, support and opening dimensions, finished levels, tile joints and relevant drainage features. Confirm the positions on site before cutting. The tiler also needs the approved clearance and finish details for each support.
Porcelain paving is easiest to integrate when its tile grid and cuts are planned around fixed, verified structural points. Set the supports from the chosen pergola’s approved drawings, confirm what the site can carry, then coordinate footing levels, tile openings and drainage in one plan. If the layers beneath an existing patio or the actual post positions are uncertain, resolve them before cutting or pouring. The tiles can then do their intended job as the finished surface while the pergola bears on a designed support.
