
Planning Pergola Shade Around a Clear Garden Outlook
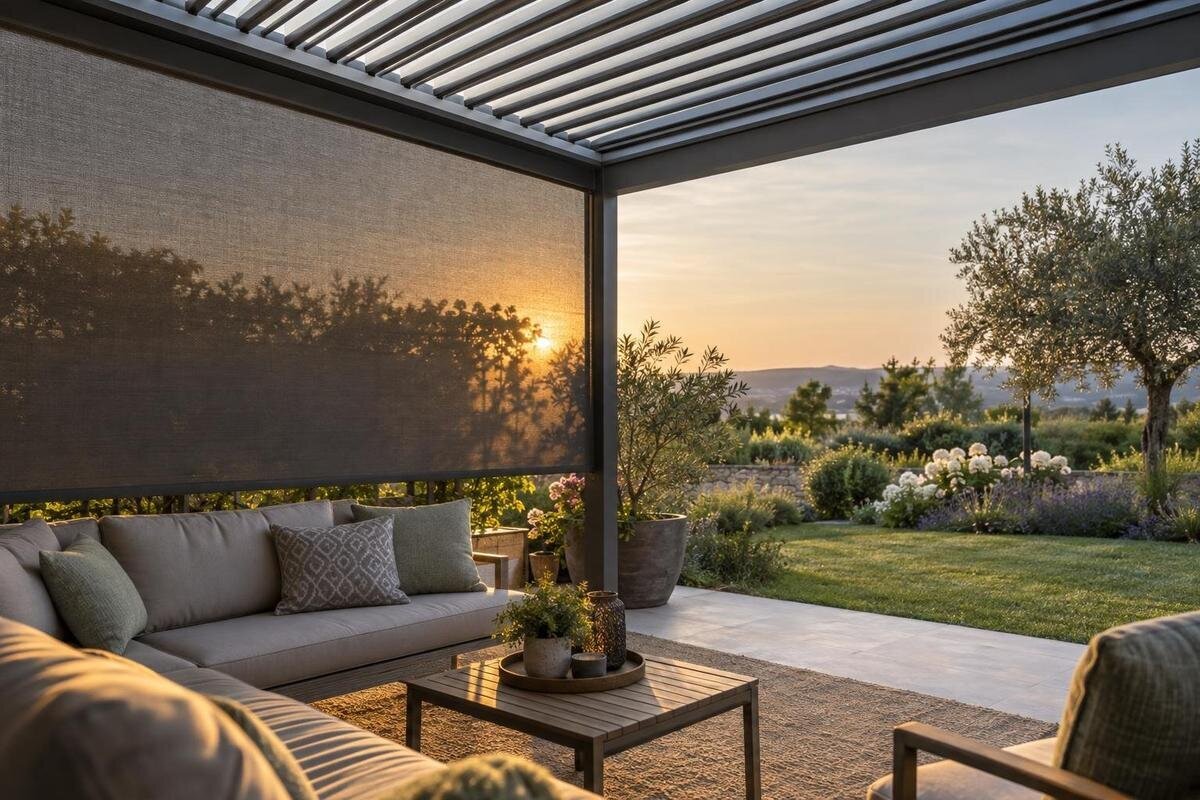
Pergola shade planning
Pergola side shade can solve a specific problem: low sun reaches the seats, but a screen in the wrong place also cuts across the garden view. The useful starting point is the person sitting down, not a standing inspection of the structure. Mark the usual chair positions, the outlook each seat should keep, and the times sunlight reaches the seating. With those points on one sketch, you can compare where shade is needed without treating every side as a candidate for a panel.

01
Choose the garden view you want to keep open
Begin with one actual seat and a clear target: a lawn, a specimen tree, a garden gate or a distant outlook. Trying to preserve every angle at once makes the aim of keeping the view open too vague to test. On a simple plan, mark the chair and the part of the garden you want to see. Note whether that view includes foreground, a path, open sky or just one feature. A narrow line to a tree is not the same as a broad view across the garden; decide which matters before judging where a side panel belongs. The view needs a width, not just a destination.
Repeat the sketch for each seat used regularly, rather than combining positions too early. Record the normal chair angle and table placement: the end seat may look past a post while the centre seat does not. Note whether chairs are often moved or turned to avoid glare; plan around that routine rather than an idealised arrangement. Label a primary view and any secondary view, so a small interruption to an optional angle is not mistaken for a failed layout. When shortlisting the Bloomcabin Pergola model, keep these priorities beside your plan. Describe the view in concrete terms, such as keeping the garden gate visible from both dining chairs. That gives you a clearer basis for comparing layouts than simply asking for an unobstructed outlook.
Set sightlines from seated eye height
A standing inspection can make a side opening seem more generous than it feels from a chair. Sit in the positions used most often and note your approximate eye height with your usual posture, whether upright for a meal or leaning back to relax. Then look at the chosen garden feature from each seat. A screen that looks low while you stand may still cover the focal point when seated, particularly if that point is low in the garden. You do not need a surveying instrument for this first pass: a photo taken from seated eye level can reveal the issue. Keep the camera roughly where your head is, not above it.
Draw from each seated eye point towards the near and far edges of the chosen feature, not only its centre. On a rough elevation, note the feature’s top and bottom as well: an opaque panel may hide part of the view without completely closing it. Repeat from the nearest and farthest seats and from a relaxed sitting posture; a reclining chair changes the line. If the Bloomcabin Wall-Mounted Pergola is on your shortlist, use these eye positions when discussing a drawing of the proposed side layout. Label which chair each line belongs to, rather than presenting several unmarked lines. Keep the dining and lounging positions separate if you use both. This makes it easier to identify a panel edge that clears one seated view but interrupts another.
02
Track the sun at the seating area
In New Zealand, midday sun is generally to the north, with morning and afternoon light coming from different sides as it moves across the sky. The exact angle at a seat changes with location, month, time, nearby buildings, trees and terrain. Mark the pergola and garden on a plan, then note where the sun is relative to the chair and chosen outlook during the hours you actually use the area. A western approach may matter for a late meal, while an early breakfast can make the eastern side more relevant; these are prompts for observation, not fixed rules about which side to screen.
Check at the relevant times on more than one day, and label each note with its date and clock time. Photograph the chair and view from the same seated position; include the edge where sunlight first reaches the seating. If you use a sun-path app, set the location and date, then compare its information with the shadows you observe from trees, buildings and other features on your site. Keep separate notes for direct sun on the seat and sun in the direction you face. These describe different aspects of the problem and help explain where shade is wanted. If you are considering the Bloomcabin Bioclimatic Pergola, take those observations into the model enquiry rather than relying on the model name to describe the shade you need.
Separate roof shade from low-angle sun
Overhead coverage and side glare are different problems. A roof can shade the area above while low sun still reaches a seat from beneath or around an edge. Trace the direction of the sun as it reaches the chair, then mark where it crosses the side opening. A screen can reduce that glare only if it lies between the incoming light and the seat; the same screen can obscure the garden if it falls inside the corridor from sitter to focal point. Choosing a panel solely by compass direction, without considering the viewing axis, can leave one of those aims unmet.
For a particular time of day, shade on only part of a side may be enough; if the sun shifts, the useful position can shift too. Sketch the chair and the sun’s direction for the hours that matter rather than treating a whole side as permanently sun-facing. Use a separate sketch for each important time if overlapping lines become difficult to read. Keep the seating and garden feature in the same positions on each sketch, so you can compare the changing direction of the light. When discussing the regular pergola in the Bloomcabin range, distinguish the overhead coverage you want from the side shade you need. If you are considering an adjustable roof configuration, verify its specific options rather than assuming it will prevent light entering from the side.

03
Draw a viewing corridor through the side opening
A plan view helps show how wide the clear view needs to be. From the seated position, draw lines towards the left and right edges of the garden feature you want to see, then extend them across the side opening. The space between those lines is the viewing corridor. A side elevation adds the vertical detail: show the seated eye point, the top and bottom of the feature and the proposed panel edge. This makes it easier to see whether a panel would hide the whole feature or only part of it, before choosing its width or height.
Include the pergola frame in the sketch, not just the shade material. A post, beam or panel edge can cross the view even if the material itself is open. For the Bloomcabin wall-mounted model, request a drawing that shows the proposed side arrangement against your seats and viewing corridor. Compare it with your plan rather than relying on a product photo taken from another angle. Keep the plan view and side elevation together: the first shows where an obstruction sits across the view, while the second shows which part of the feature it covers vertically. Mark the proposed panel edge on both. If you revise its position, update both sketches so that a clear view on one drawing is not mistaken for a clear view overall.
Match shade coverage to the view
Coverage is a separate decision from placement. An opaque panel hides whatever lies behind the part it covers. Open-weave or slatted materials may leave portions of the garden visible, but the result depends on the pattern, spacing, contrast, distance and viewing angle. A material described as see-through does not guarantee a crisp view from every chair or in every light. Look at a sample or full-size example from seated eye height against the garden background. Check the outline of the feature you want to see, not merely whether daylight passes through the material.
A narrow or partial panel may keep more of the view open, but it also shades only the area within its coverage. Decide which part of the seating needs shade and where the panel’s edge would meet the viewing corridor. Compare the proposed outline with the garden feature, noting whether it hides an edge, the centre or the whole feature. That distinction helps you decide which interruption you would accept, rather than judging every loss of view equally. When browsing the Bloomcabin bioclimatic model, keep your preferred coverage separate from the accessory selection. A screen in an inspiration image is not evidence that it is included or approved for that model, and descriptions of another screen or fabric should not be transferred to it.
04
Check the view from every regular seat
A layout that works for one person may not work for everyone at the table. Eye height, chair style and the way someone sits all change the view line. Check the seats used most often, including an end chair or lounge seat if it is part of normal use. If people of different heights use the area, include their usual positions in the check. The aim is not to make every possible viewpoint identical; it is to find out which seats need a clear view and whether the proposed shade interrupts them.
Allow for ordinary movement as well as stillness. A chair may be pulled back, turned to face another person or shifted to avoid glare, changing what lies behind a screen. Distinguish the chair’s usual position from occasional alternatives on your plan; you do not need to give every temporary position equal priority. Check the route from the seating to the house and garden gate so a panel does not make access awkward or obscure a useful view along it. When comparing a proposed side layout for the Bloomcabin Pergola, describe which seats must retain the main outlook and which can accept a partial interruption. If those preferences conflict, record the compromise explicitly rather than judging the layout only from the centre of the space.
Allow for seasonal changes in the garden
The garden outlook can change even when the pergola and shade panel stay put. Seasonal planting, leafy branches, pots and outdoor furniture may alter what is visible through an opening. A tree that leaves the background clear when bare can cover more of it when in leaf. Note what is there now and what is likely to be there in the season when you most want to use the seating. Test the view with the expected garden backdrop, not only on the day you make the plan, and avoid basing a permanent shade edge on a temporary gap after pruning or moving furniture.
The sun’s path also changes during the year. In New Zealand it is generally higher in summer and lower in winter, so an observation from one month may not show when low-angle sun will reach the seats in another. Mark the direction at the times and months that matter to you. Separate the conditions you have observed from those you still need to check, rather than treating a summer photograph as a year-round record. For a proposed layout around the wall-mounted pergola from Bloomcabin, keep the seasonal notes alongside the same seating plan. Identify whether preserving the view is equally important throughout the year or mainly during the months you use the area most. This keeps the comparison focused on your actual use rather than every possible seasonal arrangement.

05
Test a proposed panel position on site
Before settling on a position, make a temporary visual mock-up at the proposed panel edge. A freestanding sheet or a helper holding a marker can show how much of the garden the outline would cover from a seated viewpoint. A strip of tape on the ground can mark a footprint, but it cannot show the height of a panel in the sightline, so use an upright marker as well. Keep the exercise visual: do not attach a temporary screen to the pergola or treat a mock-up as confirmation that an accessory will fit.
Repeat the check from the seats that matter and at the times when sunlight reaches them. Take photos from the same seated position and record the date, clock time, seat and whether the garden view is clear. Comparing the images makes it easier to distinguish a useful reduction in glare from an unwanted loss of view. A temporary solid sheet can show the panel’s outline, but it cannot reproduce the appearance of every material; use a sample or supplier drawing for that comparison.
Prepare a model-specific shade-and-view brief
A concise brief helps turn your sketch into a useful model enquiry. Include the usual chair positions, the garden feature or corridor you want to keep visible, and the times when sunlight reaches the seating. Mark the side where shade seems most useful and the amount of the view you are prepared to give up, if any. Add a photo from seated eye level and a plan with the house, pergola outline and main garden features labelled. These notes make the design priorities clear without relying on a supplier to guess what you mean by an open outlook.
Ask which side-shade accessories are approved for the exact model, what is included in the proposed package, and whether a model-specific drawing shows the panel in relation to your seats and view corridor. Confirm any operating or clearance details that matter to your layout. For questions about mounting or structural suitability, seek advice from a qualified installer or designer; a visual mock-up or catalogue image is not an installation assessment. With those points resolved, you can compare options against the view and shade conditions you actually experience.
Frequently asked questions
How can I tell which pergola side needs shade?
Sit where you normally use the pergola and note when direct sun reaches the seating. Record the direction it comes from and whether its path crosses the garden view you want to keep. Repeat at the hours that matter, since the sun’s position changes through the day and across the year.
What does a seated sightline show?
It shows what a person can see from their usual seated position towards a chosen garden feature. Check the view from the edges of that feature as well as its centre, and repeat from other regular seats. A standing view can miss obstructions that matter when you are sitting down.
Will a side-shade panel block the garden view?
It can block the part of the view that falls behind its outline. A more open material may leave some of the garden visible, but the result depends on its pattern, position, distance and viewing angle. Check a sample or mock-up from the seats you use.
Should I plan for summer and winter separately?
If you expect to use the seating in both seasons, note the sun’s direction at the relevant times in each. Its path changes during the year, and plants can alter the background too. You do not need to plan for every possible condition; focus on the months and times that matter to you.
Can I use any screen with a pergola?
Do not assume that a screen shown separately is supplied with, or approved for, a particular pergola. Ask which side-shade options are compatible with the exact model and what is included. A model page identifies the pergola, but does not by itself confirm accessory compatibility.
The aim is not to preserve every possible view from every position. It is to shade the seating when the sun makes it uncomfortable while keeping the garden outlook that matters from the chairs you use. A sketch with seated sightlines, sun directions and a proposed panel edge gives you a practical basis for comparing layouts—and for checking that the chosen model and side-shade arrangement are a genuine match.
