
What to Check for a Pergola on a Roof Terrace
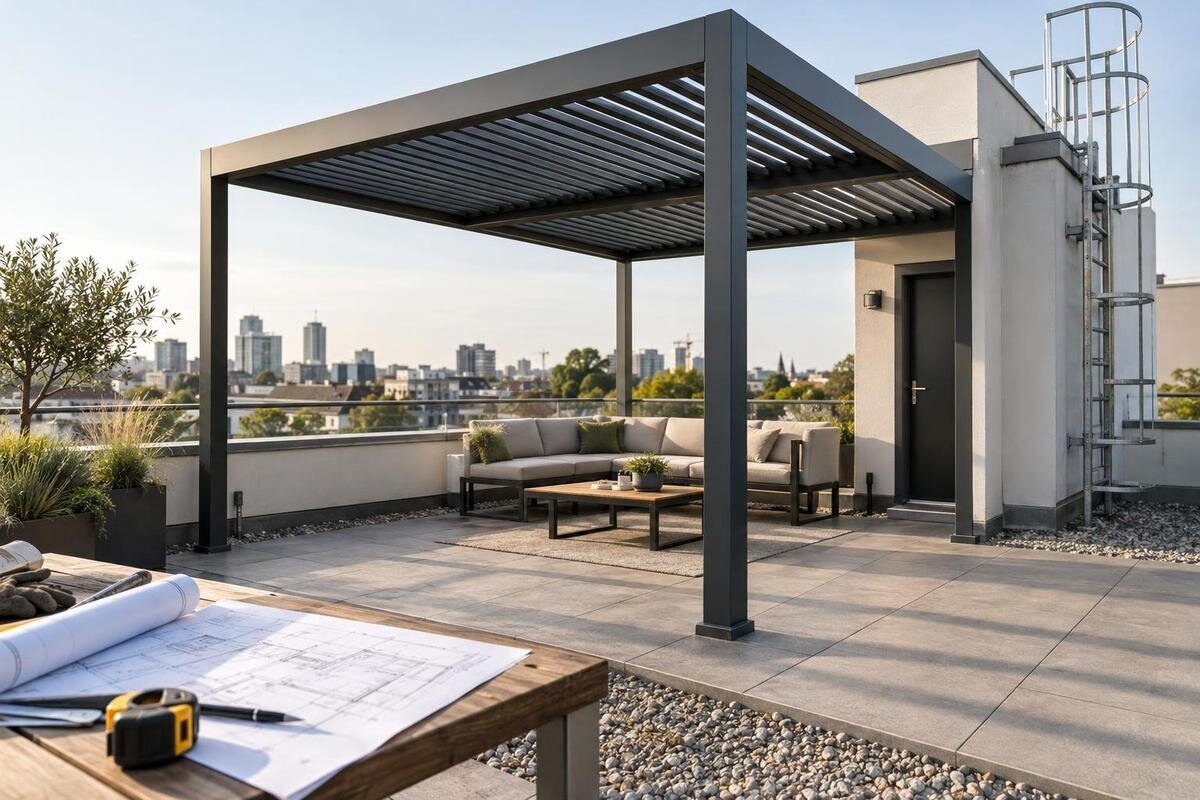
ROOF-TERRACE PERGOLA GUIDE
A roof terrace can look like a ready-made platform, but a pergola above an occupied building raises questions that do not arise on a garden lawn. Its loads must be carried by the building, its supports must work with the roof build-up, and access for delivery and installation may be limited. The visible deck surface alone cannot answer those questions. This guide explains what to gather, who needs to assess the proposal and which details to settle before choosing a model or agreeing to an installation.

Why a roof terrace needs a separate assessment
A roof terrace is a layered building assembly, not simply a slab. Pavers, tiles or deck boards may sit on pedestals above a membrane, protection layer and insulation; the structural deck can be lower down and only partly visible. A pergola foot resting on the finished surface may bear on a layer not intended to carry a concentrated load. A solid-looking finish does not show where beams or slab edges sit, how loads reach the building frame, or what capacity remains after existing rooftop equipment and later alterations are taken into account. The key question is what lies below each proposed support.
Collect the building’s structural plans, roof build-up details, alteration records and maintenance reports before choosing a position. A structural engineer can assess the supporting structure, while a roofing or waterproofing specialist can identify membrane constraints and suitable protection details. If drawings are incomplete, arrange for relevant layers and support locations to be confirmed rather than treating the visible deck as evidence. For a shared building, involve the owner, manager or body corporate early. The Bloomcabin Bioclimatic Pergola listing can identify a model under consideration, but a catalogue page or garden image does not establish rooftop suitability or show how it can be fixed.
Trace the pergola’s loads into the building
Map the full load path, not just the feet. The pergola’s own weight, plus any included or later-added components, transfers through its posts or other supports into the roof assembly, then into a slab, beams and the building’s primary structure. Wind can create uplift and sideways forces at the connections as well as pressure on the terrace. Reactions may be concentrated at a few points, so a broad foot or protective pad does not prove the layers below can carry it. Existing rooftop plant, planters and previous alterations also belong in the assessment because they form part of the site’s current loading and condition.
Ask the structural engineer to distinguish the roof’s existing loading from the loads introduced by the proposed pergola. The review should relate each support to the structure beneath it, rather than treat the terrace as one undifferentiated area. Provide available plans and information about existing equipment, and ask whether those records match the building as it stands or whether further investigation is needed. Where a support location is uncertain, show that uncertainty on the proposal instead of assuming the same conditions apply across the roof. For the Bloomcabin Wall-Mounted Pergola, request drawings for the exact model and configuration under consideration. A catalogue footprint is not a load estimate. The assessment needs to connect the product details to the actual substrate and explain the designed load path, so the installer is not left to choose a support position or connection on site.
Check wind exposure and connection forces
Roof height and surroundings affect wind exposure. A terrace may be open to wind across several sides, sit near a building corner, or be affected by nearby structures in ways that a sheltered garden is not. A parapet can alter airflow, but it is not automatically a wind shield or a structural fixing point. The design review needs to consider uplift, sideways pressure and overturning through every connection, based on the property’s geometry and exposure. A model that appears substantial, or has been used elsewhere, cannot by itself show that it will resist the forces at your address.
Describe the complete configuration you want assessed, including any screens, roof panels or accessories, because these can change the area exposed to wind. Separate what will be installed initially from additions you are considering later, so the designer knows what the proposal includes. Use the Bioclimatic Pergola model information to identify your preferred option, then request drawings for the selected configuration. If you are comparing sizes or layouts, make clear which version each drawing represents rather than combining details from different options. The review should account for the terrace’s exposure and nearby structures, not assume that a neighbouring building or parapet provides protection. Keep the assessed configuration on record: adding a screen or hanging equipment later may require a fresh review, even when the original posts and position remain unchanged.
Protect the roof waterproofing system
Waterproofing risk starts at the roof surface. A drilled or bolted support can penetrate a membrane, create a path for water, or disturb layers that are not visible from above. Even if a drawing shows a fixing point, its location and sealing method must suit the actual roof build-up and be agreed with the relevant specialists. Do not drill, cut or fasten through tiles, deck boards or a membrane on the assumption that the visible layer is sacrificial. Locate concealed roof components and services before work begins. A small penetration can have consequences beyond the pergola footprint, including damage to rooms or assets below.
Ask who will design and install the waterproofing detail, how it interfaces with the roof system, and how completed work will be inspected and recorded. Confirm whether the proposed work affects existing warranties or maintenance arrangements; do not assume a bead of sealant resolves the issue. Discuss the sequence of work as well as the finished detail. Establish when the roof layers need to be accessible, who checks them before they are covered, and how the area will be protected while the pergola is assembled. These arrangements may influence support locations and installation timing. When considering the Bloomcabin Pergola model, provide its drawings to the waterproofing specialist alongside the proposed support detail. The product listing does not specify an approved rooftop penetration detail for a particular building.

Choose a support arrangement that suits the structure
There is no universal roof-base solution. A designed fixing into structural material may require a coordinated membrane detail. A non-penetrating frame may rely on ballast or another restraint, which adds permanent weight and may still need to resist sliding, uplift and overturning. A broad base can spread pressure, but it does not make a weak terrace layer structural. Raised supports can affect drainage, inspection access and stability. These options involve different trade-offs, and ground-level anchor information should not be treated as an approved rooftop drawing.
Ask the designer to specify the support arrangement, the substrate each support bears on, how loads transfer, and how the membrane is protected or penetrated. The drawings should make the relationship between these parts clear: a base position alone does not explain what supports it or how it is restrained. The installer should receive approved anchoring drawings that match the selected model and site. Agree how proposed changes will be referred back to the designer, including changes to a base, anchor, location or added equipment. If you are considering a wall-mounted pergola, have the wall construction and connection assessed as part of the same proposal. The model name does not establish that a terrace wall, façade or parapet can take the forces. Do not use a balustrade as a fixing point unless it has been specifically designed for that purpose.
Preserve drainage and maintenance access
Keep the existing roof drainage working. Before setting out posts or bases, locate outlets, downpipes, scuppers, overflows and the paths water takes across the deck. Check that each remains reachable for cleaning and inspection. A support should not cover a drain or create a pocket where debris and water collect. Review roof falls and low points with the roofing specialist, particularly if the terrace has a history of ponding or leaks. The proposed layout should not direct water towards a doorway, another part of the building or a discharge point the roof system was not designed to serve.
If the selected configuration includes roof elements or directs rain to particular edges, obtain its drainage information and agree a discharge route. For a Bloomcabin bioclimatic pergola, use the documentation for the exact configuration so the roof professional can relate it to the building’s drains. Consider maintenance access with the pergola in place, rather than only while the terrace is empty. There should be a practical route to reach outlets, inspect the membrane and carry out repairs without treating the space beneath the pergola as permanent storage. Show drains, discharge routes and areas that must remain clear on the installation drawings. Include these in the building’s maintenance information so future occupants or contractors can understand why a gap beside a base or an access route needs to stay open.
Check layout, headroom and clearances
Check the occupied footprint, not only the advertised area. Mark posts and any bases on a measured roof plan, then show doors and their swing, stair or lift exits, balustrades, windows and rooftop services. Add the furniture you expect to use beneath the pergola, including the space needed to pull out chairs and walk around them. This separates the structure’s footprint from the space needed to use the terrace comfortably. Check routes from the entrance to seating, service panels and terrace edges; do not count a gap as usable access if furniture will normally occupy it. A post that fits on paper can still narrow a route, block an opening or interfere with a service panel. Keep entrances and escape routes clear, and ask the building manager to confirm any requirements for shared areas.
Review headroom and overhead conflicts as well as the floor plan. Check nearby windows, eaves, roof edges, lighting, cables, pipes and equipment, leaving room for tasks such as cleaning drains or accessing plant. Do not use a balustrade as a convenient post location or attach equipment that could change its function without a designed detail. If screens, lighting or other accessories are planned, show them on the layout before assessment because they can affect both clearance and structural review. The final sketch should show clear walking routes, not just the pergola outline.
Plan the delivery route and installation access
Confirm how each component will reach the terrace before booking an installer. Record the route from the site entrance to the roof, including doors, corridors, stairs, lift car and door openings, landings, turns and any access hatch. Ask the supplier for actual package dimensions and weights for the selected configuration; these cannot be safely guessed from the finished footprint. Check lift capacity and access permissions with the building manager, and consider whether components can be carried without damaging walls, floor finishes or the waterproofed terrace. A route that looks clear on a plan may still have a tight turn or height restriction.
Agree where materials will be unloaded, temporarily stored and assembled. Include these temporary locations in the structural and waterproofing discussions, rather than checking only the pergola’s final position. Keep drains and residents’ access clear throughout the work, and identify how terrace finishes will be protected during handling. For the Bloomcabin Pergola you are considering, request package information early enough to settle the route before arranging delivery. If components cannot pass through normal access, discuss an external lift with the installer and building team, including the work area, timing and any approvals that may apply. Do not improvise a crane lift or rooftop carrying plan. The professional installation plan should also cover work near roof edges and other site hazards, with a clear sequence for moving components from the unloading point to their assembly positions.

Confirm approvals and responsibilities
Establish who has authority over the terrace and the roof beneath it. For a rented home or shared building, the owner, property manager or body corporate may need to review the proposal, and the roof may be common property even when the terrace is used privately. Ask early which building, council, planning, insurance or body-corporate approvals may apply to this property and project. Do not rely on an assumption based on another installation. Where requirements are unclear, seek advice from the local council and relevant qualified building professionals before committing to supply or work.
Agree responsibilities in writing: who supplies the structural assessment, who approves the anchoring and membrane details, who carries out and inspects each part, and who keeps the records. Set out how the terrace will be protected during delivery and installation, what happens if concealed conditions differ from the drawings, and who is responsible for later inspection or roof repairs. If different contractors handle the pergola and waterproofing, have them coordinate one agreed detail rather than leaving a gap between their scopes. This helps prevent an approved design being changed informally on site.
Use model drawings to define the proposal
Use product information to define exactly what is proposed before asking for a site decision. The listings for Bloomcabin Bioclimatic Pergola, Bloomcabin Wall-Mounted Pergola and Bloomcabin Pergola state sizes from 9 to 24 m². That is a footprint range, not evidence of rooftop approval, a wind rating or a suitable anchor detail. Consult the Wall-Mounted Pergola product details when comparing options, then request drawings for the selected size and configuration, including the dimensions and components actually included. Distinguish the catalogue description from the project proposal: the latter needs to show the chosen model in its intended position on this terrace. If information needed by the engineer is missing, record the gap and ask for clarification rather than filling it in by assumption.
Bring the model information together with the structural assessment, approved anchoring drawings, membrane protection or penetration detail, drainage plan and access plan. Check that all documents refer to the same position, dimensions and configuration; a change of size, post location, roof component or accessory can affect parts of the review. Keep an agreed drawing set and record site changes before they are made. A sound proposal is not simply one that fits the terrace: its support, waterproofing, drainage and installation arrangements also need to be explained and maintained.
Frequently asked questions
Can I use a standard garden pergola footing detail on a roof terrace?
Not without a site-specific review. Garden footing and anchoring details assume particular ground conditions and exposure. On a roof terrace, a structural engineer needs to assess the building structure, and a waterproofing specialist needs to coordinate any support that touches or penetrates the roof.
Will a concrete roof deck automatically support a pergola?
No. The visible concrete may be a finish or screed above another roof layer; even structural concrete must be assessed for its location, condition and the forces from the proposed supports. Arrange a structural review rather than relying on appearance or the terrace’s size.
Can weighted bases avoid waterproofing penetrations?
Not necessarily. Ballast may avoid one type of membrane penetration, but it adds permanent weight and still needs a designed way to resist movement, uplift and overturning. It can also interfere with drainage or maintenance. Have the entire proposed arrangement assessed.
Can a pergola be fixed to a parapet?
Only if the parapet and its connection are assessed and designed for the required forces. A parapet or balustrade is not automatically a suitable fixing point because it looks solid. The substrate, connection and any waterproofing junction need a project-specific detail.
What information should I gather for an initial assessment?
Collect available structural and roof plans, photos of the proposed area, details of existing rooftop equipment and drainage, and the exact pergola model and configuration. Include the delivery route, planned accessories and any roof-system information. Ask the building owner or manager what records and approvals are needed.
Roof-terrace pergola planning depends on more than finding a model that fits the available area. The supporting structure, wind forces, waterproofing detail, drainage and installation route all need to work together. Product drawings show what is being proposed; the site assessment and coordinated plans determine whether and how it can be installed at that building. When those pieces align, the final layout can be judged on how well it suits the terrace and its everyday use.
