
How to Fit Dining and Lounge Zones Under One Pergola
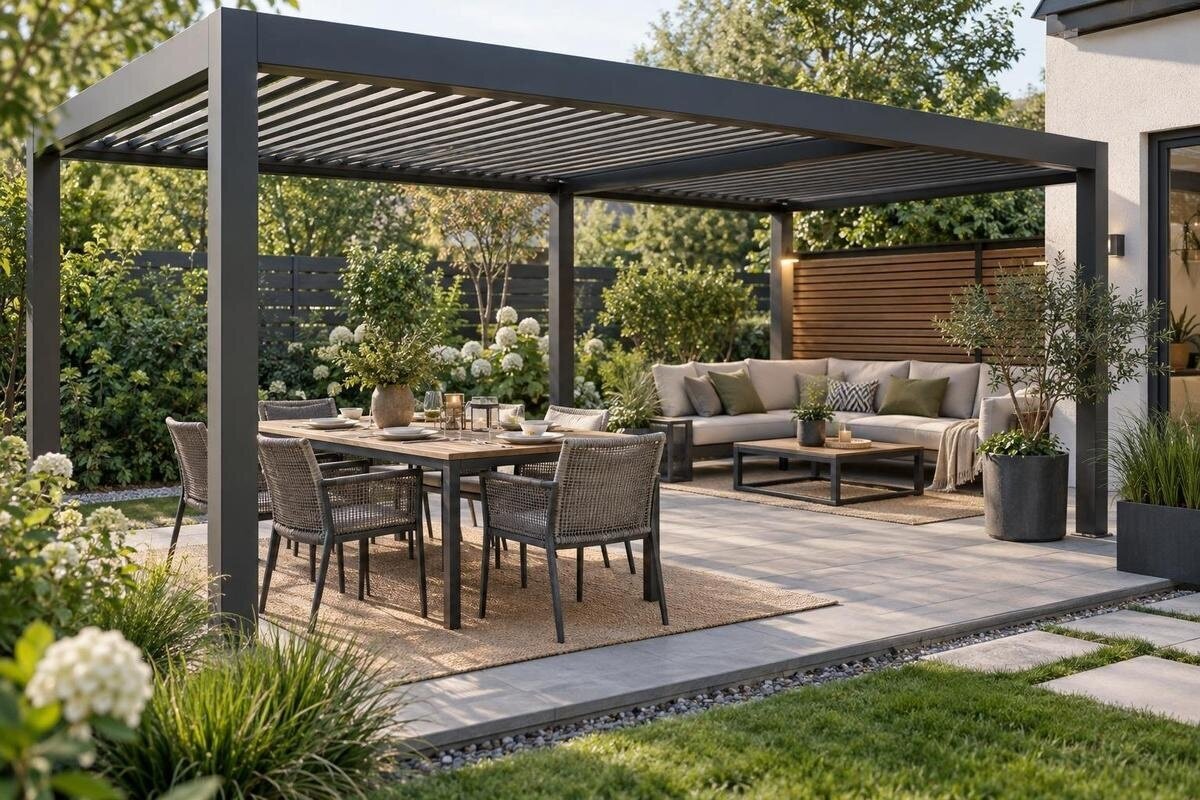
Pergola layout guide
Dining and lounge seating can share a pergola when both settings remain usable at the same time. The challenge is not simply fitting a table and sofa beneath the roof; it is preserving chair movement, conversation space and a clear route between the house, seats and garden. Plan from real furniture dimensions and everyday movement, then compare that working layout with the clear space offered by a specific pergola configuration.

Plan around both zones being used
A furniture plan viewed while every chair is pushed in can make a crowded arrangement look generous. Dining needs the table, occupied chairs, room to pull them out and space for someone to move behind or between seats. Lounging needs the full sofa or chair footprint, any coffee or side table, and room to sit down or stand up. These areas overlap whenever one activity temporarily uses space needed by the other. Draw the settings in their normal positions, rather than as separate collections of furniture that never have to work together. The key test is whether both groups can settle in at the same time.
Define normal use before choosing an arrangement. Note how many people usually eat outside, which dining seats are regularly used, whether the lounge is used by one person or a group, and whether a footstool or side table stays in place. Include other items only if they are part of the regular set-up. A second sketch can show a busier gathering, but label it as a concept rather than a guaranteed fit. That lets you distinguish the everyday arrangement from occasional extra seating and spot pinch points that appear only when chairs are occupied. Neither zone should have to borrow the other’s usable space to function.
Measure the clear floor area
Measure the surface furniture can occupy, not just the outer roof dimensions. Record the usable width and depth between pergola supports, then mark posts, wall returns, steps, raised edges, door leaves, fixed furniture and other obstacles. If the roof extends beyond the supports, do not count that projection as clear floor area. Mark where people enter and leave the deck as well. If the boundary is irregular, record its separate lengths instead of assuming the space is a rectangle. A table may fit on a clean plan but fail in practice if its chairs sit against a support or a door swings into the dining zone.
Area figures can help shortlist products, but they do not show how a particular furniture arrangement works. The Bloomcabin Pergola listing gives a range of 9 to 24 m²; compare that catalogue information with a dimensioned drawing for the exact configuration and the clear area inside its supports. Add the table, chairs and lounge furniture to the same plan, using their full depths rather than centre points. Note which measurements come from the product details and which you have taken on site. If the relevant drawing is not available, do not estimate clear space from a photograph; confirm the dimensions before treating a model as a match.
Compare side-by-side and end-to-end layouts
Side-by-side zones work when the usable width can accommodate the dining group, lounge group and route without pushing seats into one another. The route might run along an outer edge or between the settings, but it should not use the space needed to pull out a dining chair. An end-to-end arrangement can suit a longer, narrower area: put one setting towards the house and the other further out, while checking that the far zone does not become a dead end. These are concepts, not fixed recipes. The clear floor shape and actual entry points determine which arrangement is easier to use; a long roof does not automatically make the end-to-end option practical.
Sketch both concepts to the same scale, then overlay the furniture outlines. For side-by-side seating, check the narrowest point between occupied chairs, lounge seats and supports. For end-to-end seating, check whether someone can reach the far group without threading between chairs in use. When considering the Bloomcabin Bioclimatic Pergola listing, compare both layouts with a drawing of the configuration you are interested in. Keep the furniture sizes and entry points unchanged between sketches so you can see which arrangement offers better access. If neither works without overlap, change the furniture or proposed placement rather than relying on space that will be occupied during use.
Map the route between the house and both zones
Draw every route that matters: from the house door to the dining table, from the house to the lounge, and onward to steps, a gate or the rest of the outdoor area. Give the most-used route a continuous path rather than expecting people to weave around chair backs. A useful plan distinguishes a route between the zones from one through a zone: passing behind a sofa may work in one arrangement, while passing between the dining table and seated guests can interrupt a meal. Mark door swings and thresholds as well as destinations. A route that starts clear can still be blocked by a chair pulled out for someone to leave the table.
Think about carrying food and clearing dishes, not only walking empty-handed. A person with a tray needs a route from the house to the dining table that avoids a chair’s pull-out area and does not force a turn between a coffee table and sofa. If the same route reaches the lounge, let it open beside the seats rather than cut through the conversation space. When reviewing the Bloomcabin Wall-Mounted Pergola listing, place the supports shown in the configuration drawing on your plan alongside the wall, doorway and marked path. Check the route from the threshold through to each destination, including any turn beside the furniture. Draw it as a usable strip, not a centre line that leaves no room for people to pass.

Leave room for dining chairs and serving
Arrange the dining zone around the seats in use, not just the tabletop. Measure the table length and width, then include the actual chairs and how far each must move when someone sits down or gets up. End chairs can change the outline; a bench or one-sided seating changes the side from which people need to enter. Mark a place to set down a platter or jug without using the walkway. That is separate from the route to the table: if the only landing spot for food is in the path, the layout will feel busy even when the chair footprints technically fit. Test the arrangement with chairs occupied on every side you expect to use.
Placing the table nearer the house may shorten the trip from the kitchen, but only if it does not block a doorway or take up the main route. If the lounge is the first area reached from indoors, reversing the order may leave a clearer passage while allowing access to the table from an open side. There is no default order for every deck; compare the trips to your own door and outdoor destinations. For a configuration selected from the Bloomcabin Pergola model page, place the complete table-and-chair outline between the marked supports. Check access to the end chairs as well as the seats along each side. The aim is to keep the table easy to reach and use, not to put it in one prescribed position.
Measure the lounge setting in use
A lounge group needs to be measured as it will be used, not simply as a sofa footprint. Mark the front of each seat, the coffee-table edge, occasional tables and any footstool; include room for legs and for people to leave a seat. A recliner or deep chair may occupy more area in use than when tucked away, so map its usual seating position. If the setting uses separate chairs, angle them as people will place them for conversation. A neat row against one side can leave a large empty centre on paper while still making a seat awkward to reach. Check that someone can get into each seat without moving a table or asking another person to stand.
Set the lounge seats so the route from the house or garden approaches from the easiest side, rather than passing directly in front of someone’s feet. Consider whether people at the table and lounge should be able to chat, or whether some separation better suits their different activities; orientation can create that difference without a divider. A side table may keep drinks or books off the dining table, but include its full footprint if it will stay there. When comparing options in the Bioclimatic Pergola range, show the lounge seats in their intended positions, with space to approach and leave each one. Keep the dining chairs on the same drawing so that an apparently open approach to the sofa does not depend on the table being unused.
Define the boundary without blocking movement
Define the boundary with furniture direction and a deliberate gap rather than adding a barrier by default. The dining table can face along the long axis while lounge chairs turn towards each other; an open strip between them then separates the settings without becoming a narrow channel. Avoid parking a low stool, planter or spare chair in that strip if it is also the through-route. Where a walkway must run between the zones, mark it consistently from one end to the other and check its narrowest point with dining chairs pulled out. A visual border that disappears whenever someone sits down is not a reliable route.
Consider how the groups share the pergola during the same activity. Someone leaving the dining table should not have to shift a lounge chair, and someone going to a sofa should not weave around serving dishes. If cross-zone conversation matters, angle seats towards the shared area while keeping access behind or beside them; if the activities are often separate, turn each group inwards. An outdoor rug or planter can suggest a boundary, but use one only if it suits the surface and does not create an obstacle or raised edge. Let the arrangement distinguish the settings without filling an access gap with extra objects.
Test the plan on the deck
Use tape or chalk to mark the clear floor area and furniture outlines at the same scale as your plan. Mark chair pull-out positions separately, and show the route as a strip rather than a centre line. If possible, place the actual chairs and tables on the deck; if they are not on site, cut paper or cardboard templates to their measured size. Stand or sit where people would use them, open nearby doors, and see whether someone carrying a tray can pass a seated guest without asking them to move. Include the awkward corner and the path to the garden, as these are easy to overlook on a clean drawing. Treat a sketch as a concept until the site test supports it.
Run the test with both zones occupied, not one area at a time. Try the usual trip from the house, then reverse direction; pull out the chair nearest the lounge, get up from the sofa and walk through while someone else uses the space. Note where people bump into furniture, have to squeeze past or wait for someone to move. Adjust the furniture and repeat the same movements to see whether the change helps both groups. Before comparing the result with the configuration on the Wall-Mounted Pergola product page, update your drawing to reflect the positions that worked, rather than the original sketch. The test checks movement and furniture fit; it cannot confirm a product’s structure or site suitability.

Check the pergola configuration against the plan
Choose the pergola arrangement only after the furniture plan has passed the simultaneous-use checks. Confirm the overall dimensions and, separately, the clear area inside any supports. Check whether the covered area reaches both seating outlines and whether posts, attachment points or fixed site features affect the arrangement. For a position beside a wall, mark the wall and openings; for a freestanding plan, show each support in relation to the furniture and route. Keep this as a layout check, not a structural calculation. If attachment, the supporting surface or site conditions are uncertain, get advice from a qualified professional who can assess the specific situation before you commit.
Use the Bloomcabin Bioclimatic Pergola page to identify the option you want to compare, then review or request its configuration drawing. Match its orientation to your site plan before checking the dimensions and support positions. Work around the drawing in order: the entrance, dining chairs, gap between the settings, lounge access and onward route. This helps reveal whether a support interrupts a passage that worked in the furniture-only test. Keep any unconfirmed dimensions clearly marked rather than filling them in from a photograph. The purpose of this comparison is to establish whether the proposed configuration preserves the arrangement you tested, with both seating groups in place and each route still usable.
Make a final furniture and pergola check
Before settling on the plan, put the key dimensions in one place: clear floor area, support positions, table and chair outlines, lounge footprint, route, doorway swing and fixed obstacles. Mark which measurements come from the furniture and which come from the pergola drawing so a mismatch is easy to find. Check the tighter zone first; a plan with generous room around the sofa can still fail at the dining table’s end chairs. If a seat, route or door overlaps on paper, resolve it before ordering rather than relying on a later furniture shuffle. Note any detail that still needs confirmation.
Keep the everyday plan and any busier gathering plan clearly labelled so they are not confused when discussing a configuration from the Bloomcabin Pergola product page. Show which seats stay in place and which are occasional additions, along with the routes that must remain open in either arrangement. A scaled sketch makes this conversation more useful than a request based on seating numbers alone. If you change a table, sofa or chair before ordering, update its outline and recheck the affected gap rather than assuming the earlier layout still applies. Retain the final version that accounts for both occupied zones, the serving route and fixed obstacles; it gives you a clear furniture arrangement to work from.
Frequently asked questions
Can dining and lounge seating share one pergola?
Yes, if the clear area can hold both furniture settings and a usable route at the same time. Measure the table with chairs in use and the full lounge arrangement; the pergola’s outside dimensions alone do not show whether both zones will work.
How much space should there be between the zones?
There is no single clearance that suits every layout. Draw the furniture at its measured size, mark the route people need to use, then test whether they can pass while the seats are occupied. Check the narrowest point, including pulled-out dining chairs.
Where should the dining table go?
A position nearer the house may make carrying food easier, but only if it leaves the doorway and main route clear. Compare that arrangement with placing the lounge nearer the house, using the paths people actually take across your outdoor area.
Do the two zones need a screen or divider?
Not necessarily. Furniture orientation and an open gap can distinguish the settings without taking up floor space. Add a planter or divider only if the remaining route still works and it does not obstruct access to either zone.
What should I have ready before comparing pergolas?
Prepare a measured plan of the usable floor area, supports, obstacles, door swings, furniture and routes. Compare it with the drawing for the exact configuration. If the site, attachment or supporting surface needs assessment, consult a qualified professional.
A workable two-zone pergola plan accounts for people as well as furniture: chairs pulled out, lounge seats in use, serving trips and the route between them. When both settings fit on the same measured plan without borrowing space from each other, the pergola can support dining and relaxing together rather than forcing one activity to wait.
