
Fitting a Pergola into a Wildlife-Friendly Garden
Wildlife-friendly garden planning
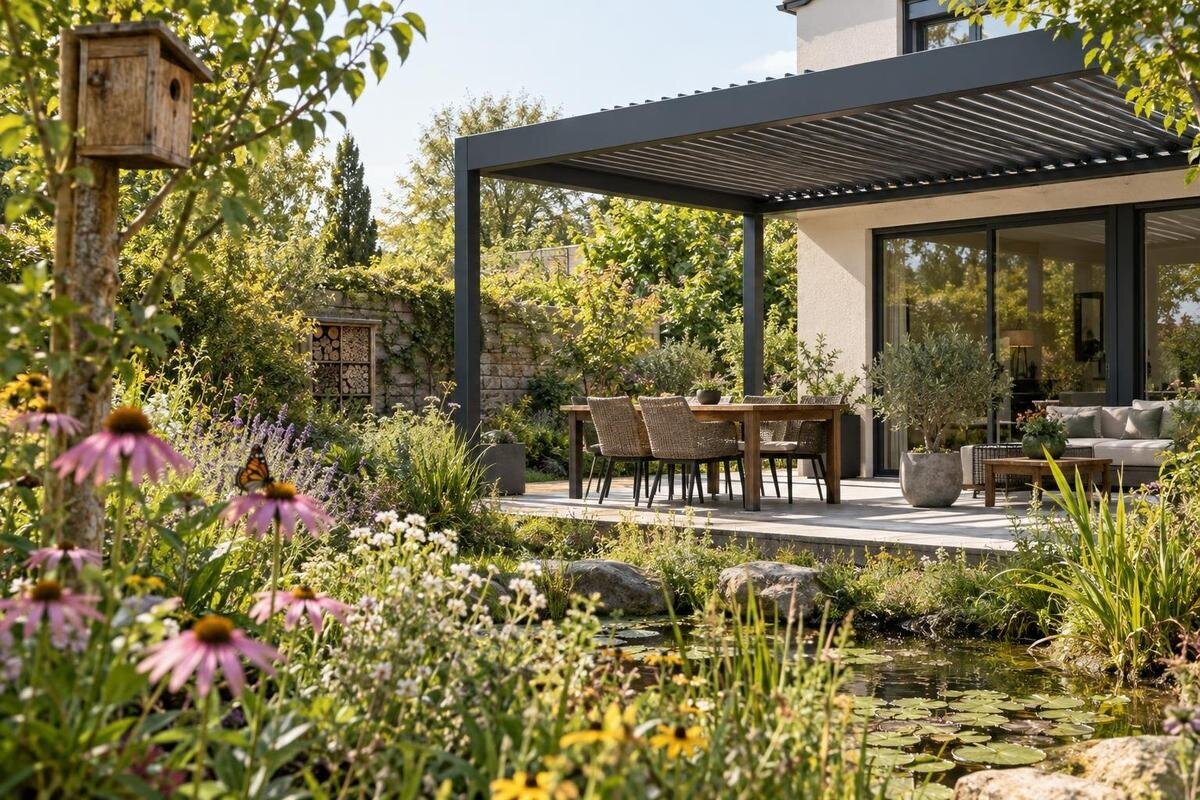
A pergola can fit into a wildlife-friendly garden when it is planned as part of the landscape, not simply placed in a spare patch. Record the existing planting and regular garden routes first, then consider the structure’s footprint, lighting and maintenance needs. The aim is a usable seating area that does not unnecessarily break up planted space or spread light into areas that do not need it. No pergola style guarantees wildlife visits: outcomes depend on the site, planting choices and ongoing care.

01
Survey existing planting and wildlife activity
Before choosing a position, draw the garden as it is and mark established trees and hedges, dense borders, ground-level cover, bare or regularly disturbed patches, and existing water features or nest boxes. Add everyday elements too: house doors, gates, taps, bins, compost, shed, clothesline and the paths you use. This is not an attempt to catalogue every species. It records where the garden already provides planting, shelter, access and household functions, so the seating area can be fitted around those uses rather than displacing them by accident. Give each retained feature a clear label, and distinguish an established bed from a space you intend to replant. Note which areas are used daily and which are reached only for occasional garden work. These details make it easier to compare possible pergola positions without treating all apparently empty ground as available building space.
Observe the garden at different times and, if practical, in more than one season. Note where birds, insects or other animals are seen, but treat a short observation as a clue rather than a complete survey. Record changes in sun, wind and soil moisture because they affect plant choices and the comfort of the seating area. If work may affect a mature tree or a place with known wildlife activity, get site-specific advice before altering it. Photos taken from the house and main paths can also reveal which views, planted edges and activity patterns a new structure would change. Mark what is staying separately from proposed changes.
Plot the pergola against planting and house access
Draw the proposed pergola to scale using the selected model’s actual dimensions, with its post positions, any projections shown in the product drawings, seats, doors, windows and access paths. A structure that looks compact in a catalogue image can occupy more garden space than expected once entry and maintenance clearances are included. Draw furniture in its intended position, including the space needed to pull chairs out and walk past occupied seats. Check whether the route from the house remains clear when the area is in use, not just when the furniture is tucked away. For a wall-mounted layout, map the length of wall involved and the planting beside it; do not assume the wall is suitable from its appearance. The Bloomcabin Wall-Mounted Pergola is one product option to compare against this layout, with wall suitability assessed separately for your site.
Plot established trees and sensitive planting before deciding where posts, paving or other ground work could go. Do not estimate a suitable post position from a trunk alone: roots are not always visible, and their extent varies by tree and site. Ask an arborist or landscape professional to assess important trees where proposed work may affect them. Also check the location of drains and underground services using reliable property information and appropriate professional advice. A dimensioned landscape drawing makes these relationships visible and helps prevent the seating footprint from taking over a border or access strip by default.
02
Keep paths clear for people and garden care
Treat paths as part of the planting plan. Connect the house with the places you visit regularly, such as the gate, compost area, shed, clothesline, tap or food beds, without making a shortcut through a dense border. Keep the approach to seats easy to follow and leave room to carry a mower, barrow or pruning tools. The width you need depends on the people, equipment and site, so draw those items on the plan and test the route with temporary markers before committing. Include turns and entrances in that test rather than checking only a straight stretch. Walk the route while carrying the equipment you normally use, and consider whether another person can reach the seating without having to step into planting. If a route serves both visitors and garden work, show where equipment can be set aside temporarily. Not every path needs to be paved, but it should be usable in everyday conditions.
Where the site allows, retain existing planted edges around or beyond the pergola rather than placing hard surfaces between every border. This keeps the garden’s planted structure from being needlessly broken up; if access for a particular species is a priority, ask a local specialist for site-specific advice. The product listing for the Bloomcabin Pergola gives sizes from 9 to 24 m². That area range is useful for an initial comparison, but it does not show the exact outer dimensions or post positions for the chosen option.
Choose planting for local conditions and mature size
Layering ground-level planting, shrubs and taller growth can give a garden more structure and screening. Choose plants for the actual sunlight, soil moisture, wind exposure and mature size of the site, rather than selecting only by flower colour. Where ecological value matters, favour plants suited to your locality and avoid choices known to be invasive there. A local nursery, regional plant list or experienced landscape adviser can help with species selection. Record the planting requirements beside each proposed plant or group on the drawing, so those choices can be checked against the conditions you observed. Include flowering periods and seasonal changes when comparing the mix, rather than judging it only by how it looks at purchase. Where an existing plant already fits the plan, record it as retained instead of automatically replacing it. A varied mix may provide different kinds of planting and flowering, but it cannot guarantee that particular animals will visit.
Set the planting line before finalising paving or post locations. A border needs to be reachable for watering, weeding and replanting; narrow leftover gaps are often difficult to care for. Leave deliberate openings for paths and pruning access without dividing every bed into small sections. Check mature spread as well as the size of plants in their pots, and allow the clearances recommended by the plant supplier. A plan that accounts for future growth is more practical than one that relies on frequent cutting back to keep an overcrowded edge in bounds.

03
Check climbers and containers against the pergola model
Climbers can add planting close to a pergola, but do not assume that every structure or attachment is suitable for vegetation, ties or planters. Before adding anything to the frame, check the exact model’s guidance with the supplier or installer. If you are considering the Bloomcabin Bioclimatic Pergola, include your proposed climber and support arrangement in that enquiry; the model name alone does not confirm suitability. If the model has moving components, keep growth clear wherever the manufacturer specifies. When support is not confirmed, plan planting beside the structure rather than relying on the frame.
Place any climber where you can prune it without reaching over furniture or trampling a bed. Keep access to junctions, fixings and wall surfaces in line with the model’s guidance, and consider a separate plant support if the pergola is not approved for attachments. Containers also need regular watering and access for care; avoid letting them block a path or maintenance strip. If a planter is to sit on a raised surface or structure, confirm that arrangement is suitable before including it in the design. Record the plant’s mature spread and likely pruning routine before installation.
Limit lighting to the areas that need it
Start by deciding which activities genuinely need light, such as walking between the house and seating or seeing a step after dark. Keep other parts of the garden dim when they are not in use rather than illuminating the whole space for decoration. Direct fixtures towards the surface being used and shield them to reduce glare and spill into borders, trees, neighbouring windows and the night sky. Consider the view from inside the house as well as from the seats. A check at dusk can reveal bright patches or shadows that are not obvious on a daytime plan.
Choose controls that suit how people use the area; separate switching or timed operation can help avoid leaving lights on unnecessarily, provided compatible equipment is selected. On the plan, distinguish lighting for the route from lighting for activities at the seats. Note when each is needed and which planted areas you want to keep outside the illuminated space. This gives the electrician a clearer brief than a general request to light the pergola. Have a qualified electrician assess electrical design and installation. If wildlife activity nearby is a particular concern, ask a local specialist about the lighting plan instead of relying on a simple rule about light colour. For a wall-mounted pergola option, consider existing house lighting alongside proposed fixtures rather than treating them as unrelated parts of the garden.
04
Plan for seasonal planting and regular maintenance
Allow access to prune, weed, water and remove fallen leaves without stepping through the middle of a bed. Show where a hose can reach, where garden waste can be carried out and where tools can be set down without blocking a path. Check shrubs and climbers at mature size against seats, routes, walls and any clearances specified for the pergola. Review the regular pergola option alongside your plan, and ask what model-specific dimensions, cleaning or inspection requirements apply rather than assuming all structures need the same access.
Set a realistic routine that covers both frequent care, such as watering, and less frequent work, such as pruning or surface cleaning where required by the product guidance. Keep the routine compatible with the planting you want to retain, while preventing growth from obscuring paths or access points. Decide what fallen leaves, seed heads and prunings need to be removed based on plant health and the garden’s conditions; there is no need to clear everything automatically or leave everything in place. If several people share the work, note who will handle key tasks so maintenance remains manageable over time.
Check rain and drainage before laying surfaces
A product name or image does not confirm whether a particular pergola model includes a cover or where water may be directed. Before finishing paving or planting beside the structure, check the selected model’s drawings and ask how rain is managed and what surface or drainage arrangements the project needs. When comparing the bioclimatic pergola option, record the confirmed rain-management details on the same drawing as the borders and paths. Leave unanswered details clearly marked rather than designing around an assumed outlet position. These details matter for nearby seating, paths and planted soil, especially where repeated wetting or splash could affect how an area is used.
Plan irrigation separately from any assumptions about rain reaching plants beneath or beside the pergola. The amount of water a border receives depends on the actual structure and position, so check site conditions rather than relying on the product category. Select surfaces that suit the intended use and can be maintained; avoid leaving narrow, inaccessible strips where debris and weeds are hard to deal with. If levels, ponding, runoff or root protection are uncertain, ask a qualified landscape professional to assess them. Show water movement on the garden plan as well as the pergola outline.

05
Access between the pergola and planting
At the point where the pergola meets a planted area, draw a usable access strip instead of leaving a narrow gap that cannot be reached. That space may be needed for pruning, cleaning or inspecting parts of the structure, according to the selected model’s guidance. Distinguish this working space from the border itself: it should not depend on stepping between plants or moving containers every time access is needed. Show how it connects to a path and whether furniture would block the entrance. If the strip ends at a corner, consider how someone will reach that corner to carry out the intended work. A planted buffer beyond the access strip can soften the edge without covering components that need to remain accessible. Keep the planting line clear of any surfaces, fixings or access points that the manufacturer says must stay unobstructed.
Where a wall-mounted arrangement is being considered, keep visual fit separate from questions about attachment and access. Have the wall and fixing conditions assessed for the site, and do not plan to cover joints or components with growth unless the product guidance permits it. Use the wall-mounted model details when discussing the selected projection and required access clearances with the supplier or installer. Record those clearances before setting the final planting line, rather than treating a gap shown in a photograph as a measurement. This leaves a practical way to care for both the wall-side edge and the plants around it.
Use one dimensioned plan to test the whole layout
Bring the decisions together on a single scaled drawing. Show the pergola footprint and post positions, trees and shrubs to retain, planting at mature size, doors, paths, seating, lights, water features and maintenance access. Mark any drainage, service or attachment details that still need confirmation. Use separate labels for existing features, proposed additions and unresolved details so everyone discussing the project can tell them apart. When a position changes, update the surrounding paths and planting on the same drawing; do not leave those relationships to be worked out during construction. A design discussion is more useful when it is based on measurements and written questions, not only on an inspiration image. Ask for dimensioned landscape drawings and documented planting requirements so the structure and the surrounding garden are considered together.
Compare product options using the same drawing. Use the Bloomcabin pergola listing to identify the option being discussed, then record its confirmed dimensions, fixing conditions, projections, clearances, supported attachments and any rain-management details against the plan. Keep unresolved questions separate from confirmed choices so a provisional layout is not mistaken for a finished design. Do not infer wildlife suitability from a product’s style. Ask the designer to record planting and maintenance requirements, and refer structural or site-specific questions to the relevant qualified professional. A resolved plan shows what the pergola changes and which existing garden uses and planted areas it leaves intact.
Frequently asked questions
Does a pergola make a garden wildlife-friendly?
No. A pergola is one garden structure; any wildlife value depends on the wider planting, existing shelter, lighting and ongoing care. Plan for the conditions and species relevant to your site, and do not treat a product style as proof of ecological benefit.
Should I choose a freestanding or wall-mounted pergola?
Compare the actual footprint, planting, routes and condition of the nearby wall. A wall-mounted option needs its attachment and wall suitability assessed for the site; a freestanding option also needs its position and ground conditions checked. Ask an appropriate professional about structural or tree-root concerns.
Can I grow a climber on the pergola?
Only if the manufacturer confirms that the exact model can support the plant or any added support. Check the mature growth, pruning access and required clearances. If this is not confirmed, plan a separate plant support instead of relying on the pergola frame.
How should I light a pergola without adding unnecessary spill?
Light only the areas needed for a task, direct fixtures towards those surfaces and shield nearby planting and windows from spill. Controls can help switch lights off when the area is not in use. Ask a qualified electrician about the design and installation.
What measurements should I put on the garden plan?
Show the chosen model's exact footprint and post positions, any projections, doors, seats, paths, planting at mature size and maintenance access. Add any confirmed cover or rainwater details. A listed area range alone cannot show all the clearances needed for the layout.
Treat the pergola as one element in a working garden. Confirm its exact footprint, retain useful planted edges and routes where practical, and plan how light, water and maintenance will be managed. The layout should suit both everyday use and the care the garden needs over time. A dimensioned plan makes those choices visible before construction begins, so the seating area can be considered alongside the garden’s existing planting and activity.
