


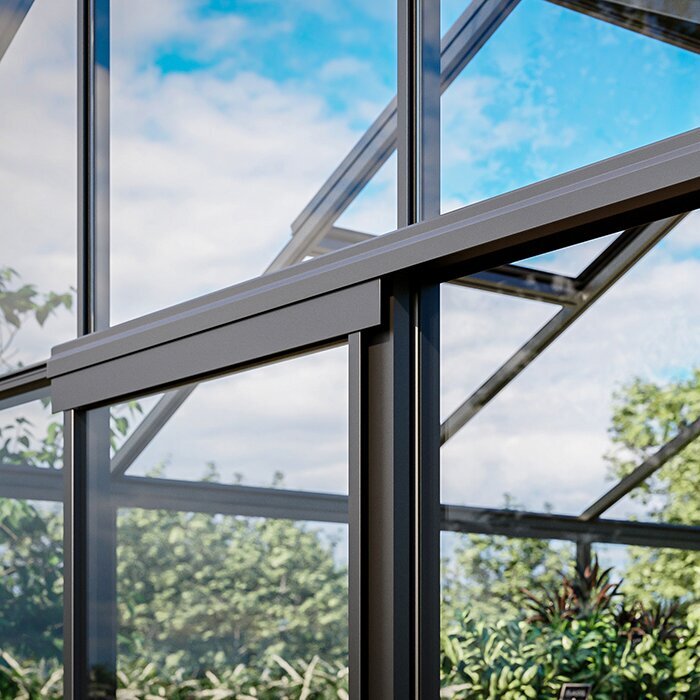




Aluminium greenhouse with integrated storage
Greenhouse and separate storage space in one aluminium structure
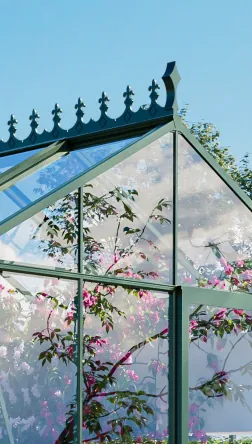
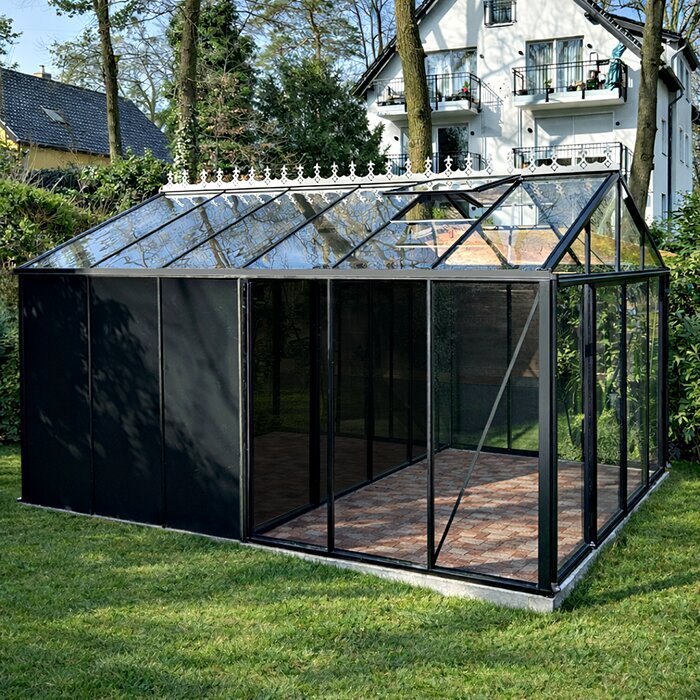
The Bloomcabin aluminium greenhouse with integrated storage combines a bright growing area with a permanently integrated, separate storage compartment. Plants, pots, tools and watering accessories can all be kept under one roof without stored items blocking the growing space or paths between plants. It suits gardeners who need a greenhouse while avoiding a separate garden shed.
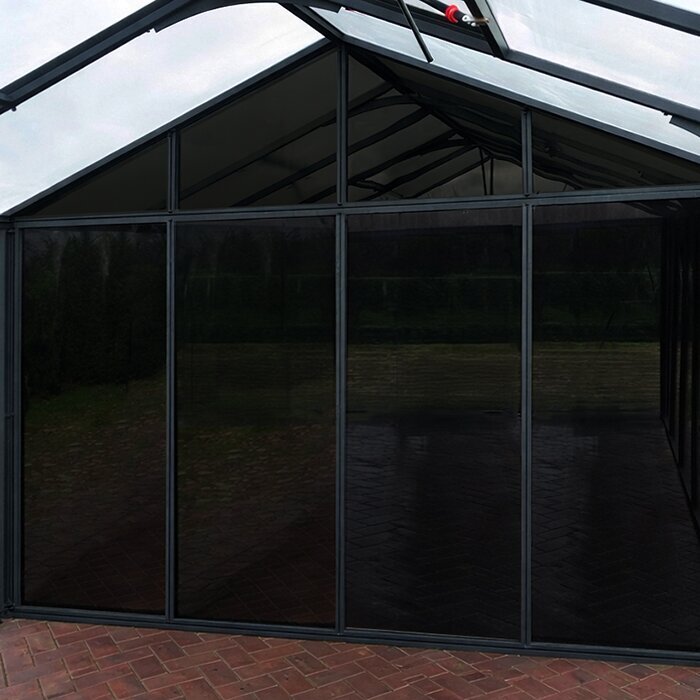
Choose from numerous versions for compact and larger gardens. Depending on the version chosen, the growing area has different glazing. Tinted panes in the storage compartment restrict views of tools, pots and supplies. Both zones remain separate in use while forming a visually unified structure.
Total floor area is not the only consideration. Decide how much room you need for beds, containers and walkways, and how much should be reserved for existing equipment. A simple plan showing key garden tools and intended crops makes the choice easier. Explore more Bloomcabin greenhouse models.
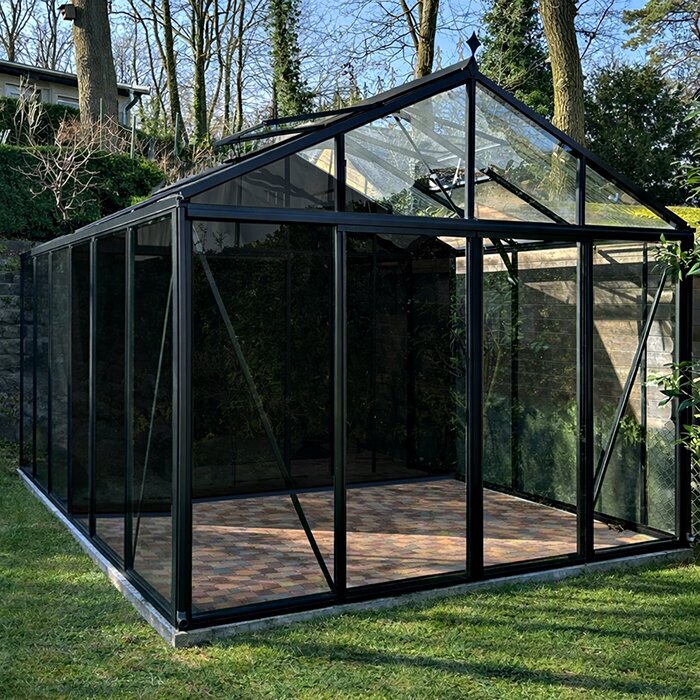
Grow and store under one roof
Two distinct functional zones in one structure
The transparent greenhouse zone is intended for vegetables, herbs, young plants and ornamentals. Benches, beds and containers can be arranged so daylight, vents and walkways work well together. The storage compartment takes up part of the floor area, but keeps out items that need neither light nor the moisture created when watering.
Watering cans, plant supports, empty pots, growing media and hand tools can be stored in the separate zone rather than beneath benches or beside walkways. Keep regularly used items close to the transition into the growing area. Seasonal items used only occasionally can go further back or on higher shelves.
This combination is especially practical where a greenhouse and garden shed would otherwise require two sites. Before buying, measure bulky equipment and check that it fits the storage compartment and passes through the planned access.
Store tools where they are needed
Short distances simplify routine jobs from sowing to tidying
The benefit is clearest when several items are needed in sequence. Growing medium, pots, labels and tools can be taken straight from storage, used at the workbench and put away again afterwards. The growing area stays clear while essential materials remain close at hand.
Flexible size selection
Suitable versions for compact and larger gardens
Separate storage compartment
Tools and accessories beside the growing area
Tinted panes
Less visibility into the storage area
Warranty
12-year warranty under the applicable warranty terms
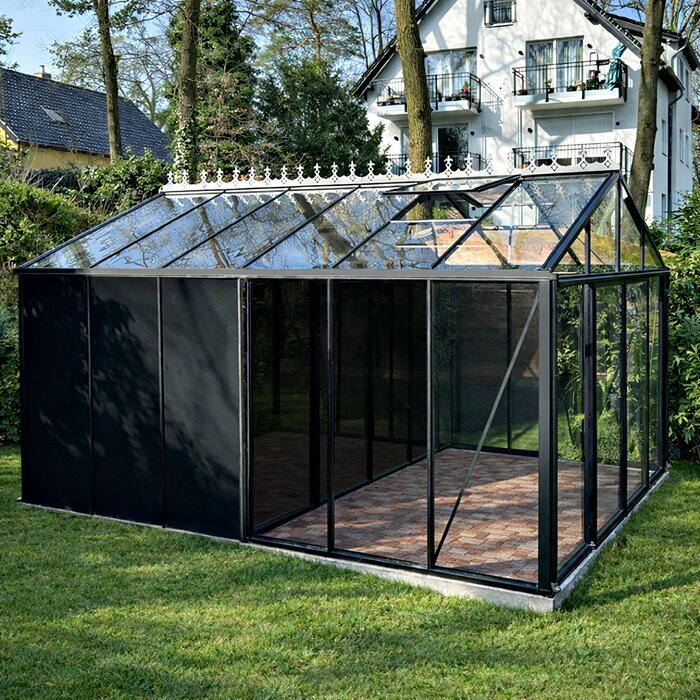
Tinted integrated storage area
Tinted panes reduce visibility while preserving the greenhouse's unified look
The tinted glazing is reserved for the storage compartment and visually distinguishes it from the transparent growing area. The continuous frame and roof shape still combine both zones into one coherent structure.
Include the full dimensions of the selected version in site planning. The storage compartment is built into the structure, so it is positioned with the growing area rather than like a separate garden shed.
The storage space is primarily suitable for clean, dry garden items such as pots, watering equipment, plant supports, ties and suitable growing media. Products with specific temperature, humidity or storage requirements must still be kept according to their labels and manufacturer instructions.
Technical details
Dimensions, glazing and standard equipment at a glance
Available sizes: 22 versions from 3.77 to 28.08 m².
Models 2.35 m wide: Ridge height approx. 2.32 m; door height approx. 1.65 m.
Models 3.10 m wide: Ridge height approx. 2.67 m; door height approx. 1.85 m.
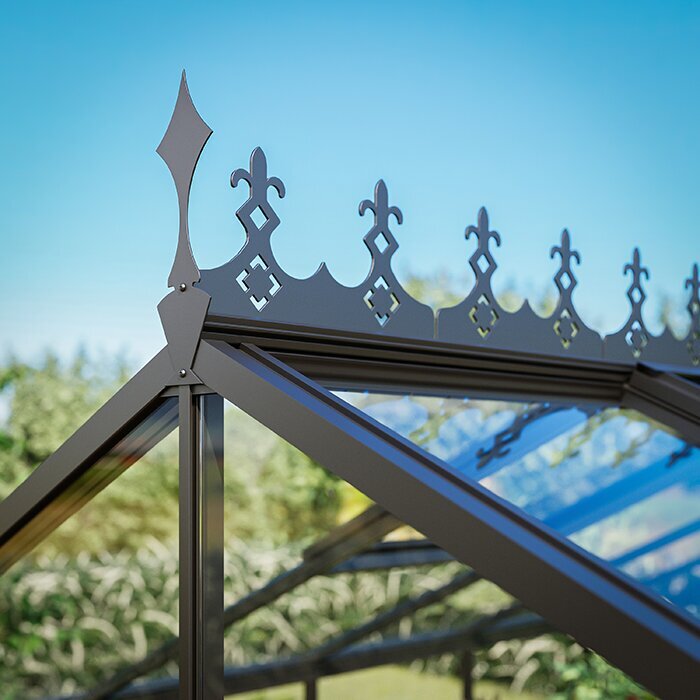
Frame: High-quality aluminium profiles.
Glazing in growing area: Polycarbonate or 4 mm toughened safety glass.
Panes in storage compartment: Tinted glazing.
Doors: 3.10 m-wide versions have single or double sliding doors, depending on model.
Equipment: Roof vents, integrated gutters and an integrated aluminium base frame. The structure is designed for wind speeds of 30 m/s and snow loads of 210 kg/m².
Further details depend on the selected version.
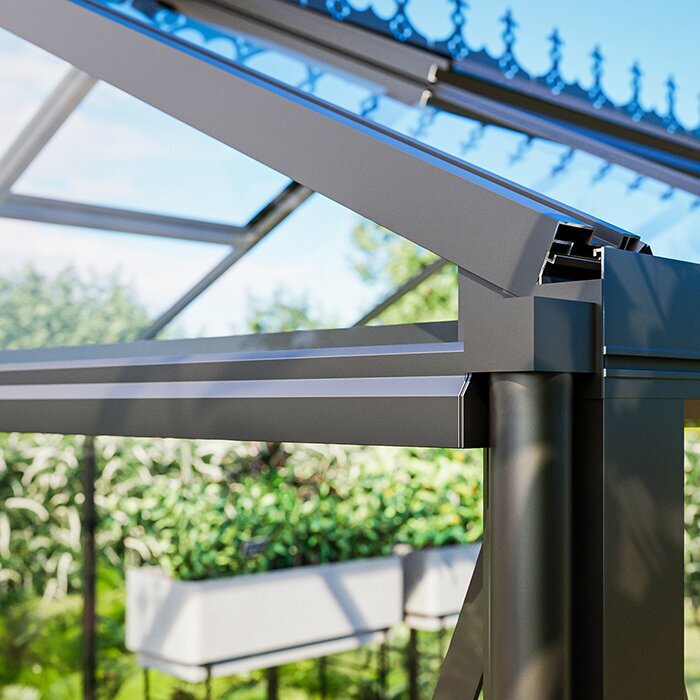
Everything ready for daily use
Take out materials, tend plants and stow used equipment straight away
Sowing, potting and seasonal changeovers often require many materials one after another. Group labels, pots, ties and hand tools by purpose. Keeping a small selection of frequently used items within reach is more practical than maintaining a permanently crowded work surface.
A clear floor makes movement between plants, shelving and watering easier. Hoses, boxes and bags should not lie in walkways. When setting up, first establish one continuous main path, then arrange benches, containers and shelves. This keeps the door accessible even while moving larger pots.
Roof vents support air exchange in the growing area. Tall plants, shelving or supports must not obstruct their operation. In the storage compartment, hooks can hold light tools, narrow shelves can organise small items, and low-level spaces can be reserved for heavy, stable containers.
Integrated storage or a separate garden shed?
When the storage compartment can sensibly replace an extra shed
The adjoining storage area is particularly useful for equipment mainly used in the greenhouse, such as plant supports, hand tools, empty containers and watering accessories. Lawn mowers, bicycles and large outdoor furniture have different requirements for door width, turning space and storage, and should be planned separately.
Take stock before buying: which items are actually used in the greenhouse, how large are they, and should they be stored upright, flat or on shelves? This helps establish whether the integrated compartment is sufficient and how much area should be reserved.
Allow some spare room for items needed together only at certain times. Propagation pots, plant supports and empty containers still take up space outside their active use, so storage should not be sized solely around daily essentials.
Starting the growing season
Prepare sowing and potting materials in good time
At the start of the season, seed trays, propagation pots, labels and different hand tools are often needed at once. Check them before first use and sort them by task. Remove empty or damaged packaging so supplies are easy to identify and missing materials are noticed early.
Keep pots and tools awaiting cleaning separate from prepared materials. A clearly defined place for used items stops soil reaching seeds, labels or clean propagation containers. Clear this area after finishing so the transition into the growing zone remains free.
Seeds and other sensitive products should remain in the storage compartment only when the relevant manufacturer instructions for temperature, humidity and storage can be met. Separation from the watered growing area helps, but does not guarantee suitable storage conditions. Sealable, clearly labelled containers protect small items from spills and mix-ups.
Vent properly on warm days
Keep roof vents clear and counter heat build-up promptly
Strong sunlight can raise temperatures substantially in the growing area. Use roof vents as required and check temperature and humidity regularly. Plants and supports must not block the opening area. As conditions depend on weather, planting and use, ongoing monitoring is more useful than a fixed ventilation schedule.
Guide shoots and supports clear of moving windows and operating parts. During the season, check whether new growth reaches the opening area. Before the growing season, ensure vents move freely and remove dirt and plant debris.
Products that cannot tolerate high temperatures or strong fluctuations do not belong in the storage compartment. Always follow the instructions on the relevant packaging. Materials with special storage needs require another suitable location.
Direct rainwater safely
Use gutters and keep the area around base and doors dry
The integrated gutters collect roof water and can be connected to suitable drainage or a designated storage tank. Containers must stand securely and must not restrict doors, maintenance routes or access to the storage compartment.
If using rainwater for watering, the collection point should be reachable without steps, tight turns or long carrying distances. The container needs a load-bearing base. Regularly remove leaves and deposits from connections and gutters so water can drain in a controlled way.
Overflowing water should be directed away from the base frame, foundation and doorways. Persistent puddles make use harder, carry dirt into both zones and soften surrounding ground. Decide where excess water can run during site preparation.
Set up storage effectively
Allocate shelves, hooks and floor space by weight and frequency of use
Narrow shelves keep hand tools, string, labels and small spare parts off the floor. Position them so edges do not project into the walkway and doors remain clear. Frequently used items belong at an easy reach; lightweight, rarely used material can go higher up.
Heavy bags and robust containers are best kept close to floor level. Stacks must not tip or press against glazing and frames. Fragile pots should not sit beneath heavy tools. Sensible weight distribution makes the compartment easier to access and clean.
Dedicated zones for potting materials, watering accessories, plant supports and cleaning supplies prevent storage becoming cluttered. Labelled boxes show where each item belongs. Leave enough room to reach rear shelves without moving everything first.
Balance growing space and storage
Classic or Storage: more growing space or dedicated storage
With the Classic version, the full floor area is available for plants and working space. This is useful if suitable storage already exists or you want room for as many beds, containers and benches as possible. Tools and consumables must then be brought in from outside or kept in the growing area.
The Storage version reserves part of the structure for a separate compartment. This reduces the continuous growing space while keeping tools and accessories organised nearby. The key question is whether the remaining growing area is sufficient for intended crops, paths and work furniture.
Storage particularly suits gardeners who regularly pot up, tie in, water or clean on site and need several items for those jobs. Those with few tools who want to plant every available area may prefer one uninterrupted growing zone. A layout showing shelves, beds and paths makes the difference clear before purchase.
A stable base
Install the integrated aluminium base frame on a level, permanently load-bearing surface
The integrated aluminium base frame needs stable, level support. Unevenness can affect frame alignment, glazing fit and sliding-door operation. Check the planned footprint carefully before assembly. The surface must support the whole area and must not be levelled only at individual points.
On longer versions, small height differences have a greater effect across the entire structure. Check diagonals, level and height before fitting frames and panes. Follow the product-specific assembly instructions and correct deviations before installing further components.
Ground conditions, frost conditions, drainage and local requirements must be assessed for the specific site. The appropriate foundation depends on those conditions. Also consider underground services, property boundaries and nearby buildings before excavation, anchoring or delivery of materials.
Glazing for the growing area
Choose the right glazing for the growing area
Toughened safety glass offers clear visibility and the classic appearance of a glass greenhouse. Plants are easy to observe from outside, although splash marks and deposits are also more noticeable. Follow product-specific instructions for assembly and cleaning. Avoid abrasive products, hard tools and point loads.
Polycarbonate differs from clear glass in appearance, light effect and handling. The better option depends on your priorities for looks, use and care. Select the glazing when choosing the version. With either material, panels must be fitted correctly and their fixings checked regularly.
The tinted panes in the storage compartment serve a different purpose from glazing in the growing area: they limit views of the contents. Still leave space between stored items and the panes. This makes cleaning easier and prevents tool edges or unstable stacks pressing against the glazing.
Plan access without bottlenecks
Coordinate door positions, garden paths and carrying routes
Access to the storage and growing areas should match the garden routes you actually use. Before selecting a site, consider the direction from which tools, plants and growing media will arrive. The side areas must remain clear for sliding doors too. Walls, raised beds or large containers must not obstruct operation.
A bag of growing medium, full watering can or large pot should be transportable without tight turns or contact with glazing. It is therefore not only the doorway that matters, but also the routes immediately in front of and behind it. Steps, loose edges and sharp changes in level can make carrying unnecessarily difficult.
Include routes to the house, compost area and water supply. The shortest route is not always the most practical if it is difficult to walk in wet weather or crosses sensitive planting areas. A firm, usable route makes care easier throughout the season.
After the main season
Check, clean and store materials completely dry
Collect plant supports, string, clips and empty pots after the main season, and discard damaged items. Clean and dry useful items fully before returning them to their designated storage place. This prevents dirt and moisture from being trapped for extended periods.
Remove dead plant material and loose soil from the growing area so frames, base and glazing remain accessible. You can then check fixings and ensure vents and door tracks are free from dirt and obstructions. Do this before extra seasonal material narrows the storage-compartment paths.
Damp textiles, wet cardboard and dirty containers should not be stored long term. They reduce visibility and may cause odours or marks. Check even rarely used items for residual moisture before placing them in rear shelves or boxes for a longer period.
Special requirements for garden chemicals
Store fertilisers and plant-protection products safely as instructed
Fertilisers, plant-protection products and other garden chemicals must be stored in their intended containers and according to manufacturer instructions. Labels must remain legible. Do not transfer such products into food containers, and store them separately from seed and harvested produce containers.
Proximity to the growing area does not replace suitable packaging or required storage conditions. If the compartment does not meet a product's requirements for temperature, humidity or ventilation, store it elsewhere appropriately. Product information gives instructions for dealing with spills.
Sharp tools, chemicals and heavy containers need a secure, stable place out of reach of children and pets. Also ensure shelving is stable and no items can fall out when the door is opened.
Work area in the growing zone
Create a compact potting zone without narrowing the main path
A workbench near the transition to the storage compartment shortens trips during sowing and potting. Choose its depth and position so doors, vent controls and the walkway remain clear. A wipe-clean surface makes soil easier to remove. Store beneath it only materials that can remain dry and do not block access.
Set out only the pots, tools and growing media needed for one task. After use, return clean equipment to its place; seal leftovers or dispose of them properly. A small container for plant waste keeps cuttings off the work surface and away from storage.
The main path must remain passable while working. Put boxes and watering cans in a designated side area, not in front of doors. If you often move larger containers, test their route during setup. This reveals poorly placed bench edges, shelves or plant supports early.
Longer versions
Divide extra space into clear functional areas
Longer versions often accommodate more plants, work equipment and seasonal supplies. Do not use the extra space randomly for more shelves. A clear sequence of entrance, storage, work area and growing zone keeps routes understandable and avoids needless carrying through the whole structure.
More plants often require extra supports, pots, tying materials and watering accessories. Allow for these quantities in storage planning without accumulating unnecessary supplies. Modular boxes can be reorganised between seasons. Long plant supports need holders where they cannot tip over or block a door.
Divide long shelving into manageable sections so frequently used items do not disappear behind seasonal materials. Clear crossways also make plants and panes accessible without first moving several items.
Compact versions
Plan every permanent storage position in advance where floor space is limited
Even in a compact version, the storage compartment is valuable if no other suitable storage exists in the garden. Every box left there permanently takes noticeable space. Focus on items actually needed for greenhouse work. Bulky or rarely used equipment is often better kept elsewhere.
Draw beds, benches, containers and the required walkway into your plan. Then check how much growing space remains beside the storage compartment. Allow for mature plants and their supports, not only small young plants. This prevents the space becoming too tight in the first fully planted season.
The right size depends on the desired balance between growing and storage area and on how it will be used. Tall crops have different requirements from numerous benches or containers. A little extra room in the path is usually more useful than one narrow additional position that later blocks access to plants or panes.
Keep track of stock
Check supplies regularly and buy only needed materials
Record which frequently used supplies remain and which packs are already open. Remove empty packaging and broken items from the inventory immediately. The list then shows only material that can genuinely be used.
Check stock before work-intensive periods and add only what is missing for planned tasks. Clear labels help distinguish similar small items and opened packs; a short note of the storage location shortens searching.
After the season, compare which supplies were actually used. Materials regularly left over need not be bought again in the same quantity, while small items that often run out can be replenished deliberately. This keeps stock aligned with actual greenhouse use.
Prepare for delivery and assembly
Organise access, assembly space and protected temporary storage in advance
Before delivery, check that components for the selected version can be transported to the assembly site. Keep the route clear so frame and glazing parts do not have to be carried through narrow or densely planted areas. Prepare a clean area where components can be laid out clearly before assembly.
Clear sufficient working space around the planned footprint. Shrubs, garden furniture and loose materials should obstruct neither assembly nor later access to gutters and outside surfaces. Also plan where packaging can be collected during assembly without blocking paths or doors.
Before starting, have the product-specific instructions and all related documents ready. Compare delivered parts with the stated contents before fitting frame and glazing, and assemble the structure in accordance with the instructions.
Frequently asked questions
Practical questions about choosing and using the Storage greenhouse
How do I determine the storage space I need?
List all items to be kept permanently beside the greenhouse and note their actual dimensions. Then plan shelving, floor positions and clear access. The remaining area must be sufficient for plants, work furniture and walkways.
Which items suit the storage compartment?
It is primarily suitable for dry garden items such as empty pots, plant supports, watering accessories and hand tools, plus correctly packed potting materials. Products with particular temperature, humidity or storage requirements may be kept there only if manufacturer instructions can be met.
Does tinted glazing protect sensitive products from heat?
No. Tinting primarily restricts views from outside. It does not guarantee a particular temperature or replace suitable packaging or required storage. Heat- or light-sensitive products must be stored according to their manufacturer instructions.
Which glazing option suits my requirements?
Compare the clear view and classic appearance of safety glass with the look and light effect of polycarbonate. Include the respective care instructions and check which glazing is available for your chosen version.
How do I check whether bulky items fit through the door?
Compare the dimensions of the largest item with the door opening on the selected version. Include handles, projecting parts and the space needed to turn immediately before and behind the door. A scale plan helps identify possible bottlenecks early.
How can roof vents remain easily accessible?
Leave adequate clear space beneath and beside roof vents. Tall plants, supports and shelves must not block the opening area or controls. Remove dirt and plant debris regularly, and check before the season that the vents move freely.
What site requirements apply to the integrated aluminium base frame?
It needs permanently stable, level, load-bearing support. Rainwater and overflow should also be directed so it does not collect at the base or in front of doors. Leave enough space around the structure for assembly, cleaning and checking the gutters.
Where should shelving and heavy supplies go in storage?
Heavy bags and stable containers belong on low-level floor positions. Frequently used small items are best stored in easily reached shelves. Shelves must not narrow doors and walkways or press against frames or glazing.
Choose the right Storage version
Match growing space, storage and access to your garden use
Before choosing, compare the available site with your planned crops and the items to be kept in the storage compartment. The right version leaves enough room for plants and working routes without shelves, pots or equipment narrowing access.
Product comparison checklist
✓ Measure the largest item to be kept permanently in the storage compartment
✓ Include longest plant supports, widest boxes and largest containers in the plan
✓ Check door type and glazing for the selected version before ordering
✓ Allow side clearance for sliding doors and transport routes
✓ Decide the rainwater drainage route before preparing the site
✓ Check assembly instructions, contents and clear assembly space before starting