
Garden Shed Assembly Tools: A Practical Checklist
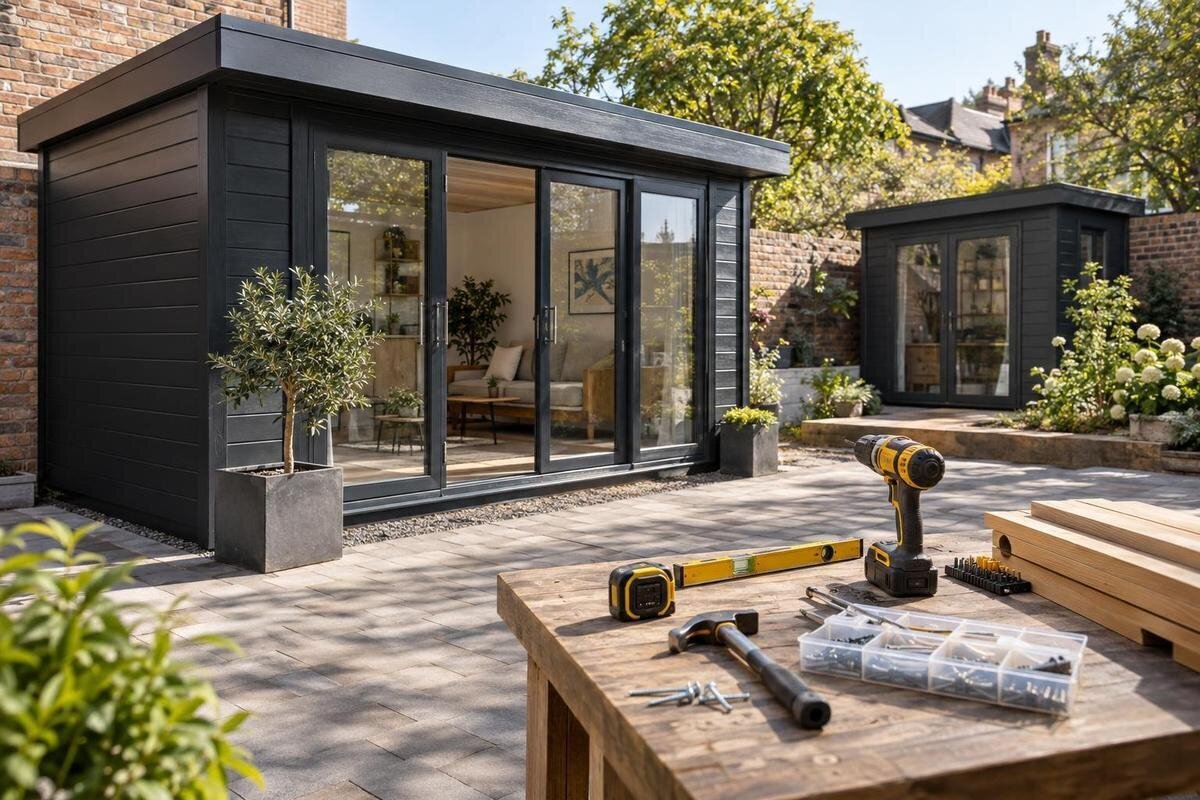
Garden shed assembly
Getting your garden shed assembly tools ready is less about buying a complete toolbox and more about matching a practical checklist to the exact kit. Check the assembly instructions, separate tools from parts supplied with the shed and see what you already own before work begins. This guide covers measuring and marking, fastening, powered tools, protective equipment and organisation, so you can gather the essentials without packing equipment the instructions do not call for.

Before you order 1
Read the instructions for the exact model
Before reaching for a drill or screwdriver, locate the assembly instructions for the exact model you have ordered. Read the tool list, symbols and safety notes, not only the first assembly diagram: a driver bit, spanner or other special tool may be mentioned later in the sequence. Mark every named tool on one page, noting whether the instructions describe it as optional or supplied with the kit. If the product listing you selected is the Verdana 1 garden shed, copy that exact name at the top of your notes. Add page or step references beside unfamiliar items so you can find each callout without searching once work is under way.
Check that the guide matches the model and any variant stated on your order, then scan it from beginning to end for tool callouts. A picture may show a tool in use without giving its size or type; if the requirement is unclear, ask the supplier or instruction provider rather than guessing. Look for a key explaining symbols or abbreviations, and distinguish tools from diagrams of parts or accessories. Keep separate notes for tools you own, items to borrow and anything still to source. Treat a broad online shed checklist as a reminder, not a substitute for model-specific directions; a guide for a similar-looking shed may not cover your kit.
Check what the kit includes
Before setting out hand tools, compare the kit's parts and fasteners with its contents list. The aim is not to start building early; it is to distinguish supplied components from equipment you must provide. Mark each instruction-listed tool as included, not included or unclear, and record its required type instead of writing a vague entry such as driver. If the paperwork refers to the Verdana 2 garden shed, keep that name on the inventory sheet so the fittings and matching checklist stay together. If the instructions say a tool is not supplied, flag it as something to source; do not assume that a tool shown in a picture is part of the package.
Use the contents list to check parts and labels, then keep small fittings grouped in their original bags or labelled containers until the relevant step. Do not assume that a bag of screws, an accessory or a tool shown in a picture is interchangeable with another item; compare its label and description with the instructions. If something appears missing, damaged or different from the list, pause and resolve the discrepancy before it becomes difficult to identify which part belongs where. Write down the item and its label rather than relying on memory. This keeps tool preparation tied to the actual kit instead of a generic shed list.
Before you order 2
Measuring and marking tools
A tape measure, pencil and straight edge cover common measuring and marking tasks, but the instruction sheet determines which are needed. Follow the stated units and reference points in the diagrams rather than estimating from a product photo or a similar shed. A carpenter's square can help you mark or check a right angle when the instructions call for it. If you are comparing directions with a listing such as the Durano garden shed, record any specified measuring tool on that model's own checklist; do not carry it over from a different kit. Keep measurements on a note sheet if the guide does not permit marking the parts.
Add a spirit level only if the instructions call for a level check, and use it at the point and on the surface the guide identifies. A level cannot correct an unsuitable base or settle a site-preparation question; those requirements need to be resolved separately. Keep a sharp pencil and an eraser or removable marker ready if marking is allowed, but avoid writing directly on parts unless the instructions permit it. A notebook is useful for recording measurements, step references and questions that need answers before assembly. This keeps temporary marks and measurement notes off the finished components.
Match the driver or spanner to the fastener
Fasteners determine which driver, screwdriver or spanner you need, so check the instructions and fastener labels before choosing a set. Head shape and size matter: an ill-fitting bit can slip, damage the fastener or slow the job. Add only the screwdriver types, correctly sized bits, hex keys or spanners that the actual guide names. The same check applies to the Veltor 1 garden shed: the model name helps identify the right paperwork, but it does not reveal fastener sizes or tool requirements. If a tool is mentioned without a clear specification, resolve that detail before assembly rather than packing several unsuitable alternatives.
Set out the required bits in the order you expect to use them, and check that each is clean and not visibly worn. A screwdriver or spanner with the correct fit can also be useful if the instructions allow hand tightening; it may be easier to control for a small adjustment than a powered tool. Follow the tightening sequence in the guide, and do not force a fastener that resists. Check the fit again before trying another tool. If the instructions call for a bit holder or extension, list that separately: having a driver does not mean you have every attachment it needs.

Before you order 3
Decide whether a powered tool is suitable
A cordless drill/driver may save effort, but it is not automatically required for every garden shed. Use one only if the assembly instructions allow it, and match the bit to the specified fastener. Charge the battery in advance, confirm that the battery and charger are compatible with the tool, and add a spare battery if you have one. If your notes refer to the Orello 1 garden shed, keep its model name beside any drill requirements rather than assuming another kit's settings apply. A charged tool is no help if the correct bit or attachment is missing, so check both together.
If a powered tool is permitted, read its user instructions and check its condition before assembly. Follow the tool maker's directions for its settings and handling; do not assume a high-speed or impact setting is suitable for shed fasteners. For a corded tool, follow the manufacturer's instructions, check the lead for visible damage and keep it clear of the assembly path. Follow the specified method when changing bits or adjusting the tool, and return it to its designated place when not in use. If the instructions require equipment you do not have, check whether an alternative is permitted instead of substituting one by guesswork.
Do not add cutting tools by default
A saw, chisel, knife or sanding tool is not a default part of a shed assembly checklist. Add cutting or finishing equipment only if the instructions clearly specify the task and identify the tool required. A product name or image does not show that a component needs trimming. If a listing such as the Modano 1 garden shed is on your shortlist, base any cutting requirement on the relevant assembly directions, not on a general shed guide. Record the step where the tool is needed so you can prepare for it without unpacking or carrying equipment unnecessarily.
Where the directions do call for cutting, make sure you understand which part, tool and protective equipment they mean before starting; ask for clarification if any point is ambiguous. Do not use a saw or knife to make an awkward component fit, remove material to correct a mismatch or compensate for an item that seems out of place. Pause and compare the component with the parts list and instructions instead. A cut can be difficult to reverse, and an unplanned change may affect later steps. If the specified tool is unavailable, resolve that before the assembly reaches that stage.
Before you order 4
Add protective equipment and handling aids
Put task-appropriate protective equipment on the checklist alongside tools rather than treating it as an afterthought. Safety glasses, suitable footwear and hearing protection may be needed depending on the work and tools; use the assembly guide and each tool's user instructions to decide what applies. Gloves may help with handling some parts, but choose them for the task and avoid anything that interferes with a secure grip or safe tool operation. Keep loose clothing and long hair away from moving equipment. Before starting, make sure the equipment is serviceable and available to anyone who needs it during the build.
Simple handling aids can help position tools or components, but they must not replace the assembly instructions. Use a clamp, soft-faced mallet or access equipment only where the directions allow it and the item suits the task; do not hammer a component into place or improvise a platform. A work light can help if the area is dim; position it so it does not block your view or create a trip hazard. Follow the maker's instructions for each aid, and remove anything damaged or unstable. If you are unsure whether an aid is suitable, leave it out and ask before using it.
Keep tools and fittings organised
Give every tool a designated place before assembly starts: a tray for small items, a separate spot for hand tools, and a clean area for the instructions. Keep frequently used tools within easy reach, but leave a clear route around the work area and avoid placing tools where they could be knocked onto parts. If the paperwork identifies the wooden garden tool shed M, use that exact name on your tray or checklist to keep its fittings and notes together. A stable surface for the tray is better than balancing loose pieces on a component or leaving them on the ground where they can be lost.
Sort fasteners by the assembly steps or by the labels supplied, not by appearance alone, and return unused pieces to the correct container after each stage. A simple tick-off sheet can show which tools are set out, which are still needed and what should be put away before the next step. Keep spare batteries and chargers organised separately, and charge them only as their manufacturer directs. Good organisation saves repeated searching without crowding the work surface or hiding small fittings. It also makes it easier to notice when a named tool has not been returned to its place.

Before you order 5
Complete a final tool check
Do a final tool check with a written list instead of relying on memory: instructions and parts list, measuring and marking tools, specified drivers or spanners, permitted powered tools and compatible bits, protective equipment, and any listed handling aids. Tick off each item only after seeing it at the work area; writing drill is not enough if the correct bit is still missing. Add a battery, charger or lead only where the chosen tool requires it. Put the pencil, checklist and instructions somewhere visible, and keep the list within reach rather than under the parts.
If you need to borrow or hire a tool, confirm its exact type and attachments first, and make sure you know how to use it as intended. Set out tools needed at the opening stages, while grouping later-stage equipment separately so the workspace stays manageable. If a named item is unavailable, do not quietly replace it with a different tool; check whether the guide or tool maker allows an alternative. Sorting that out in advance is easier than stopping with components in progress and searching for a substitute.
Check tool requirements before ordering
Your checklist can influence which shed you choose, especially if the instructions call for equipment you do not own. Before ordering, look for model-specific assembly information and note any special driver, cutting tool or access equipment it mentions, as well as whether any tools are supplied. If you are considering the wooden garden tool shed S, confirm which instructions apply and whether they identify a less common tool; do not assume a general checklist covers every listing. If the information is not available or is unclear, write down the question rather than guessing from the product name or photographs.
Ask for clarification before purchase if the tool requirements, supplied items or assembly scope are not clear. Compare the answers with what you can borrow, hire or use safely, and allow time to source a particular tool. If the work includes tasks outside your experience, arrange suitable help rather than treating the purchase of another tool as a complete solution. A workable choice is one whose instructions, tools and preparation you can account for before opening the kit. That is more useful than comparing generic tool lists in the abstract.
Frequently asked questions
Is there a standard list of garden shed assembly tools?
No single list suits every kit. The instructions may call for measuring and marking tools, specified drivers or spanners, particular bits, or a powered tool. Treat those as possibilities, not a universal package. Use the callouts for the exact model, then note which items are included and which you need to source.
Do I need a drill to assemble a garden shed?
Not necessarily. Check whether the assembly instructions allow or require a drill/driver, and use the specified bit and settings. If the guide calls for hand tools, do not assume a powered tool is a suitable substitute. Charge batteries and check attachments before starting if a cordless tool is permitted.
Are tools included with a garden shed kit?
Check the contents list and assembly information for the particular kit; do not assume that tools shown in a picture are supplied. Mark each required tool as included, not included or unclear. If the information does not say, ask before ordering so you can plan what to borrow, hire or buy.
What safety equipment should I prepare?
Follow the shed assembly guide and the user instructions for any tools you use. Depending on the task, suitable footwear, safety glasses or hearing protection may be called for. Choose gloves for the handling involved, and avoid anything that interferes with your grip or safe use of a tool.
Can I use tools I already own?
Yes, if they match the type and size specified, are in serviceable condition and can be used as directed. Check that you have the right bit or attachment, not just the driver itself. If a tool does not fit or the instructions call for a different one, do not force a substitute.
An effective garden shed assembly checklist is specific rather than long. Use the instructions for the exact model to identify each tool, confirm what is included and match attachments such as driver bits to the stated fasteners. Set out protective equipment and handling aids only where the task calls for them. When a requirement is unclear, find the answer before the build rather than forcing an unsuitable tool into the job. That preparation makes it easier to see what still needs to be borrowed or sourced.
