
Drainage Around a Garden Shed: Keeping Water Away From the Base
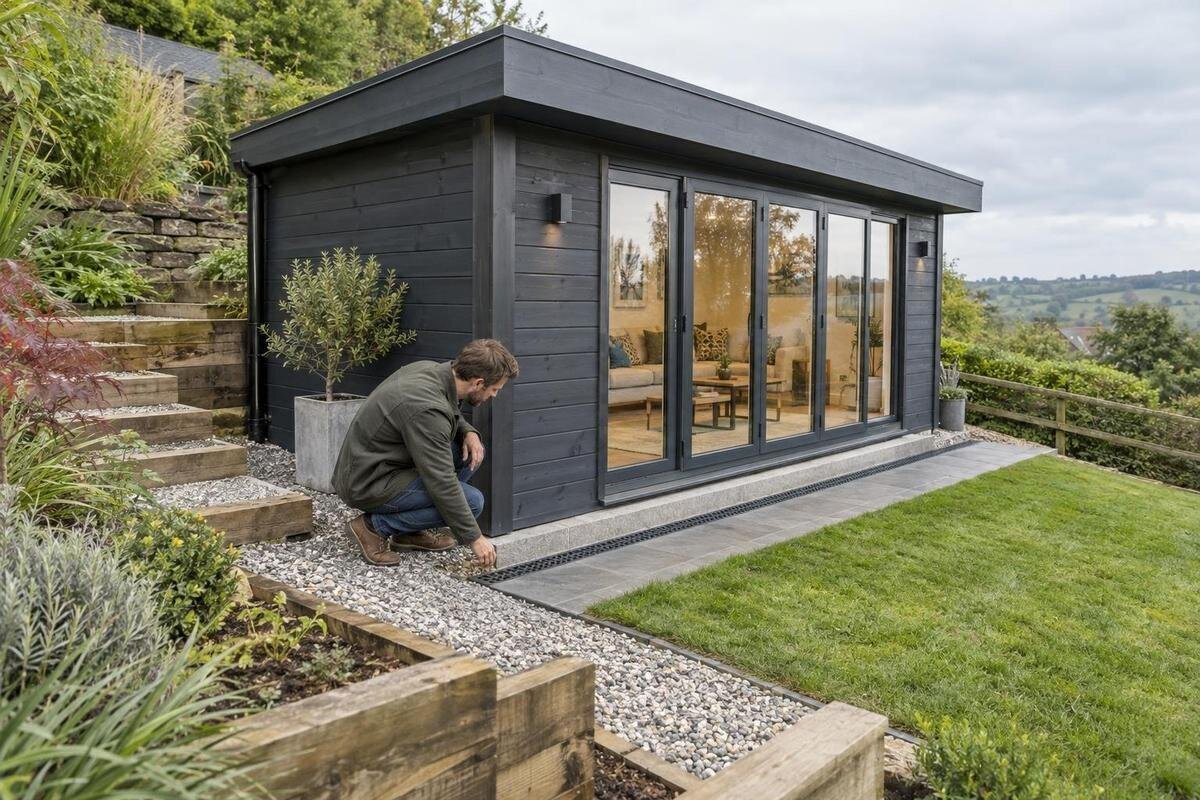
Garden shed drainage
Planning garden shed drainage is part of choosing the position, not a finishing job after the base is in place. Rain may arrive from the roof, run across the plot from higher ground or collect in a shallow dip that is easy to miss when the surface is dry. A useful plan traces each source to a destination that will not send water back towards the base. Observe the site in wet conditions, then check the chosen shed's verified footprint, roof details and installation requirements before ordering. That keeps decisions tied to the actual layout instead of a catalogue image or an improvised channel.
Before you order 1
Map where rainwater already moves
Start with the ground as it behaves, not as it looks on a sunny afternoon. After ordinary rain, note where water first appears, which way it travels, where it slows and where it leaves the garden. A photograph from the same viewpoint and a simple sketch can help you compare observations after different showers. Record shallow puddles, muddy tracks, scoured soil or silt deposits; these can reveal a repeat route even when no stream is visible. Observe from safe ground, and do not walk through flowing water or enter a flooded area to inspect a site.
On the sketch, mark the proposed shed position, paths, paving, boundaries, visible downpipes and any drain grates. Use measured site dimensions and a confirmed product drawing; a catalogue photograph is not a reliable scale plan. If you are comparing the Verdana 1 garden shed, ask for its current footprint and any stated installation clearance before marking a position. This shows whether the outline crosses a wet patch or runoff route. If you do not know where an existing drain leads, mark it as unknown rather than treating it as a safe outlet. Note when observations were made, as one shower may not reveal every flow path.
Trace rainwater from the shed roof
Treat the roof as a separate source of runoff. Depending on its design and on what is supplied or added, rain may fall from an eave, enter a gutter or leave through a specific outlet. Do not assume that gutters, downpipes or collection fittings are included because they appear in a product photograph or are common on other sheds. Before buying, request any available roof or drainage details and written confirmation of what comes with the shed, what is optional and what is not supplied. Ask where the water leaves the roof and whether the manufacturer's instructions specify compatible fittings or clearances. Clarify whether components need to be bought separately and whether installation affects their placement.
For a candidate such as the Verdana 2 garden shed, the useful question is where rain will leave its roof in relation to the chosen site, not what its model name suggests. A concentrated outlet beside one corner may wet a small area; an open drip edge can affect a longer strip. Mark the outlet or drip line on the same plan as the base, access path and intended discharge route. Allow for wind-driven rain rather than assuming every drop will fall vertically. Plan how runoff continues beyond the shed before the base is installed, and ask the installer to confirm that the route follows the product requirements and has a suitable destination.
Before you order 2
Check for water arriving from elsewhere
Look beyond the shed outline. Rain may arrive from a higher lawn, a neighbour's paved area, a driveway, a patio or a downpipe serving another building. Paved or compacted surfaces can move runoff differently from planted ground, so a change of surface can redirect water even where the land looks almost flat. In rain, follow each visible route and note whether separate flows meet near the proposed position. Record where existing grates, channels and downpipes sit, but do not assume they are connected, clear or suitable for additional water merely because they are present. A route may also change after paving or landscaping, so include planned changes in your notes.
If water already crosses the garden, placing a shed in that line can turn a familiar flow into pooling beside the base or around the access route. Compare the mapped flow with the verified product footprint; a different position may be simpler than redirecting a large catchment. If the Durano garden shed is on your shortlist, use its confirmed dimensions, not its name or a photograph, to see how much of the flow area it would occupy. Show existing channels, paths and proposed outlets on the same sketch so drainage does not conflict with access. Do not divert runoff onto a boundary or neighbouring property; get advice where there is no obvious on-site route.
Read the ground levels around the proposed site
Even a nearly level area has high and low points. After rain, look for shallow depressions, muddy tracks, washed soil, silt lines or a wet patch that remains after surrounding ground dries. Paving edges, garden walls and raised beds can hold back or redirect flow; even a small lip where paving meets soil may affect where runoff pools. A low point some distance away can also help explain why water gathers beside the proposed shed. Observe the broader plot to find the cause rather than treating the visible puddle as the whole problem. If possible, compare more than one rainfall event; a dry site on one occasion is not proof it will stay clear.
Once the footprint for the Veltor 1 garden shed has been verified, mark its outline on the site with a temporary, removable line and compare it with low spots and flow paths. This is a planning check, not a substitute for setting out the base or assessing ground levels. Avoid filling a dip or digging a channel by guesswork: either can move water towards the shed, a path or a neighbour's land. Have the installer confirm how the support is to be prepared and how the surrounding surface should direct rain away from it. If subtle changes in level are hard to read, arrange a site assessment before settling on the position.
Before you order 3
Allow space to inspect and maintain the area
Leave practical working space around the base instead of treating the shed's exact footprint as the whole area needed. Someone may need to inspect the perimeter, clear a drain or reach roof-water components for maintenance. A walkway, edging, stored items or dense planting should not block an outlet or create a channel that traps water against the base. Nor is an empty strip automatically a drain: if its surface is low, it may become a narrow trough. Plan the finish, access and runoff route together, and check any clearance required by the selected product or installer rather than relying on a universal measurement. Assembly access and long-term inspection space may have different needs.
Before buying the Orello garden shed, use verified installation information to establish its footprint and any stated assembly or service clearance; do not estimate these from a photograph. Add an approach for routine access and a way to reach visible drains without stepping over an open channel or through a wet patch. A path used to enter the shed should not become the outlet for roof water. If space is tight, show the proposed path and drainage route to the seller or installer and ask whether the position meets the product instructions. Set the arrangement before paving or landscaping, since later changes can narrow the maintenance area or alter how water moves.
Choose a safe destination for runoff
A drainage plan must identify a destination, not just a point where water is collected. Depending on the site, runoff might be directed to a suitable existing stormwater route or another area designed to receive it; not every option suits every property. Avoid ending a downpipe at the base, beside a frequently used path or at a boundary where it could affect neighbouring land. A channel or drain that captures water without a safe outlet may simply move the puddle. If you are considering an infiltration feature such as a soakaway, or a connection to a public system, have its suitability and availability checked locally instead of assuming the ground will absorb the water. Keep any outlet accessible for inspection.
For a shortlist that includes the Modano 1 garden shed, separate product questions from site drainage. Verify the roof-water arrangements and any required outlet locations, then ask a drainage professional whether the chosen route can accept the runoff. Do not judge soil drainage from a dry surface or select an infiltration solution by rule of thumb: ground conditions, groundwater and nearby structures can affect the outcome. If you cannot identify a suitable discharge point, pause before ordering and seek advice. Ask how the outlet should be inspected and maintained, and what to do if it becomes blocked. Directing water towards the nearest low spot is not a plan unless that place can safely receive it.
Before you order 4
Coordinate drainage with the base and installation
Plan the drainage route together with the base and installation layout. Surface water should not be directed against the supporting edge or concentrated where it could disturb prepared ground. A change in ground levels after the base is completed can create a new route back towards it, while digging close to installed work may interfere with the installer's preparation. The product's base requirements and the installer's site assessment still govern how support is built; drainage advice does not replace those instructions. Give the installer the runoff sketch before work starts and ask them to flag any route that conflicts with the base or its required clearance.
For the wooden garden tool shed M, or any other shortlisted model, request the current information needed for site planning: confirmed external dimensions, roof outline or outlet guidance where available, and base and assembly requirements. Give the same details to the person preparing the ground so that the shed position and water route are not planned separately. Confirm in writing who is responsible for gutters or other roof-water components, surface drainage, outlet connections and making good disturbed areas. If separate contractors are involved, agree who confirms final levels and checks the outlet before installation. The product listing and a drainage assessment answer different questions; choosing a shed does not automatically include drainage work.
Plan access and work before placing the order
Consider access and the order of work alongside delivery and installation arrangements. The route for bringing the shed and materials into the garden may also be needed for excavation, pipework or drainage equipment. If it is blocked, newly paved or crossed by unfinished work, installation can become difficult and completed surfaces may need attention. Ask the supplier or installer what access must remain clear, what site preparation they expect and when the base and drainage work should be ready. Do not assume a delivery or assembly service includes grading, gutters or runoff connections; confirm the scope and any separate work directly.
Before placing an order for the wooden garden tool shed S, ask which drawings or site details the installer needs and whether the layout accommodates both the base and the drainage route. Mark pipes, channels, paths, boundaries and access on the same plan, then have the installer review possible conflicts. Where separate trades are involved, agree who confirms outlet locations and ground levels, and who protects finished drainage during later work. Ask whether the delivery or installation route will cross completed drains and how they should be protected. Keep the answers with the order documents so there is a clear record of what is supplied and what still needs arranging.
Before you order 5
Check how the drainage works after rain
After installation, observe the first few rainfall events from a safe place and compare actual water movement with your sketch. Check whether roof water reaches its intended outlet, whether surface runoff still gathers near the base, and whether the route carries it away without creating erosion or another wet area. Look at both the entry and exit of any visible drain: leaves, silt or building debris can restrict flow. A route that copes with light rain may reveal a bottleneck in heavier conditions, so observe again when it is safe to do so. If the result differs from the plan, ask the installer or drainage specialist to review it before changing the levels or outlet.
Keep accessible inlets, grates and channels clear, and include the surrounding ground in routine garden checks. Reassess the route after paving, landscaping, a new building or a changed downpipe, because these can alter how much water arrives or where it travels. Where roof components need attention at height, use a properly equipped person rather than taking an unsafe shortcut. A short record of when and where water gathers can help a professional identify whether the cause is a blockage, an outlet problem or changed site runoff. Maintenance can prevent avoidable obstructions, but it cannot correct a discharge route that was unsuitable from the outset.
Know when to get a drainage assessment
Arrange qualified drainage advice before ordering if water regularly pools, several roof or ground flows meet at the proposed position, you cannot identify where an existing drain leads, or a planned route may affect a boundary, nearby building or public stormwater system. Uncertain ground or groundwater conditions can also make a simple surface fix unsuitable. The aim is not to choose a drain yourself; it is to establish whether the site can receive the runoff and what must be coordinated with the shed base. If a public connection is being considered, check locally whether it is available and appropriate rather than treating it as an assumed outlet.
Take a simple site plan, observations from rain and the selected product's verified dimensions or any available drawings to the installer or drainage professional. Ask for a clear recommendation that identifies incoming sources, collection points, the proposed destination and any work that must happen before the base is built. Confirm who is responsible for each part and which requirements come from the shed supplier. Ask what changes to the roof-water layout or surrounding landscaping would require a fresh review. Once these points are settled, compare options using facts that affect the layout, not names, images or presumed fittings, and order when the position, base plan and water route are compatible.
Frequently asked questions
How can I check where rainwater runs on my site?
Watch from safe ground during and after more than one rainfall. Mark where runoff enters, travels, pools and leaves, including roof outlets and paved areas. A sketch and a few photographs can help you compare what happens in different conditions. If the flow is hard to trace or the site floods, ask a qualified drainage professional to assess it.
Should a downpipe end beside the shed base?
Not by default. A concentrated discharge can leave water beside the support or turn a normally dry strip into a wet route. Choose a suitable destination first, and make sure the water will not be sent across a path, boundary or neighbouring property.
Do garden sheds always include gutters?
No. Components supplied with a particular model can vary, and a photograph does not confirm what is included. Ask for written details about gutters, downpipes and outlet positions, including anything that must be purchased separately. Plan for roof runoff even if no gutter is included.
Will a soakaway solve water pooling?
Not necessarily. Its suitability depends on ground conditions, groundwater, nearby structures and where water can safely be directed. A dry surface alone does not prove that infiltration will work. Ask a qualified drainage professional to assess the site before choosing this approach.
When should I plan drainage around a garden shed?
Before committing to the position or preparing the base. Confirm the shed's footprint, roof-water details and installation requirements, map existing runoff, then agree the drainage route and work sequence with the installer. Early coordination can prevent drains conflicting with finished paving or access routes.
Good drainage begins with a site-specific map: where rain arrives, where the shed roof releases it and where it can safely go. Keep that plan aligned with the verified product footprint and base requirements, and reassess it if later paving or landscaping changes the flow. Choosing a garden shed with those routes in mind helps keep water from collecting beside its base without relying on an improvised outlet.
