
Growing Broccoli in a Greenhouse
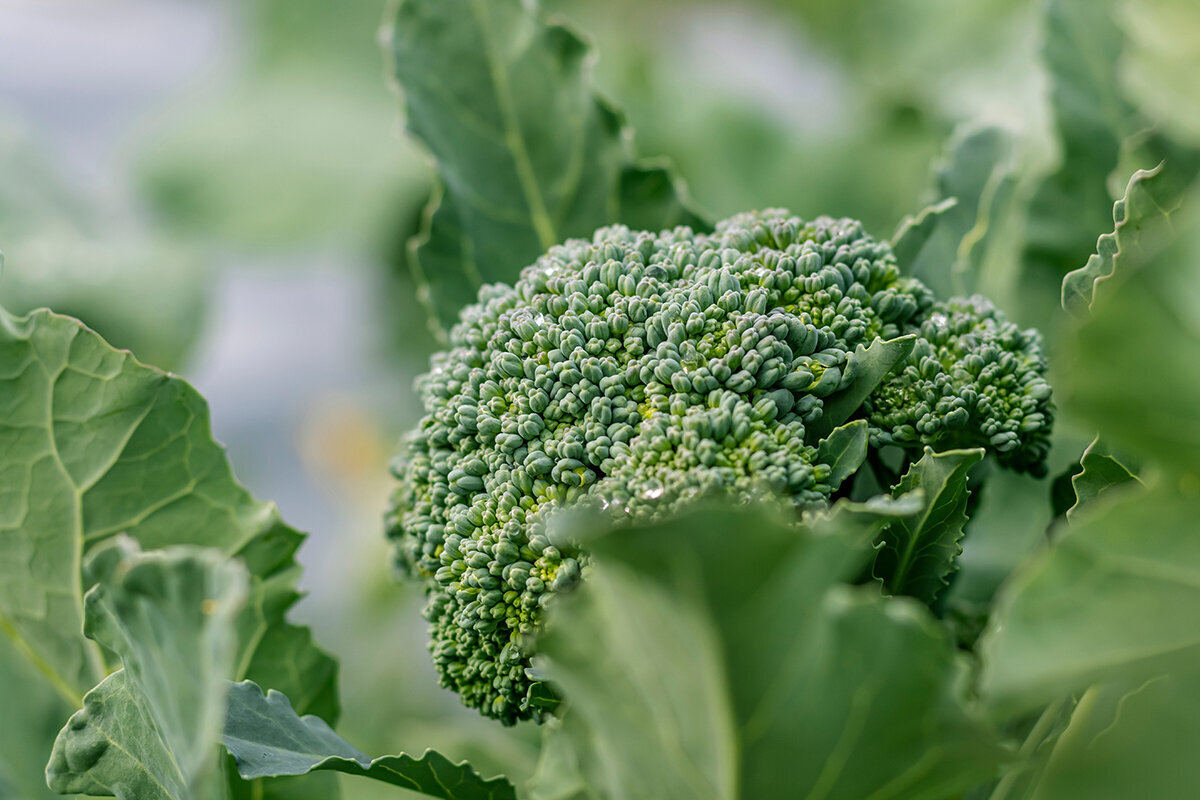
The head reads the climate
Growing broccoli in a greenhouse
A firm, dark-green broccoli head is no accident. Its fine texture reveals dry spells, heat spikes, restricted roots and a missed harvest date.
In a greenhouse, broccoli is a rewarding crop for cool periods, provided the structure is used as a controllable shelter rather than a permanent heat trap. Raise sturdy young plants, allow for mature foliage and let humid air escape reliably.
Best seasonCool autumn, winter and spring
Plant spacing50–60 cm per plant
Useful temperature rangeAbout 18–21 °C for raising seedlings
Greatest riskWarm, humid head formation
01 · Controlled coolness
A greenhouse does not help broccoli simply by making it warmer.
The growing principle
Use glazing, roof vents, doors, shade and watering to soften sharp weather changes. Before heads form, the aim is an evenly growing, vigorous plant—not soft foliage pushed into rapid growth by heat.
Broccoli is a brassica for cool growing windows. Steady growth, sufficient water, appropriately mature plants and cool head formation encourage dense crowns. A greenhouse offers effective controls, but it does not remove the plant’s preference for moderate temperatures.
02 · Choose the growth habit
Choose a crop type that suits your greenhouse bed.
Seed packets often focus on days to maturity. Under cover, head shape, the mature plant’s space needs and its ability to produce side shoots deserve equal attention.
Compact head
Early harvest
Short season · less space
Sprouting
Many pickings
Small florets · long harvest
Calabrese
Large main head
Broad leaves · generous spacing
Early-heading varieties
These types suit a short greenhouse season when the bed must later be cleared for tomatoes or cucumbers. Harvest is concentrated in one central head. Cut promptly once buds are dense and closed; side-shoot production varies by variety.
Sprouting types
Sprouting broccoli produces numerous smaller florets over an extended period rather than one large crown. It suits households wanting regular small harvests. The branching plants can become dense, however, and need an open airflow path and repeated checks.
Large Calabrese types
Traditional blue-green Calabrese plants usually produce a substantial main head followed by smaller side shoots. They need plenty of leaf space and work particularly well when planted for head formation in the cooler part of the year. Match the variety to the intended harvest window.
For a first greenhouse crop, a robust heading variety with a clearly stated season is easiest to manage. For a longer harvest, add a few sprouting plants at one end of the bed rather than forcing every variety into the same rhythm. Keep labels until harvest: variety name and season are valuable clues if maturity or head shape is unexpected.
03 · The young plant sets the standard
Raise young, resilient plants—not overgrown ones.
Broccoli seedlings can look compact for a long time even when their roots have completely filled the cell. Do not hold them in small pots merely because planting later is more convenient. Overgrown, stressed or root-bound plants are more likely to form small heads prematurely. This is called buttoning.
Sow one seed into loose seedling mix and cover it with only a few millimetres of mix. Keep the sowing evenly moist but not wet. Once seedlings emerge, they need plenty of light straight away and can grow considerably cooler. Modest feeding after the first true leaf is better than forcing growth with heavy fertiliser.
Once several true leaves and a firm, intact root ball are present, begin hardening off gradually. A greenhouse eases the transition but can also conceal stress: sunny days heat up quickly under cover while clear nights may still become very cool.
From seedling to head
01
SowClean mix; cover lightly.
02
EmergePlenty of light; gentle airflow.
03
Pot onGive roots room.
04
Harden offIncrease exposure gradually.
05
Plant outWater in well at final spacing.
Until emergence, keep the mix consistently moist but never waterlogged. Then move seedlings into bright light without delay. Gentle air movement encourages stocky stems and prevents leaves from staying wet for long.
Pot on before roots begin circling tightly. Handle seedlings by their leaves where possible. Over several days, increase light, air movement and temperature variation while preventing the small root balls from drying out.
Age in weeks is not the only measure. Plant firm, actively growing seedlings with several true leaves, a compact root ball and a youthful habit. In much of South Africa, sow an autumn crop from late summer for planting in autumn, then time a spring crop so head formation avoids hot weather. Adjust timing for your local altitude, frost risk and greenhouse climate.
04 · Spacing is climate control
Allow for the mature plant’s leaf mass.
Many disappointments start with a bed that looks neat after planting but becomes much too crowded later. Small transplants seem easy to place side by side. Once broad blue-green leaves touch, moisture lingers around the heads, inspection becomes difficult and plants compete for light, water and nutrients precisely during head formation.
Use 50 cm as a practical minimum for compact plants in a well-ventilated row. Increase spacing to up to 60 cm for large varieties, long-season crops or a greenhouse where humidity escapes slowly. Around 60 cm between rows is a dependable guide. Include paths and vent areas in the plan: a hand-width between young plants becomes a valuable reserve of air and quality at full leaf growth.
Keep both ends of the bed accessible. You should be able to inspect leaf undersides, check moisture below the soil surface and cut the main head without leaning through a neighbouring plant’s crown.
Layout for air and access
Incoming air
Clear ventilation route
Clear ventilation route
Broccoli row
Open leaf structure
Open leaf structure
Harvest path
Dry access
Dry access
Position the tallest broccoli plants so they do not block airflow between the door and roof vents. In a narrow greenhouse, one generously spaced row accessible from both sides is usually more useful than two beds pressed tightly against glazing and path.
Container growing is possible, but each plant needs a deep, sufficiently large container and fertile, structurally stable growing medium. Keep roughly 50 cm between plants. Containers heat up and dry out faster in sun than a soil bed, so moisture needs more frequent checking.
05 · Climate chamber
Head quality comes from calm averages, not one reading.
Broccoli tolerates cool conditions well, but the developing head reacts sensitively to accumulated heat and fluctuating soil moisture. Aim for bright, cool days with moving air. For seedlings, a range around 18–21 °C is practical. During head formation, keep the greenhouse as cool as the season allows. Open early on sunny days rather than waiting for leaves to wilt.
Persistent warmth above about 20–22 °C, combined with uneven watering, can encourage coarse, loose or prematurely maturing heads. Small glasshouses reach these temperatures well before outdoor air feels hot. A min-max thermometer at leaf height reveals heat spikes. The Bavarian Garden Academy recommends opening ventilation equivalent to at least one quarter of the floor area in small greenhouses.
Stress ↑Development →
High
Stunted
Loose
Open
Medium
Water
Ventilate
Harvest
Low
Even
Setting
Dense
Daily ventilation routine
- Morning
- Open roof vents and the door before direct sun turns the greenhouse into a heat store. Check that genuine air exchange is happening; a narrow gap alone is often inadequate in a densely planted structure.
- Midday
- Use shade sparingly only on exceptionally hot, sunny days. Broccoli needs light, but neither an overheated crown nor stalled roots. Ventilation and correct crop timing remain more effective than permanent dimming.
- Evening
- Close in good time before cold nights, without trapping wet leaves inside. Where possible, foliage should dry before nightfall. At the same time, avoid an abrupt cold draught directly over plants.
- After watering
- Ventilate sufficiently for excess humidity to escape. Wet foliage, condensation and a permanently damp path are not suitable ways to cool a greenhouse.
06A · Water flow
Keep the root zone evenly moist.
Broccoli is sensitive to the swing between drying out and waterlogging. From planting to harvest, it needs a moist, oxygen-rich and steadily supplied root zone. Water deeply so moisture reaches below the surface. Let a soil check, weather and plant growth—not a rigid weekly schedule—determine the next watering.
Rain does not supply a greenhouse crop; sun, ventilation, soil type and container size all alter demand considerably. Check actual moisture in the rooted zone with a finger or trowel. Drip irrigation or slow watering at soil level keeps leaves and heads drier than daily overhead spraying. Morning watering also allows excess humidity to escape in time.
06B · Nutrient flow
Feed steadily, not in bursts.
Broccoli is a heavy feeder. Generous nitrogen applications do not replace healthy roots, light, water or suitable temperatures. Start with a soil analysis where possible and a mature, well-structured bed. Mature compost improves structure and water retention; fresh manure should not go directly beside the crop. Supply should suit the existing soil, not a blanket maximum rate.Soil analysis first Additional fertiliser should follow results and visible growth.
A restrained top-up after establishment can be useful. After cutting the main head, a light application can support side shoots if the plant remains healthy and active. Avoid sudden heavy feeding: excessive nitrogen, very rapid growth and wide spacing can encourage hollow stems. Do not add micronutrients speculatively without first investigating the cause.
Water and nutrient supply meet during head formation. A plant that has not repeatedly paused because of drought or poor nutrition is better prepared to form a dense, even crown.
07 · Read the crown
How a dense broccoli head forms.
A broccoli head consists of many unopened flower buds. Its quality is built before it looks like a finished head. First, the plant needs generous leaf area and roots able to take up water and nutrients continuously. When development, variety and weather align, the central growing point changes and buds arrange themselves into a compact crown.
A head may therefore look unusual even when the problem is noticed only shortly before harvest. Miniature heads on small plants usually signal an earlier interruption in growth: a pot kept too long, cold or heat stress, drought or transplant shock. Coarse, spreading buds and yellow flowers more often indicate later stress from heat, uneven water or a missed harvest.
Before settingEncourage brisk but balanced leaf growth. Young plants need room, oxygen around roots, even moisture and a moderate nutrient supply.
As heads setManage the greenhouse especially evenly. Avoid heat spikes, dry spells and abrupt changes in fertiliser concentration.
As heads matureKeep airflow open around the crown. Check often and harvest while buds are firmly closed rather than risking quality for a few extra centimetres of diameter.
08 · Diagnosis zone
The head shows what did not align in the crop.
Do not treat every imperfect head with the same standard response. Compare the symptom with plant age, root condition, temperature pattern, watering and airflow. Many visible faults began several weeks earlier.
Early head
Buttoning
Small plant.
Coarse buds
Loose head
Heat or drought.
Yellow buds
Flowering
Harvest now.
Hollow stem
Growth stress
Check supply.
Small, early crown
Buttoning
Likely causes: The young plant was held back—for example by a pot kept too long, cold or heat stress, drought, inadequate supply or stress during planting. It switched to head formation before building enough leaf area.
Gentlest response: Harvest the usable small head. For the next batch, review raising time, root development and planting date rather than trying to force the existing plant back into leaf growth with heavy fertiliser.
Open or coarse buds
Loose beading
Likely causes: Heat during head formation, high humidity, uneven watering, a sudden growth surge or late harvest. Individual buds stand out clearly and the crown loses its dense, fine-grained surface.
Gentlest response: Ventilate earlier on sunny days, keep the root zone evenly moist and avoid heavy feeding. If the head is ready, cut it promptly before the first flowers open.
Yellow flowers or yellowing
Opening crown
Likely causes: Maturity progressed faster than the checking and harvest routine. In warm weather, firm green buds can elongate and open quickly. This is usually a timing issue, not automatically a plant disease.
Gentlest response: Cut the head immediately. Stems, buds and flowers remain edible, but texture and appearance are better before flowering. In warm conditions, check the crop daily afterwards.
Brown patches or hollow stems
Internal stress
Likely causes: Uneven moisture, very fast growth, excessive nutrition, wide spacing, varietal sensitivity or an unbalanced micronutrient supply may combine. A hollow in an otherwise firm stem is usually a quality issue, not automatically a safety concern. Remove soft, discoloured or rotten tissue generously.
Gentlest response: Have soil or growing medium tested before adding individual micronutrients speculatively. Stabilise watering and feeding. Remove damaged or rotten sections at harvest and clean tools after use.
09 · The calm inspection round
Caterpillars, aphids and damp problems often begin quietly.
A greenhouse excludes some weather, not every pest. Cabbage white and moth caterpillars enter through doors or vents and hide in leaf folds near the crown. Aphids gather on soft shoot tips; flea beetles leave tiny holes in young leaves. Check at least twice a week, and more often during head formation or warm weather.
Start with the most local and gentle action. Pick off individual caterpillars, wipe away small aphid colonies or dislodge them with a directed jet of water from sturdy leaves. Remove badly affected plant parts and old brassica debris from the greenhouse. Crop nets can help but must not restrict ventilation unreasonably. If a plant-protection product is needed, use only a product currently registered in South Africa for the crop and use, follow its label and observe the withholding period.
Managing humidity is also practical disease prevention. Keep spacing clear, water the soil rather than the crown and remove dead leaves. Do not leave the greenhouse shut after watering merely because outdoor air feels cool.
Five-minute inspection round
- Check leaf undersides for eggs, caterpillars and aphid colonies.+
- Gently separate leaves and check that they are dry and air reaches the plant centre.+
- Feel several centimetres below the surface before watering; a dry top crust alone is not reliable.+
- Check developing heads for loose buds, caterpillar droppings and yellowish areas.+
- Remove damaged leaves from the greenhouse instead of leaving them on the path or beneath benches.+
Plan a multi-year break between broccoli and other brassicas in the same bed. A long rotation substantially reduces pressure from soil-borne diseases and overwintering pests. This applies to permanent greenhouse beds as well as open vegetable plots.
Harvest-cut height
Main head
Dense green buds
Dense green buds
Cut line
Above lower leaf axils
Above lower leaf axils
Leaf bases
Leave intact
Leave intact
Side shoots
Keep axillary buds
Keep axillary buds
Cutting guide: Harvest when the central head has reached a good size and every bud remains tightly closed. Cut in the morning with a sharp, clean knife and take a sufficiently long stem. Make the cut above strong lower leaf bases and leave the healthy rooted plant in place.
After the main cut: Many Calabrese and sprouting varieties form smaller side shoots from the remaining leaf axils. Continue watering evenly. A modest feed may support this second harvest if it suits the soil and existing feeding plan.
10 · The clean cut
Harvest the main head—and let side shoots follow.
Do not wait for supermarket-sized broccoli when the surface is already loosening. Closed buds, firm structure and tenderness matter more than the greatest possible diameter. Once individual buds stretch or show yellow, the ideal window has passed. In warm weather, inspect daily because compact green heads can become open flowers very quickly.
Side shoots are among the finest greenhouse harvests: small, tender and easy to cut in useful kitchen portions. Continue giving the plant even water after the main harvest, remove only diseased leaves and maintain airflow. Cut florets continuously while their buds remain close together.
Cool broccoli immediately after harvest and do not leave it long in a warm kitchen. In the refrigerator, it keeps best in a humid but not dripping-wet environment. Use it soon, as warmth quickly reduces tenderness and fresh flavour.
For a greenhouse with clear paths, effective roof ventilation and productive growing space through the cool seasons, discover the Classic Aluminium Greenhouse from Bloomcabin. Its adaptable, orderly interior provides a capable setting for successive broccoli, leafy-greens and early-seedling crops.
11 · Growing windows in South Africa
Schedule head formation for your reliably cool growing period.
Cool coastal and high-altitude areas
Cool coastal districts and higher inland areas often offer a longer broccoli-friendly season, though seedling growth can slow in cold, low-light weeks. An early crop benefits from protected establishment; have frost protection ready where frost occurs. Autumn and winter crops can perform especially well when temperatures remain moderate.
Temperate inland regions
Think in two cool-season windows. An autumn planting can clear the bed before warm-season tomatoes or peppers, while a late-winter or early-spring crop can be productive before summer heat. Ventilate early even in cool weather, because sunshine can create surprising warmth under glass.
Warm subtropical areas and urban gardens
Use the greenhouse primarily during the coolest months and avoid head formation in hot summer weather. In densely built or warm northern gardens, even a sunny winter day can overheat a covered crop. Sow in time for the key development stage to fall during shorter days and cooler nights.
Work backwards from the harvest window you want. Use the variety’s maturity indication from planting and add time for raising seedlings. A Classic Aluminium Greenhouse with an observed sun path, clear paths, roof vents and an accessible door makes these timing decisions more dependable. Automatic window openers can help where the greenhouse cannot always be opened manually in the morning.
12 · Frequently asked questions
A restrained correction is usually the right one.
Broccoli is a crop of small, timely adjustments. Before applying fertiliser, shade or plant protection, establish whether heat, uneven watering, restricted roots, overcrowding or simply a missed harvest is the real cause.
Can broccoli grow in an unheated greenhouse?+
Yes. In South Africa, an unheated greenhouse is particularly useful during cool autumn, winter and spring periods. Its advantage is protection from wind, heavy rain and variable weather, not tropical warmth. It is not automatically frost-free during prolonged cold spells, so young plants may need extra protection. Ventilate on sunny days even when outdoor air is cool.
How many broccoli plants fit in a small greenhouse?+
Plan for the mature plant, not the seedling. At 50–60 cm spacing, one row accommodates only a few large plants. This can still be productive if side shoots are harvested after the main head. Edge areas can temporarily hold seedling trays, lettuce or low herbs provided the airflow route remains open.
Why do my broccoli heads stay small?+
Alongside a naturally compact variety, stressed or overgrown young plants, drought, unsuitable temperatures and interrupted nutrition may be responsible. A miniature head appearing unusually early on a small plant is often buttoning. The head remains edible; younger plants and a steadier growing window help with the next crop.
Should broccoli be shaded in a greenhouse?+
Shade can temporarily soften extreme sun peaks, but it replaces neither ventilation nor good timing. Broccoli needs abundant light to build leaves and heads. Open roof vents and the door first, stabilise water supply and use shade only as an extra measure if temperature at plant level still rises too quickly.
Can broccoli grow in containers?+
Yes, provided every plant has a deep, generous container with fertile, well-drained growing medium. Allow around 50 cm between plants. Containers warm quickly in sun and have limited water reserves. Check moisture more frequently and water deeply without creating persistent waterlogging.
Sources and further reading
Technical information behind the growing plan.
More from Bloomcabin: Made-to-measure aluminium greenhouses · smart greenhouses from Bloomcabin · Read more about long-term greenhouse planning
- Bavarian Garden Academy – Planning and using small greenhouses properly
- Bavarian Garden Academy – Raising or buying young plants
- Bundessortenamt – Guidelines for vegetable value trials and variety testing
- University of Minnesota Extension – Growing broccoli in the home garden
- University of Minnesota Extension – Irrigation strategies for vegetable crops
- University of Maryland Extension – Growing broccoli in the home garden
- University of Massachusetts Extension – Head quality and physiological disorders in broccoli
The crown plan
Design the calmest part of the garden year.
A high-quality greenhouse is not only a space for heat-loving tomatoes. It is a precisely controllable shelter for crops that deliver their best quality in bright, cool conditions. Give broccoli a deliberately planned row, enough room for mature foliage, a clean harvest path and ventilation that responds before heat and humidity build in the crown.
Configure a Classic Aluminium Greenhouse for your own sequence of cool-season crops—broccoli, lettuce, brassica seedlings and early herbs. Dimensions, roof vents and paths can be planned so care and climate management work together. Discover the Classic Aluminium Greenhouse and compare the possibilities of a Classic Aluminium Greenhouse for well-organised growing areas over the long term.
Classic Aluminium GreenhouseDecision 01 Set the cool harvest window first.
Decision 02 Draw the layout using mature-plant spacing.
Decision 03 Keep a clear, dry route for checking and harvesting.
