
How to Store a Garden Shed Kit Before Assembly
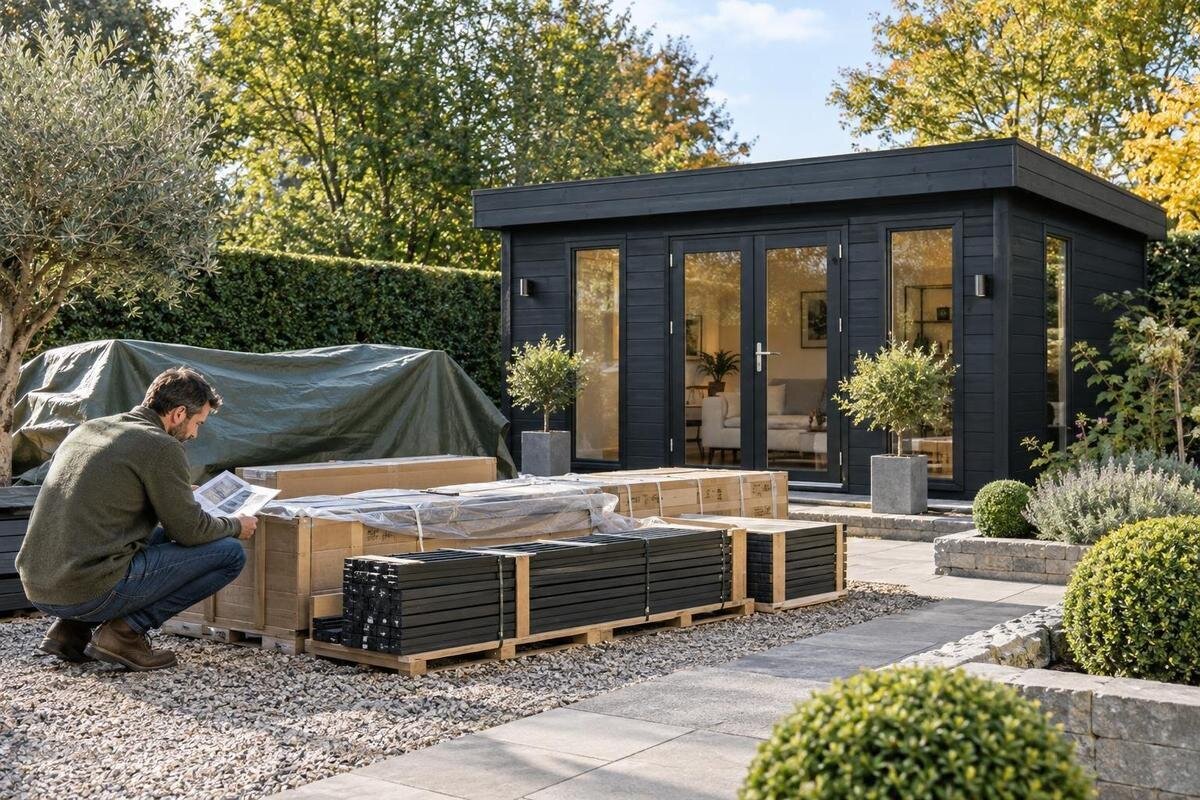
Garden shed storage
When a garden shed kit arrives before you are ready to build, the storage period becomes part of the project. Keeping the boxes out of rain is only one consideration: the ground, support, airflow, sunlight, packaging, loose hardware and paperwork all matter. A sensible holding place reduces avoidable handling and helps you spot problems before assembly. Follow the kit’s own labels and instructions wherever they give specific storage or handling directions; general advice cannot replace guidance for the model you have ordered.

Choose a storage place before the kit arrives
Choose a storage spot before the kit arrives, rather than making a gap wherever the packages happen to fit. A roofed, dry and secure space is preferable. Measure the floor area you can actually use and allow room to reach package labels and move each pack without climbing over the stack. Ask for packed dimensions if they are not available in the product information; the footprint of an assembled garden shed does not tell you how much room its kit occupies. Check internal doorways and turns too, so packages will not need awkward repositioning once inside.
Look for hazards overhead and nearby: a leaking roof, a pipe joint, an open window that admits rain, a sprinkler, a drain that backs up, or shelves holding items that could fall. Keep the kit out of everyday traffic and away from equipment that might strike it. If other people share the space, mark the reserved area and ask them not to pile things on top or shift the boxes. When considering the Verdana 1 garden shed listing, use current product details or ask the seller about packed size and storage directions; an assembled photo cannot confirm these. If your timing is uncertain, ask how long the sealed kit may wait before ordering.
Keep packages raised and evenly supported
Do not set a kit directly on soil, grass or a floor that may become wet. Ground moisture can reach lower packaging even when the room feels dry, and a small leak or spill may go unnoticed beneath a stack. Raise the packs on clean, stable supports, such as a suitable pallet or shelving arrangement, if the supplied directions allow it. Keep the lowest edge clear of likely water and check that the floor beneath is dry before placing the kit. Avoid storing packages directly against a damp wall.
Supports should be stable and arranged so they do not crush a corner or leave long components sagging. Follow printed orientation, stacking or support marks; do not assume one box can carry another simply because its outer surface looks strong. Check the guidance supplied for the Verdana 2 garden shed listing, or ask the seller about the particular kit if instructions are missing. Avoid high stacks and loose bricks or offcuts that can shift or puncture packaging. If the floor or platform flexes, slopes or feels unstable, choose another location rather than shimming it with loose scraps. Raise the kit only as much as needed for protection; a high, awkward stack creates its own handling risk.
Protect the kit from rain without trapping moisture
An indoor, roofed space is easier to keep dry than a temporary outdoor spot. If the kit must remain outside, set it on a raised, stable base beneath a suitable shelter or waterproof cover, and arrange the cover so rain runs away from the packages. Keep the cover above the boxes where possible instead of wrapping it tightly around them. A close-fitting plastic sheet may trap condensation against packaging; a loose cover can flap or allow wind-driven rain underneath. Do not assume either arrangement will protect the kit safely on its own.
Make sure the cover cannot funnel water onto an edge or form a pocket where rain collects, and secure it without crushing boxes or blocking all airflow. Keep the kit away from roof edges or gutter outlets where overflow could run down the cover. Check after rain and windy weather for pooled water, shifted covers and damp patches; remove standing water and let the outside of the packaging dry without opening it if the instructions say to keep it sealed. When asking about a kit such as the Durano garden shed, quote the model and ask what protection is appropriate. A cover is a temporary measure, not a reason to leave the kit uninspected.
Limit exposure to sun, heat and damp
Keep the packages out of prolonged direct sun, strong heat and persistently damp air. Sunlight can heat one side of a covered stack, while a very hot storage space or an area beside a heater may create conditions unlike those intended for the kit. Dampness from laundry, a bathroom, a leaking tap or a condensation-prone wall is also avoidable. A room can feel dry at one visit and still collect moisture overnight, so look for water marks or condensation on nearby surfaces. Do not store the kit beside fuel, solvents, fertilisers or other chemicals that could leak onto the packaging.
Materials and finishes differ, so do not apply one storage rule to every kit. If a garden shed includes timber, repeated wetting and drying or prolonged damp storage may affect its components; other materials may have their own limits. Use the packaging instructions or contact the seller or manufacturer for advice on temperature, ventilation and storage duration. For Veltor 1, look for model-specific information rather than assuming that every kit has the same storage requirements. Keep packages clear of exhaust or hot-air outlets, and do not apply a preservative or other treatment to stored parts unless the instructions call for it.

Keep packaging and labels intact
Keep the original packaging intact for as long as practical. Boxes, protective sheets and dividers help keep pieces grouped and may carry model labels, part numbers or handling marks that are useful during assembly. Opening everything early can expose components to dust and moisture, separate parts from their identifiers and make it harder to match each pack to the instructions. If the assembly guide says to inspect or unpack sooner, follow it; the point is to avoid casual unpacking, not to ignore a manufacturer’s check. Keep labels facing out so you can identify packages without shifting the stack.
Check each package’s exterior when it arrives and note crushed corners, tears, punctures or signs of water. Photograph damage before moving or opening the affected pack, and keep the shipping labels and order details. Do not cut deeply into taped packaging, where a blade could mark a panel or finish; open it only when you are ready and have a clean place to set out components. If the kit is listed as Orello 1, keep that model reference with the order documents and follow the supplied instructions to decide whether its packaging should stay sealed, be re-sealed or replaced. If there are several packs, note how many arrived before their labels become obscured.
Store fittings and paperwork with the kit
Treat small fittings and paperwork as part of the kit, not as loose items to sort out later. Keep unopened hardware packs with their labelled box or in a clearly identified container; if a pack has already been opened, keep each group in its original labelled bag where possible. Place loose items in a lidded container, not a pocket or unmarked jar, and label it with the kit name and pack reference. Store it beside the main components in a dry spot, where it cannot be mistaken for household hardware or moved during a clear-up. Avoid spreading pieces out on a bench where they could be swept away.
Put the assembly guide, parts list, care notes, order confirmation and seller correspondence together in a clean folder, with a digital copy as a backup if available. Keep documents away from damp packaging; do not rely on loose paperwork tucked into a box to stay readable if the box gets wet. Avoid writing on finished surfaces or sticking tape directly to them to identify parts. Photograph any label before replacing it, and retain the original. For an order for Modano 1 garden shed, use the packing list and supplied instructions to identify which fittings should be present and how they are grouped. A note of which packs have been opened can prevent a later search.
Keep packages stable and avoid placing weight on them
Do not use the kit as a shelf or place unrelated garden equipment on top. Extra weight can crush packaging, press against vulnerable edges or make a stack unstable, even if the outer box looks undamaged. Keep long panels or bundled components in the orientation shown on their labels; leaning them unsecured against a wall risks slipping, while standing them upright without support can put pressure on an edge. The right arrangement depends on the packaging and contents, so printed instructions take priority over general advice. Keep labels visible rather than burying them beneath another package.
Before moving a package, check the route through the storage area and clear trip hazards, then follow the handling instructions and get suitable help for its weight and shape. Avoid dragging boxes over rough ground, repeatedly shifting the pile, or carrying panels by a part not intended as a handle. Do not dismantle a bundle or remove protective pieces to make a stack fit unless the instructions allow it. For the kit identified as wooden garden tool shed M, confirm package orientation and handling details in the supplied information. If reaching one package means lifting another, do not pull it from underneath a stack; rearrange the packages only when it can be done safely.
Check storage needs before ordering
How long the kit will wait matters. A short stay in a dry, protected space differs from an uncertain delay through a wet or hot spell, but there is no single safe storage period for every material and packaging type. Before confirming an order, align the delivery date with the time you expect to be ready, and ask the seller what to do if assembly is postponed. Check whether the kit must remain sealed, whether ventilation or temperature guidance applies, and whether its components have a recommended storage orientation. Ask whether the packaging is intended for sheltered storage only.
Make the storage plan after you have those answers, rather than assuming all shed kits are alike. The wooden garden tool shed S listing identifies the option you are considering; verify its packed size, materials, storage guidance and included documents through current product information or by asking the seller. If dates are uncertain, choose a place you can keep protected and inspect, rather than one dependent on a temporary cover or repeated moving. If the proposed waiting period exceeds the seller’s recommended storage time, adjust the delivery date or agree on a suitable holding arrangement before the kit arrives. Allow time to check the kit before assembly.

Inspect the kit while it is waiting
Check the outside of the kit regularly while it waits, with extra attention after heavy rain, a leak, strong wind or anything that may disturb the cover or storage area. Look for damp packaging, soft or crushed corners, new tears, water marks, insect activity and shifted supports. Check around the stack as well as on top: moisture may enter at floor level, while a hidden leak can run behind boxes. You do not need to open sealed packages for every visual check; their condition and the surrounding space often show whether the arrangement needs attention. If dampness keeps returning, change the storage setup rather than simply adding another cover.
Keep a brief note of when you find a problem and take clear photographs before altering the packaging. If a package becomes wet, punctured, mouldy or badly crushed, move it to a dry, secure place only if you can do so safely and without worsening the damage; do not force a heavy or unstable stack. Look for signs that pests have damaged packaging, but avoid spraying chemicals on or near the kit without checking the instructions. Do not assume the contents are unaffected or try repairs before asking the seller or manufacturer what to do. Save any reply with the order documents and keep affected parts identifiable.
Check the contents before assembly
Before assembly, read the instructions for the exact kit and compare the parts against its list in the order recommended. Choose a dry, clean place to unpack, set aside labelled small-parts packs and keep packaging labels available as you work. Check that the documents match the model ordered and that no parts are visibly cracked, bent, stained or otherwise damaged. Use the manufacturer’s stated guidance for any acclimatisation or preparation; do not guess that a kit should be left open for a fixed number of hours or days. If the instructions specify how to open or arrange the parts, follow that model-specific direction.
If you find missing parts, unclear identification, or components that are damp or damaged, pause before cutting, modifying or assembling them. Photograph the issue, keep the packaging and labels, and contact the seller or manufacturer with the model and order information. Follow their instructions about drying, replacement or other handling rather than applying a treatment that could affect assembly. Check the hardware against the parts list without mixing packs, and do not substitute a similar-looking fastener or panel unless the manufacturer confirms it is appropriate. A check before building is more useful than finding a mismatch midway through construction.
Frequently asked questions
Can I store a garden shed kit outside?
Only if you can keep it raised, sheltered from rain and sun, stable and ventilated, and the manufacturer allows it. A cover alone does not make exposed storage suitable. Check the kit after poor weather, and ask the seller about the exact model and expected waiting period.
Should I open the boxes as soon as they arrive?
Not automatically. Inspect the outside first and follow the instructions for your kit. Opening it early can expose parts and separate them from their labels. If the instructions or damaged packaging call for an inspection, unpack on a clean, dry surface and keep the labels and small-parts bags together.
Can I stack the packages on top of one another?
Only where the package markings or instructions allow it. Follow the stated orientation and stacking order, keep the stack stable, and do not put unrelated items on top. If there is no guidance, ask the seller rather than judging by the appearance of the boxes.
How often should I check a stored kit?
There is no universal schedule. Inspect it periodically, taking account of how long it will be stored and the conditions around it. Check after rain, wind, a leak or a shifted cover, and look for dampness, damaged packaging and supports that have moved.
What should I do if the packaging gets wet or damaged?
Photograph the problem and keep the labels and order information. Move the kit to a dry, secure place only if you can do so safely without worsening the damage. Contact the seller or manufacturer before drying, repairing or assembling the affected components.
A kit that stays dry, raised, stable and clearly identified is easier to assess when assembly time comes. The right method still depends on its packaging and materials, so use the supplied instructions for details such as opening, orientation and storage duration. Keep the small parts and paperwork with the main packages, inspect the kit during a long wait, and resolve any moisture or damage before building. That way, assembly begins with the kit’s condition and contents understood, rather than with a search for missing labels or a hidden leak.
