
Install a pergola yourself or use professional installation?
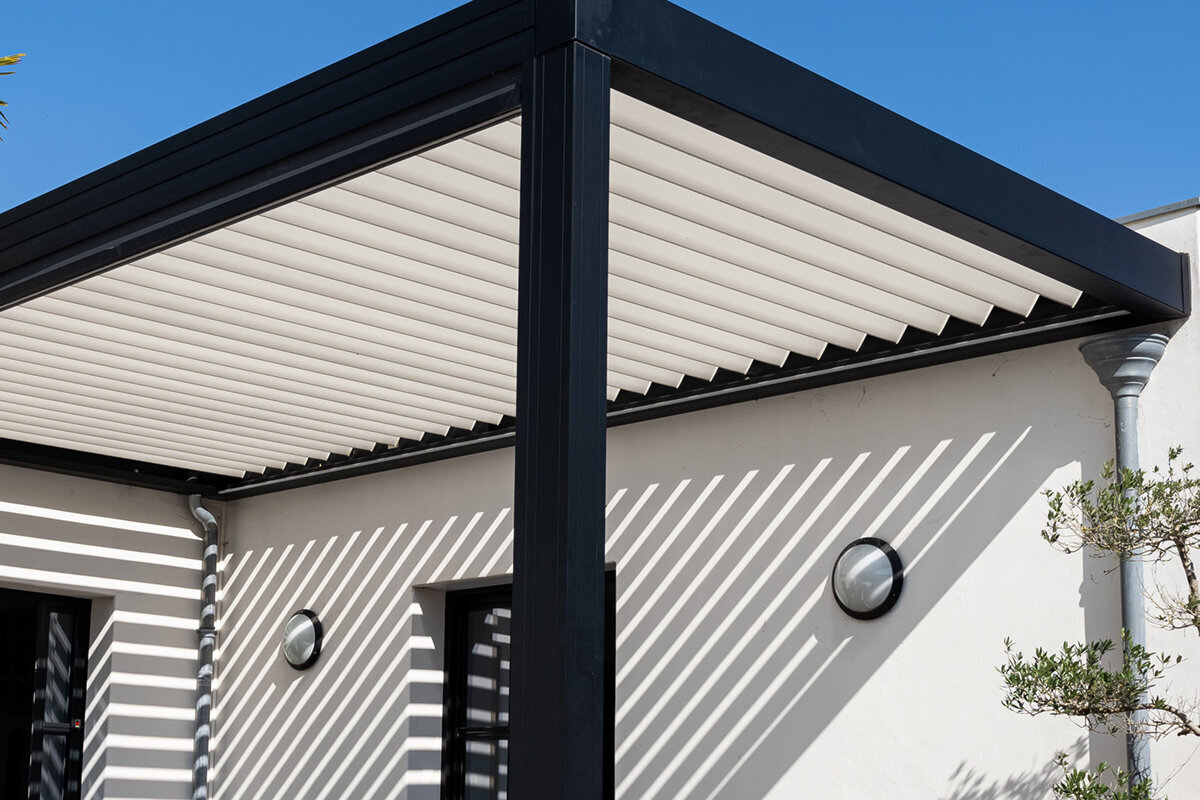

An aluminium pergola changes an outdoor area for the long term. Whether self-installation or professional fitting is right for you depends not only on DIY skills, but also on the foundation, alignment, component weight, helpers and possible electrical work.
Anyone installing a pergola themselves is responsible for preparation as well as assembly. The installation instructions set out the sequence, but do not replace a careful assessment of the ground. Accurate post positions, a load-bearing foundation and controlled alignment strongly influence how stable and well-proportioned the structure will be.
Professional installation may be worthwhile where the surface is uneven, access is difficult or several trades are involved. This can apply to a patio with existing finishes, drainage questions or planned electrical equipment. An installer can coordinate the work, but the structural conditions should still be clarified in advance.
Base the decision on the tasks involved rather than instinct alone. Consider realistically which work you can do safely, what support is available and where outside expertise is appropriate. This turns the wish for a pergola into a manageable project with clear responsibilities.
Decision · 01
Assess the installation scope realistically
A bioclimatic aluminium pergola comprises components that must fit together precisely. Before starting, read the installation documents in full, check the delivery and mentally work through every stage. The issue is not simply whether you can tighten screws, but whether you can transfer measurements accurately, store components without damage and maintain a safe sequence of work.
Do not underestimate site logistics. Long profiles, posts and roof elements need a clear lay-down area and several pairs of hands when lifted. Plan breaks for interim checks. Map the build on paper or on site, marking storage zones and safe routes for long profiles. Check that packaging, protective materials and small parts can be kept dry and organised. If components must be found during assembly or carried over obstacles, the risk of scratches, mix-ups and inaccurate work rises significantly. Seek professional support if you are unsure about handling, the ground or any installation step.
Before committing to self-installation, map the build on paper or directly on the site. Mark storage areas, routes for long profiles and places where helpers can stand safely. Also check that packaging, protective materials and small parts can be stored dry and in order. A well-prepared work area reduces unnecessary interruptions. If important components have to be found during the build or carried over obstacles, scratches, mix-ups and inaccurate work become more likely.
Decide in advance who will check measurements during assembly and who will secure components. Clear roles prevent important checks from being missed between carrying, aligning and fastening.
- Read all documentation before the first task and mark dimensions, fixing points and required checks.
- Arrange helpers for carrying and alignment; improvised solo work increases the risk of damage and misalignment.
For projects with an adjustable roof structure, take a look at bioclimatic aluminium pergolas and their installation requirements.
Self-installation · 02
When self-installation can work well
A standard aluminium pergola can be a manageable self-installation project where the starting conditions are straightforward. This includes a level, accessible area, clearly planned post positions and a prepared fixing concept. Experience with a spirit level, measuring tools and correctly tightening fixings helps, but does not replace following the product-specific instructions consistently.
Do not treat installation as a side task between other appointments. Controlled assembly needs concentration, daylight and enough room. Lay out small parts in order, protect visible surfaces and document important interim stages. Before starting, check whether edges, joints, steps or perimeter areas affect the post positions. Also consider where rainwater from adjacent surfaces will run. A feature identified early can usually be resolved more calmly during planning than after fixings have already been installed. If questions remain, professional advice is the better next step.
With the ground, it is not enough for a surface simply to feel solid. What matters is whether the intended fixing points can be prepared appropriately for the long term and whether dimensions can be transferred reliably. Before starting, therefore check whether edges, joints, steps or perimeter areas affect post positions. Consider where rainwater from adjoining surfaces is directed. An issue identified early is usually easier to solve during planning than after fixings are in place. If uncertain, seek professional advice.
Compare planned post positions with the actual site before you begin. This helps identify whether edges, drains or transitions will affect the intended installation sequence.
- Check in advance that all installation areas are unobstructed and that ladders or work equipment can be used safely.
- Allow enough time for alignment and checks instead of tightening fixings finally under time pressure.
With a clear, straightforward layout, standard aluminium pergolas offer a practical starting point for self-installation.
Ground conditions · 03
Clarify the foundation and fixings first
The foundation is not a minor detail; it is the basis of every installation decision. An existing patio may be suitable, but its construction, condition and fixing options must be assessed. Visible paving says little about the load-bearing layer below. Slopes, edge distances, drainage and concealed services should also be checked before drilling.
If you are installing the pergola yourself, set post positions only once foundation dimensions and axes can be understood clearly. Work from a clear measured layout and compare diagonals so the structure can be squared. If you are uncertain about concrete, substructure or fixings, a suitable contractor or knowledgeable professional should assess the situation. Also check tools, ladders, steps and clear working space around the structure. Stop work if weather, light or the availability of helpers no longer allows focused assembly.
Before assembly, make a short tools and materials check using the installation documentation. Alongside obvious equipment, aids for marking, cleaning and protecting components while laid down are often useful. Check ladders and steps, and ensure there is sufficient clear movement space around the structure. Do not use temporary solutions when a component cannot be held safely or a work point cannot be reached securely. Good preparation also means stopping once weather, light or the helper situation no longer permits focused work.
Record any identified features directly on a sketch. Marked axes, distances and obstacles make discussions with helpers or professionals easier and provide a clear basis for the next steps.
- Assess the build-up and condition of the existing surface before choosing a fixing method or marking drill points.
- Check axis dimensions and diagonals several times; small deviations can become very noticeable when installing the roof.
For a carefully planned outdoor cover, bioclimatic pergola solutions depend on accurately prepared ground conditions.
Tools · 04
Plan equipment, helpers and safety
A single toolbox is rarely enough for building a pergola. Depending on the system, you need appropriate measuring tools, drilling and fastening equipment, safe access equipment, and protection for hands and eyes. Check that batteries are charged and that drill bits, driver bits and spanners suit the intended ground and fixing elements. Unsuitable tools can quickly damage screws or lead to inaccurate drilling.
Role allocation is equally important. One person should measure and confirm dimensions while others hold components or fasten them. Agree clear instructions when lifting and never leave components unsecured. Use a fixed checking sequence for alignment: compare reference points on the ground, posts, beams and diagonals. Record measurements clearly instead of relying on first impressions. A second person should check connections before they are fully tightened. This makes twisted profiles or shifted axes easier to spot.
Use a defined checking sequence for alignment and repeat it at every construction stage. Start with reference points on the ground, then compare posts, beams and the resulting diagonals. Record measurements clearly rather than relying only on appearance. An independent visual check by a second person before connections are fully tightened is particularly helpful. It can reveal twisted profiles or shifted axes. This care also makes later component installation easier because the starting geometry remains reliable.
Set up the work area so routes and working zones remain separate. Helpers can then move profiles safely while measurement points and sorted small parts are protected from accidental movement.
- Have measuring tools, suitable drilling equipment, safe steps and personal protective equipment ready before assembly.
- Allocate tasks clearly so holding, measuring and fastening do not have to be improvised at once.
If you are organising the installation yourself, check the documentation for classic aluminium pergolas particularly carefully for tool and helper requirements.
Alignment · 05
Precision shapes the finished result
A pergola looks balanced and well finished only when posts are plumb and beams align cleanly. Do not fully tighten the fixings until the basic geometry has been checked. Measure repeatedly, work in stages and inspect the structure from different viewpoints. This is especially important across large areas, where small inaccuracies can affect both appearance and performance.
Professional installation comes into its own when local conditions require exact adjustment. Uneven transitions, limited installation space or connections to existing outdoor areas need a well-considered sequence. Even with self-installation, pause before proceeding: only when measurements, plumb alignment and connections are correct should further elements be fitted and fixings fully tightened according to the instructions. Plan controls, lighting or other components early and discuss them with a legally registered local electrical contractor. Mechanical details and cable routes can then be considered together before visible assembly work is complete.
Electrical planning should start with how you intend to use the space. Consider where controls, lighting or other components would be useful and which areas must remain accessible. Share these thoughts early with a legally registered local electrical contractor so mechanical details and cable routes can be considered together. Avoid deciding on connections only after visible assembly has been completed. Openings, fixings or covers may then already be in inconvenient places. Clear coordination does not complicate planning; it avoids unnecessary rework on the finished aluminium pergola.
Before final tightening, check the appearance again from typical viewpoints in the garden or on the patio.
- Use several measurement directions rather than one check; plumb, line, axis dimension and diagonal answer different questions.
- Fully tighten connections only after a complete interim check, where the installation instructions allow this.
For accurate roof and post geometry, bioclimatic aluminium pergola models require precision from the very start of planning.
Electrical planning · 06
Consider electrical connections separately
Once lighting, controls or other electrical components are planned, the project is no longer purely mechanical. Set cable routes and positions early to avoid visible temporary solutions. You may prepare mechanical work yourself, but a legally registered local electrical contractor should assess compatibility and protection, complete the connection, inspect and test it, and address applicable CoC documentation.
Discuss with the pergola installer and legally registered electrical contractor which preparatory work is useful and what information each needs. This may include the site, planned electrical loads, existing connections and intended controls. This clarification remains valuable with a fully professional installation because it keeps structural and electrical decisions coordinated. Describe the starting situation clearly with site photographs, access information and details of existing finishes. Record handovers between foundation, assembly and electrical work in plain terms so everyone knows their responsibility.
The installation is easier to organise when you describe the starting situation to the installer as specifically as possible. Photographs of the area, access details and information on existing finishes can identify open points early. Ask what preparations must be completed before the installation date and whether components need to be ready in a particular place. Keep agreements about the transitions between foundation, assembly and electrical work clear. This helps preparation without requiring you to assess or coordinate technical details yourself.
Prepare a simple sketch showing preferred positions and access routes for the discussion.
- Plan cable routes and connection positions before installation so components do not need to be opened or bypassed later.
- Have a legally registered local electrical contractor assess and complete connections, including required inspection, testing and applicable CoC documentation.
For outdoor areas with a clear basic layout, standard aluminium pergolas are a good basis for considering electrical wishes in good time.
Professional installation · 07
What a professional installer can cover
Professional installation can involve more than simply assembling components. Depending on the agreement, it may cover checking the installation sequence, precise alignment and controlled assembly on prepared ground. Before appointing anyone, ask exactly what the scope includes: who handles measurement, foundation preparation, access, packaging disposal or coordination with other trades? Only clearly described tasks can be compared reliably.
Even with professional support, key decisions remain yours. You determine the location, use and desired equipment, while the installer needs reliable information. Record features such as services, slopes or access restrictions early. For local requirements, consult the relevant municipality or building-control office rather than relying on assumptions from neighbouring projects. A task list supports a sound decision: work you can complete yourself, items requiring clarification and tasks for professionals. If a critical task has no clear solution, seek appropriate support.
For a sound decision, use a simple list with three categories: work you can safely complete yourself, tasks needing clarification and areas for professionals. Include not only assembly but also preparation, material logistics, measurement checks and possible follow-up work. Then check whether helpers and equipment match this division. If there is no clear solution for a critical task, that is a good reason to get support. A mixed approach can be useful when you want to handle preparation while professionals assist with the more demanding interfaces.
For a mixed approach, ask early for clarity about handover points.
- Request a written description of included work, interfaces and conditions for a smooth installation date.
- Share site features early, including access, finishes, slopes, services and limited working areas.
At demanding sites, professional installation for bioclimatic aluminium pergolas can support a structured build.
Decision · 08
Choose the right option for your project
The best installation method is the one that suits your project and resources. Self-installation is not an obligation, and professional installation is not a sign of limited ability. With a clear site, practical experience, suitable tools and support, you can handle tasks yourself in a controlled way. If you want to reduce risk or protect your time, plan external help for critical stages.
Make the decision before ordering where possible, rather than when opening the packages. Create a list of open questions about the foundation, working area, helpers, tools, electrical planning and responsibilities. If questions remain unanswered, a professional site assessment is often more valuable than later correction during assembly. Keep installation documents, information about used components and notes on special conditions organised. Before use, check that all intended steps are complete and that no tools, protective film or loose parts remain. Clear documentation makes later adjustments and conversations with professionals easier.
Careful planning does not end immediately after installation. Keep installation documents, information about used components and notes on special conditions organised. Before use, check that all intended tasks are complete and that no tools, protective films or loose parts remain. If questions stayed open during the build, note them down rather than overlooking them. Clear documentation helps you prepare future adjustments or discussions with involved professionals. This keeps the choice of self-installation, professional installation or a combination transparent in the finished result.
Review the task list with everyone involved shortly before starting.
- Assess your decision by site conditions and tasks, not only by previous DIY experience or apparent time savings.
- Where interfaces are unclear, choose a mixed approach in which professionals handle critical work and you assist with preparation.
For clearly planned outdoor areas, traditional aluminium pergolas can provide a suitable basis for your individual installation plan.
Comparison
Self-installation and professional installation compared
Both approaches can be suitable when conditions and responsibilities are clear. The table helps you assess typical project questions in a structured way. It does not replace an assessment of the specific ground conditions or site.
| Criterion | Self-installation | Professional installation |
|---|---|---|
| Requirements | DIY experience, helpers and a prepared site | Agreed scope and an accessible installation location |
| Foundation | Assess independently and prepare according to the plan | Clarify responsibility and inspection in writing beforehand |
| Alignment | Measure repeatedly, check and adjust carefully | Established processes for assembly and alignment |
| Tools | Provide and use suitable equipment yourself | Equipment usually organised by the installer |
| Electrical work | Prepare mechanics; use a registered electrical contractor | Coordinate the electrical contractor interface early |
Install it yourself
Suitable for an accessible, level site, a clear foundation solution and practical experience of accurate measuring, fastening and alignment.
Choose professional installation
Useful for demanding anchoring, uncertain load-bearing capacity, difficult access or coordination of several connections and trades.
Consider a mixed approach
Professionals can handle the foundation and electrical work while you organise preparation and assembly yourself by agreement.

Prepare your installation decision in five steps
Brief advance planning helps you identify early whether self-installation is realistic and where professional support is useful. Record results in writing and clarify open points before committing to an installation date.
01
Survey the site
Measure the area, access routes and distances. Note slopes, changes in finishes, visible obstacles and known service routes.
02
Assess the ground
Clarify the construction, load-bearing capacity and fixing options. If in doubt, seek a competent assessment before installation.
03
Read the installation sequence
Read the instructions completely. Put work steps, components, tools and required helpers into a realistic order.
04
Define interfaces
Decide who will handle the foundation, assembly and any electrical work. Describe handovers clearly so no gaps arise.
05
Start safely
Choose a suitable workday with a clear site, sufficient daylight and time for measurements, breaks and final checks.
Pre-installation checklist
These points help you compare self-installation and professional installation against your actual project. An open point is not necessarily a reason to stop, but it signals that more planning is needed.
01. The site, dimensions, access and clear storage areas have been fully recorded and documented.
02. The ground and possible fixing areas have received a clear, competent assessment.
03. Post positions, axes and distances have been marked carefully before drilling.
04. The installation instructions have been read and all components checked for completeness.
05. Enough helpers are available to lift, hold and align components safely.
06. Suitable tools, protective equipment and safe access equipment are available.
07. Electrical needs and cable routes are planned; registered-contractor and applicable CoC requirements have been checked.
08. Responsibilities for the foundation, assembly, checks and any follow-up work are clearly agreed.
Frequently asked questions about pergola installation
Can I install an aluminium pergola myself?
This may be possible if the site is well prepared, you can follow the instructions confidently and sufficient support is available. A load-bearing base, precise alignment and safe working practices are key. If you are uncertain about fixings or structural capacity, involve a knowledgeable professional.
What matters most for the foundation?
The foundation or load-bearing ground must suit the planned fixing method and local situation. Check not only the visible surface but also its construction, condition, slope and services. If these points cannot be assessed clearly, a knowledgeable person should evaluate the conditions before installation.
Do I need several helpers for installation?
Support is generally sensible because posts, beams and further components must be held safely and aligned accurately. The number of people needed depends on the model, installation sequence and site conditions. Plan helpers not only for carrying, but also for controlled measuring and securing.
May I connect electrical components myself?
Mechanical preparation and cable-route planning can form part of your project. A legally registered local electrical contractor should confirm equipment compatibility and protection, complete and test connections, and provide any applicable CoC documentation. Agree positions and requirements early so pergola assembly and electrical planning work together.
Do I need approval for a pergola?
Requirements vary with location, size, construction and use. Do not rely on another property's experience. Before starting, ask your municipality or building-control office about plans and approval under its planning scheme. Also obtain any applicable consent from the body corporate, homeowners' association or landlord.
What should I clarify before professional installation?
Clarify in writing which tasks are included and which conditions you must provide. Important points include the foundation, access, work area, measurements, possible electrical work and how site-specific features will be handled. The more clearly these interfaces are described, the better the installation sequence can be prepared.
Plan your pergola
Plan safely, install with confidence
Whether you install your aluminium pergola yourself or have it fitted professionally depends on the project conditions. A prepared base, clear dimensions, safe processes and early clarification of interfaces matter more than a quick decision. Realistically assessing your options creates a sound basis for installation.
Use planning as a decision-making aid: what can you do yourself in a controlled way, and where are experience or specialist skills needed? Bloomcabin helps you compare different pergola types calmly against your outdoor space and installation planning.
Discover suitable aluminium pergolas and compare installation requirements for your project.
