
Planning round, arched and gable windows correctly

Window planning
A round window in a stairwell, a segmental arch above a patio door or a gable window beneath the roof only looks natural when shape, structural opening and use work together. With non-rectangular glazing, appearance is only part of the decision: should the element bring in light, provide ventilation, frame a view or continue an existing façade pattern? Even small decisions affect measurement, divisions, hardware, junctions and the order of work on site. Considering the full sequence of windows across a façade before selecting individual special shapes avoids an element that works in a sketch but looks unsettled or is difficult to operate once installed. This guide helps coordinate round, arched and gable windows with neighbouring rectangular windows, insulation and sealing layers, and the installation process.
Start with the window composition, not the individual shape
A special shape should serve a purpose in the overall elevation. A round window may light a staircase, a semicircle may emphasise the top of a rectangular opening, and a triangle may follow the roof pitch. Draw the entire façade with floor levels, door heads, roof edge and every window axis. Imaginary alignment lines are especially important: does the centre of a round window sit on an axis? Does the arch spring from the same height as neighbouring lintels? Do the slopes of a gable window meet the roof geometry or deliberately sit apart from it? These are not merely matters of taste. They determine whether the opening reads as part of the architecture or as an added motif.
Different reference points apply indoors. Beneath a sloping roof, a gable window can make a room feel taller, while a round window at a landing creates a focused pool of light. Assess sightlines, furniture and future cleaning rather than judging the exterior alone. For a room that mainly needs daylight, a window with fixed glazing is a useful starting point: its shape can focus on light and proportion without accommodating a sash. If ventilation is also needed, the special shape itself does not necessarily have to open. A combination of a fixed shaped element and an unobtrusive, accessible opening window often creates a calmer and more practical room.
Describe the geometry clearly and measure early
“Round” or “arched” is not enough information for an order. A circular window needs at least its diameter and a reference to the finished wall surface. For a semicircle, width, overall height and the point where the arch begins are essential. Segmental arches also require the arch’s rise or flatness; pointed and gable shapes need width, height, angle or the exact outline. Always state whether dimensions refer to structural work, the opening after plastering or the planned element size. If these levels are mixed, discrepancies may only emerge after sealing and internal finishes have been prepared. A full-size template may also be needed for free-form or irregular outlines. Establish who produces it, from which building layer it is taken and how its orientation is marked. Agree whether manufacture follows a drawing, digital measurement data or an approved template; conflicting references must not circulate in parallel.
Measuring existing openings requires particular care where reveals are old. Do not measure at one point only: check width, height and diagonals at several points, as well as possible irregularities. Photographs with a scale, an elevation sketch and a clearly marked internal or external face help everyone involved. For an apparently symmetrical opening, also verify that its centre is truly central. A fixed-glazed round window is a clear starting point for a circular daylight opening, but it does not replace an accurate shape drawing. When comparing quotations, ask explicitly which dimensions form the manufacturing basis and who checks deviations in the building structure before approval.
Consider the entire opening
Separate fixed glazing, opening sashes and ventilation
The more complex the outline, the more precisely the question should be asked: must this exact field open? Fixed glazing suits a window high in a gable, a designed stair wall or an elevation requiring no visible sash division. It can also make sense where the accessible space below is needed for another purpose. A moving sash, by contrast, needs room for its frame, hardware and swing path. In an arch it also changes the visual effect because the construction must follow the opening function. Decide first on daylight, air change, view and operation; the shape is then the appropriate enclosure for those requirements.
Opening a window that cannot be reached without a stool or other aid rarely solves a ventilation problem convincingly. For rooms needing regular ventilation, allow for a workable operating height, sensible handle access and enough clear space in front of the sash. As an alternative to a movable arch, a separate, higher top-hung outward-opening window may be specified if its position and opening direction suit the room and façade. This keeps a distinctive fixed field visually uninterrupted while locating ventilation where it can be used. The suitable solution depends on use, furnishings and installation conditions; divide functions before finalising the façade drawing.
Choose arch forms for their effect and their junctions
A true semicircle looks calm and symmetrical, but requires an opening with clearly defined vertical sides and springing point. A segmental arch is flatter and can suit broad, relatively low openings. A pointed arch draws the eye upward and changes a façade more strongly than a shallow arch. What matters is not which shape appeals as an isolated motif, but whether it fits the proportions, window axes and existing lines. Where a form repeats across several openings, document the radius, springing point and divisions consistently. Different springing heights alone can make a row look unintentionally uneven.
A fixed-glazed semicircular window works as a fanlight above a rectangular opening when its straight edge and diameter deliberately relate to the element below. It is not automatically the right addition to every door or window. Consider whether the rectangle and semicircle should be separated by a visible frame section, continuous transom or another division. The internal reveal must also make the transition intelligible. Do not provide only the finished dimension in an enquiry; include an elevation drawing with the relevant reference edges. This allows the intended relationship between the lower element and the arch to be checked before manufacture is approved.
Develop gable windows from roof form and room lighting
A gable window is more than a triangle in a wall. Its slopes relate to the roof pitch, verge, internal lining and often structural components. Decide whether the upper outline should follow the roof line exactly or whether a rectangular or trapezoidal solution makes better use of the room. A very tall triangle can take light deep into a room, yet make the lower area less useful for views. Conversely, a low rectangular window combined with a fixed shaped section can address viewing height and roof form separately. An internal elevation reveals the strongest option as clearly as the façade. Compare at least two scaled alternatives: one outline close to the roof slope and another set further in with more wall margin. The first visually uses most of the gable area; the second often provides clearer junction zones. In both drawings, show the actual frame sightlines rather than presenting the structural opening as glass alone.
For daylight in a roof gable, a fixed-glazed triangular or angled window provides a direct shaped solution where opening is unnecessary. Before choosing, designers and installation specialists should review the actual structural outline, junction surfaces and route of the internal lining together. At sloping edges, sufficient room for a continuous, carefully planned junction matters more than a drawing that uses every remaining area. Also show where frame edge, glass area and internal reveal will sit. This prevents surprises when the glazed area appears smaller than the imagined structural shape, or when the internal slope looks different from the exterior.
Plan glazing bars as a grid, not as an afterthought
Glazing bars organise glass areas, can echo historic precedents or visually divide large fields. Their grid is particularly influential in round and arched windows: radial lines draw towards the centre, horizontal lines can calm an arch, and vertical lines connect with adjacent rectangular windows. First decide whether bars merely structure the appearance or genuinely divide the glazing. Use clear terms for decorative bars and glazing-dividing bars. A sketch should show position, number, symmetry and relationship to the frame, rather than simply stating “with glazing bars”.
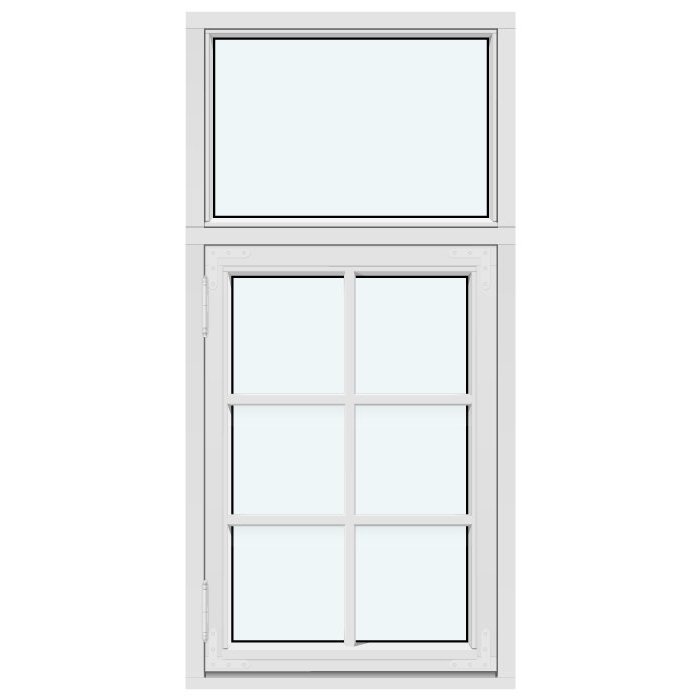
Fewer divisions can look clearer in a small special shape, whereas a large gable field may benefit from an aligned grid. Compare the appearance in daylight from normal viewing distance and internally from the actual sightline. A division that looks balanced on a sample drawing may cut awkwardly across a view from the room. Where movable elements stand beside the shaped window, a traditional-style outward-opening “Kombi” casement window can offer a design comparison for a traditional divided window arrangement. The exact glazing-bar layout for the full project should still be drawn and approved separately; a product title does not describe an individual division.
Consider the entire opening
Review internal and external views together
Frames, reveals and glazing are perceived differently inside and outside. Externally, an arch may appear as a slim outline; inside, its depth and the wall area occupied by its reveal become apparent. With a round window, planned internal finishes should not accidentally create an uneven border. In a gable, check whether the slope, window edge and ceiling lining meet as clear lines. Prepare an external elevation, internal elevation and at least one section for every special opening. The section reveals questions absent from a front view: wall build-up, setbacks, window position and the route of junction zones. Add eye level, finished floor level and important furniture edges to the elevations. This shows, for example, whether a transom crosses a preferred view or a deep sill conceals the lower glazing. At stairs, assess views from different steps and landings too, because centre points and outlook shift noticeably as people move.
Opening direction belongs in this assessment. An inward-opening sash takes up room and may clash with curtains, radiators or furniture; outward-opening versions need clear space outside. Where internal space is limited, a single outward-opening casement window can be a comparison for functional planning. This does not mean it replaces an arched form. It shows that design and operation can be considered separately. Mark the sash swing on the floor plan and check it against the intended furnishings instead of leaving the question until installation.
Plan junctions to walls, roofs and sealing layers
A special window does not end at the visible frame edge. It needs a junction to the relevant wall or roof build-up that connects the project layers clearly. With arches and slopes, careful detail planning becomes more important because materials cannot simply continue as they would along a straight edge. Clarify who designs the junction details, who prepares the opening and who coordinates the work. Show the window’s position within the wall, outer and inner junction zones, possible linings and transitions to plaster, façade cladding or roof surfaces. General product images do not replace a project-specific section.
Pay particular attention where geometries meet: the springing point above a rectangular opening, the apex of a triangle and the lower corners of a gable window. Improvised solutions should not occur there, as the structural outline, insulation and visible finish can otherwise clash late in the process. In a roof plane, a roof pivot window is a different product category from a window in a vertical gable: it sits within the roof surface and therefore needs a different form of integration. Do not confuse these situations in the specification. State the location and building element clearly, and have the responsible professionals check the suitability of the relevant junction approach for the project.
Coordinate existing character, style and replacement openings responsibly
When replacing an existing shaped window, the current appearance is a valuable planning basis but not a complete manufacturing specification. Document the outline, divisions, frame sightlines, reveal depth and relationship with neighbouring windows. Then decide what should be retained: the exact shape, symmetry, traditional glazing-bar pattern or primarily the room’s lighting effect. A new solution can fit sensitively without copying every detail. Conversely, a visually similar form can look unsuitable if it does not pick up the building’s axes or divisions. Samples, photographs from several distances and an overlaid drawing of old and new elevations support a considered decision.
If an opening will serve different purposes in future, assess the alteration as a complete package. A purely decorative fanlight does not automatically become a useful ventilation window simply because a sash is included. A double-casement existing window can become a calmer fixed glazed area where daylight matters more than operation. For the operating logic of a broader rectangular window, an inward-opening double-casement window offers a comparison. Its choice says nothing, however, about historic character, glazing bars or the appropriate shape of a replacement opening. Base the final solution on measurement, room function and façade design, not on an old photograph alone.
Organise enquiries, approval and installation sequence precisely
A good enquiry brings together information otherwise supplied later in fragments: dimensioned elevations, sections through special junctions, internal and external views, opening direction, desired fixed fields, glazing-bar drawings, colour or finish in line with the project design, and photographs of the existing condition. Give every element a unique position number. Ask which details must still be confirmed before manufacture, and compare quotations using the same drawing basis. An apparently lower-priced comparison has little value if shape, divisions or function are described differently. Before approval, check every outline again against the actual opening and the planned finished wall.
Coordinate the programme with structural work, sealing, plastering or façade work and internal finishes. Bloomcabin states a delivery time of 4–6 weeks for windows and doors, subject to order confirmation; only plan the binding sequence after that confirmation. Do not assume that site dimensions will be corrected silently when ordering. On delivery, check the position number, visible shape, opening side and obvious damage before installation. Keep approved drawings and acceptance documents in good order. Windows and doors carry a 5-year guarantee; consult the related documents for the applicable conditions and procedure.
Frequently asked questions
Can a round window be opened?
An opening function is a separate planning issue. With a round or arched outline, the frame, hardware and sash strongly affect appearance and operation. Fixed glazing is often clearer where daylight is the only requirement. Where ventilation is needed, a separate, accessible opening element can be the more practical alternative.
What dimensions does a manufacturer need for an arched window?
A clear outline and an unambiguous measurement reference are required. For a semicircle, width, overall height and arch springing point are essential; other arches also need their exact geometry. Mark the internal and external faces and state whether dimensions are structural, opening or element sizes. A dimensioned elevation and section avoid interpretation gaps.
Are glazing bars worthwhile in gable windows?
That depends on size, view, neighbouring windows and the desired façade order. Glazing bars can divide a large area or continue an existing grid. They can also interrupt the clear triangular form and the outward view. Set the division and bar type using an approved elevation drawing.
When should measuring take place?
The governing measurement should be taken when the opening and the layers determining window position can be assessed reliably. For new builds and renovations, the right time depends on the project. Agree it with those responsible for structural work, wall build-up, junctions and installation before manufacturing dimensions are approved.
Do I need approval for a gable window?
Approval cannot be determined without the location, building and proposed work. For a Cape Town project, consult the City's building-plan guidance; elsewhere, ask the relevant municipality which planning and building approvals apply. Check alterations to an existing building or envelope early with qualified planning and building professionals.
Next step
Round, arched and gable windows succeed through a clear chain of decisions, not shape alone. Develop the outline from the façade, room and intended use; separate daylight from ventilation; and document dimensions, reference lines and glazing-bar layout clearly. Then place junction details, opening clearance and the installation sequence on the same planning basis as the elevation. Aligning a dimensioned external view, internal view and appropriate section before ordering creates a sound basis for measurement and execution. The special window then becomes a fitting part of the building rather than a late site problem.
