
How to Prepare Garden Shed Timber Before Painting
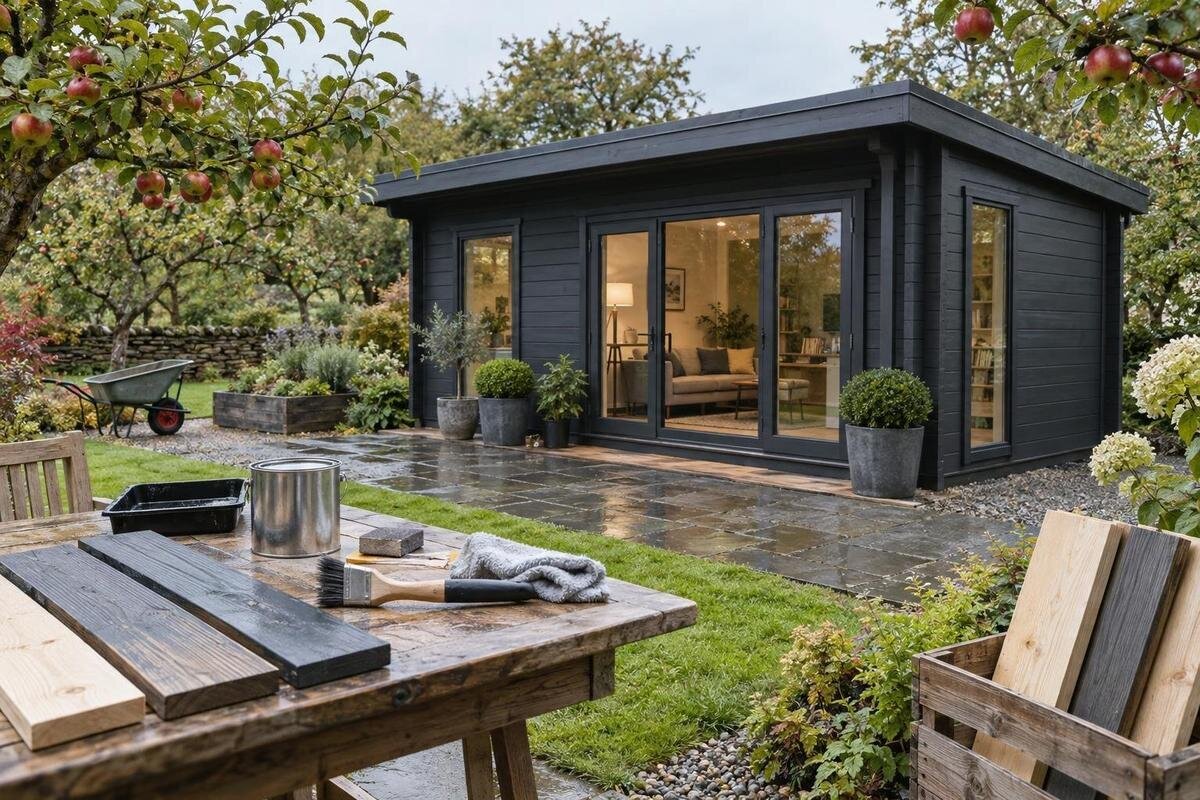
Garden shed care
Knowing how to prepare garden shed timber before painting starts with identifying the surface, not sanding every board. A shed may have bare timber, a factory-applied treatment or an older coating, and each can call for a different approach. Work in order: inspect, protect, clean, deal with loose material, sand only where needed, remove dust and allow the wood to dry. Before primer goes on, check the paint system and any shed-care instructions. The aim is a clean, sound, dry surface suited to the products you plan to use, rather than a uniformly stripped one.

Product details to confirm 1
Identify the timber and any existing finish
Before choosing abrasives, establish whether the surface is bare timber or already has a treatment or coating. Garden sheds do not all arrive in the same condition, and a smooth-looking panel can still carry a factory-applied product. An older shed may have paint, stain or a clear finish, sometimes with repairs on only one side. Walk around in good daylight and note changes in sheen, colour and texture, along with peeling edges, filler, knots and weathered patches. Check sheltered corners and ground-level boards as well as exposed walls, since their condition may differ. Photographs and a simple sketch can help you map the areas that need attention.
If you are still comparing sheds, use a listing such as the Verdana 1 garden shed listing to identify the model, then ask the seller what finish or preservative is supplied and what preparation is recommended before painting. A product name or catalogue image cannot establish the timber's exact surface condition. For a shed you own, check its order paperwork, assembly guide and care notes, and keep details of previous coatings together. If the finish is unknown, do not begin by sanding it away. Cleaning products, abrasives and primer all need to suit the surface that is actually there.
Set up the work area and check the weather
Gather the basics before you start: a soft brush, clean cloths, a bucket, a cleaner approved for the surface, a scraper for loose material, sanding blocks, suitable abrasive and a vacuum with a brush attachment. Keep masking tape, protective sheeting and a small hand brush nearby. Arrange enough light to see shiny or dusty patches, including at corners and under eaves. Use eye protection and suitable protection against sanding dust; follow the instructions for cleaners and paint products. Keep the work area clear of other people and pets, and place tools where they cannot be knocked against freshly cleaned boards.
Check the forecast and product labels before washing or sanding. The primer and paint maker may specify limits for air or surface temperature, humidity, rain-free time or recoating; follow those directions rather than relying on a universal drying timetable. Avoid washing when rain is likely or dew may settle before the boards dry. Wind can carry dust onto prepared timber, while direct sun can make boards very hot and affect how some products behave. If the shed's instructions are missing, use the Verdana 2 garden shed product page to identify the model when requesting care guidance. The listing itself is not a technical specification.
Product details to confirm 2
Mask and protect parts that should stay unpainted
Decide in advance where paint and primer belong. Depending on the shed, visible fittings and adjoining parts may not be timber, and some areas need to remain clear so doors, windows or other moving parts work freely. Check the shed's instructions and coating label before masking. Protect glazing, metal hardware, seals, locks, hinges, handles and the ground beneath the wall where appropriate. Do not cover vents, drainage routes or joints that the maker says must stay open. Remove a part only if you can do so safely and refit it correctly. Photograph complex hardware first and keep small screws together.
Use masking tape suited to the surface, and test it on a hidden spot if you are unsure whether it might lift an existing finish. Press down the edge without stretching the tape, then secure sheeting so it cannot flap onto the timber. Do not leave a waterproof cover pressed against damp boards, and remove masking at the time recommended by the coating maker. If you need to confirm which parts of a shed you are considering are timber before planning the paint boundary, identify the model from the Durano garden shed listing and ask for its documentation. The product name alone does not describe every component.
Remove loose dirt before washing
Start with dry cleaning. Brush away cobwebs, loose soil, leaves, grit and surface dust with a soft brush, working from the upper boards down so debris does not settle on an area you have already cleaned. Use a hand brush around corners and trim. Avoid scraping sound timber aggressively or using a wire brush that can score the grain and leave metal particles behind. Dry brushing also helps show what is stuck to the surface: a smear that remains may need gentle washing, while a lifted paint edge is a separate coating problem. Remove loose dirt first so wet cleaning does not spread it into the grain.
Wash only where needed, using a cleaner compatible with the timber and any existing finish. Follow its label for dilution and contact time, apply it with a sponge or soft brush, and use as little water as practical. Avoid soaking joints or using a pressure washer, which can force water into gaps and roughen the surface. Rinse only as directed, then let the shed dry before sanding. If the cleaning method for a new shed is unclear, use the Veltor 1 garden shed page to identify the product when asking the seller whether its supplied surface needs special care. Do not infer a particular treatment from the product title.

Product details to confirm 3
Deal carefully with old paint and surface damage
Once the surface is clean, inspect any existing coating. If paint is firmly attached, the chosen paint system may call for cleaning and light sanding to provide a suitable key; follow its instructions and do not strip sound material automatically. Where paint is flaking, scrape only the loose edges and smooth the transition into the sound finish using the method specified for that coating. A patchy surface may have both bare and painted sections, so note them separately. Do not paint over peeling edges in the hope that primer will hold them down: the weak layer underneath can still lift.
Treat unidentified older coatings cautiously. Do not dry-sand or grind an unknown, brittle or powdery finish until you have established what it is and the appropriate dust controls. Ask a qualified painter or other competent professional if necessary. For a new shed, use the Orello 1 garden shed listing to identify the model when asking whether a supplied treatment affects paint compatibility. Also distinguish surface wear from timber damage: soft, deeply split or decayed wood needs its cause assessed and may need repair or replacement before coating. Paint and primer cannot restore damaged timber.
Sand with the grain without removing more than needed
Choose an abrasive suited to the condition of the timber and the coating instructions. There is no single grit that suits every shed: rough bare boards, a sound painted surface and a repaired patch may need different levels of abrasion. Start with a less aggressive option on a small, inconspicuous area, inspect the result and move to a coarser abrasive only if needed. Sand along the grain with steady, light pressure. The aim is to smooth raised fibres or rough edges and, where specified, lightly key a sound finish, not to remove a layer of timber or expose every board.
Use a sanding block on broad, flat sections to keep pressure even, and hand-sand corners, mouldings and narrow edges to avoid digging into them. Keep the abrasive flat and change it when clogged; worn paper can rub rather than cut. Take care around board ends, joints and thin trim, where an uneven pass can leave a hollow or round a crisp edge. Avoid sanding across the grain, which can leave visible scratches after painting. If you do not know what sanding is acceptable on a factory-finished surface, identify the shed using the Modano 1 product page and ask the supplier for advice before removing material.
Product details to confirm 4
Remove every trace of sanding dust
Dust left on timber can mix with primer and leave a gritty, uneven surface, so clean after sanding rather than assuming it will blow away. Start with a vacuum fitted with a soft brush attachment, or a clean soft brush, and work along the grain from the top down. Pay attention to joints, corners, the underside of trim and horizontal ledges, where dust gathers. Clean the vacuum attachment first if it contains garden soil or debris. Avoid sweeping dust onto a wall you have already cleared, and do not use a high-pressure air jet that simply redistributes fine particles around the work area.
Finish with a clean, dry lint-free cloth. If the primer maker allows a lightly damp wipe, use minimal moisture and let the timber dry completely before coating; otherwise use a dry method. Check the surface in good light and pass a clean cloth lightly over a test area. Visible powder or a dusty mark means it needs another pass. Recheck the floor and nearby ledges before applying primer, because a breeze or foot traffic can carry dust back. If you need to confirm whether the supplied timber had a treatment before sanding, identify the model through the wooden garden tool shed M listing and request its care notes rather than guessing from the dust or colour.
Make sure the timber is dry throughout
After washing, give the timber enough time to dry before sanding or priming. A board can feel dry on its face while moisture remains around joints, board ends, sheltered corners or the underside of trim. Drying depends on the amount of water used, airflow, shade, weather and the condition of the timber, so there is no reliable number of hours for every shed. Follow the cleaner and coating instructions, and keep the area ventilated without blowing new dust onto the surface. Do not rely on a quick touch or a change in colour alone as proof that the boards are ready.
Check more than one location, especially areas that were washed heavily or stay shaded. If the coating manufacturer specifies a moisture limit, use a suitable meter according to its instructions and compare readings with that requirement; do not substitute a generic figure. Delay the work if the timber still feels damp, looks unevenly wet or has condensation on it. If a recently delivered shed appears damp, the wooden garden tool shed S product page can help identify the model when you ask the supplier how to proceed. It does not prove the timber's moisture condition. Resolve uncertainty before sealing moisture beneath primer.

Product details to confirm 5
Check the surface before applying primer
Make a final pass across every wall before opening the primer. The timber should be free of loose dirt, greasy marks, flaking material, sanding dust and damp patches. Bare areas should be smooth enough for the chosen finish, while any existing coating should be sound and prepared as its maker requires. Look across the boards from different angles: light falling across the surface can reveal raised fibres, shallow scratches, paint edges and dusty corners that are hard to see straight on. Check around fasteners, joints, door edges and trim without sanding away material that is meant to remain. Correct missed spots, then remove any new dust.
Read the primer label alongside the topcoat instructions, because compatibility depends on the timber, any preservative or old coating, and the paint system. Some products call for a dedicated primer; others specify a different approach, so do not assume a general-purpose product will suit every shed. Confirm that the surface and weather conditions meet the stated requirements, and note drying and recoating times. If the manufacturer's guidance differs from a general preparation tip, follow the product-specific direction or ask the supplier for clarification. A prepared surface is not simply smooth: it must also be clean, dry and suitable for that primer.
Test an uncertain area and know when to pause
If you are unsure how an existing finish will respond, do not commit the whole shed to a new system at once. First check that sanding and painting are appropriate, then prepare a small, inconspicuous test patch using the product sequence and drying times on the labels. Inspect it only after the products have had the stated time to dry; look for lifting, wrinkling, softening or an uneven appearance. A test patch can flag an obvious incompatibility, but it does not replace the manufacturer's advice or identify an unknown coating. Keep a note of the products and steps used so you can repeat them consistently if the result is satisfactory.
Pause rather than adding more abrasive or cleaner if the timber remains damp, the old finish keeps lifting, the surface is greasy or powdery after cleaning, or the wood is soft or damaged. Those signs may point to an unresolved coating, contamination or repair issue, and covering them could only hide it temporarily. Ask the paint supplier, shed supplier or a competent painter what is appropriate for that particular surface. Once the cause is addressed, return to the preparation sequence: clean, repair where needed, sand appropriately, remove dust, confirm dryness, then apply the primer specified for the job.
Frequently asked questions
Do I need to wash a new garden shed before painting?
Not automatically. Remove loose dust and inspect the surface first. Wash it only if there is dirt or residue that needs cleaning, using a method compatible with the timber and any supplied treatment. Follow the shed-care and paint instructions, then allow the wood to dry fully before sanding or priming.
What sandpaper grit should I use on garden shed timber?
There is no single grit for every surface. The right choice depends on whether the timber is bare, weathered, repaired or already coated, and on the paint instructions. Test a less aggressive abrasive in an inconspicuous spot, sand with the grain and use only enough abrasion to prepare the surface.
How long should timber dry after washing?
There is no reliable fixed drying time for every shed. Water used, airflow, shade, weather and the condition of the timber all make a difference. Follow the cleaner and coating instructions, check sheltered areas and joints, and wait if the wood still feels damp or shows signs of condensation.
Can I paint directly over old paint?
Only if the old coating is sound and compatible with the new paint system. Clean it and prepare it as the paint maker directs; remove loose edges rather than painting over them. If the coating is unidentified, brittle or powdery, do not dry-sand it until you have established what it is and how to handle it.
How can I tell if the timber is ready for primer?
Check that it is clean, dry and free of sanding dust, loose fibres and flaking coating. Any old finish should be sound and prepared as required by its maker. Then confirm that the primer is suitable for the actual timber and any existing treatment, and that the surface and weather conditions meet the product instructions.
Good paint preparation is a sequence of small checks, not one heavy sanding session. Once you know what is on the boards, remove dirt, address loose material, abrade only where the paint system calls for it, clear the dust and allow the timber to dry. The final check is whether the actual surface, not just one easy-to-reach patch, meets the primer instructions. Resolving an unknown coating or damp area before painting gives the next layer a sound starting point.
